thehennessyguy Posted October 8, 2015 Share Posted October 8, 2015 (edited) My first post on britmodeller and my second 1/48 scale model from Airfix. I'm going to be brush finishing this model with humbrol enamel paints and will be updating this topic a couple times a week I hope all of you enjoy and I look forward to some feedback from you guys thanks !This the colour scheme I choose for the finish with the 24 yellow nose cone and 123 extra dark sea grey on top with a Number 90 beige green and 135 satin vanish mix for the underside of the model">http://I also have some Sprue pictures and a picture of the paints themselves ">http://">http:// paints">http://Thanks for having a look And I'll be starting the build soon Edited October 9, 2015 by thehennessyguy 3 Link to comment Share on other sites More sharing options...
Biggles87 Posted October 9, 2015 Share Posted October 9, 2015 Looking forward to it, can't see your pictures though. Good luck John PS welcome to Britmodeller Link to comment Share on other sites More sharing options...
thehennessyguy Posted October 9, 2015 Author Share Posted October 9, 2015 (edited) Thanks John it's my first post so I'm not really sure how it works yet but I'll have it sorted for the actual build posts ! Edited October 9, 2015 by thehennessyguy 1 Link to comment Share on other sites More sharing options...
thehennessyguy Posted October 9, 2015 Author Share Posted October 9, 2015 Can you see the photos now or just got the option to click the link , I've linked the images in the photo bar and it shows up in the full editor but doesn't work in preview and when i link the image straight from photo bucket the forum won't let me upload the post so I'm really lost, How do you link photo's to your post's?? thanks for the help, Brandon Link to comment Share on other sites More sharing options...
Jusjay Posted October 9, 2015 Share Posted October 9, 2015 Looking forward to seeing the build PS on photobucket copy the img code to the clipboard and post that, should work Link to comment Share on other sites More sharing options...
thehennessyguy Posted October 9, 2015 Author Share Posted October 9, 2015 thanks for the help but i still cannot post every time I try I always get the message 'you are not allowed to uploaded that image extension on this community' i really cannot find a way around this and have been trying all day to solve this, looked through the FAQ and help page but nothing is working any ideas guys? -Brandon Link to comment Share on other sites More sharing options...
dadgaddad Posted October 9, 2015 Share Posted October 9, 2015 Nice choice of kit, I've just started one of these as well, can't get enough Seafires. When posting an image I usually just click inside the Direct box in Photobucket. That will copy the URL for you and then just paste into Image (the green square below the smiley face) in the toolbar at the top of your post. That should insert your picture striaght into your post. Link to comment Share on other sites More sharing options...
thehennessyguy Posted October 9, 2015 Author Share Posted October 9, 2015 Nice choice of kit, I've just started one of these as well, can't get enough Seafires. When posting an image I usually just click inside the Direct box in Photobucket. That will copy the URL for you and then just paste into Image (the green square below the smiley face) in the toolbar at the top of your post. That should insert your picture striaght into your post. thanks for the help but the issue remains haha the image shows in the text bus as i click post i am not allowed and receive a box saying You are not allowed to use that image extension on this community. Link to comment Share on other sites More sharing options...
thehennessyguy Posted October 9, 2015 Author Share Posted October 9, 2015 (edited) Hi guys Thanks for bearing with me during all the picture fuss haha it's all sorted now and I'll be making a start with the model tomorrow 😀 Edited October 9, 2015 by thehennessyguy 1 Link to comment Share on other sites More sharing options...
thehennessyguy Posted October 10, 2015 Author Share Posted October 10, 2015 (edited) As promised i have made a start not much progress but just started painting the cockpit and getting it ready to be put together, i will be doing more sunday evening and if not then it will be monday evening haha . Here's the pilots seat after some chipping around the edge using some Humbrol acrylic 11. Also got the instrument panel finished i don't really add colour to these i prefer to dry brush some white over the dials and bring the detail out rather than my low skill big colour blobs thanks for following the post, This is really the first model i'm trying my best on,it's not going to be the greatest but its all part of learning look forward to feedback thanks again guys Edited October 10, 2015 by thehennessyguy Link to comment Share on other sites More sharing options...
phildagreek Posted October 10, 2015 Share Posted October 10, 2015 Looks good so far, you won't see much inside once it's all closed up anyways. Maybe a drop of gloss varnish in the centre of each dial for the "glass". Link to comment Share on other sites More sharing options...
thehennessyguy Posted October 10, 2015 Author Share Posted October 10, 2015 Thanks Phil that's a great Idea I will do it tomorrow I have some humbrol clear gloss so should do the job fine Link to comment Share on other sites More sharing options...
Martian Posted October 10, 2015 Share Posted October 10, 2015 Nice start! Martin Link to comment Share on other sites More sharing options...
thehennessyguy Posted October 11, 2015 Author Share Posted October 11, 2015 Thanks Martin 😀 Link to comment Share on other sites More sharing options...
dadgaddad Posted October 11, 2015 Share Posted October 11, 2015 I like to paint the dials white then paint the whole panel black. Once this has dried you can use a sharp pin to scratch some of the black away. It doesn't have to be anything special as it will be hardly seen but it does make a difference I think. Once you've done that drybrush and add a drop of gloss varnish into the dial for the glass. Here's one I made earler. Link to comment Share on other sites More sharing options...
thehennessyguy Posted October 11, 2015 Author Share Posted October 11, 2015 That's a great idea I'll give it a go later 😀 Thanks Link to comment Share on other sites More sharing options...
thehennessyguy Posted October 13, 2015 Author Share Posted October 13, 2015 (edited) Hi guys sorry I'm late on the post I've had a lot of work to do, but tonight i managed to make some progress I've put the two fuselage halves together and painted the cockpit and also got the propeller blades fitted onto the front. starting with the glossing of the dials on the cockpit! i then painted the props all black so i could tape them up and paint the yellow safety tips on them. i then taped and painted the yellow section's and here they are put together, It does look rough and thats because i know i will end up getting paint all over the props and will have to re paint places anyway haha Then i painted the cockpit a different shade of green i think it was humbrol 221? I'm not sure but the instructions said humbrol 33 black but i did some research and i saw the cockpits were not black and i found the humbrol 221 a more fitting colour. i then did some cockpit detailing and dry brushing and then proceeded to put the fuselage halves together. When the glue had dried i sanded down all the join marks and i will use filler once i have put the wings into place just so i can get the whole model filled rather than keep repeating the steps individually. Thats all for today ! thanks for checking in guys Brandon Edited October 13, 2015 by thehennessyguy 2 Link to comment Share on other sites More sharing options...
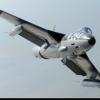
Miggers Posted October 14, 2015 Share Posted October 14, 2015 Can't fault a Sea.47 at all. Just remember though Brandon,LA546/900/LM was THE Station Commander's(Caspar John) personal aeroplane, so would have been very clean and presentable at all times. Just as a side interest,here's the Wiki for Caspar John: https://en.wikipedia.org/wiki/Caspar_John Link to comment Share on other sites More sharing options...
Thom216 Posted October 14, 2015 Share Posted October 14, 2015 Pretty good looking so far. I started one a few years ago, but stopped as I futzed up the wing root. Too much glue obliterating too many lines. Better luck with this one! Link to comment Share on other sites More sharing options...
Ex-FAAWAFU Posted October 15, 2015 Share Posted October 15, 2015 Can't fault a Sea.47 at all. Just remember though Brandon,LA546/900/LM was THE Station Commander's(Caspar John) personal aeroplane, so would have been very clean and presentable at all times. Just as a side interest,here's the Wiki for Caspar John: https://en.wikipedia.org/wiki/Caspar_John In my era the big theatre / cinema / lecture hall thingy at BRNC Dartmouth was named after him: the Caspar John Hall. It may still be, for all I know (though I was there in 1978...). At the time I had no clue who he was - "some Admiral" would have been about as far as I got. Had I known he was a WAFU, I'd have paid more attention! 1 Link to comment Share on other sites More sharing options...
thehennessyguy Posted October 16, 2015 Author Share Posted October 16, 2015 Thanks for looking guys and I didn't know that miggers I had a good read up and I will take good care when building Thanks! Link to comment Share on other sites More sharing options...

Recommended Posts
Create an account or sign in to comment
You need to be a member in order to leave a comment
Create an account
Sign up for a new account in our community. It's easy!
Register a new accountSign in
Already have an account? Sign in here.
Sign In Now