JasonC Posted November 18, 2015 Author Share Posted November 18, 2015 Cheers Colin, glad you like them. I'm hoping someone will start a build in the near future! J. Link to comment Share on other sites More sharing options...
Blogs On Posted November 18, 2015 Share Posted November 18, 2015 Well said that man! Nicely volunteered! . . . . Coat. Hat. Running! Link to comment Share on other sites More sharing options...
JasonC Posted November 18, 2015 Author Share Posted November 18, 2015 Well said that man! Nicely volunteered! Preferably someone who builds faster than I do! J. Link to comment Share on other sites More sharing options...
gingerbob Posted November 18, 2015 Share Posted November 18, 2015 That gives me an easy out- and I don't have mine yet anyway. bob Link to comment Share on other sites More sharing options...
Jon Kunac-Tabinor Posted November 19, 2015 Share Posted November 19, 2015 The question is of course - bomber or night fighter?...... Jonners 1 Link to comment Share on other sites More sharing options...
Roof Rat Posted November 19, 2015 Share Posted November 19, 2015 The question is of course - bomber or night fighter?...... Jonners Or a nice shiny PRRR Link to comment Share on other sites More sharing options...
JasonC Posted November 19, 2015 Author Share Posted November 19, 2015 The question is of course - bomber or night fighter?...... Jonners Did you manage to find a NF kit in the end? J. Link to comment Share on other sites More sharing options...
Blogs On Posted November 19, 2015 Share Posted November 19, 2015 "The question is of course - bomber or night fighter?......" In my 'umble opinion, night fighter every time. The Ultimate Night Hunter. Link to comment Share on other sites More sharing options...
Kahunaminor Posted November 19, 2015 Share Posted November 19, 2015 Congratulations to all but particularly Jason, on a well researched, executed and received piece of kit. Thanks to all for their involvement. Regards, Link to comment Share on other sites More sharing options...
gingerbob Posted November 20, 2015 Share Posted November 20, 2015 Got mine yesterday, and I agree it looks very nice. As for the other dilemma, probably NF, but... bob Link to comment Share on other sites More sharing options...
Jon Kunac-Tabinor Posted November 26, 2015 Share Posted November 26, 2015 Did you manage to find a NF kit in the end? J. Hi Jason - yes Jonners 1 Link to comment Share on other sites More sharing options...
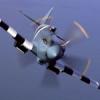
JasonC Posted November 28, 2015 Author Share Posted November 28, 2015 Nacelle finally glued to the wing! It was attached with superglue along the resin-plastic joints, and normal plastic cement at the back end. You can see where I've put a shim in (the white plastic) as discussed earlier in order to line up the top surface.Initial filling was done with superglue and talc, and the final smoothing with Mr Surfacer.There's still the slightly larger gaps at the roots to do, which will probably be tackled with Milliput.I've also installed some brass rod to hold the spinner, using the Tamiya spinner backplate as a template to find the centre.cheers,Jason 5 Link to comment Share on other sites More sharing options...
Collin Posted December 4, 2015 Share Posted December 4, 2015 Jason: The two sets of two-stage cowlings showed up...they look beautiful. I just started a Braniff Wing FB, but when I am done...bring on the two stage bomber Tamiya kit conversion. Cheers Collin in Washington DC. 1 Link to comment Share on other sites More sharing options...
JasonC Posted December 5, 2015 Author Share Posted December 5, 2015 Jason: The two sets of two-stage cowlings showed up...they look beautiful. I just started a Braniff Wing FB, but when I am done...bring on the two stage bomber Tamiya kit conversion. Cheers Collin in Washington DC. Good stuff. Hope you enjoy them! Cheers, J. Link to comment Share on other sites More sharing options...
JasonC Posted December 6, 2015 Author Share Posted December 6, 2015 And here she is just about ready for primer. Just a thin bead of Milliput along the joint on this side... And a little more at the leading edge on the other side to build up the fillet. I've also scribed the panel lines that run along the cowling, above the exhausts. cheers, Jason 3 Link to comment Share on other sites More sharing options...
politicni komisar Posted December 12, 2015 Share Posted December 12, 2015 I got my!! The product is of superior quality highly recommend. P.k 1 Link to comment Share on other sites More sharing options...
JasonC Posted December 14, 2015 Author Share Posted December 14, 2015 Thanks for the recommendation PK. I keep meaning to get some photos of the primed wing assembly, but the weekend has been manic. It was the little chap's first birthday on Sunday, so it was at least a chance to have some cake, and thereby get match fit for Chrimbo. J. Link to comment Share on other sites More sharing options...
Jon Kunac-Tabinor Posted December 14, 2015 Share Posted December 14, 2015 I think Crimbo cake practice for your lad's 1st birthday beats a 2 stage Mossie Jason!! I've got some decals for mine now, so just waiting of the donor kit to arrive from Japan..... Cheers Jonners 1 Link to comment Share on other sites More sharing options...
JasonC Posted December 16, 2015 Author Share Posted December 16, 2015 So...here it is after a little remedial filling and scribing. Maybe still a little extra scribing to do around that root joint, but I hope it now gives a good idea of the final look. Off to see Star Wars now! regards, Jason 6 Link to comment Share on other sites More sharing options...
Nick Belbin Posted December 17, 2015 Share Posted December 17, 2015 Thanks for delivering my set last night, Jason. I trust the film was worth being up half the night for! I can testify that these nacelles are beautifully modelled and moulded - and with Jason having only two or three sets left, you're going to have to be quick if you want a set! Nick 1 Link to comment Share on other sites More sharing options...
woody37 Posted December 17, 2015 Share Posted December 17, 2015 Jason, they look great, can't wait to use mine 1 Link to comment Share on other sites More sharing options...
JasonC Posted January 16, 2016 Author Share Posted January 16, 2016 Decided to plough on with the rest of the kit. Here's the cockpit. Replacement seats from Quickboost, the rest is out the box. The coloured dials on the T.1154 might be accurate*, but they certainly look a little garish! cheers, Jason PS. As Nick notes above, I'm down to the last couple of nacelle sets so if you're interested.....! *Actually I've realised I've probably got the colours reversed! 4 Link to comment Share on other sites More sharing options...
JasonC Posted February 6, 2016 Author Share Posted February 6, 2016 After a bit more reading around I came to the realisation that the bomber I intend to model most probably would not have had the T.1154/R.1155 combination on the rear deck. It seems more likely that it would have had the later fit of T.1143(?) in the rear fuselage. The space on the cockpit deck and behind the pilot seat would have been taken up by the receiver and display unit for Gee. I then spent a few days telling myself it didn't matter, and that no-one likely to see the model would give a hoot. And so last night I clipped off the T.1154/R.1155 boxes and started on scratchbuilding the Gee equipment. First the display unit, which needs to look vaguely like the upper box in the picture below (and on the right in the next photos). Here's what I ended up with. The grab handle could be thinner, but I didn't have the right gauge of wire handy. regards, Jason 2 Link to comment Share on other sites More sharing options...
JasonC Posted February 10, 2016 Author Share Posted February 10, 2016 Added the support frame for the display unit: And both units roughly placed in the cockpit. The box on the rear deck is the receiver. cheers, Jason 2 Link to comment Share on other sites More sharing options...
819 Squadron Posted February 10, 2016 Share Posted February 10, 2016 Decided to plough on with the rest of the kit. Here's the cockpit. Replacement seats from Quickboost, the rest is out the box. The coloured dials on the T.1154 might be accurate*, but they certainly look a little garish! cheers, Jason PS. As Nick notes above, I'm down to the last couple of nacelle sets so if you're interested.....! *Actually I've realised I've probably got the colours reversed! Hi Jason, I am following your build from the beginning and I'm really impressed by the quality and finess. I am very interested in the engine sets. I have the paragon sets but yours look much better. I would be in for two sets. Please let me know your thoughts. Cheers, Jost Link to comment Share on other sites More sharing options...

Recommended Posts
Create an account or sign in to comment
You need to be a member in order to leave a comment
Create an account
Sign up for a new account in our community. It's easy!
Register a new accountSign in
Already have an account? Sign in here.
Sign In Now