arfa1983 Posted May 1, 2015 Share Posted May 1, 2015 (edited) I have been waiting for an excuse to start this for a while, and to be honest it had probably moved down to the bottom of the stash. That was until I saw this group build and thought, let's do this! I had accumulated some aftermarket for it, with the idea of super detailing it. I was going to get additional photo etch and even a resin cockpit, but I think this will be enough if I'm to finish by the end of July. Only problem with after market I bought is I think that the sidewinders are probably not the correct model for this vintage of plane. The sparrows are probably also wrong, but they won't be so obvious I don't think. The final problem is that it just isn't gonna look so badass with an open radome showing the radar, but anyway I better use it. Thanks to John at Showcase Models in Melbourne for parting with this kit out of his personal stash. Hopefully I can do it justice! I will most likely do the VF301 aircraft. but this may change. VMFA A112 is also a possible contender. Any recommendations for paints and realistic load outs will be greatly appreciated. And below my two last Hasegawa Phantoms. The Japanese one was my first model kit after a 10 year hiatus. Move over F15SG and desert storm Tornado, I got 3 months to get this done! Edited May 2, 2015 by arfa1983 4 Link to comment Share on other sites More sharing options...
Mozzy19 Posted May 1, 2015 Share Posted May 1, 2015 Nice choice. I built this kit last year in one of the schemes from the kit although I did replace the exhausts with the spares from the Academy F-4B kit. Sean Link to comment Share on other sites More sharing options...
arfa1983 Posted May 1, 2015 Author Share Posted May 1, 2015 Nice choice. I built this kit last year in one of the schemes from the kit although I did replace the exhausts with the spares from the Academy F-4B kit. Sean Any photos of it? Feel free to post here. I was waiting to build this before I bought the Academy kit. Actually waiting/hoping for them to do an F-4E variant. Link to comment Share on other sites More sharing options...
arfa1983 Posted May 1, 2015 Author Share Posted May 1, 2015 Primed and ready to paint tomorrow. Seats are not primed. I will take longer on these and put these into cockpit at the end of the build. 2 Link to comment Share on other sites More sharing options...
Mozzy19 Posted May 1, 2015 Share Posted May 1, 2015 Any photos of it? Feel free to post here. I was waiting to build this before I bought the Academy kit. Actually waiting/hoping for them to do an F-4E variant. The build was here: http://www.britmodeller.com/forums/index.php?/topic/234956238-hasegawa-148-f-4s-phantom-finished/With the finished product here: http://www.britmodeller.com/forums/index.php?/topic/234957558-hasegawa-148-f-4s-phantom/ I've not built the Academy kit yet, but it's one of the options for this group build. Sean Link to comment Share on other sites More sharing options...
Air-to-Air Posted May 2, 2015 Share Posted May 2, 2015 I'll be interested to see this come together. You've obviously got some good "form" when it comes to Hasegawa's F-4 offerings. Link to comment Share on other sites More sharing options...
arfa1983 Posted May 3, 2015 Author Share Posted May 3, 2015 Dry fitted together. Front has been carved out to accommodate radar. Must make sure I don't forget to put some weights inside before I close up. This hasegawa kit really is fantastic. I am looking forward to building the Academy kit if people say it's better than the hasegawa offering. Also some photos for (my) inspiration. 4 Link to comment Share on other sites More sharing options...
Greg B Posted May 3, 2015 Share Posted May 3, 2015 I'll be keeping an eye on this. One of my favourite Phatom schemes. The Ferris idea did not work, but the schemes looked bloody good. Link to comment Share on other sites More sharing options...
Col. Posted May 3, 2015 Share Posted May 3, 2015 Based on your previous Phantom phorm this one will be worth watching. Link to comment Share on other sites More sharing options...
arfa1983 Posted May 3, 2015 Author Share Posted May 3, 2015 (edited) Got some paint on the cockpit today and got the fuselage together with some large fishing weights installed behind the cockpit. My LHS is currently out of Tamiya extra thin cement so I bought the extra thin limonene cement. I hate this stuff. It is clearly far less aggressive to the polystyrene, which is good for accidental overflow, but its bonding properties aren't so good. Cockpit was painted with citadel colours. Not 100% happy with how it turned out, but it should be enough. Little bit of cleanup required but nothing too serious. I will have to fill the gaps behind the seats in the cockpit. Edited May 3, 2015 by arfa1983 3 Link to comment Share on other sites More sharing options...
arfa1983 Posted May 6, 2015 Author Share Posted May 6, 2015 Whoever said you are more likely to cut yourself with a blunt knife than a sharp one never used xacto blades. Starting to look like a phantom though. The offending blade can be seen under the starboard wing. I glued the canopy together. It was while trimming that I trimmed my finger. I have a spare one from the f4j build shown above, so I might still pose with canopy open. 3 Link to comment Share on other sites More sharing options...
jgrease Posted May 6, 2015 Share Posted May 6, 2015 I glued the canopy together. It was while trimming that I trimmed my finger. I have a spare one from the f4j build shown above, so I might still pose with canopy open. A spare finger or canopy? Sorry, I just had to say it. John 3 Link to comment Share on other sites More sharing options...
arfa1983 Posted May 9, 2015 Author Share Posted May 9, 2015 A spare finger or canopy? Sorry, I just had to say it. John Hi John I meant spare canopy. The showtime f4j phantom kit comes with open and closed canopies. It does not come with any spare fingers, toes or any other appendages! 1 Link to comment Share on other sites More sharing options...
Alan P Posted May 10, 2015 Share Posted May 10, 2015 Hi John I meant spare canopy. The showtime f4j phantom kit comes with open and closed canopies. It does not come with any spare fingers, toes or any other appendages!You'd think it would, at the price!Great work, looking forward to seeing a Ferris Phantom. Link to comment Share on other sites More sharing options...
arfa1983 Posted May 16, 2015 Author Share Posted May 16, 2015 So apparently the f4s doesn't have these bumps for strengthening. So I removed them. Going to need some filling and rescribing. I've never had much luck rescribing but I'll give it my best shot. Not sure why hasegawa left them on as they would have needed to redo the wing moulds for this version anyway I would have thought. 2 Link to comment Share on other sites More sharing options...
Mozzy19 Posted May 16, 2015 Share Posted May 16, 2015 Not sure why hasegawa left them on as they would have needed to redo the wing moulds for this version anyway I would have thought.Hasegawa use the same wing moulds for the F-4E/F/G kits which do need the bulges on them.Nice work by the way. Sean 1 Link to comment Share on other sites More sharing options...
arfa1983 Posted May 17, 2015 Author Share Posted May 17, 2015 Had a productive day yesterday. The radome from eduard was squashed flat so I soaked it in hot water then used the kit radome as mould for shaping it. Also removed the plates on the rear stabilisers and re scribed. Then did some filling and sanding then primed to identify any problem areas. Of course as soon as I has done this I realised I had left off the photo etch strengthening plates. I also assembled the main resin parts of the radar and had to do a bluetak assembly to see how it would all look! Supposed to do work today but I would love to get some paint on after fixing the last little areas with filler. 3 Link to comment Share on other sites More sharing options...
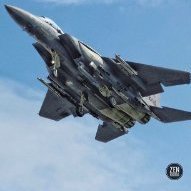
arfa1983 Posted July 12, 2015 Author Share Posted July 12, 2015 (edited) Not long to go now! It's going to be a struggle to get this done. But it is possible! Seats are done and in. To be honest this distracted me for a couple of days after seeing them flying around practising for national day celebrations here. Edited July 12, 2015 by arfa1983 2 Link to comment Share on other sites More sharing options...
arfa1983 Posted July 12, 2015 Author Share Posted July 12, 2015 Pre shaded and also first paint on. Usually I pre shade and then lose it all when the paint goes on. I'm deliberately leaving the shading showing through and hopefully I get the heavily weathered effect that I see on some of the really awesome models I see on this website! 2 Link to comment Share on other sites More sharing options...
arfa1983 Posted July 12, 2015 Author Share Posted July 12, 2015 Main colours done. I'm pretty happy with the contrast between each of them. Not too much which is good. 3 Link to comment Share on other sites More sharing options...
Navy Bird Posted July 23, 2015 Share Posted July 23, 2015 Sorry I missed this one, it's looking really good! I hope you get it done in time - I have the same problem with my build. Cheers, Bill Link to comment Share on other sites More sharing options...

Recommended Posts