Ravens Posted April 14, 2015 Share Posted April 14, 2015 The kit: The ship is Zvezda's 1/350 scale battleship Borodino, which was the lead ship of a class of five pre-Dreadnoughts built for the Imperial Russian Navy and launched in 1901. The Extras: I'll be using the photoetch set for Borodino by Gold Medal; wooden decks by Artwox; and replacement barrels by RB Model. I may also add the nameplates for the display stand, made by North Star. The build: As I've painted my fair share of grey warships over the years I will be painting Borodino in black with yellow funnels. In actuality I will probably opt for a very dark shade of grey in order to help recessed detail stand out, although I'm wondering if a satin finish over pure black might also achieve satisfactory results? Weathering will be at a minimum as I'm aiming for that 'clean' display stand model look. The first step will be to clean up the hull parts and drill out the portholes in preparation for priming. Then I will have to study all the instructions and get my head around how best to tackle the sub-assemblies without cutting off access for the wood deck and etch. I'm particularly interested in the deck-house etch parts - I'm hoping that they're full replacements and not just facades - especially for the bridge areas - which would save me no end of work with the drill and files . Anyway - onwards with the build, and as always I'm grateful for any comments, advice and suggestions. Regards, Ross. 2 Link to comment Share on other sites More sharing options...
Darby Posted April 14, 2015 Share Posted April 14, 2015 Looking forward to this one. Always like the look of these old vessels 1 Link to comment Share on other sites More sharing options...
Ravens Posted April 14, 2015 Author Share Posted April 14, 2015 Looking forward to this one. Always like the look of these old vessels The pre-Dreadnoughts have really grown on me lately, especially the ones with tumblehome hulls. I hope we get some RN subjects in plastic before too long; HMS Canopus would be nice. Ross. Link to comment Share on other sites More sharing options...
longshanks Posted April 14, 2015 Share Posted April 14, 2015 I will be watching with interest Kev 1 Link to comment Share on other sites More sharing options...
Bangor Lad Posted April 14, 2015 Share Posted April 14, 2015 I'll be watching too. Some Pre-Dreadnaughts are fascinating and complex ships. 1 Link to comment Share on other sites More sharing options...
prowler0000 Posted April 15, 2015 Share Posted April 15, 2015 Watching with GREAT interest! 1 Link to comment Share on other sites More sharing options...
Aginvicta Posted April 15, 2015 Share Posted April 15, 2015 I have this kit with the same PE and wooden deck waiting to be built so I will be following your build with interest, Andy 1 Link to comment Share on other sites More sharing options...
Ravens Posted April 16, 2015 Author Share Posted April 16, 2015 The hull pieces have been fitted together, primed with Halford's grey undercoat and the lower hull has been sprayed with a (roughly) 4/1 mixture of Tamiya Flat Red and Hull Red. I've also assembled a deckhouse, and sprayed the deck parts black. Before the Artwox wooden deck layers can be fitted I must first paint the raised details, and also drill out all of the numerous skylight windows. If I am to display some of the skylights in the open position then I must decide which ones are to be hollowed out completely. For the next step I will be painting and attaching the casemate housing and guns, and completing construction of the deckhouse structures. Thanks for looking in, and happy modelling. Ross. 4 Link to comment Share on other sites More sharing options...
Ravens Posted April 18, 2015 Author Share Posted April 18, 2015 The upper hull has been painted with a 2-1 mix of Tamiya X-1 Black and XF-63 German Grey, producing a semi-gloss finish. The portholes were painted with a 50-50 mix of Citadel colours bronze and silver, and given a dark brown wash. The casemate housing and guns were then attached and some more deck-house walls constructed, and the propeller shafts were fitted. Now I need to find some thin transparent plastic sheet to make the glass for the deck-houses, and finish painting the decks, then I can get to work on the superstructure and turrets. Ross. 7 Link to comment Share on other sites More sharing options...
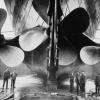
longshanks Posted April 18, 2015 Share Posted April 18, 2015 Some interesting shapes in the bow area Kev Link to comment Share on other sites More sharing options...
Ravens Posted April 19, 2015 Author Share Posted April 19, 2015 The Artwox decks were fittted without any major problems - hopefully they will remain nice and flat. All of the casemates are now done, and some plastic sheet has been glued to the interiors of the superstructure to represent glass. It's a bit of a cowboy-builder job but shouldn't be noticeable once the roofs are added, however the bridge areas with their larger windows might require a little more neatness. Here's everything done so far dry-fitted. And those windows. Thanks for looking in. Regards, Ross. 5 Link to comment Share on other sites More sharing options...
warreni Posted April 19, 2015 Share Posted April 19, 2015 Looking great Ross. Those portholes must have tested your patience. Cheers Warren 1 Link to comment Share on other sites More sharing options...
Ravens Posted April 19, 2015 Author Share Posted April 19, 2015 Thanks Warren. I find resting the ring finger of the brush hand against something while painting helps to keep the hand steady for tackling those fiddly areas. Still, roughly a fifth of them required correction where my hand started getting shaky. Regards, Ross. Link to comment Share on other sites More sharing options...
Ravens Posted April 19, 2015 Author Share Posted April 19, 2015 I've had a crack at replacing some of the secondary armament barrels. I was dreading this operation but it hasn't turned out too badly. The instructions seemed to call for heating up the brass part and then pushing it into the plastic, but that didn't work with the small pieces and I ended up drilling holes and securing them with superglue instead. Hopefully they will look properly aligned when the turrets are assembled. Four down, eight more to go and then the main guns. Ross. 4 Link to comment Share on other sites More sharing options...
Ravens Posted April 22, 2015 Author Share Posted April 22, 2015 A quick update. The turrets have been assembled and are ready for painting. I couldn't spot the single bar rails for the main turret tops in the Gold Medal set, so I cut up some 1/700 three-bar rails for this role instead. The bottom deck glued in place plus some more hull parts dry-fitted: I also broke off a propeller shaft by accident, which makes me glad I forgot to install the torpedo net shelves prior to painting the main hull. Cheers, Ross. 7 Link to comment Share on other sites More sharing options...
beefy66 Posted April 23, 2015 Share Posted April 23, 2015 Ross looking great those wooden decks really look nice Beefy 1 Link to comment Share on other sites More sharing options...
Shar2 Posted April 23, 2015 Share Posted April 23, 2015 Looking great. I love these old style ships. 1 Link to comment Share on other sites More sharing options...
foxy Posted April 24, 2015 Share Posted April 24, 2015 I to like these and this is looking good. Have you thought on what period this will be, especially when you come to the smaller armaments on the deck and crows nest. There's some very confusing aspects on weather shields were on in this or that period. I got so confused with the advice, mine is still half finished. The chimney tops was another confusing issue. Great work and good luck, will be following this so as to finish my own one day. Foxy Link to comment Share on other sites More sharing options...
Ravens Posted April 24, 2015 Author Share Posted April 24, 2015 I to like these and this is looking good. Have you thought on what period this will be, especially when you come to the smaller armaments on the deck and crows nest. There's some very confusing aspects on weather shields were on in this or that period. I got so confused with the advice, mine is still half finished. The chimney tops was another confusing issue. Great work and good luck, will be following this so as to finish my own one day. Foxy Cheers Foxy. I don't know very much about the Borodinos, and I'm struggling to find useful photos and data so I'll probably just base it around the Gold Medal set. It would be nice to have most of the details correct for a particular year, but I'm not too worried about it. Ross. Link to comment Share on other sites More sharing options...
Ravens Posted May 2, 2015 Author Share Posted May 2, 2015 The turrets and deck-house roofs have been painted and the main decks and upper tumblehome hull have been glued into place. I've had to contend with some fit issues, lost and subsequently found piece (which had somehow worked its way into my bin), and also managed to superglue my thumb to the model while attempting to correct said issues. Some gaps between the deck and the hull were filled with Squadron white putty. I have also undercoated the GMM etch set with Vallejo grey airbrush primer. The next stage will involve assembly of the bridge structures, various fittings and choosing a yellow colour for the funnels. Thanks for looking in. Ross. 7 Link to comment Share on other sites More sharing options...
warreni Posted May 2, 2015 Share Posted May 2, 2015 I can't remember but did the Borodino go to the battle with Japan? If you are going to model it for that battle I read an article somewhere that the ships were covered in coal dust after such a long voyage. Don't know if you are 'into' weathering or not (I are not) but I suppose spraying matt dark gray all over those lovely wooden decks would work.. (says Warren who doesn't have much of an idea on things weathering with ships) By the way, nice work my friend! Whatever look you choose I am sure it will come out great. 1 Link to comment Share on other sites More sharing options...
Ravens Posted May 2, 2015 Author Share Posted May 2, 2015 I can't remember but did the Borodino go to the battle with Japan? If you are going to model it for that battle I read an article somewhere that the ships were covered in coal dust after such a long voyage. Don't know if you are 'into' weathering or not (I are not) but I suppose spraying matt dark gray all over those lovely wooden decks would work.. (says Warren who doesn't have much of an idea on things weathering with ships) By the way, nice work my friend! Whatever look you choose I am sure it will come out great. She did indeed fight at Tsushima, but I'll be going for more of a clean 'museum' style for this build, as opposed to the 'in service' look. If I ever do another Borodino class then I may opt for a waterline version with weathering and figures. Cheers, Ross. Link to comment Share on other sites More sharing options...
Slowbuilder Posted May 10, 2015 Share Posted May 10, 2015 That really is a beautiful job you've done there. I'm thinking of doing this kit myself as a break from the stuff I usually do. Where did you get the Artwox deck from? I used to get mine from WEM, but since they went under I can't find anywhere in the UK that does them apart from a handful at Hannants. 1 Link to comment Share on other sites More sharing options...
Jockster Posted May 10, 2015 Share Posted May 10, 2015 Very nice build Ross, Zvezdas Varyag had me looking at this period in warship evolution in a whole new light. I like the Borodino but I'm not likely to build her any time soon so it's a pleasure watching a nice build like yours! 1 Link to comment Share on other sites More sharing options...
Ravens Posted May 11, 2015 Author Share Posted May 11, 2015 That really is a beautiful job you've done there. I'm thinking of doing this kit myself as a break from the stuff I usually do. Where did you get the Artwox deck from? I used to get mine from WEM, but since they went under I can't find anywhere in the UK that does them apart from a handful at Hannants. I had the same hassle trying to track one down. WEM had it listed as out of stock for months on end right up until they went out of business, but I eventually managed to find one on Ebay - it shipped from Australia if I recall correctly. Ross. Link to comment Share on other sites More sharing options...

Recommended Posts
Create an account or sign in to comment
You need to be a member in order to leave a comment
Create an account
Sign up for a new account in our community. It's easy!
Register a new accountSign in
Already have an account? Sign in here.
Sign In Now