Spikelhund Posted March 31, 2015 Share Posted March 31, 2015 Hello everyone, I've not had much of a modelling output for the last year or so, plenty started but only one finished, I started this kit last week and thought I'd post up some progress. I've got quite a few bits of Barracuda studios resin for this build plus some extra decals and also some Eduard fabric belts and PE instrument panel. I wanted to add some extra detail to the cockpit so copied some wiring from an MDC cockpit I'd done a few years back, added PE foot pedals but I kept knocking them off so went back to the kit parts. Should of used a finer wire for some of the work but all painted up now. some of the forward detail on front right side was just an approximation for added interest. Fabric belts added, slightly confusing instructions and they seemed very long, I'd not used them before and didn't want to shorten them and lose detail but I think I'll do better next time. I used an Eduard PE panel which I adapted as it was made for a Hasegawa kit. On this occasion I should of snuck some decals in for the dials as the PE isn't printed very brightly. Added some Airscale cockpit placards and started to bring the cockpit parts together. That brings me pretty much up to date, I'm doing a new gun sight from plastic strip etc, it's one of my approximations but I couldn't live with the kit part. Hope you like what I've done so far, all comments are welcome. Cheers... 7 Link to comment Share on other sites More sharing options...
CWO_D_Rankin Posted March 31, 2015 Share Posted March 31, 2015 Stunning detail. 1 Link to comment Share on other sites More sharing options...
FalkeEins Posted March 31, 2015 Share Posted March 31, 2015 that's beautiful Mke... (but perhaps not surprised you don't finish too much...) 1 Link to comment Share on other sites More sharing options...
Vesa Jussila Posted March 31, 2015 Share Posted March 31, 2015 Very nice detailing and good start. 1 Link to comment Share on other sites More sharing options...
RMCS Posted March 31, 2015 Share Posted March 31, 2015 Beautiful work 1 Link to comment Share on other sites More sharing options...
Spikelhund Posted March 31, 2015 Author Share Posted March 31, 2015 Thanks everyone for taking the time. I've got a bit done today so will post an update asap. Cheers... Link to comment Share on other sites More sharing options...
olsen Posted April 6, 2015 Share Posted April 6, 2015 Now that's a nice cockpit ! I like your light gray colour choice for RLM 66; a good idea as assembled pits can get pretty dark once installed. I also like the mist of dust on the forward cockpit walls along with the random dark gray spekels which convey tone, depth and slight ware. Nicely done. I look forward to your progress, Cheers, Peter 1 Link to comment Share on other sites More sharing options...
galfa Posted April 6, 2015 Share Posted April 6, 2015 Your cockpit looks great. One of the best I ever seen. What about your paint job ? - Enamels or acrylics? - Pre-shading or Post-shading? - Oilwash and/or Drybrush? 1 Link to comment Share on other sites More sharing options...
gregax Posted April 6, 2015 Share Posted April 6, 2015 FANTASTIC cockpit! Following this one! 1 Link to comment Share on other sites More sharing options...
somnas Posted April 7, 2015 Share Posted April 7, 2015 Will follow this one for sure, the pit looks fantastic and your previous builds makes me believe this will be a good one! /Erik 1 Link to comment Share on other sites More sharing options...
Spikelhund Posted April 7, 2015 Author Share Posted April 7, 2015 Hi, Thanks for all your comments. a little more progress to show. My attempt at a new gun sight, I've added Barracuda studios resin exhausts and removed the solid plastic vents, also used stretched sprue to fill unwanted seams that don't fall on panel lines, Here you hopefully cannot see where I've filled with sprue the unwanted seam on the fuselage side halfway between the square vent and panel line, Barracuda vents added and also some beefed up cowling bulges from Alleycat, I mucked up one of the Barracuda bulges with some dodgy sanding which was a shame as they had nice rubber seal detail which I've tried to replicate on these ones. Cowling seam has been cleaned up and panel lines re-scribed, I somehow managed to put the wing spar on backwards however it was a simple correction as I used a razor saw to remove the outer section (before adding inner top wing) and swapped them the correct way around, as you can see the wheel bay has now built up as normal and I had no issues dryfitting the bottom wing.... phew . Hope to get some paint on wheel bays later today. Cheers everyone... 1 Link to comment Share on other sites More sharing options...
Spikelhund Posted April 7, 2015 Author Share Posted April 7, 2015 Your cockpit looks great. One of the best I ever seen. What about your paint job ? - Enamels or acrylics? - Pre-shading or Post-shading? - Oilwash and/or Drybrush? Thanks for your question galfa, Paints are all acrylic, Gunze, Tamiya, Citadel and Vallejo apart from one or two switches painted with Humbrol enamel. After a base coat (over Mr Surfacer primer) I do some shading on structural details and then some highlights on panel centres etc. I'll follow that with dry brushing some light grey to pop out some detail, some specks of Vallejo German grey were added with a sponge. Details are painted and for a wash in cockpits and wheel wells I'll use a 50/50 mix of water and future/Klear with a drop of paint, usually black and an earthy brown which will settle nicely in the recesses and create nice shadows and depth, the best bit is it wont leave a tide mark as it drys just a nice graduated tint. The wash leaves a shiny finish for decals and in this case I used Tamiya flat clear to flatten it all down. Some MiG pigments added a bit of muck around the bottom edges and I used a silver Prisma coloured pencil for some chipping on the foot plate and seat back. Hope that answers your question. Cheers... Link to comment Share on other sites More sharing options...
Gremlin56 Posted April 7, 2015 Share Posted April 7, 2015 This is so amazingly good Mike, really love what you are doing here 1 Link to comment Share on other sites More sharing options...
Spikelhund Posted May 12, 2015 Author Share Posted May 12, 2015 Hi chaps and ladies, Sorry for the lack of updates, I always seem to have to rename files to get them to display hence lots of downloading uploading shenanigans! Anyway much progress has been made so lets catchup. Wheel bays painted, Gunze aqueous RLM 02, Undercarriage complete, this is a fiddly multi part assembly that doesn't appear very strong so next time I'll get some of the brass Brassin bits. I'd got some Barracuda wheels but I'm saving them for another kit, After priming I sprayed the fuselage band Gunze RLM 24 after which I discovered a pretty much empty jar of RLM 76 so had to whizz into Chester to get some Tamiya colours for mixing, The top was sprayed with Gunze RLM 75 and 74, I wasnt very happy with the mottleing but left it a few days and it grew on me. For the national marking I used Maketar masks, very very sticky little blighters that took me ages to wrestle into position, I'm such a fumblewit at markings , Here is the result, Then onto decals, some of these split as I applied them but luckily nothing too bad, Finally stencils were applied, took a few sessions, I used mostly the Eagle editions set but also a few of the Kit decals came to the rescue. I've started weathering using the Ammo PLW sets which are very nice, chipping is a mix of painting and silver pencil, Thanks for looking and all comments are very welcome. Cheers... 3 Link to comment Share on other sites More sharing options...
sailorboy61 Posted May 12, 2015 Share Posted May 12, 2015 Hello everyone, I've not had much of a modelling output for the last year or so, plenty started but only one finished, I started this kit last week and thought I'd post up some progress. I've got quite a few bits of Barracuda studios resin for this build plus some extra decals and also some Eduard fabric belts and PE instrument panel. I wanted to add some extra detail to the cockpit so copied some wiring from an MDC cockpit I'd done a few years back, added PE foot pedals but I kept knocking them off so went back to the kit parts. Should of used a finer wire for some of the work but all painted up now. some of the forward detail on front right side was just an approximation for added interest. Fabric belts added, slightly confusing instructions and they seemed very long, I'd not used them before and didn't want to shorten them and lose detail but I think I'll do better next time. I used an Eduard PE panel which I adapted as it was made for a Hasegawa kit. On this occasion I should of snuck some decals in for the dials as the PE isn't printed very brightly. Added some Airscale cockpit placards and started to bring the cockpit parts together. That brings me pretty much up to date, I'm doing a new gun sight from plastic strip etc, it's one of my approximations but I couldn't live with the kit part. Hope you like what I've done so far, all comments are welcome. Cheers... " started to bring the cockpit parts together......." understatement of the week perhaps! Fantastic work! 1 Link to comment Share on other sites More sharing options...
sailorboy61 Posted May 12, 2015 Share Posted May 12, 2015 Hi chaps and ladies, Sorry for the lack of updates, I always seem to have to rename files to get them to display hence lots of downloading uploading shenanigans! Anyway much progress has been made so lets catchup. Wheel bays painted, Gunze aqueous RLM 02, Undercarriage complete, this is a fiddly multi part assembly that doesn't appear very strong so next time I'll get some of the brass Brassin bits. I'd got some Barracuda wheels but I'm saving them for another kit, After priming I sprayed the fuselage band Gunze RLM 24 after which I discovered a pretty much empty jar of RLM 76 so had to whizz into Chester to get some Tamiya colours for mixing, The top was sprayed with Gunze RLM 75 and 74, I wasnt very happy with the mottleing but left it a few days and it grew on me. For the national marking I used Maketar masks, very very sticky little blighters that took me ages to wrestle into position, I'm such a fumblewit at markings , Here is the result, Then onto decals, some of these split as I applied them but luckily nothing too bad, Finally stencils were applied, took a few sessions, I used mostly the Eagle editions set but also a few of the Kit decals came to the rescue. I've started weathering using the Ammo PLW sets which are very nice, chipping is a mix of painting and silver pencil, Thanks for looking and all comments are very welcome. Cheers... Lovely work on those wheels. 1 Link to comment Share on other sites More sharing options...
Ilan Posted May 12, 2015 Share Posted May 12, 2015 Beautiful work so far! cheers. 1 Link to comment Share on other sites More sharing options...
Spikelhund Posted May 12, 2015 Author Share Posted May 12, 2015 Thanks guys for the comments. Cheers... Link to comment Share on other sites More sharing options...
tank152 Posted May 13, 2015 Share Posted May 13, 2015 That is looking rather nice. You may have seen these but here are a couple of pics of the real thing. https://www.flickr.com/photos/28092068@N03/5380387283/in/album-72157631642287527/ https://www.flickr.com/photos/28092068@N03/5380387117/in/album-72157631642287527/ I notice you have used Maketar masks, did you purchase them directly from them, if so how did you find them to deal with? The reason I ask is that I emailed them over a week ago now and haven't heard anything back from them, I know it says they may be slow in responding but you'd have thought they would have done within a week. Tim. 1 Link to comment Share on other sites More sharing options...
Spikelhund Posted May 13, 2015 Author Share Posted May 13, 2015 Thanks Tim, I've seen one of those pictures before, thanks for the links. I ordered the masks direct and received a confirmation email, the masks themselves took a week or so to arrive, I've had masks from them before and not had any problems. Cheers... Link to comment Share on other sites More sharing options...
tank152 Posted May 13, 2015 Share Posted May 13, 2015 Ok thanks, I may just go ahead and order some of them then. Do you find the Kabuki masks easier to work with than vinyl ones? If ever you do any more Bf109s its worth having a look through that guys pics as he has got loads of mid to late war pics of 109s, you can easily spend a night going through them. 1 Link to comment Share on other sites More sharing options...
Spikelhund Posted May 13, 2015 Author Share Posted May 13, 2015 Tim I find vinyl seems to shrink leaving gaps on national markings etc, also in my less than nimble fingers it can easily get stretched out of shape. I certainly will build more, really fancy doing a K4 so will keep that link handy. Hope to get some finished pics up soon as it's all done. Cheers... 1 Link to comment Share on other sites More sharing options...
tank152 Posted May 13, 2015 Share Posted May 13, 2015 Yeah I've read that on Maketar's site, so it is true, thanks for confirming that. I'll look forward to viewing the finished article, it'll be well worth the wait. Tim. 1 Link to comment Share on other sites More sharing options...
Grayson Posted May 13, 2015 Share Posted May 13, 2015 You have elevated this build into art, truly fantastic work here. 1 Link to comment Share on other sites More sharing options...
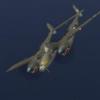
Spikelhund Posted May 17, 2015 Author Share Posted May 17, 2015 Thanks for the comments. Posting a few pictures but will post more later in the RFI forum. Thanks for looking. Cheers... 1 Link to comment Share on other sites More sharing options...

Recommended Posts
Create an account or sign in to comment
You need to be a member in order to leave a comment
Create an account
Sign up for a new account in our community. It's easy!
Register a new accountSign in
Already have an account? Sign in here.
Sign In Now