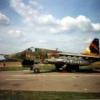
harvy5 Posted December 4, 2014 Share Posted December 4, 2014 (edited) The break at work on Frogfoot, I started another project. Su-22M-3K is the export version of the Su-17M-3 with engine R-29-300 also used for the Mig-23.Differs mainly the rear fuselage and rudder.Were exported to Hungary, Peru, Libya, Vietnam, Syria, Iraq, Yemen and Afghanistan.Since I am lazy, I used the rear fuselage of the model Su-7 OEZ Letohrad. Su-22M3K were used seat K-36DM early versions. I used therefore modified the seat from the set RESIN ART for Su-25th In this set, I used the control stick. Edited April 30, 2017 by harvy5 2 Link to comment Share on other sites More sharing options...
exdraken Posted December 5, 2014 Share Posted December 5, 2014 great! an 22M-3!!! someone finally trying this surgery! i will follow this closely! what about airbrake size and location are there any problems?? did not notoce th part of the rudder/ more the fin yet, thanks! Link to comment Share on other sites More sharing options...
andym Posted December 5, 2014 Share Posted December 5, 2014 (edited) Excellent, someone actually doing the surgery to make a correct M-3, not just putting the wrong decals on the Eduard kit. Will watch this with interest. Also out of interest are you going to do anything about the over-thick wings? Edited December 5, 2014 by andym Link to comment Share on other sites More sharing options...
James G Posted December 5, 2014 Share Posted December 5, 2014 Nice start! Link to comment Share on other sites More sharing options...
harvy5 Posted December 5, 2014 Author Share Posted December 5, 2014 Today, little progress in the cockpit and the front wheel well And now waiting for me sanding, puttying and rescribing... great! an 22M-3!!! someone finally trying this surgery! i will follow this closely! what about airbrake size and location are there any problems?? did not notoce th part of the rudder/ more the fin yet, thanks! Air brakes are OK! Excellent, someone actually doing the surgery to make a correct M-3, not just putting the wrong decals on the Eduard kit. Will watch this with interest. Also out of interest are you going to do anything about the over-thick wings? I don't know yet what with wings. I'll probably make new. 2 Link to comment Share on other sites More sharing options...
harvy5 Posted December 13, 2014 Author Share Posted December 13, 2014 After a week there's another little progress. I gave right shape the tail fin.In the next step, I corrected the top part fuselage. The fuselage has finally right shape and this weekend waiting for me correction wings ... 3 Link to comment Share on other sites More sharing options...
exdraken Posted December 13, 2014 Share Posted December 13, 2014 very impressive! will take note! these subtle, or actually absolutely not subtle differences in shapes alone make this hobby worthwile! 2 Link to comment Share on other sites More sharing options...
Tomjw Posted December 13, 2014 Share Posted December 13, 2014 Was very interested to see this, so I will tag along for the ride. Cheers, Tom. Link to comment Share on other sites More sharing options...
Low flyer Posted December 13, 2014 Share Posted December 13, 2014 This is brilliant I am following this very closely Link to comment Share on other sites More sharing options...
harvy5 Posted December 14, 2014 Author Share Posted December 14, 2014 What looked like a nightmare, it was not so bad. Sanding and sanding and wing has the correct profile. Of course it was necessary to modify certain shapes, especially landing flaps Wings in position before take-off. Version M-3 and all previous versions Su-17/20/22 in this position using only slots.. It will be interesting ... 1 Link to comment Share on other sites More sharing options...
Bonehammer Posted December 14, 2014 Share Posted December 14, 2014 (edited) I just saw this one. Big project don't scare ya, do they? The fuselage swap is Would have never thought of doing it this way, otlishtniy. I too sanded the outer wings on my first Su-22, then on the second one I took a different approach: grooves on the inside of the parts and cuts on the inboard sides allowed to 'flatten' the parts to a more realistic appearance. Edited December 14, 2014 by Bonehammer Link to comment Share on other sites More sharing options...
exdraken Posted December 16, 2014 Share Posted December 16, 2014 (edited) hello,, cool! please don't forget to do something about the front windscreen inclination! it is totally straight in the kit! Edited December 16, 2014 by exdraken Link to comment Share on other sites More sharing options...
Bjorn Posted December 16, 2014 Share Posted December 16, 2014 Impressive! As if there was not enough work with this one if you build it OOB... Link to comment Share on other sites More sharing options...
harvy5 Posted December 16, 2014 Author Share Posted December 16, 2014 hello,, cool! please don't forget to do something about the front windscreen inclination! it is totally straight in the kit! ... I know about it, but now I do not know how to fix it ... Impressive! As if there was not enough work with this one if you build it OOB... and I want more, Su-22M-4 and UM-3K ... 1 Link to comment Share on other sites More sharing options...
exdraken Posted December 16, 2014 Share Posted December 16, 2014 ... I know about it, but now I do not know how to fix it ... my solution: I sanded away the plastic on the fuselage til I got a drooping attitude. surely not enough but at least the right dirction: you know this build: http://www.britmodeller.com/forums/index.php?/topic/234934642-su-22m4-fitter-148-updates-tactical-numbers-etc/page-4?hl=su-22m4 sand away the plastic where the red lines arered the more or less finished one with subtle drop visible (to me at least) by the way, I should take photos of the finished and armed aircraft one day!!! Link to comment Share on other sites More sharing options...
harvy5 Posted December 17, 2014 Author Share Posted December 17, 2014 ... a few little things. Wings have the right shape and size. I started to work on the main gear bays. 1 Link to comment Share on other sites More sharing options...
harvy5 Posted December 17, 2014 Author Share Posted December 17, 2014 hello,, cool! please don't forget to do something about the front windscreen inclination! it is totally straight in the kit! I watched your work. I'll probably have to make a new windscreen. The main problem is bad inclination armor windscreen. Other shapes are OK 1 Link to comment Share on other sites More sharing options...
exdraken Posted December 17, 2014 Share Posted December 17, 2014 maybe I am wrong, but the main problem is the straight fuselage part where the canopy is to be placed. it should be angled down as in your plans. I used them to draw in red the inclination maybe we are speaking of the same thing, just in case! manufacturing a new front canopy is definitely out of the scope of my capabilities! let me know about your solution! Link to comment Share on other sites More sharing options...
harvy5 Posted December 17, 2014 Author Share Posted December 17, 2014 maybe I am wrong, but the main problem is the straight fuselage part where the canopy is to be placed. it should be angled down as in your plans. I used them to draw in red the inclination maybe we are speaking of the same thing, just in case! manufacturing a new front canopy is definitely out of the scope of my capabilities! let me know about your solution! Again I looked at everything and here is the result. End of the windscreen must be increased by 1.25 mm. Blue tape on the right shows edge of the frame. Link to comment Share on other sites More sharing options...
harvy5 Posted December 20, 2014 Author Share Posted December 20, 2014 (edited) ... again little progress. Modified elevators and fuselage in the place of attachment. Problem with inclination windscreen I removed. Sanding and Evergreen are good helpers. Edited December 20, 2014 by harvy5 1 Link to comment Share on other sites More sharing options...
exdraken Posted December 20, 2014 Share Posted December 20, 2014 nice! and innovative! you are really correctig everything it seems! No short-cuts! :) Link to comment Share on other sites More sharing options...
Bozothenutter Posted September 30, 2015 Share Posted September 30, 2015 did this ever get finished? really interested how this went! 1 Link to comment Share on other sites More sharing options...
exdraken Posted September 30, 2015 Share Posted September 30, 2015 did this ever get finished? really interested how this went! me too! please show us some progress! want to do a two seater in a similar way..... Link to comment Share on other sites More sharing options...
harvy5 Posted October 5, 2015 Author Share Posted October 5, 2015 Now I do not have the right inspiration ... I work on the MiG-21 family of 1/48 and fighting with Su-25 1/32 Trumpeter Link to comment Share on other sites More sharing options...
harvy5 Posted April 30, 2017 Author Share Posted April 30, 2017 After a long time, little progress.Not a KP but a new kit from Kitty Hawk.After opening box I was very happy, beautiful surface, perfect details, great progress from 25 years old KP.I started building.And then I found out , waiting to Hobby Boss.Bad shapes and angles I din't want to fix but surface bugs?Visibly cut mold, senselessly holes.http://http://http://Dents on the surface of the details.http://http://http:// Of course,during repairs disappeared many details. Link to comment Share on other sites More sharing options...

Recommended Posts
Create an account or sign in to comment
You need to be a member in order to leave a comment
Create an account
Sign up for a new account in our community. It's easy!
Register a new accountSign in
Already have an account? Sign in here.
Sign In Now