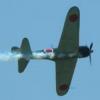
zero Posted May 11, 2014 Share Posted May 11, 2014 (edited) Well after trying to swap these kits and ebay then no one seemed to want them, so I decided as there taking up space, Lets build them First Hasegawa's Lightning F6 Raised Panel lines on this kit, bit dated as it the old Matchbox kit (I'm 99% Sure off that! ) Which has been issues both by Hasegawa and Revell after the end of Matchbox. it still being sold to this day by Hasegawa in the Combo boxing and to be honest having built it in the past, it a great little kit. As you can see I'm updating the pit with a Pavel Resin cockpit set, I would not normally do this, but both the trumpeter and Airfix Lightning have pits so I don't want this one to look out of place. I'm also going to replace the back end of this with the Aeroclub Burner section, which was designed for the Airfix kit, but I'm sure can be graphed on to this one to give a better look to the back end. Second kit is the unloved (slated) trumpeter F6) the two biggest woes with this kit are the back end, and as you can see I'm using the Aeroclub back end replacement, and the belly tank (which I will replace) with the Heritage F6 replacement part, Sadly with this bit you can only build the F6, but I'm happy with that, I'll Build the New Airfix kit to build the F2a. PS I'm still looking for one more Aeroclub back end replacement (Part V237) so if you have one you will never use, please let me know, (I cleared john of his remaining stock!) Decals I'll be using the Xtradecal set as pictured above, (along with some others, I have to hand too!) These two builds are not the only F6 Lightnings I have in the stash, ie I have the Hasegawa Combo set I mention earlier and two more Aeroclub Burners plates two so all three Hasegawa kits will look the same, and hopefully the trumpeter one will not look to far off. I hope to to the Hasegawa kit in 11 sqn markings with over wing tanks in place, the Trumpeter kit I'm undecided on and will depend on how good the back end graph looks, and if I need paint to cover it. Anyway in at the deep end! I'm currently sorting out the difficult bits of the Trumpeter kit, once I've sorted the correction parts and how there going to affect the builds I'll then start the cockpits and get the builds underway. Before and after WIP and before some cleaning up More later I hope. Dave Edited May 11, 2014 by zero 2 Link to comment Share on other sites More sharing options...
Daniel Posted May 11, 2014 Share Posted May 11, 2014 Great idea to built them rather than let the languish in the stash. Dam Link to comment Share on other sites More sharing options...
dambuster Posted May 11, 2014 Share Posted May 11, 2014 Raised Panel lines on this kit, bit dated as it the old Matchbox kit (I'm 99% Sure off that! ) I thought that the Hasegawa was an original Hasegawa mould, later reboxed by Frog and then Frog did their own copy...Don't believe it has any link to th Matchbox F6. Peter Link to comment Share on other sites More sharing options...
Duncan B Posted May 11, 2014 Share Posted May 11, 2014 The Hasegawa Lightning is a fine old kit and is actually much older than the Matchbox Lightning, it's origins date back to Frog I believe. It'll build up into a nice representation of a Lightning where as the Trumpeter will make up into a nice representation of something that someone described over the phone to someone who didn't speak the same language and had never seen a Lighting before! Still you will have fun with both of them and that is the point is it not? Duncan B 1 Link to comment Share on other sites More sharing options...
zero Posted May 11, 2014 Author Share Posted May 11, 2014 ? Strange I thought it was a matchbox kit. (I have a built Matchbox kits from years ago, so I will take some pictures of it tomorrow!) Anyway the nightmare begins (more WIP pictures) Close of play for today, Thanks for looking Dave Link to comment Share on other sites More sharing options...
Duncan B Posted May 11, 2014 Share Posted May 11, 2014 One thing I do remember from my own build of the Hasegawa kit is that the fit of the air brakes is far from prefect. I think I ended up filling the cavity with filler then scribing the outline of the air brake later, not the best method really. It might be better to put something in the bay to hold the air brake at the correct level then fill around the gap. Duncan B Link to comment Share on other sites More sharing options...
Winenut Posted May 12, 2014 Share Posted May 12, 2014 Matchbox usually have cavernous recessed panel lines. As oppposed to raised ones. I made the original Matchbox back in the day with an awesome silver paintjob!!! well it was awesome to me when I was bout 10! Looking forward to more posts of these fat bellied fighters Link to comment Share on other sites More sharing options...
zero Posted May 12, 2014 Author Share Posted May 12, 2014 After getting the trumpy kit to where I fell I need to do the cockpit and get the fuse joined etc to carry on, I've decided to take the option of the easier one first. ie the Hasegawa kit. So I'm now hacking the internal bulkhead etc to fit the resin Cockpit and graphing the aeroclub burner plate on the back end, not much to see really. After this is posted, I'll cut the bulkhead and get the cockpit painted and fitted. I also need to do a bit more filling and finish on the back end. May be a little while before I post any more on this, I will picture the work done as I go, but I want to get some paint on my GR1 Harrier now the cockpit has arrived, so I will be working on this as I wait for paint to dry on the harrier. I'll get this up to the cockpit painted fitted and closed up the fuse, then I'll start updating the tread more!. Link to comment Share on other sites More sharing options...
Paul J Posted May 12, 2014 Share Posted May 12, 2014 ? Strange I thought it was a matchbox kit. (I have a built Matchbox kits from years ago, so I will take some pictures of it tomorrow!) Anyway the nightmare begins (more WIP pictures) Close of play for today, Thanks for looking Dave The blisters at the gun area on the resin looks a bit too big. Or certainly is bigger than the kit. Hmm. Link to comment Share on other sites More sharing options...
chrisrope Posted May 13, 2014 Share Posted May 13, 2014 Nice to see them getting done, especially the Hasegawa kit. I just want to get a couple more shifted from the pile of doom then I'll be starting my Revell re-box F6. As noted previously, the Hasegawa kit is their own and has the same parts the FROG, the only difference seems to be the layout of the sprues. Hasegawa still box their own but the FROG has done some travels round Eastern Europe. I remember building some rotten Ruski re-box in greasy brown plastic Revell have re-boxed both the FROG and Hasegawa kit layouts in different versions, the camo F6 is the FROG, grey/red F6 is the Hasegawa. The Matchbox is a whole different kit, build-able as an F2a or an F6. Also plenty of raised detail , airbrakes moulded in but a fuselage that's too skinny Cheers Chris Link to comment Share on other sites More sharing options...
Viking Posted May 13, 2014 Share Posted May 13, 2014 Nice! I like Lightnings and agree that the Hasegawa F6 is not bad, great to see that you are building it rather than letting it become stash fodder. As for the Trumpeter kit, lets just say I never bought one... Will check in on a regular basis to watch this. Cheers John Link to comment Share on other sites More sharing options...
upnorth Posted May 13, 2014 Share Posted May 13, 2014 Nice work so far. The only complaints I could really level against the Hasegawa Lightning is that the refueling probe doesn't resemble the real item around the mounting brackets (the Matchbox probe is much better that way) and the missiles were a serious mess of flash in any boxing of it I ever had (I've had four of them over the years), once the flash was cleared away, I was no longer convinced that I had a good representation of the missile anymore. I did get a quite satisfactory result using the Hasegawa kit with the probe, missiles and pylons from the Matchbox kit. Link to comment Share on other sites More sharing options...
Gimme Shelter Posted May 14, 2014 Share Posted May 14, 2014 Smashing subject - I am really looking forward to following this build. I have just bought 2 of the Trumpeter 1/32 monster sized lightning so which I hope to build together like your project here. I bought them from eBay and each kit had tons of lovely resin extras included - yum yum.. Keep it coming - John Link to comment Share on other sites More sharing options...

Recommended Posts
Create an account or sign in to comment
You need to be a member in order to leave a comment
Create an account
Sign up for a new account in our community. It's easy!
Register a new accountSign in
Already have an account? Sign in here.
Sign In Now