PlaStix Posted May 30, 2014 Share Posted May 30, 2014 That is looking very smart!! Well done!! You've got a really good look to the camouflage - nice soft transition between the colours. It's going to take me while to get mine looking like that and I'm probably going to have a hard edge between the colours on mine. Hope you have a good day. Kind regards, Stix 1 Link to comment Share on other sites More sharing options...
Miggers Posted May 30, 2014 Share Posted May 30, 2014 (edited) Hey Pascal. Nice job of the freehand camoflage and the sometimes tricky wingroot joints. Down elevator and kicked over rudder are also often seen parked Spitfire things too. Keep your pre-shading quite light though my friend,Spitfires are awfully smooth and free of big panel lines in real life. It tends to be just the access panels and cockpit door that really stand out. Pop onto my post in Plastix's thread and have a look at the link to the micro drill set,might be useful for you Edited May 30, 2014 by Miggers 1 Link to comment Share on other sites More sharing options...
Dreamcatcher Posted May 30, 2014 Author Share Posted May 30, 2014 Hi Stix and Miggers ! Thank you so much for your nice comments ! Unfortunately, I had no more time to spend on the spitfire today. May be this week end ? Haney and I we had to go to buy some food to fill the refrigerator - and a bottle of glass cleaner liquid, go to the pharmacy to buy some more Alcohol 90° , and so on... @Miggers : I have this set of micro drill at home since a couple of monthes : Bought it in the Hobby King's UK warehouse : http://www.hobbyking.com/hobbyking/store/__13019__Mni_Drill_Bit_Set_14pc_.html I still have to find some plastic card thin enough to be used and stuck in the armament bays - and i also have to pray to have enough dexterity to build these parts ! Best reagrds Pascal 1 Link to comment Share on other sites More sharing options...
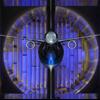
Dreamcatcher Posted June 1, 2014 Author Share Posted June 1, 2014 (edited) Hello,This is a end of week-end update : The preshading have been done once again : Then, as the front part of the canopy requiered, one more time, to use some putty, i had to stick the "head up display" : Once again i had to play with putty - this kit will transform me as a mason !!!After 3 hours of hard fight against my Italeri acrylics and my airbrush, i achieved the new camouflage (free hand painted, once again) : But this time i managed the presahding to be visible - especially on the plane's bottom : I was affraid that the putty i had to apply all around the front part canopy was because of an error of positionning of this part, but after a check, it seems the part is at the right place : I still have some retouch of paintings to do on the dark grey, but, i feel that i need a short break so... That's all for today ! To be continued ! Kind regards Pascal Edited June 1, 2014 by Dreamcatcher 3 Link to comment Share on other sites More sharing options...
PlaStix Posted June 1, 2014 Share Posted June 1, 2014 Good evening Pascal, Looks like you've been having fun this weekend! Filling around the canopy was not easy was it. I ended up virtually doing it twice before it looked okay. I couldn't figure out why it wouldn't sit down properly. I do like your camo - I have had to go for a hard edge to the transition between colours due to using hairy sticks for painting. I think the softer edges look much better. The pre-shading on yours works much better now. Hope you have a pleasant rest of the evening. Kind regards, Stix 1 Link to comment Share on other sites More sharing options...
Dreamcatcher Posted June 2, 2014 Author Share Posted June 2, 2014 Hi Stix, Yes indeed, filling around the canopy was pretty hard : On my Spitfire, both the sides and the front area needed to be filled with putty. I also had to apply some putty by two or three times to fill the gap. Thank you for your kind words, Best regards Pascal 1 Link to comment Share on other sites More sharing options...
PlaStix Posted June 3, 2014 Share Posted June 3, 2014 Hi Pascal, Same with me - the fit of the front canopy part was extremely odd - I ended up trying to file off bits here and there, both on the canopy and the area it was to be attached to on the fuselage, and I still ended up having to fill on all around. No matter what I tried I couldn't see what was stopping it from sitting down correctly. Anyway I am looking forward to seeing the next stages of your progress. Hope you have a good day. Kind regards, Stix 1 Link to comment Share on other sites More sharing options...
Dreamcatcher Posted June 3, 2014 Author Share Posted June 3, 2014 Thank you very much Stix, Yesterday at night i corrected some paint "bugs" here and there but i saw this morning that the grey is not of the same color depending of the thinner i used. Because of that, i have a small area on the left side of the rudder painted with a "slightly lighter dark grey" than the other dark grey areas on the plane. I hope to manage to correct this little problem tonight or tomorrow at night. As the decals set to reproduce the "TB247" / GWoW Spitfire piloted by Mister Pierre Remlinger - 340th RAF (Free French) Squadron during late WWII don't exists in 1:48 scale, i started to try to create the main markings that i will need to reproduce this plane. Another challenge for me... Have a nice evening and thanks to all for watching ! 2 Link to comment Share on other sites More sharing options...
Dreamcatcher Posted June 5, 2014 Author Share Posted June 5, 2014 Hi there ! Yesterday at night i corrected the dark grey on the rudder and i sprayed the Klear to prepare the plane's surface to receive the decals. Now i have a big work to do on the computer to try to create the specific markings of Jacques Remlinger's Mk.XVI and print them on a water slide decal paper sheet. See you soon ! Pascal 3 Link to comment Share on other sites More sharing options...
PlaStix Posted June 5, 2014 Share Posted June 5, 2014 That is looking excellent!! I'm looking forward to seeing your custom decals too! Hope you have a good evening. Kind regards, Stix 1 Link to comment Share on other sites More sharing options...
Alan Kelley Posted June 6, 2014 Share Posted June 6, 2014 Looking good Pascal- nice bit of paintwork there. 1 Link to comment Share on other sites More sharing options...
Dreamcatcher Posted June 6, 2014 Author Share Posted June 6, 2014 (edited) That is looking excellent!! I'm looking forward to seeing your custom decals too! Hope you have a good evening. Kind regards, Stix Hi Stix, Thank you for your kind words. I started to draw the custom decals. I hope to be able to find the good colors once printed but the point that fright me the most is that I hope i will manage to cut correctly the "roundels". I also don't know at this time if the decals will be "micro-sol friendly" or not... Week end is in sight, may i look forward for some new updates on your very nice Mk XVI ? On my side, i will have a lot of CAD work. I'm not sure that i will be able to post some news... Well... We will see... it will depends of how the work goes on. @ Alan : Thank you very much for your kind words too ! To be continued... Enjoy your builds ! Pascal Edited June 6, 2014 by Dreamcatcher Link to comment Share on other sites More sharing options...
PlaStix Posted June 6, 2014 Share Posted June 6, 2014 Hi Pascal, I'm sure you are going to anyway, but, If I was thinking of doing this (which I'm not) - I'd print off extra decals and test them on some scrap parts. I tested my painting first on the unused engine side covers before actually painting the plane. I plan to test some more painting on these at a later stage. It would also mean you could test the micro-sol. Just a thought. And yes it's the weekend!! I hoping to get some kit building done and I will hopefully post some updates. I'm also hoping to get started on my kit for the D-Day 70th Anniversary Group Build. Hope you have a good weekend. Kind regards, Stix 1 Link to comment Share on other sites More sharing options...
Miggers Posted June 6, 2014 Share Posted June 6, 2014 Here's a thought Pascal. Are there any 340 Squadron decals in 1/72nd scale? That way,you'd only have to scan them,upscale them and then print them off. 1 Link to comment Share on other sites More sharing options...
Dreamcatcher Posted June 7, 2014 Author Share Posted June 7, 2014 Hello, Yes... and no Miggers, Some 1:72 scale decals exists but they reproduce the GWoY, not the GWoW. The "croix de lorraine" (Lorraine cross ?), are white on a light blue back ground on these decals set and on GWoW the cross was light blue on a red back ground with a yellow outline all around the red. The drawing process don't affraid me - i often use my old CAD software to design my own R/C model built from scratch, it only the fact that i never used my water slide decal papers on plastic model kits and i don't know which beahviour to expect from it with the micro sol / micro set and i have to find a process to cut the round shaped roundels - i think i will have to cut them "free hand". best regards Pascal 1 Link to comment Share on other sites More sharing options...
Miggers Posted June 8, 2014 Share Posted June 8, 2014 Good man Pascal. Can't wait to see how they come out because I need to do some in black for mine. I have the artwork,but I still haven't bought the decal film and printed them off :rolleyes: Link to comment Share on other sites More sharing options...
Dreamcatcher Posted June 9, 2014 Author Share Posted June 9, 2014 (edited) Hi Miggers, This is how looks my printed decals sheet : I had no problem to apply the smaller decals : But for the moment applying the bigger ones is a real nightmare... The use of micro set seems to be prohibited with the acrylic varnish i used to waterproof the printed decals it melt the varnish and remove the print ! The Klir don't like the Micro set too : The painting + Klir melted and was transformed in a kind of brown dough in some area as you can see on the rudder (On the other hand, micro sol works rather good to allow the decals to dive in the bottom of the pannel lines) And the last but not least problem : The printed ink gets loose in the slightest friction or folding... even after 4 layer of varnish... I don't know what to do... Shall i try to print another sheet of decals and try another varnish ?, shall i have to look for some aftermarket 19mm diameter french roundels ? or simply give up and use decals from the box ? I'm very disapointed for now... Oh, just a thing Miggers : if you, also plan to print some roundels : Print them with a dark background all around - it's very very hard for me to see perfectly the border of a yellow outlined roundel on a white background. Have a nice day Kind regards Pascal Edited June 9, 2014 by Dreamcatcher Link to comment Share on other sites More sharing options...
Dreamcatcher Posted June 9, 2014 Author Share Posted June 9, 2014 i just removed the tricolor flag on the rudder and, ofcourse, the paint have also been removed with the decals... Link to comment Share on other sites More sharing options...
PlaStix Posted June 9, 2014 Share Posted June 9, 2014 Morning Pascal, Ouch!! They're not looking good. What a shame! Have you got any Humbrol DecalFix? I've used it on mine and it doesn't react with my version of Klear - Pledge. I don't know how it would react with your decals though. Don't give up yet but I'd try them on some test pieces first. It would be good if you could make it into the version you want it to be. Kind regards, Stix 1 Link to comment Share on other sites More sharing options...
Miggers Posted June 9, 2014 Share Posted June 9, 2014 (edited) Aw Pascal mate,that's a real shame . They'd printed off really well too. I don't tend to use setting solutions(Microsol,Decalfix or what-have-you),I'll give the entire airframe an even brushed coat of Kleer. Once that's gone off(a couple of days),I'll start decalling but bed them down on a few spots of wet Kleer. That pulls them right down onto detail once it dries. Whether it'd affect sealed home printed decals I'm not sure though. Not really sure what to suggest there Pascal,is there not a sheet of 1/48th roundels and fin cockades you can get? EDIT. Yes there is,well roundels anyway : http://www.ebay.co.uk/itm/Berna-Decals-1-48-FRENCH-AIR-FORCE-ROUNDELS-43-82/131070555968?_trksid=p2045573.c100033.m2042&_trkparms=aid%3D111001%26algo%3DREC.SEED%26ao%3D1%26asc%3D22871%26meid%3D7497536861231886137%26pid%3D100033%26prg%3D9837%26rk%3D3%26rkt%3D4%26sd%3D390351444930 Just use your printed serials and Cross of Lorraine decals onto the airframe and make masks with the printed squadron codes to lightly airbrush them in ??????? Edited June 9, 2014 by Miggers 1 Link to comment Share on other sites More sharing options...
Dreamcatcher Posted June 9, 2014 Author Share Posted June 9, 2014 That's a good idea Miggers, Thanks for the e-bay link. I think i will give a second try printing a "custom decals set" and try another varnish. I also asked on a french forum if somebody can provide some decals from stock... Have a nice evening and thanks for your kind words Pascal Link to comment Share on other sites More sharing options...
Miggers Posted June 9, 2014 Share Posted June 9, 2014 No problem Pascal. I know how frustrating it can be when trying to replicate markings of a particular aircraft. 1 Link to comment Share on other sites More sharing options...
Dreamcatcher Posted June 15, 2014 Author Share Posted June 15, 2014 (edited) Hi friends, Last Friday i printed a "V2.0" version of my Remlinger's Spitfire Markings. The dark background behind the markings was very helpfull when i had to cut them - adopted Solution ! This time, i shaked very well the varnish Spray (at least 5 minutes !) before to spray 3 coats of varnish over the decals. I waited 60 minutes between each coats. I allowed them 36 hours for drying and this afternoon, as the weather was sad, i started a new try with the custom decals. The results are not excellents but... i think that they are acceptable. This is how my spitfire looks tonight : (yes... The rain started to fall... once again !) I also removed the Cannons from the wings. I would like to try to improve a bit more the armament bays, as Stix done so greatly on his very nice Mk XVI. To be continued... Have a nice evening ! Pascal Edited June 15, 2014 by Dreamcatcher 3 Link to comment Share on other sites More sharing options...
PlaStix Posted June 15, 2014 Share Posted June 15, 2014 The decals are looking much better Pascal. It's great that your able to make some custom ones. I'm glad you're making progress again - I look forward to seeing your detailed gun bays. Hope you have a good rest of the evening. I'm probably not going to get much chance to work on either of my kits until next weekend. Oh well........... Kind regards, Stix 1 Link to comment Share on other sites More sharing options...
Dreamcatcher Posted June 16, 2014 Author Share Posted June 16, 2014 Thank you very much Stix, I have some more painting job to do on the Spitfire to erase a couple of dark spots due to the unexpected reaction of the varnish with the micro-set (spots on the left side of the rudder and the left side of the fuselage near the roundel). The grey/green letters GW W have been cut yesterday and are ready to join the fuselage. Last week i found some soft and very thin grey plastic sheets in which i will try to build the inner armament bays improvements. A question for you Stix : Do you have shortened the landing gear's legs on your Mk.XVI, please ? Some people said they are one or two millimeters too long but I'm not sure to know how to reduce their length without weakening them... (May be planting a small metallic stalk in the plastic to join the landing gear's leg and the lower part of the shock absorber ?) I hope you all will have a nice day ! All Comments and suggestions are welcome. Kind regards Pascal 1 Link to comment Share on other sites More sharing options...

Recommended Posts
Create an account or sign in to comment
You need to be a member in order to leave a comment
Create an account
Sign up for a new account in our community. It's easy!
Register a new accountSign in
Already have an account? Sign in here.
Sign In Now