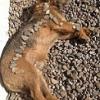
jer Posted March 23, 2014 Share Posted March 23, 2014 Having posted various planes when i have finished building them I thought I'd do a WiP of my latest build, which is Kitty Hawks Jaguar GR1 with some extras too. I haven't built a Jag since I was a teenager which was quite while ago now and in more recent years I have pondered over getting the Airfix 1/48 but when I saw Kitty Hawks release of the GR1/3 kit I thought I'd have a go at one. To go with the build I purchased the Aires Gun bay, Airbrakes, Cockpit and Wheel bays too + Masters pitot tube and Flightpaths fuel tanks and pods + SAC's landing gear. The kit does come with nice bits and bobs of photo etch some of which i will use but i am a bit of a sucker for Aires pit's and wheel bays. From reading reviews I realise that Kittys Hawks GR1/3 Jagaur comes with some flaws (as in i don't think you can build a correct GR3 from the box) but my general work style is to build it from the box and throw in a few detailed after market extras, dip in paint and job done!! I'll appreciate any feedback during the build if I'm doing anything wrong. I started the build a couple of weeks ago but this was just painting and weathering the pit and wheel bays, so here we go.....sorry if there's too many photos....... Here are the main landing gear bays, cracking detailing.... Lots of bits to prime up...... Landing gear wired up..... Landing gear painted up in FS 36320 Dark Compass Grey (Lifecolour)......though they look white in the pic!! Still haven't weathered them. Everything gets dipped in aircraft interior green (mixture of Mr Hobby interior green and Humbrol pale yellow 81), except the inside of the air brakes. The pit and front landing gear being dry fitted. I had a lot of sanding to do to get these two to fit. Front wheel bay needed grooves cut to fit the landing gear. Avionics bay wired up.... ....then painted up..... and dry fitted..... Bays painted, not much weathering required as i had primed in black. Gun bays painted.... Air brakes bay painted... The plastic sheet showing cockpit dials is reversed and painted white to highlight them. Now the fiddly task of doing the belts. Primed, then painted in sand colour and aluminium for the buckles. I dry brushed the pit with aluminium and highlighted knobs. wiring and switches. So today I have achieved the following..... Clear parts seated in position...and glued.... Then liquid masked to protect during painting.... Canopies removed from sprues and tided up.. Angle of attack hole drilled and dry fitted. Will fix in place at the end of the build. Enlarged the hole for the pitot tube as it's actually made for the Airfix model. CA glued gun bay, air brake bay and wheel bays. Also CA glued main landing gear in position as it's difficult to access once the bays are assembled. Weights added, probably won't need that much as i've added aftermarket cockpit and front wheel well but as i'm using white metal gear it will take the weight. There you go, that's where I am now. Next job will be to complete the joining of the front fuselage and getting the cockpit and front wheel well to sit together. 8 Link to comment Share on other sites More sharing options...
Shaun Posted March 23, 2014 Share Posted March 23, 2014 Very nice work, great bit of detailing work on the sub assembles. What colour scheme are you planing to finish the aircraft? Shaun 1 Link to comment Share on other sites More sharing options...
Tim T Posted March 23, 2014 Share Posted March 23, 2014 Loving what you have done so far. I will be following this with interest. Always loved the Jag. 1 Link to comment Share on other sites More sharing options...
Dave A Posted March 23, 2014 Share Posted March 23, 2014 There's some goings-on going on there alright! Smashing detailing, & a fine example of a methodical mind at work! 1 Link to comment Share on other sites More sharing options...
andy wood Posted March 23, 2014 Share Posted March 23, 2014 great start 1 Link to comment Share on other sites More sharing options...
jer Posted March 23, 2014 Author Share Posted March 23, 2014 Very nice work, great bit of detailing work on the sub assembles. What colour scheme are you planing to finish the aircraft? Shaun Ahhhh haaaa good point!! Forget to say, at the moment it'll be med sea gray and dark green and I'll be using from the kit decals XX732, 54 Sqn, Cotishall (1979). Though I might have a gander on the internet to see what else is available. Link to comment Share on other sites More sharing options...
viper-30 Posted March 23, 2014 Share Posted March 23, 2014 Really like this ,have got one tucked away for a rainy day. 1 Link to comment Share on other sites More sharing options...
AndrewE Posted March 23, 2014 Share Posted March 23, 2014 Great start. I picked up one of these today at Hinckley so I am looking forward to see how yours comes together. Andrew 1 Link to comment Share on other sites More sharing options...
Gustavo Bunger Posted March 24, 2014 Share Posted March 24, 2014 WOW !! "Ninja" build here ! Cracking ! 2 Link to comment Share on other sites More sharing options...
SaintsPhil Posted March 24, 2014 Share Posted March 24, 2014 Brilliant I'll be watching this one, those bays all look good, usual Aries quality, not too bad a fit though by the looks of it, or have you hidden that well?... 1 Link to comment Share on other sites More sharing options...
Solo Posted March 24, 2014 Share Posted March 24, 2014 Amazing, just amazing. Stunning details. I just love to watch, nothing more. 1 Link to comment Share on other sites More sharing options...
jer Posted March 25, 2014 Author Share Posted March 25, 2014 Managed to get a small amount done tonight. Started to cut the cockpit area to hold the new Aires cockpit.... The cockpit was CA glued into place and so was the front wheel bay. Very tight fit. The Aires cockpit was too wide and i sanded until the sides were paper thin. I possibly could have sanded the internal sides of the fuselage to make more room. Dry fitting looks ok from the sides.. However the under belly showed there was a small gap. i'm going to have to clamp and fill. I have also added some supports to help the fuselage stay still when the front is attached to the main part. Thanks for looking..... 3 Link to comment Share on other sites More sharing options...
LT Motta Posted March 25, 2014 Share Posted March 25, 2014 Nice! 1 Link to comment Share on other sites More sharing options...
shawty82 Posted March 26, 2014 Share Posted March 26, 2014 Looking very nice indeed! Have ogled this kit a while at my local shop and this is swaying me towards actually getting the wallet out 1 Link to comment Share on other sites More sharing options...
Stu_davros Posted March 26, 2014 Share Posted March 26, 2014 Fantastic progress. 1 Link to comment Share on other sites More sharing options...
exdraken Posted March 26, 2014 Share Posted March 26, 2014 interesting way of building! how do you manage to get the landing gear straight that way? I already struggle with a closed fuselage! Link to comment Share on other sites More sharing options...
Gary West Posted March 26, 2014 Share Posted March 26, 2014 Interesting thread and lovely work so far Link to comment Share on other sites More sharing options...
jer Posted March 26, 2014 Author Share Posted March 26, 2014 interesting way of building! how do you manage to get the landing gear straight that way? I already struggle with a closed fuselage! Hi Exdraken, I had to create two grooves on the side of the front wheel to replicate the two holes in the kit part. Main landing gear were exactly the same as the kit parts so fitted well. Link to comment Share on other sites More sharing options...
jer Posted March 26, 2014 Author Share Posted March 26, 2014 Not much progress tonight. Glued together the intake sides. Then filled, will sand down tomorrow. Glued together engine compartment. Cut out exhaust petals.. Rolled them using my patented leg method!! PE CA glued into exhaust nozzle. Thats it for tonight....... 3 Link to comment Share on other sites More sharing options...
phildagreek Posted March 27, 2014 Share Posted March 27, 2014 Nice work, looks good, obviously putting some effort into it! Link to comment Share on other sites More sharing options...
jer Posted April 7, 2014 Author Share Posted April 7, 2014 Looking for some advice. Probably going to use some bits from the Flightpath set other than the fuel tanks but I'm getting confused over where I should attach the TIALD pod and the ECM pod. Is it more common for the TIALD pod to be on the port outer pylon and can the ECM to go on the starboard outer pylon? Also the instructions only reference the ACIM pod being on the over wing pylon replacing one of the AIM-9's, does it matter which one? Can you have TIALD, ECM and ACIM all on at the same time!? Any advice appreciated! Link to comment Share on other sites More sharing options...
Gimme Shelter Posted April 8, 2014 Share Posted April 8, 2014 Hi - this looks very neat and smart all-round so far 1 Link to comment Share on other sites More sharing options...
Fritag Posted April 8, 2014 Share Posted April 8, 2014 Beautiful work jer. In part the answer to your question will depend on what vintage of jag you're doing and how anal you want to be. The bang seat in your photos (lovely work) has the early mark 9 head box - and I don't know if they were replaced or not by the time of the GR3. One of the armourers on BM would probably know. I know a little about pre gulf war GR1/GR1a - but nowt about post gulf war GR3s. Certainly no TIALD pod or over wing pylons on pre gulf war jags of that vintage. A typical (non recce) war fit for the wrap around camo UK based GR1a's in the late 80s would be centre line tank, tandem beams on the inboard pylons with 4 x 1,000lbers and ECM and Phimat on the outboard pylons. Steve 2 Link to comment Share on other sites More sharing options...
Fritag Posted April 8, 2014 Share Posted April 8, 2014 (edited) Oops - my above post got duplicated - dunno how. Edited April 8, 2014 by Fritag Link to comment Share on other sites More sharing options...
jer Posted April 8, 2014 Author Share Posted April 8, 2014 Hi Steve, thanks for the info. This is my first build thread, normally I post "here's one I made earlier" so this time I'm interested in what should be correct by asking! I am not an expert plane buff i just enjoy building them. I'm using the kits decals for a GR1. The plane represented is XX732, 54 Sqn, Cotishall (1979). I got the flightpath set for the fuel tanks as they're supposed to be tapered and kit one doesn't and there's only one too! The other stuff I thought could go on but judging on what you say I'll probably just leave it with fuel tanks and the rest will be clean. I'd need to fashion that overwing strip that can be seen when the pylon isn't there. Kit doesn't give the option to not have overwiby pylons. Would it be correct for a GR1 to have a PHIMAT and ECM on the outboard pylons and two fuel tanks on the onboard pylons? Cheers Jer Link to comment Share on other sites More sharing options...

Recommended Posts
Create an account or sign in to comment
You need to be a member in order to leave a comment
Create an account
Sign up for a new account in our community. It's easy!
Register a new accountSign in
Already have an account? Sign in here.
Sign In Now