Zone19 Posted January 18, 2014 Author Share Posted January 18, 2014 (edited) Difficult bit for me is making the noddy cap for the seeker head. The best way I've found is to use the part on the sprue that connect the sprue to the part...I'll upload a picture of what I mean in a bit.....Here you are... How about taking the wings and fins off a operational one as a aqui round still has a operational head without a AOTD and the rest is a concrete tube. But remember to change the umbilical for a training one as you will blow the GGG!!! I saw some aqui rounds on the net, but can't remember where That was 'tres pomme de terre OTAN' Edited January 18, 2014 by Zone19 Link to comment Share on other sites More sharing options...
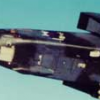
blikkey Posted January 18, 2014 Share Posted January 18, 2014 Here's a link for a raids pod fitted to a Harrier:- http://www.airfighters.com/photosearch.php?key=90075 I hope this helps 1 Link to comment Share on other sites More sharing options...
Zone19 Posted January 18, 2014 Author Share Posted January 18, 2014 Ok a bit of a progress report....There has been some process but not much....So here goes... Remember the cockpit panels...They looked like this... Well they now look like this... With the help of this... Here's the Pilots front panel, for the right hand one I had to bevel into the resin to get it to fit...Bit by bit with a knife to get the panel to fit.... The front part of the 'office' so far Well here's the fruits of my scribing...I decided to put a wash straight onto the plastic to see what else needed doing, as you can see form the top one, the scribing has helped, compared to the bottom one that hasn't been scribed. So time to crack on with scribing that one Any comments and suggestions more that welcome Cheers, Zone19 1 Link to comment Share on other sites More sharing options...
Pete in Lincs Posted January 19, 2014 Share Posted January 19, 2014 'tres pomme de terre OTAN' Now there's a term I haven't heard in a while. 1 Link to comment Share on other sites More sharing options...
Zone19 Posted February 3, 2014 Author Share Posted February 3, 2014 Right a quick update...Been a bit busy, but managed to sit down and do some more this weekend....Mainly creating Aquisition Winders.... Firstly you have to glue the tail onto the 9L...Like so... Then ever so gently score the tail planes and the winglets...So this eventually happens....I'm using a Knife blade handle with a Sewing Machine needle...Cheers Frietag Then remove all the excess, re-score the lines...so you have 2 Aim9-L Sidewinder aquisition (Just the seekeer head is live) missiles... A bit of filling and some Mr Surfacer to do and it should be ready to paint Next a bit of an I think I melted it Anyway, thanks for looking 2 Link to comment Share on other sites More sharing options...
MPaul Posted February 3, 2014 Share Posted February 3, 2014 Looking good. Just done the same for my acquisition round, and also similar for raids pod 1 Link to comment Share on other sites More sharing options...
Snitok1983 Posted February 3, 2014 Share Posted February 3, 2014 (edited) Great build! On this and last New year Santa entered to me the same (almost) kit (in 2012 ADV in 2014 IDS version) And your post I will use as tutorial;-) (there is the one Russian modeller web site "karopka.ru", which have in every New Year eve organizing a project: every member of the project before one month to New year getting (random by computer choice) a post address of the new year gift recipient.In other word you are becaming the anonim Santa. And thanks to the christmas magic I am for two year in a row got the revell 1/72 "tornado" from different isolated each from other Santas :-) P.S. Sorry for my poor english. I hope you will understand me correctly:$ Edited February 3, 2014 by Snitok1983 Link to comment Share on other sites More sharing options...
Col. Posted February 3, 2014 Share Posted February 3, 2014 Thought I'd already commented in this thread but evidently not so here goes; wonderful work and some great banter coming through on the subject Link to comment Share on other sites More sharing options...
Zone19 Posted February 4, 2014 Author Share Posted February 4, 2014 Great build! On this and last New year Santa entered to me the same (almost) kit (in 2012 ADV in 2014 IDS version) And your post I will use as tutorial;-) (there is the one Russian modeller web site "karopka.ru", which have in every New Year eve organizing a project: every member of the project before one month to New year getting (random by computer choice) a post address of the new year gift recipient.In other word you are becaming the anonim Santa. And thanks to the christmas magic I am for two year in a row got the revell 1/72 "tornado" from different isolated each from other Santas :-) P.S. Sorry for my poor english. I hope you will understand me correctly:$ Thank You Snitok, I will try to make it as concise as I can...Ahhhh...What we call 'Secret Santa' Your 'English' is better than my 'Russian' Thought I'd already commented in this thread but evidently not so here goes; wonderful work and some great banter coming through on the subject Col. Thank you for that, really appreciated, and yes there will be loads of 'Banter' Link to comment Share on other sites More sharing options...
Rich F Posted February 12, 2014 Share Posted February 12, 2014 Looking very good so far Zone 19. I did something similar back in the Tornado GB a few years ago. Heres the link if it helps. 1 Link to comment Share on other sites More sharing options...
Zone19 Posted February 13, 2014 Author Share Posted February 13, 2014 Ahhhhhh that was yours....And a very impressive diorama it is Rich...TBH that's the one that inspired me to do mine 1 Link to comment Share on other sites More sharing options...
Zone19 Posted February 24, 2014 Author Share Posted February 24, 2014 Time for another update.... I've done some bits and bobs to the seats, tail, ECM, BOZ and Drops... Firstly Seats. This is how they looked... Firstly I drill out the bit between the main gun and the back pad... Then I scribed out the shape of the back pad... Then using the Dremmel you can see above I cut the offending parts out.... Then cleaned them up and painted them, including a darker coat for the pad, there are a couple of spots that need touching up (Damn iPhone zoom!!!)... Next the tail, you may remember I melted the tail slightly, but after some Mr Surfacer 500 and scribing...all is looking good again... And finally BOZ and ECM Pods... Nothing major carried out, just slowly slowly at the moment, will update as soon as I done more to this Thanks for looking Zone19 1 Link to comment Share on other sites More sharing options...
Zone19 Posted July 15, 2014 Author Share Posted July 15, 2014 Right, I suppose I had better do an update Firstly the floor is down for my Man Shed...10'x8' Woo Hoo So this is what I've been up to at the moment... I started by scoring the GSP's, which is the scariest thing I've done so far...I know the sizes are slightly out!!!!! Then I boxed them in, along with the APU Exhaust... There you go, for the moment... Link to comment Share on other sites More sharing options...
dr_gn Posted July 15, 2014 Share Posted July 15, 2014 I'm about to start this kit as a GR4 Dambusters conversion. I'm not 100% sure, but is the rear chamfer on the BOZ pod the wrong way around i.e. the chamfer should face away from the fuselage? Cheers. And finally BOZ and ECM Pods... Nothing major carried out, just slowly slowly at the moment, will update as soon as I done more to this Thanks for looking Zone19 1 Link to comment Share on other sites More sharing options...
spike7451 Posted July 15, 2014 Share Posted July 15, 2014 I'm about to start this kit as a GR4 Dambusters conversion. I'm not 100% sure, but is the rear chamfer on the BOZ pod the wrong way around i.e. the chamfer should face away from the fuselage? Cheers. And finally BOZ and ECM Pods... Nothing major carried out, just slowly slowly at the moment, will update as soon as I done more to this Thanks for looking Zone19 It is facing the wrong way,but I think that's because Revell must've used a GAF Tornado as an example &,as I've just found out,they have a Boz for each outer pylon...The kit one's also too rounded,should be more pointy... 2 Link to comment Share on other sites More sharing options...
nimrod54 Posted July 15, 2014 Share Posted July 15, 2014 Joining this party a bit late, but would just like to say that there is some cracking work going on. I look forward to seeing more of the same. 1 Link to comment Share on other sites More sharing options...
Fritag Posted July 16, 2014 Share Posted July 16, 2014 Thought I'd already commented in this thread but evidently not so here goes; wonderful work and some great banter coming through on the subject I have commented before - but I think it's worth restating that there's both some wonderful work and some great banter coming through. Learning a lot. I 1 Link to comment Share on other sites More sharing options...
Zone19 Posted July 18, 2014 Author Share Posted July 18, 2014 Right, I just found some more pictures I should have put on Starting with the seats...As can be seen on page 1, the back cushion was rectangular, where on the real one it has a half circle (ish) cut out, to allow for the pad to go around the neck and over the shoulder, no over, not off the shoulder!!! So I started with removing as much of the resin pad as I could... Then I cut out a piece of Wine Foil (Cheers Fritag) thats about the right size Then make some indents to give me an idea where I'm cutting Then, taking a steel ruler, a pin vice and a sewing needle I echted out, very gently, the piece I wanted to remove Then stuck the Eduard seat straps to the back of it... Stuck the straps to the seat head box and then the rest to the seat itself... Then some Mr S (500) Then give it a paint...And pop it in the Office to see what it looks like....First though a pic of the open office, notice blue arm restraints in place, a couple of strands of cotton, then the white (Dirty...Bloody grubby handed growbags) leg restraints (not in yet) draped over the sticks, front and rear... So that brings me upto date... Thanks for looking in, comments, ideas are most welcome... Link to comment Share on other sites More sharing options...
wasacop Posted July 18, 2014 Share Posted July 18, 2014 Looking good Steff! However, I know it's been a while since we were on the line but the leg restraints were blue whereas the arm restraints were white till the 1 & 2 winged master race got their filthy hands on them!! 1 Link to comment Share on other sites More sharing options...
Fritag Posted July 18, 2014 Share Posted July 18, 2014 Looking good Steff! However, I know it's been a while since we were on the line but the leg restraints were blue whereas the arm restraints were white till the 1 & 2 winged master race got their filthy hands on them!! As I recall things - it was the pre-flight inspection that used to get the gloves filthy - having to wander around the jet pretending to know what you were looking for - and feeling obliged to reinforce the impression by randomly prodding and poking and pushing and pulling bits of jet here and there.......... Tornado crew were obviously more highly prized than the rest of us - getting arm as well as leg restraints.......Or perhaps they just needed more restraining? 1 Link to comment Share on other sites More sharing options...
Zone19 Posted July 18, 2014 Author Share Posted July 18, 2014 Looking good Steff! However, I know it's been a while since we were on the line but the leg restraints were blue whereas the arm restraints were white till the 1 & 2 winged master race got their filthy hands on them!! I knew I'd get it the wrong way round!!! As I recall things - it was the pre-flight inspection that used to get the gloves filthy - having to wander around the jet pretending to know what you were looking for - and feeling obliged to reinforce the impression by randomly prodding and poking and pushing and pulling bits of jet here and there.......... Tornado crew were obviously more highly prized than the rest of us - getting arm as well as leg restraints.......Or perhaps they just needed more restraining? LOL Some of them were certainly 'animalistic' after a few quaffs!!! Link to comment Share on other sites More sharing options...
wasacop Posted July 18, 2014 Share Posted July 18, 2014 (edited) Fritag, that sounds like an accurate description of a normal A/F or turnround inspection on the lesser Squadrons!! Edited July 18, 2014 by wasacop 1 Link to comment Share on other sites More sharing options...
Tomjw Posted July 18, 2014 Share Posted July 18, 2014 Fantastic progress here. Learning a few things as well. Cheers, Tom. 1 Link to comment Share on other sites More sharing options...
spike7451 Posted July 19, 2014 Share Posted July 19, 2014 Steff, Don't forget those yellow pipes connect to the pipes on the seatheadbox.. PS,you going to Blackpool in Sept? Right, I just found some more pictures I should have put on Starting with the seats...As can be seen on page 1, the back cushion was rectangular, where on the real one it has a half circle (ish) cut out, to allow for the pad to go around the neck and over the shoulder, no over, not off the shoulder!!! So I started with removing as much of the resin pad as I could... Then I cut out a piece of Wine Foil (Cheers Fritag) thats about the right size Then make some indents to give me an idea where I'm cutting Then, taking a steel ruler, a pin vice and a sewing needle I echted out, very gently, the piece I wanted to remove Then stuck the Eduard seat straps to the back of it... Stuck the straps to the seat head box and then the rest to the seat itself... Then some Mr S (500) Then give it a paint...And pop it in the Office to see what it looks like....First though a pic of the open office, notice blue arm restraints in place, a couple of strands of cotton, then the white (Dirty...Bloody grubby handed growbags) leg restraints (not in yet) draped over the sticks, front and rear... So that brings me upto date... Thanks for looking in, comments, ideas are most welcome... 1 Link to comment Share on other sites More sharing options...
Turbine_Man Posted July 19, 2014 Share Posted July 19, 2014 Excellent work.. I have a soft spot for a Tonka as ex IX, XIII and XV®... Also was on the display team for XV® in '95. 1 Link to comment Share on other sites More sharing options...

Recommended Posts
Create an account or sign in to comment
You need to be a member in order to leave a comment
Create an account
Sign up for a new account in our community. It's easy!
Register a new accountSign in
Already have an account? Sign in here.
Sign In Now