Zone19 Posted August 11, 2014 Author Share Posted August 11, 2014 Very nice progress so far and I've learn't something too! Did not know about the sprung fillet seal on the Inner pylon, very good nugget of info there. Looking forward to your next update. Rgds, Eng Thanks Eng and yes we used to have to do that as it kept splitting or something...That was Riggery Jiggery work lol Nice work transplanting the Airwaved wings. Sad to admit it, but I really like your shed as well. Tom. Thanks Tom, was a little worried about it, but all sorted...And I'm pretty chuffed with the shed myself Lovely construction work - amazing 1000 yard stare....... Cheers Steve And they had some Civvie trying to get us to practice that, seeing as the majority were either serving or ex-services he got short sharp removal LOL 1 Link to comment Share on other sites More sharing options...
Fritag Posted August 11, 2014 Share Posted August 11, 2014 And they had some Civvie trying to get us to practice that, seeing as the majority were either serving or ex-services he got short sharp removal LOL Nice of them to let you wear your own woolly gloves tho' 1 Link to comment Share on other sites More sharing options...
spike7451 Posted August 11, 2014 Share Posted August 11, 2014 Steff, Don't forget the rear face of the Revell BOZ pod is the wrong way round,it points inward to the left when it should face out & down!...Any flares that it fired that way round would hit the taileron... 1 Link to comment Share on other sites More sharing options...
Zone19 Posted August 17, 2014 Author Share Posted August 17, 2014 Right....Another update...As dear old Spike has pointed out, the BIOZ pod is facing the wrong way!!! Well this was worrying me!! And rightly so...I had to cut the 'bum' off, replace what I had cut, then stick it back on!!! So I cut it off...No worries...Punched out a disc a little larger, restuck it, sanded it, then went to stick the cut off part and promptly dropped the piece on the freekin floor and lost it!!! But I decided I'd punch out 2 more disc, stick them on, sand them down and angle the BOZ the correct way!!!! So that's all sorted And Yes I have double check...No I haven't I've quadruple checked so no bloody wind ups Fritag That did annoy me, so I decided to crack on with some GSE, I decided to do my towing arm, which has gone together really well...And I've cracked on with my Houchin too...These are both 'Flightpath' from David J. Parkins, Great stuff, but I had to drill out the brass rod a bit, for the towing arm, as when I tried to put the first connector in, it snapped but luckily there were some spares in there And now the Houchin So, once again, thank you very much for looking, and I look forward to your comments Zone19 4 Link to comment Share on other sites More sharing options...
Zone19 Posted August 19, 2014 Author Share Posted August 19, 2014 Another quick update... GSE now primed, using Mr S 1200 and thinners, 50-50 mix...Well Houchin and towing arm... 1 Link to comment Share on other sites More sharing options...
pbaudru Posted August 19, 2014 Share Posted August 19, 2014 Hi great job so far ! I have used these resin wings in the past on a hasegawa model. Here is the build: http://users.skynet.be/fb990055/Tornado_Has_montagem.htm May I make a comment about them ? I think my wings were too 'curved' down and I didn't realize that when I build my model…..and looking at the picture of the real machine I never found a Tornado with the wings like this so be careful and try to correct them before paint. Cheers, Pierre. 1 Link to comment Share on other sites More sharing options...
Tomjw Posted August 19, 2014 Share Posted August 19, 2014 Nice save with the BOZ pod. Also the tow bar and the Hutchin look excellent. Tom. 1 Link to comment Share on other sites More sharing options...
Zone19 Posted August 31, 2014 Author Share Posted August 31, 2014 Right...Another quick update...But not on the Tonka...Man Cave 'Dun Modelling...NOT!!!' is finished inside...A few bits to do outside...But insides are all done Link to comment Share on other sites More sharing options...
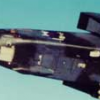
Zone19 Posted August 31, 2014 Author Share Posted August 31, 2014 There has been some progress on the main body...A bit of cleaning up and a coat of Mr Surfacer 1200, 50/50 mix of thinners. Once dry a light going over with one of Flossy's polishing files...Here it is after priming and before a bit of polishing... You can see here the dust that made it feel quite rough... But after a quick polish... It also highlighted some rough edges on the resin wings... But after the polishing...You can see where MR Surfacer has come away...So another priming... And it highlights areas that need sorting... Looking at the front end of the model, yes I need to rescribe it...and the back section, you can see it's lack of details and rivets compared to the back... So I may be busy doing a boring laborious job or re-scribing and riveting!!! Unless anyone has any ideas to make the riveting easier? Thanks for looking in Zone 1 Link to comment Share on other sites More sharing options...
spike7451 Posted September 1, 2014 Share Posted September 1, 2014 Don't forget you'll be away this weekend Steff,getting messy in Blackpool at the weekend.... Link to comment Share on other sites More sharing options...
Zone19 Posted May 17, 2018 Author Share Posted May 17, 2018 (edited) Nearly 4 Years later and she is back on the Bench!!! Gutted I have lost all my images!!! 😫😫😫😫 Edited May 17, 2018 by Zone19 1 Link to comment Share on other sites More sharing options...
Azgaron Posted May 17, 2018 Share Posted May 17, 2018 Looking good! Pity about the pics though! Håkan 1 Link to comment Share on other sites More sharing options...
Andy Mac Posted May 17, 2018 Share Posted May 17, 2018 Bloody Photobucket is a pain, but good to see you back on the case. 1 Link to comment Share on other sites More sharing options...
Zone19 Posted May 18, 2018 Author Share Posted May 18, 2018 Ok, the reason this has been on hold is the following: When I removed the filler I found this: No wonder I bottled it...Then I didn't have the confidence to attempt this so I just parked it...So 4 years later the I now have a lot more knowledge and Skills and Confidence to attempt this. Recently I have found that if you drop your old Sprue's into Thinners, they melt!!! Making AWESOME filler!!!! See Below: So all I need to do is let it dry, it takes about 24 hours to dry, then sand it back and shape the outlet Cheers, Zone 2 Link to comment Share on other sites More sharing options...
Zone19 Posted May 29, 2018 Author Share Posted May 29, 2018 Update Time.... Front canopy masked and painted clear orange, why you ask, well let me tell you...The front canopy of a Tonka has a slight Orange colour to it, as they found that by putting a very thin layer of Gold between the layers of Glass, this was to reduce glare from the Sun. Before: After: Thanks for looking and look forward to comments. Cheers, Zone 2 Link to comment Share on other sites More sharing options...
Zone19 Posted June 13, 2018 Author Share Posted June 13, 2018 OK...Update time...This post is photo heavy: Main Structure: Seats, no lapstraps at the Mo as they will be one of the last things fitted: Nav's Console: Pilot's Console, needs the HUD sorting and fitted: Nav Seat and Console dry fitted: Both Fitted: View from Rear: BOZ and ECM: 1500Ltr Drop Tanks: Thanks for looking, any suggestions, please let me know. Thanks, Zone. 1 Link to comment Share on other sites More sharing options...
Azgaron Posted June 13, 2018 Share Posted June 13, 2018 Looks nice! Håkan 1 Link to comment Share on other sites More sharing options...

Recommended Posts
Create an account or sign in to comment
You need to be a member in order to leave a comment
Create an account
Sign up for a new account in our community. It's easy!
Register a new accountSign in
Already have an account? Sign in here.
Sign In Now