rustywelder Posted November 17, 2013 Share Posted November 17, 2013 Wow! very nice work. Link to comment Share on other sites More sharing options...
WARDOG Posted November 17, 2013 Share Posted November 17, 2013 Rizon, That is ingenious work all around, especially on the wings! I too am carefully watching this project to use as much as I can on mine, whenever that happens! Outstanding! Great Job, WARDOG Link to comment Share on other sites More sharing options...
Rizon Posted November 21, 2013 Author Share Posted November 21, 2013 The Ejection Seat. I think I might have over-egged this one. Two evenings and a bit, 60 parts and counting later, I end up half way through scratch building an ejection seat for the F-7NM. From what I can tell from pictures is that the bang seat in the F-7 is one of the later models of the Martin Baker Mk10 seat. From the English labelling on the seats they look like originals, not Chinese manufactured examples. So a Mk10 I shall build. This is what I started off with; seat pan/survival equipment container and headrest/parachute container were salvaged from the kit (the grey parts). White of course being sheet styrene and thus self cut. The complete seat is an Italeri Mk10 from a Hawk, just as something to start with for scale: A bit later the seat looked a bit more promising. Stretched sprue was used to emulate the Warren-truss like structure on the side of the seat. The “spine” is a rod flanked by some sheet styrene. By the next evening the seat had gained the canopy piercers, drogue gun, oxygen bottle, g-suit and mask interface, seat adjustment levers, emergency seat jettison lever and some other bits..... And something I don’t think any resin seat has – the rocket motor gas generators on the bottom of the seat.... The past weekend brought some heavy storms and flooding. But all cleared by Sunday with an awesome summers day over the bay. Thus I could take the modelling outside to the patio while keeping an eye on the BBQ fire in the background... Oh, and apologies for the poor quality pix, in Macro mode all my available (digital) cameras fall over when trying gain a bit of depth of field. Would be much more fun doing that with proper film! 3 Link to comment Share on other sites More sharing options...
Col. Posted November 21, 2013 Share Posted November 21, 2013 Tending the bbq, model making, drinking a beer. Who says men can't multitask 2 Link to comment Share on other sites More sharing options...
Mfezi Posted November 22, 2013 Share Posted November 22, 2013 Well, you clearly have very little use for resin parts... You make me feel a little embarrassed about my own models By the way, have you given a loadout any thought? I can't recall seeing pictures of armed Namibian F-7s. Link to comment Share on other sites More sharing options...
David_DFN Posted November 23, 2013 Share Posted November 23, 2013 Impressive work !!! Take a seat and wait for the continuation Link to comment Share on other sites More sharing options...
Rizon Posted November 24, 2013 Author Share Posted November 24, 2013 Not sure what load-out to give the F-7. Most I have seen hanging on the Namibian F-7 was 4 pylons. I quite like the look of the F-7 with two under wing drop tanks. Namibia being the country of wide open spaces, I am sure that that configuration is possible. I have seen the K-8 trainers loaded with standard Mk82 bombs, so I'd guess those might be able to be fitted to the F-7. But the real question that remains is what air-to-air missiles the Namibian Air Force has available.... Link to comment Share on other sites More sharing options...
Winenut Posted November 24, 2013 Share Posted November 24, 2013 stop teasing us with beers and BBQ's and Migs Link to comment Share on other sites More sharing options...
Rizon Posted November 24, 2013 Author Share Posted November 24, 2013 Why? Just had another one of those Sundays... OK, wont post a picture.... Link to comment Share on other sites More sharing options...
MikeW Posted November 24, 2013 Share Posted November 24, 2013 I plan on one of those days today - we have great weather in Los Angeles' winter. Don't have the ocean view, and it will be Budweiser instead of Windhoek, but I can pretend! Cheers, Mike 1 Link to comment Share on other sites More sharing options...
Nwanda Posted November 25, 2013 Share Posted November 25, 2013 Excellent work and equally excellent choice of beers, although I find after a hot day in namibia Tafel rather does the trick! Looking forward to the final product Mike Link to comment Share on other sites More sharing options...
Rizon Posted November 28, 2013 Author Share Posted November 28, 2013 Oh for how I long for those hot days in Namibia now! I’d be hard pushed to choose a favourite between Tafel Lager, Windhoek Lager and Windhoek Draught to be honest .... :grin: Alas, but I digress.... Back to modelling. Just a small bit of progress. I turned my attention to the landing gear. The bang seat took a back seat for the moment, because I have to paint the thing before I can progress. And my paints are still packed in boxes from the forced modelling intermission and a more recent move. But I’ll get to it eventually. Right. Landing gear. The kit wheels were, yup, oversized. I replaced the nose wheel with the two nose wheels from an Airfix F-4. These wheels were moulded as thin as a biscuit, so I merely glued them back-to-back to give the proper thickness. The hub detail is also a bit more representative of the F-7, having a rather deep profile. Incidentally, the main wheels of that F-4 went to the infamous Airfix MiG-15, which received a similar chop-shop treatment as this current MiG, to bring the fuselage in line with scale drawings.... But that is another story.... The main wheels were fashioned from the kit parts, by turning them down, freehand, on a Dremel tool. Here I used sand paper and files to craft the shape out of the original. As an axle I used some M2 threaded rod screwed into the wheel hub, which in turn was clamped in the Dremel. Not the most precision approach, but quite functional. And a comparison between , kit wheel, plans and the modified wheel: 1 Link to comment Share on other sites More sharing options...
sharkmouth Posted November 29, 2013 Share Posted November 29, 2013 Thanks for a treat! Regards, Link to comment Share on other sites More sharing options...
feifeitim Posted December 12, 2013 Share Posted December 12, 2013 Wonderful modelling Rizon - being miles from home has obviously had no impact on your skills! 1 Link to comment Share on other sites More sharing options...
ruudster Posted December 12, 2013 Share Posted December 12, 2013 Great work. 1 Link to comment Share on other sites More sharing options...
Rizon Posted December 15, 2013 Author Share Posted December 15, 2013 Another mini-update: Currently busy with building the undercarriage. Not much time spent lately on modelling, somewhat difficult with trying to chase year end deadlines at work, family visiting and everyone around me being on holiday already.... In the picture below is my effort at detailing the undercarriage, starting with what is available in the kit. The let main gear leg is the original one, with the right one my modified one. First thing that needs to be done is to shorten the kit item. Then I added that interesting scissor linkage that rotates the wheels upon retraction of the gear. Also in the picture is the nose gear. Didn’t bother taking a picture of the original item – it was practically a rectangular bloc of plastic with a stick poking out o it.... Now I ran out of things to build and excuses, next thing is to unpack the box containing my paints and the works... But first, time to light the fire in memory of a great man. 1 Link to comment Share on other sites More sharing options...
gingerbob Posted December 15, 2013 Share Posted December 15, 2013 Oh, yawn, just another Namibian Air Force subject, by someone going to shocking and creative lengths (no pun intended) to get things at least approximately right! Welcome, new guy! bob Link to comment Share on other sites More sharing options...
Rizon Posted December 15, 2013 Author Share Posted December 15, 2013 Jaa, sorry for being boring, but I guess someone has to do it.... Link to comment Share on other sites More sharing options...
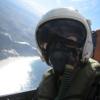
Rizon Posted January 21, 2014 Author Share Posted January 21, 2014 (edited) Slow progress lately, but this is what I have been up to. Mainly working on the ejection seat and pilot figure. I started painting both, and at the same time added the last parts to the bang seat. This consisted mostly of the harness and associated belts. The harness/seat cushion was made from several pieces of thick sketch paper. The paper gives it a bit of texture and is more flexible to emulate the real thing. This was then glued in place and Tamya tape strips used as the belts Finally the pilot figure was strapped in. The figure itself is from the kit, albeit modified a bit. The helmet needed some reshaping and I added the mask and hose. Photos of Namibian fighter pilots show them wearing orange flight suits with green speed-jeans; as such I painted the figure then. Final addition being the map on the knee, made from a pit of paper. Edited January 21, 2014 by Rizon 1 Link to comment Share on other sites More sharing options...
Rizon Posted January 21, 2014 Author Share Posted January 21, 2014 And a bit of work on the airframe; Afterburner can was created from a bit of styrene tubing, sealed off on one end, chamfered on the other and painted black inside and Humbrol steel on the outside. In the mean time I painted the fuselage exhaust area with Rub’nBuff. This requires a few applications, with polishing in between, and it takes forever to dry. Hence the early start... Then added the fairing where the angle of attack sensor sits and made the Pitot tube from stretched sprue and thin pieces of styrene. In retrospect the addition of the Pitot is a bit early, might get damaged, but fortunately with the thing made of stretched sprue, it is quite flexible... Now for the next challenge - making a canopy.... Already acquired a small wooden box to build a vacuum former from.... 1 Link to comment Share on other sites More sharing options...
Mfezi Posted January 21, 2014 Share Posted January 21, 2014 Heck, Rizon, you would be bored out of your mind with a modern shake-and-bake Tamigawa kit... It is hard to believe that seat is scratch-built, and in 1/72nd scale also! Link to comment Share on other sites More sharing options...
Rizon Posted February 5, 2014 Author Share Posted February 5, 2014 The next hurdle tackled was the canopy – more specifically the vacu forming of one. I started off by building a vacu former buy organising myself a neat wooden box they sell at art stores. And along with that a small picture frame to act as a carrier for the plastic film. One 30 mm hole on the side of the box for the vacuum cleaner hose and 105 holes on the lid later I had a functional vacuum former box. To clamp the plastic sheet in the frame I constructed a small sub frame that can quickly be screwed on the main frame, sandwiching the sheet in-between. Still on my to-do list for the future is to make a couple of frames in various sizes, so that I can use different sizes of plastic sheets to minimize wastage. Primary driver here is the sourcing of raw materials – I haven’t found a local supplier of PET-G sheets of a sufficiently small thickness. So I end up hamstering vacu-formed packaging of what ever I can find, provided it has nice and flat surface. Important here is to use PET-G, not plain PET, as PET chrysalises when heated and becomes white. I learned that the hard way – which does leave me to wonder how do they vacu-form that in the first place....? Then the male plug for the canopy. I made it from some Balsa. Easy enough to sand to shape. When using it for vac-forming it is necessary to remove the grain however. This I did by soaking the surface with super glue, then sanding, adding another layer of super glue, sanding etc. I also applied some Tamya primer at times to check for surface smoothness. Oh, and don’t vacu-form with Tamya primer on – it melts onto the plastic. Also learned that the hard way.... But before I did all of that I did a couple of trial runs with the blank Balsa plug. Just to get the hand of using the vac-form system and importantly to check if the resulting canopy would fit. Otherwise I’d still have to modify the plug further. But it fitted nicely. I’m still not perfectly happy with the canopy, though I consider it quite useable. The problem is still the surface finish of the plug. Strange how such small features imprint themselves onto the plastic, while some big details somehow refuse to resolve properly.... Anyway, such the intricacies of this hobby. Still in the process of seeing if some Future or Humbol clear can help in hiding the small blemishes. My first two attempts at vacu-forming the canopy: Provisionally fitted in place. Still a lot of trimming and cleaning up left though: 1 Link to comment Share on other sites More sharing options...
MikeW Posted February 5, 2014 Share Posted February 5, 2014 Crikey Moses! Now that is modelling! ( When i simply go for after market decals I think I'm being radical.) Enjoying this. Cheers, Mike Link to comment Share on other sites More sharing options...
spiton Posted February 5, 2014 Share Posted February 5, 2014 Very interesting building !! Link to comment Share on other sites More sharing options...
aidy Posted February 6, 2014 Share Posted February 6, 2014 Respect the amount of work you've put into the kit. This should turn out to be a great model. Link to comment Share on other sites More sharing options...

Recommended Posts
Create an account or sign in to comment
You need to be a member in order to leave a comment
Create an account
Sign up for a new account in our community. It's easy!
Register a new accountSign in
Already have an account? Sign in here.
Sign In Now