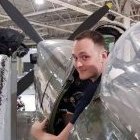
Stuart91 Posted October 13, 2013 Share Posted October 13, 2013 Hi Everyone, My finished Tamiya 1/48 Supermarine Spitfire Mk.I finished in 610 Sqaudron markings part of No.11 Fighter Group, protecting the south of England from the Luftwaffe. If anyone is looking for a straight-forward out the box spitfire this is definitely the one, being Tamiya is goes together very smoothly, the only hitch i would say are that the decals are fairly thin especially serial letters and roundels, if you are you using decal softener like i did, i have to say be careful not to over do it as they are very fragile and prone to cracking and splitting. Scratch built the seatbelts - probably can just about see them and also the brake lines on the undercarriage apart from that straight out of the box, the cockpit layout and very well detailed for standard but im sure there are people that will go straight for the aftermarket parts, and also the ariels from the antenna (they do not come with the kit) i scratch built those aswell. This was my first attempt at using a 'wash' medium, i used to the Humbrol black wash (thought i'd give it a try) very thinly applied and then brused over with a cotten bud, applied with a thin brush into the panel lines and then stroked backwards to show airflow over the surfaces. very pleased with the outcome, gives a good effect. Enjoy, Stuart Thanks for Looking, i know everyone at some points posts a Spitfire build on here, but im very patriotic and it has a special place in my heart for its role it played defending Britain, a little tribute to 'The Few' 5 Link to comment Share on other sites More sharing options...
Spitfire31 Posted October 14, 2013 Share Posted October 14, 2013 Very nice and 'Spitfirish' build with great looking weathering! Er… the crowbar in the cockpit hatch should be green or steel, not red… Also, perhaps the aerial wire you use looks a bit heavy compared with the full size? Nice work all told! Kind regards, Joachim Link to comment Share on other sites More sharing options...
richellis Posted October 14, 2013 Share Posted October 14, 2013 A nice build, Ive built one of these and its a cracking kit 1 Link to comment Share on other sites More sharing options...
stevej60 Posted October 14, 2013 Share Posted October 14, 2013 A very nice example,weathering looks good. 1 Link to comment Share on other sites More sharing options...
Royster Posted October 14, 2013 Share Posted October 14, 2013 Looks good from here. I have a couple in the stash that hopefully look as good as yours 1 Link to comment Share on other sites More sharing options...
fallmonk Posted October 14, 2013 Share Posted October 14, 2013 Looks great my only question is no roundlets on the underside??? And the two wires going to the tail planes?? Never saw that before! Link to comment Share on other sites More sharing options...
Stuart91 Posted October 14, 2013 Author Share Posted October 14, 2013 Hi, thanks for the comments guys appreciate them, and yeh according to the instructions the early Mk.I's never had roundels on the under-side, but the other version in the box does, slightly later maybe?? did a bit of research in some books i have and online and saw that this is correct - not sure why tho, and from what i have seen only the Mk.I's possibly the Mk.II's?? had the aerial wire coming off the tail plane to the side of the fuselage, literally went on what the instructions told me, i'll do some research and see if i can find out why this configuration was used. cheers, Stuart Link to comment Share on other sites More sharing options...
Johnny Red Posted October 14, 2013 Share Posted October 14, 2013 It's nice to see a Spitfire in a world of Gray modern jets well done Stuart91. 1 Link to comment Share on other sites More sharing options...
Val Posted October 15, 2013 Share Posted October 15, 2013 Great work mate, I love a good spit! Yeah I've heard the crowbars where only red post-war on the doors, but, to be honest, when I do my Tamiya mk I I may well also put a red crowbar in to add a spice of colour to the pit! Love the weathering as well, 10/10 from me 1 Link to comment Share on other sites More sharing options...
Parabat Posted October 15, 2013 Share Posted October 15, 2013 The wires running from tails to fuselage are the IFF antennae. nice work. Link to comment Share on other sites More sharing options...
The original Kit Builder Posted October 15, 2013 Share Posted October 15, 2013 The IFF aerials were fitted to all Mk1 to V and early IX's. Underwing roundels were removed early 1940, IIRC, when the underside colour changed to Sky. They returned in 1941 with the change to the OG/DG/MSG scheme 1 Link to comment Share on other sites More sharing options...
johnd Posted October 16, 2013 Share Posted October 16, 2013 My understanding is that underwing roundels made a reappearance on day fighters as a result of ADM 332 Issue 3, published on 15 November 1940. There were certainly examples about (with or without the Night port wing) in Sky with roundels in November and December 1940. Link to comment Share on other sites More sharing options...
Stuart91 Posted October 16, 2013 Author Share Posted October 16, 2013 Great work mate, I love a good spit! Yeah I've heard the crowbars where only red post-war on the doors, but, to be honest, when I do my Tamiya mk I I may well also put a red crowbar in to add a spice of colour to the pit! Love the weathering as well, 10/10 from me The IFF aerials were fitted to all Mk1 to V and early IX's. Underwing roundels were removed early 1940, IIRC, when the underside colour changed to Sky. They returned in 1941 with the change to the OG/DG/MSG scheme My understanding is that underwing roundels made a reappearance on day fighters as a result of ADM 332 Issue 3, published on 15 November 1940. There were certainly examples about (with or without the Night port wing) in Sky with roundels in November and December 1940. Hi, thanks for the comments - appreciated, help shed some knowledge on the configuration, and as for the red crowbar as many of you have stated it should be the same colour as the interior, seems i have made a genuine mistake, i shall paint over it a re-weather it, as i like my models to be as true to the real thing as much as possible, cheers, Stuart Link to comment Share on other sites More sharing options...
colin Posted October 16, 2013 Share Posted October 16, 2013 Very nice Spitfire, your the only person I've come across so far who's said Tamiya's decals were a little thin, normally they say too thick Link to comment Share on other sites More sharing options...
Stuart91 Posted October 18, 2013 Author Share Posted October 18, 2013 Sorted the access door to the cockpit, no red crowbar anymore Link to comment Share on other sites More sharing options...
chaddy Posted October 18, 2013 Share Posted October 18, 2013 Looks great my only question is no roundlets on the underside??? And the two wires going to the tail planes?? Never saw that before! They are the IFF aerials and can commonly be seen on photographs of Spitfires of the period. 1 Link to comment Share on other sites More sharing options...
gingerbob Posted October 18, 2013 Share Posted October 18, 2013 Actually the crowbar wasn't fitted at all to the door until early (?) '41, so paint it 'invisible'! Underside roundels came in in early August, as I recall. Funny thing, your photos (what they're using as background?) make it look small- I might have thought 72nd! Pretty. bob 1 Link to comment Share on other sites More sharing options...

Recommended Posts
Create an account or sign in to comment
You need to be a member in order to leave a comment
Create an account
Sign up for a new account in our community. It's easy!
Register a new accountSign in
Already have an account? Sign in here.
Sign In Now