Takamota Posted July 4, 2013 Share Posted July 4, 2013 Well what can i say? What an absolute joy to build. Goes together really well with minimal seam line clean up. Stand just sets it off nicely i think. Simple as it is. Paint was Tamiya X-7 thinned 50-50 with Mr Color self levelling thinners. And markings were decals from box. Hope you like and thanks for looking in. 14 Link to comment Share on other sites More sharing options...
RNoAF Aerobatic Team Posted July 4, 2013 Share Posted July 4, 2013 Smashing result! Link to comment Share on other sites More sharing options...
snapper_city Posted July 4, 2013 Share Posted July 4, 2013 Stunning. The stand is great and really helps it to stand out... Link to comment Share on other sites More sharing options...
Silverstone 2 Posted July 4, 2013 Share Posted July 4, 2013 Amazing finish on your Red Arrow!!! Could you tell me how you got the Perspex rod to be such a good shade of blue? Did you boil the Perspex tube and simply bend it to suit? Phil. Link to comment Share on other sites More sharing options...
goon Posted July 4, 2013 Share Posted July 4, 2013 Very effective display. Stunning paint finish! Link to comment Share on other sites More sharing options...
rmcclure Posted July 4, 2013 Share Posted July 4, 2013 What a great finish. I aspire to that kind of skill with gloss paint. Link to comment Share on other sites More sharing options...
batcode Posted July 4, 2013 Share Posted July 4, 2013 looks great, nice paint finish, thu have found that perticular tamiya red once dried does look great Link to comment Share on other sites More sharing options...
Abacus Posted July 4, 2013 Share Posted July 4, 2013 How nice is that! Link to comment Share on other sites More sharing options...
sailorboy61 Posted July 4, 2013 Share Posted July 4, 2013 Great OOB build. Lovely finish and stand too. Link to comment Share on other sites More sharing options...
stevej60 Posted July 4, 2013 Share Posted July 4, 2013 Stunning absolutely stunning! Link to comment Share on other sites More sharing options...
kiwitrogg Posted July 4, 2013 Share Posted July 4, 2013 That is very, very nice ! Link to comment Share on other sites More sharing options...
spruecutter96 Posted July 4, 2013 Share Posted July 4, 2013 Damn... I may have to dig my one out of the stash and have a go at it, now. (Pretty sure it won't look as good as this, though). Thanks very much for sharing... Link to comment Share on other sites More sharing options...
Stryker Posted July 4, 2013 Share Posted July 4, 2013 What can I say Tom? Link to comment Share on other sites More sharing options...
Takamota Posted July 4, 2013 Author Share Posted July 4, 2013 (edited) Thanks a lot guys. Amazing finish on your Red Arrow!!! Could you tell me how you got the Perspex rod to be such a good shade of blue? Did you boil the Perspex tube and simply bend it to suit? Phil. Rod was sprayed with Tamiya Gloss clear blue. I put the oven to its highest heat setting and donned an oven glove. Held the rod in the oven careful not to touch it against the sides for about a minute or so then gently started to bend to shape. Back in the oven for another minute then a little bit more gentle bending etc etc Edited July 4, 2013 by Takamota Link to comment Share on other sites More sharing options...
Mr B Posted July 4, 2013 Share Posted July 4, 2013 Really grand....very nice finish rgds mr b Link to comment Share on other sites More sharing options...
Cimmerian Posted July 4, 2013 Share Posted July 4, 2013 smashing - very crisp finish! Link to comment Share on other sites More sharing options...
burnley63 Posted July 4, 2013 Share Posted July 4, 2013 What a "stonkin" example of a Red Arrow - have to say the minimal stand just makes it for me. Brilliant clean finish Link to comment Share on other sites More sharing options...
AirfixAndy Posted July 4, 2013 Share Posted July 4, 2013 One of the best Red Arrows builds Ive seen and ,as others have said , the simple stand really adds to the overall finish . One to be very proud of Andy Link to comment Share on other sites More sharing options...
Mark M Posted July 4, 2013 Share Posted July 4, 2013 thats cracking mate Link to comment Share on other sites More sharing options...
triumphfan Posted July 4, 2013 Share Posted July 4, 2013 Fabulous model. As others have said, the display stand is simple but very effective. Steve. Link to comment Share on other sites More sharing options...
Phantom726 Posted July 4, 2013 Share Posted July 4, 2013 Best finsh - EVER! What an amazing job! Link to comment Share on other sites More sharing options...
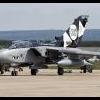
Hawkkeeper Posted July 4, 2013 Share Posted July 4, 2013 nicely done, just a shame Revell couldn't correct the 'pen nib' panel on top of the tailcone, it should run the angle to the rear vertical face of the tailcone, revell have modelled the original short version, which didn't last very long. Link to comment Share on other sites More sharing options...
MartinSK Posted July 4, 2013 Share Posted July 4, 2013 Excellent finish with gloss colour...very clean and beatiful model. Could I ask you about decals? You wrote that decals are from the box...was there any problem with "slighty pink white" on white arrows, stipes... on the red surface due to poor opacity? Because on your pictures it seems shiny white (not the pink white:) Thank you Martin Link to comment Share on other sites More sharing options...
Séan Pádraig Posted July 4, 2013 Share Posted July 4, 2013 Revell really did the Red Arrow Hawk proud with that 1/32 kit.... and you've build yourself a fantastic looking model... it would make a stunning centrepiece in any collection. Link to comment Share on other sites More sharing options...
Takamota Posted July 5, 2013 Author Share Posted July 5, 2013 Excellent finish with gloss colour...very clean and beatiful model. Could I ask you about decals? You wrote that decals are from the box...was there any problem with "slighty pink white" on white arrows, stipes... on the red surface due to poor opacity? Because on your pictures it seems shiny white (not the pink white:) Thank you Martin The decals were ever so slightly opaque but, as you can see, they dried and looked pretty white. Considered masking and painting them but they are white enough now it's done i think. nicely done, just a shame Revell couldn't correct the 'pen nib' panel on top of the tailcone, it should run the angle to the rear vertical face of the tailcone, revell have modelled the original short version, which didn't last very long. I think that may be a fault on my part. I used the ones the plans suggested and after finished noticed two parts on sprue. They have supplied both short and long. Ignorance of the type on my part. I can live with it now but thanks for heads up. Will check pictures for next Hawk build. 1 Link to comment Share on other sites More sharing options...

Recommended Posts
Create an account or sign in to comment
You need to be a member in order to leave a comment
Create an account
Sign up for a new account in our community. It's easy!
Register a new accountSign in
Already have an account? Sign in here.
Sign In Now