SecretReeve Posted May 1, 2013 Share Posted May 1, 2013 So I will be starting the MkII Viper soon and will be setting a new precedent for myself, something I always forget to do and that would be to paint first, glue second. I'm hoping it will make painting easier. Of course, as with all my models so far, I will be adding my own lighting to it, and I've already begun work on the lighting system, so heres a quick video tour of it. I still need to add a blinking led for the wing tips but its not far off now. Link to comment Share on other sites More sharing options...
SecretReeve Posted May 3, 2013 Author Share Posted May 3, 2013 Picked up the kit today, I figured more on a diorahma style build this time, landing gears down, cockpit open, pilot sat ON the vehicle instead of in it, going to add a workman and a tool chest to the display as well. I started drilling out the cockpit for lighting and also gave the pilot (starbuk) a thumbs up instead of a control stick. Then dry fitted most of the major components together and arranged it all how im thinking. The stand will not be used other than an aid in assembly. Link to comment Share on other sites More sharing options...
Madmonk Posted May 3, 2013 Share Posted May 3, 2013 Looking good, like the idea of the pilot sat on it rather than in it. I have a MkVII kit I want to light up so will be watching with interest. Cheers, Warren Link to comment Share on other sites More sharing options...
SecretReeve Posted May 3, 2013 Author Share Posted May 3, 2013 (edited) thanks, I'm going to start painting sub assemblies tomorrow, the landing gears, rear wing, cockpit, usual little peices i guess, I have to wait till next friday to order in various sizes of fiber optic strands from 0.25mm to 2mm but i will try to get as many pics/videos as I can to post up of the work in progress. Got bored and decided to make a start on sub assembly painting, Landing gears, Gear bays and start on the pilot: Tomorrow I will paint the under carriage white and get the rear landing gears glued in, try to find the motivation to finished the drilling on the cockpit and paint that up and TRY to paint up the rest of the hull with white and pilot in "interior green" from model master because I really cannot be bothered mixing colors haha. Edited May 3, 2013 by SecretReeve Link to comment Share on other sites More sharing options...
SecretReeve Posted May 4, 2013 Author Share Posted May 4, 2013 Link to comment Share on other sites More sharing options...
Madmonk Posted May 4, 2013 Share Posted May 4, 2013 That's fast work! I want to light up the guns on the MkVII so will need to remould the guns with the fibre in, I think they are too delicate to drill! Keep up the good work. Cheers, Warren Link to comment Share on other sites More sharing options...
SecretReeve Posted May 5, 2013 Author Share Posted May 5, 2013 Link to comment Share on other sites More sharing options...
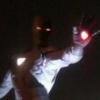
Sgt.Squarehead Posted May 6, 2013 Share Posted May 6, 2013 (edited) Aiieee.....Noooo! The dreaded Cylon head-clamp! Edited May 6, 2013 by Sgt.Squarehead Link to comment Share on other sites More sharing options...
SecretReeve Posted May 6, 2013 Author Share Posted May 6, 2013 yup lol Link to comment Share on other sites More sharing options...
SecretReeve Posted May 8, 2013 Author Share Posted May 8, 2013 not alot going on with this at the moment, waiting for pay day to get primer so i can hopefully primer it, lay down some black, re-primer it and then lay down the glos white ontop to fix the light bleed in awkwrd to reach inside spots. Link to comment Share on other sites More sharing options...
SecretReeve Posted May 11, 2013 Author Share Posted May 11, 2013 heres an update, the decals, some of then, are too big, not impressed. anyway, long way to go still... Link to comment Share on other sites More sharing options...
S5 modeller Posted May 15, 2013 Share Posted May 15, 2013 Looking good, is it me or does Starbuck look like the master chief out of halo? Have you looked at the pe upgrades for the cockpit? They make it look cool. Link to comment Share on other sites More sharing options...
yeehah1 Posted May 15, 2013 Share Posted May 15, 2013 Looking good, is it me or does Starbuck look like the master chief out of halo? Have you looked at the pe upgrades for the cockpit? They make it look cool. 15 05 2013 PE Upgrades for the cockpit? Where and by who??? Thanks in advance Liam Link to comment Share on other sites More sharing options...
chadders Posted May 15, 2013 Share Posted May 15, 2013 Paragrafix. Prepare for open wallet surgery. http://www.paragrafix.biz/search01.asp?MainCat=Photoetch Link to comment Share on other sites More sharing options...
SecretReeve Posted May 16, 2013 Author Share Posted May 16, 2013 the cockpit will be lit anyway so not worried about PE parts for this one. This has taken a back shelf to the motorcycle/car/truck lighting kit projects at the moment though due to the projects being programmed and run on micro controllers for teeny weeny circuit boards. Link to comment Share on other sites More sharing options...

Recommended Posts
Create an account or sign in to comment
You need to be a member in order to leave a comment
Create an account
Sign up for a new account in our community. It's easy!
Register a new accountSign in
Already have an account? Sign in here.
Sign In Now