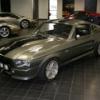
Graham77 Posted January 8, 2013 Share Posted January 8, 2013 My first bike build and it looks like a great kit and an awesome bike (Sadly I don't know much about ths area but am looking to learn) Just a quick pic of the box and the scheme I am looking to do. More to follow when I get started Cheers Graham Link to comment Share on other sites More sharing options...
charley420 Posted January 9, 2013 Share Posted January 9, 2013 Cor that was cheap! It does look extra mean in black, but i love my green one more lol Link to comment Share on other sites More sharing options...
wkennerley Posted January 9, 2013 Share Posted January 9, 2013 (edited) I look forward to this one, boy are there some nice bikes on this GB Wayne Edited January 17, 2013 by wkennerley Link to comment Share on other sites More sharing options...
Graham77 Posted January 9, 2013 Author Share Posted January 9, 2013 (edited) "Cor that was cheap!It does look extra mean in black, but i love my green one more lol"It was the main reason I bought it and I actually think the green one looks great aswell, sadly already ordered the paint for the black version. Let's hope they both look as good as your green one when they are finished Edited January 10, 2013 by Graham77 Link to comment Share on other sites More sharing options...
rkennerley Posted January 9, 2013 Share Posted January 9, 2013 welcome to the fun Graham i think you will enjoy building that bike,i would have gone with the white on the box don't know why but i just like it Link to comment Share on other sites More sharing options...
Graham77 Posted January 10, 2013 Author Share Posted January 10, 2013 welcome to the fun Graham i think you will enjoy building that bike,i would have gone with the white on the box don't know why but i just like it It caught my eye in the shop but there is something about the black i like, for a while I was considering splitting it down the middle and doing one side black and one white so i could have both schemes......hmmm maybe i should give that a go or will it look silly on a bike? On a car I would say silly bu they are a lot wider and this kit does have two really nice colour schemes. Link to comment Share on other sites More sharing options...
rkennerley Posted January 10, 2013 Share Posted January 10, 2013 If you want to do it half and half go for it you can display it one or the other but that is just me i have all ways liked "different" paint jobs on my vehicles.Just don't ask your better half what colour you should do it or you will end up with a pink breakdown truck like I did Link to comment Share on other sites More sharing options...
D1fuN0 Posted January 12, 2013 Share Posted January 12, 2013 If you want to do it half and half go for it you can display it one or the other but that is just me i have all ways liked "different" paint jobs on my vehicles.Just don't ask your better half what colour you should do it or you will end up with a pink breakdown truck like I did Or a pink Hello Kitty 916...... (Seriously, don't ask) Steve Link to comment Share on other sites More sharing options...
Mark Posted January 18, 2013 Share Posted January 18, 2013 Hmmmm..... Link to comment Share on other sites More sharing options...
D1fuN0 Posted January 18, 2013 Share Posted January 18, 2013 Hmmmm..... Hahaaaaaaaaaaa !!!!!!! Ok, its a 1098, but.... Hahaaaaaaaaaaa!!!!!!!! Link to comment Share on other sites More sharing options...
Graham77 Posted January 19, 2013 Author Share Posted January 19, 2013 Don't know if i should confess this on here but sadly I know more about hello Kitty than a 916 or a 1098...... but moving quickly on here is the shot of the plastic sitting out And after a few minutes of snipping and cleaning up the engine was starting to look quite smart. So I carried on snipping and cleaning and putting more and more subassemblies together ready for prime and paint and here is where I ended up (mostly dry fitted but still starting to take shape. I haven't built a tamiya kit for years and had forgotten how nice they were, this one has lots of detail and is falling together, hopefully the paint will arrive soon and I can start doing it justice. I have a quick question now for the red on this bike (Tamiya aerosol) would a white or grey primer be best I am going to knock up a couple of test pieces to try and see what results I get, I am thinking white although with the halfords paint I got a really good red using grey primer but that was also the recommended primer, Tamiya paints are another new step for me. OK I am off to find out what a 1098 and a 916 look like. Thanks for looking and broadening my education Graham Link to comment Share on other sites More sharing options...
Riggers Posted January 19, 2013 Share Posted January 19, 2013 Don't know if i should confess this on here but sadly I know more about hello Kitty than a 916 or a 1098...... but moving quickly on here is the shot of the plastic sitting out And after a few minutes of snipping and cleaning up the engine was starting to look quite smart. So I carried on snipping and cleaning and putting more and more subassemblies together ready for prime and paint and here is where I ended up (mostly dry fitted but still starting to take shape. I haven't built a tamiya kit for years and had forgotten how nice they were, this one has lots of detail and is falling together, hopefully the paint will arrive soon and I can start doing it justice. I have a quick question now for the red on this bike (Tamiya aerosol) would a white or grey primer be best I am going to knock up a couple of test pieces to try and see what results I get, I am thinking white although with the halfords paint I got a really good red using grey primer but that was also the recommended primer, Tamiya paints are another new step for me. OK I am off to find out what a 1098 and a 916 look like. Thanks for looking and broadening my education Graham Graham, Looking good mate! I always prime with a yellow base before applying a red finish. Brings out the red more than a white which can look.......pink! ATB.......... Link to comment Share on other sites More sharing options...
charley420 Posted January 19, 2013 Share Posted January 19, 2013 Have a go with the tamiya rattle cans on some scrap first, they can be a little over excited and splurge a massive shot of paint if you're over zealous with the button pressing. Link to comment Share on other sites More sharing options...
D1fuN0 Posted January 19, 2013 Share Posted January 19, 2013 Looking good graham, following with interest. Steve Link to comment Share on other sites More sharing options...
Graham77 Posted February 17, 2013 Author Share Posted February 17, 2013 Finally some progress although more time has been spent at the bench than on pics so just a quick overview of where I am at today Took all your advise guys and sprayed the red over a yellow base having first tested it all out on a piece of scrap. The red comes up really good over a grey base aswell but was a little too dark for this but will definitley be looking to use it on a car in the future. (It also looks a lot redder(?) in the pics on here is more metallic in real life a bit closer to the colour on the boxart) Thanks for the heads up Charley they needed a good shake and a bit of warming up then a quick practice but now I have the hang of it are going on pretty well (or at least good for me). Thanks for the hints and tips, I spent a while drilling out all the brakes and they are looking good now they have a bit of paint on them when I get the swing arm finished I'll pop some better pics up of them. Cheers for now Graham Link to comment Share on other sites More sharing options...
Graham77 Posted February 24, 2013 Author Share Posted February 24, 2013 A little more painting and this bike is starting to come together, first the engine a little more work to go but its nearly there Then the rear wheel and chain assembly Finally the frame with almost all the colour on and most of the accessories Couldn't resist dry fitting it all together to see how it looks As the build progresses though almost all of it will be hidden under the bodywork. Slowly I am starting to catch up with the other builds on here and am really enjoying building this bike (although frustrating it is at times, chain has snapped three time now and i am getting tired of fixing it although hopefully once it is all connected it should be safe from my elephant fingers) Thanks for reading Graham Link to comment Share on other sites More sharing options...
Will Vale Posted March 6, 2013 Share Posted March 6, 2013 The red does indeed look terrific, really vivid without a hint of pink. Link to comment Share on other sites More sharing options...
Rickpadwick1801 Posted March 6, 2013 Share Posted March 6, 2013 Nice job....i want to build one of these myself.... Hmmmm..... Well I have to say that I know more about 1098s than Hello Kitty, but that is all down to my job.... but I had a good laugh at that especially as the company I work for has a red 1098 in the showroom.... Link to comment Share on other sites More sharing options...
Graham77 Posted April 1, 2013 Author Share Posted April 1, 2013 And now for some more pics, this is going to be close but hopefully i will win the race, have a couple of days off now and just the handlebars abd the decals to do everything else is painted and ready to be screwed to the frame. I'll take some more pics tonight as it now has the exhausts on and hopefully will get the bars done and the bodywork decals, then just the front to sort out and assemble and then touch up my clumsiness. Back to the bench Graham Link to comment Share on other sites More sharing options...
Natter Posted April 1, 2013 Share Posted April 1, 2013 That looks really smart. I really hope you get it finished inside the allotted time, but I look forward to seeing it finished no matter what, it'll look great (it does already!) Link to comment Share on other sites More sharing options...
Graham77 Posted April 2, 2013 Author Share Posted April 2, 2013 Final post for this GB, father time has brought it to an end and I have to say I am fairly happy with how it has turned out. (couple of decals to add, ok about 30 bolt heads but have no time so calling it a day and will be having a go at a base aswell as the others look fantastic on a base) Here she is (any ideas to get rid of the silvering on that decal greatly recieved) One day i'll get organised and not leave these GB's to the last minute, thanks for all the comments and also the great tips that I picked up from the other builds on here I will be using them for my next bike build (Did someone mention a Superbike GB........). Hopefully will take some better pictures tomorrow once all the decals have set for the gallery Happy building and biking Graham 1 Link to comment Share on other sites More sharing options...
Will Vale Posted April 2, 2013 Share Posted April 2, 2013 Looks grand! I find the last minute aspect of group builds is the thing which motivates me to actually finish stuff Link to comment Share on other sites More sharing options...
Natter Posted April 3, 2013 Share Posted April 3, 2013 Mean looking, gorgeous - and finished. Well done indeed. Link to comment Share on other sites More sharing options...
Graham77 Posted April 3, 2013 Author Share Posted April 3, 2013 Thanks guys and couldn't agree more Will, if I don't finish a GB it takes an age to finish the model as there is always the next GB. Right where did I put that Le Mans car.... Link to comment Share on other sites More sharing options...
D1fuN0 Posted April 3, 2013 Share Posted April 3, 2013 Thats a really nice looking ninja graham... very nicely done. welcome to the dark side... steve 1 Link to comment Share on other sites More sharing options...

Recommended Posts