cheeley Posted December 6, 2012 Share Posted December 6, 2012 (edited) Hi Tim, sponge chipping is a technique that I've seen used when people weather AFVs - to my eye it looks like that's what ajcmac has done here (it may not be though!). You get a bit of sponge material, like some packaging material or a makeup sponge, tear a bit off, and dip the ragged edge in paint. Dab it on a bit of paper to get the excess off, then dab it where you want the 'chipping'. This explains it's use with AFV weathering: http://migjimenez.bl...ust-stains.html Thanks for the banner, I have duly pinched it Chris Edited December 6, 2012 by cheeley Link to comment Share on other sites More sharing options...
ajcm Posted December 7, 2012 Author Share Posted December 7, 2012 Hi ajcmac Excellent build so far! Can you explain how you achieved the chipping/weathering on the engine bearers and cowl? looks really effective and realistic....... Many thanks in advance. Regards Tim Tim As Chris said, I used a sponge. I made a mixture of dark brown and black, Vallejo Model Color, wet the sponge with paint, I spent it with kitchen paper to remove the excess and then just apply it. Regards ajcmac Link to comment Share on other sites More sharing options...
timmah Posted December 7, 2012 Share Posted December 7, 2012 Hi Tim, sponge chipping is a technique that I've seen used when people weather AFVs - to my eye it looks like that's what ajcmac has done here (it may not be though!). You get a bit of sponge material, like some packaging material or a makeup sponge, tear a bit off, and dip the ragged edge in paint. Dab it on a bit of paper to get the excess off, then dab it where you want the 'chipping'. This explains it's use with AFV weathering: http://migjimenez.bl...ust-stains.html Thanks for the banner, I have duly pinched it Chris Hi Chris Thanks for the info and link, will be trying that from now on..... No problem re the banner, don't forget to check your messages! Regards Tim. Tim As Chris said, I used a sponge. I made a mixture of dark brown and black, Vallejo Model Color, wet the sponge with paint, I spent it with kitchen paper to remove the excess and then just apply it. Regards ajcmac Hi ajcmac Thanks for confirming the technique, really like they way it's turned out and I will definitely be using that at some point soon. Are those sponge brushes home made or purchased? Many thanks in advance. Tim. Link to comment Share on other sites More sharing options...
smuts Posted December 9, 2012 Share Posted December 9, 2012 Hi, very nice work on the pit & firewall/engine mounts ..great weathering. Andy Link to comment Share on other sites More sharing options...
ajcm Posted December 9, 2012 Author Share Posted December 9, 2012 Hi Chris Thanks for the info and link, will be trying that from now on..... No problem re the banner, don't forget to check your messages! Regards Tim. Hi ajcmac Thanks for confirming the technique, really like they way it's turned out and I will definitely be using that at some point soon. Are those sponge brushes home made or purchased? Many thanks in advance. Tim. Tim The sponge is the one that comes to protect the electrical equipment. Then cut it into pieces. Regards ajcmac Link to comment Share on other sites More sharing options...
ajcm Posted December 11, 2012 Author Share Posted December 11, 2012 Interior almost ready. Missing pilot's seat and seat belts. Regards ajcmac 1 Link to comment Share on other sites More sharing options...
Spikelhund Posted December 14, 2012 Share Posted December 14, 2012 Gorgeous painting in the pit. Big thumbs up! Cheers... Link to comment Share on other sites More sharing options...
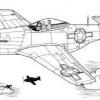
ajcm Posted December 17, 2012 Author Share Posted December 17, 2012 I started working on the engine. I added some wires. Regards ajcmac 1 Link to comment Share on other sites More sharing options...
Arniec Posted December 18, 2012 Share Posted December 18, 2012 Great job sofar. Thanxs for the sponge tip. You are never to old to learn something from another modeller. Cheers, Link to comment Share on other sites More sharing options...
trickyrich Posted December 18, 2012 Share Posted December 18, 2012 wow that's coming on great! If I send you mine, can you do it too! Link to comment Share on other sites More sharing options...
Dan Posted December 19, 2012 Share Posted December 19, 2012 Magnificent work! I'm enjoying seeing everyone else's models come together as much as my own Link to comment Share on other sites More sharing options...
oldhouse Posted December 20, 2012 Share Posted December 20, 2012 Very,very nice work so far !! Great weathering !! Peter Link to comment Share on other sites More sharing options...
ajcm Posted December 24, 2012 Author Share Posted December 24, 2012 Complete engine... and I glued all the wings. To all the members of this forum a desire for a Merry Christmas. Best regards. ajcmac 1 Link to comment Share on other sites More sharing options...
Skybert Posted December 24, 2012 Share Posted December 24, 2012 Very convincing engine weathering! Link to comment Share on other sites More sharing options...
ajcm Posted December 26, 2012 Author Share Posted December 26, 2012 I finished the interiors... Regards ajcmac 1 Link to comment Share on other sites More sharing options...
smuts Posted December 27, 2012 Share Posted December 27, 2012 Superb.. Andy Link to comment Share on other sites More sharing options...
Doug Rogers Posted December 27, 2012 Share Posted December 27, 2012 That looks fantastic, more like 1/32 scale than 1/48. Link to comment Share on other sites More sharing options...
stoohoo Posted December 29, 2012 Share Posted December 29, 2012 Like the others have said, that is looking superb ajmac, look forwards to the next update Cheers, Stu Link to comment Share on other sites More sharing options...
ajcm Posted January 5, 2013 Author Share Posted January 5, 2013 Finally the sheet of decals. The chosen scheme. Fuselage and wings glued. Have completed the machine guns. Missing the dashboard, and of Aires/Quickboost, the correct air intake and the ailerons for this model. Arrives Monday. Then start painting the model. Regards ajcmac Link to comment Share on other sites More sharing options...
Gene K Posted June 26, 2015 Share Posted June 26, 2015 Finally the sheet of decals. SO how did this great build end? Gene K Link to comment Share on other sites More sharing options...
HOUSTON Posted June 28, 2015 Share Posted June 28, 2015 ajcmac, Only just saw this BRILLIANT build.. It looks AWESOME and every new technique . trick, helpful hint is appreciated.....and the sponge job is very well executed.. EXEMPLARY workmanship.. Hope you have this done and its somewhere in the RFI section.. Thanks for your lovely build so far HOUSTON Link to comment Share on other sites More sharing options...
p-26luvr Posted August 29, 2015 Share Posted August 29, 2015 I just came across this thread. Very good work. I am making up the F-2 version for a winter diorama in Russia at present. Carl T Link to comment Share on other sites More sharing options...

Recommended Posts