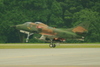
EricP Posted June 3, 2012 Share Posted June 3, 2012 Here's my entry ... I've had the pleasure of seeing the Macchi Roulettes in action once (waaayyyy back in 1984), and they obviously left an impression. The current team is good, but there's something to be said about the roar of turbojets jazzing up an aerobatic show. Plus, I love the look of this scheme, which has been dubbed "Fanta can". The box: Four schemes are on offer: And obviously the one to be built is the top one: The instructions are incorrect though, they would have you paint the fuselage a single color, but the box art is sorta correct (they colored the bottom of the wing orange, it should be silver): Contents: Kit consists of 3 sprues: 2 light grey and 1 clear Surface detailing is light, raised lines for panels and deeper channels for control surfaces: The MB Mk 4 bang seats are simple but should look ok under paint: The cockpit tub's a bit plain, but will be dressed up with decals (same treatment for the plain instrument panels in the previous and next images): Transparencies are a bit thick but clear: I plan to build this in-flight, so I'll source for a suitable pilot (maybe one from an old Matchbox or Airfix kit), and build a base for it, with a length of clear acrylic rod to hold it up in a banking pose (this way you get to see the top and bottom markings). I'm trying out Lifecolor paints, and have already bought the orange and white paints ... they ran out of silver, so I'll go the Alclad route with that. Cockpit color will also be Lifecolor light grey. Rather than use the white decals, I'm planning to mask out the white areas, which I have to do for the fuselage "band" anyway, this way I get consistency (I don't know how opaque the decals are, but white decal over orange and silver is likely to be different in shade). The straight lines should make the job easier (yeah, I know ... famous last words ... ) Link to comment Share on other sites More sharing options...
Alpha Delta 210 Posted June 3, 2012 Share Posted June 3, 2012 Great choice. I love the variety of types and schemes that are already breaking cover. This is going to be a great GB. Good luck with it. Link to comment Share on other sites More sharing options...
EricP Posted July 12, 2012 Author Share Posted July 12, 2012 It has been a long time since the last update, my apologies. The last few weeks have been eventful ... I left my old job, took a week off where I completed cataloguing my stash and moved the unbuilt kits to a storage unit, freed up space in a study corner at home where my kids can do their homework, and most importantly, I can build kits after they're done (!), and started a new job. Phew! That didn't leave much time for building models, so I got some help from a professional: She has more than 5 years of experience with miniatures, mostly scale models of blondes with impossibly slim waists and limbs. Here she is helping to wet sand the wings of the Macchi. I intend to have this model gear-up, with a clear acrylic rod holding it aloft via the jetpipe, so some work needs to be done ... here's the jetpipe part and some thick plastic card. Backed up the jetpipe with extra plastic so it can hold the rod. And installed it in the rear fuselage. The gear doors were glued close ... they weren't a good fit, so Tamiya putty was applied and sanded. I'll re-scribe the gear doors later. A flying aircraft needs a pilot, and the kit doesn't provide one, so I enlisted the help of a pilot from an Airfix SAAB Gripen kit. This guy is half Swedish, half Australian, so let's just call him Flt Lt Bruce Svensson Bruce was painted with Vallejo acrylics thinned with water, a 000 brush, a magnifier, and very little coffee. Bruce fitted well into the front seat, but needed some space for his size 12 boots, so a bit was shaved off the instrument console. Here's another angle, the seats are also painted with a "that looks about right" color mixed from Vallejo acrylics. The decal instruments don't actually look too bad, should be quite convincing under the canopy. Apart from that, most of the parts needed have been trimmed and cleaned up, and the canopy has been Future'd and is drying in a dust-free container. I've also bought the acrylic rod and a rectangular wooden base from an arts store, I'll need to buy a drill bit of the correct diameter to drill into the base and the model. Till next update ... hopefully it progresses faster from here. I've started gluing the fuselage halves together, carefully to minimize seams so that I can preserve the delicate raised panel lines. Link to comment Share on other sites More sharing options...
Mikkel Posted July 12, 2012 Share Posted July 12, 2012 really looks great! very nice work! Bruce the pilot is great, wish I could make such nice pilots :/ Link to comment Share on other sites More sharing options...
CliffB Posted July 12, 2012 Share Posted July 12, 2012 Sorry Eric, but under the Group Build rules, models must be all your own work! Looking great though! Cliff Link to comment Share on other sites More sharing options...
Gajman Posted July 12, 2012 Share Posted July 12, 2012 (edited) That pilot looks great! It is a nice scheme. I've been thinking of building one in this scheme myself. I have about 10 of these kits seeing as how they were £5.99 from Wonderland Models and I bought a load for my SAAF collection I wish I'd seen this thread before getting so far ahead with my builds. I've been toying with the idea of mounting mine in flight so that you can see top and bottom. I thought of having them as if they have 'burst' during a show. But I haven't reinforced the jet pipes. Gary Edited July 12, 2012 by Gajman Link to comment Share on other sites More sharing options...
Alpha Delta 210 Posted July 12, 2012 Share Posted July 12, 2012 What a great start! I'm looking forward to this. Link to comment Share on other sites More sharing options...
AndyC Posted July 12, 2012 Share Posted July 12, 2012 Excellent! That pilot is stunning for 1/72! Nice scheme too Link to comment Share on other sites More sharing options...
EricP Posted July 13, 2012 Author Share Posted July 13, 2012 Thanks for the comments, guys! @Cliffb ... ... @Gajman ... that's a great deal you got on the kits, Gary, I would have bought a carton! Ok ... Friday the 13th, everything went swimmingly throughout the day, came back home to continue a bit of work on the kit ... and Murphy's Law struck. The carpet monster swallowed the airbrake some time after I had started the kit. And I don't even have carpet at home! What to do? Go to the hobby shop, buy another kit just to get that par.... no, no, no, tempting excuse, but no! There's a little flat piece on the sprue gates that seems to fit ... a bit of work with the razor saw and ... Hey, it fits! Mr Murphy ... The nose wheel well is pretty deep, and I can just imagine the gear door dropping in and staying stuck inside, so a few pieces of sprue gates come to the rescue. Stick on the nose gear door. Now to wait for it all to dry, then careful sanding to preserve the panel lines. I did a test fit of the wings ... and there will be gaps. I sort of anticipated this after seeing Gary's build. Link to comment Share on other sites More sharing options...
Alpha Delta 210 Posted July 13, 2012 Share Posted July 13, 2012 Great progress, Eric. I love the ingenious air brake solution! Looking forward to the next instalment. Link to comment Share on other sites More sharing options...
Alan P Posted July 14, 2012 Share Posted July 14, 2012 That's a great pilot and cockpit you've done there! And the quick fix solutions are great. I should learn to stop whinging and get on with it like you do!! Al Link to comment Share on other sites More sharing options...
Gajman Posted July 15, 2012 Share Posted July 15, 2012 Some very clever solutions there, simple yet effective. You're a brave man trying to preserve the panel lines. I gave up and have sanded them all off. I'm enjoying watching your build progress, keep it up. Gary Link to comment Share on other sites More sharing options...
Gajman Posted August 5, 2012 Share Posted August 5, 2012 Eric! Eric! Are you out there? Come on, don't leave us in suspense, post some updates. Link to comment Share on other sites More sharing options...
EricP Posted August 26, 2012 Author Share Posted August 26, 2012 Long overdue update, my apologies ... and I gotta say upfront that I'm unlikely to get this completed by the deadline, as I'm on a business trip to a country that's about to be hit by Typhoon Tembin in a couple of days Hopefully all that happens is that it gets slightly more humid (i.e. rain!). This is a great GB, and I'm humbled by the quality and productivity of the folks here. On to my update ... I didn't like the look of the rear bulkhead of the kit, so I just added a thin sliver of plasticard to it and trimmed to size: Then the wings and stabs went on, and I made a quick simple jig out of blu-tack ... on hindsight, next time I'll use bits of sprue gates held in place by blu-tack. This method still works, though, as the blu-tack doesn't deform even in tropical heat. And after everything's nice and dried, it starts to look like an aircraft! Then, of course, disaster struck ... the aircraft must have thought "I have wings! I must fly!" ... and it flew down towards the floor ... fortunately my reaction was fast enough, unfortunately I reacted by using knees to catch the flying model (hands were holding paint stuff at the time). With several (scale) metric tons of pressure, the aircraft grade aluminum deformed slightly but was able to be bent back into shape: ... to be continued ... Link to comment Share on other sites More sharing options...
EricP Posted August 26, 2012 Author Share Posted August 26, 2012 I wanted to put this on an acrylic rod on a base, but did not have a drill bit that's big enough ... my old drill is a Tamiya Router (the difference between this and the blue-colored Tamiya Drill is that this is not geared down, and spins faster), but it only holds bits up to 3mm. A fellow modeler offered a Bosch IXO cordless screwdriver for sale, with a drill chuck that can hold drill bits of up to 6mm, perfect for my purpose: Comes in a nice little case as well, this is an older model, the newer ones just have a metal tin to hold the screwdriver and accessories. Back to the model ... I sprayed Gunze gloss white as an undercoat, then after several days (weeks!) of drying, started masking: I then sprayed another light coat of white to "seal" the masking tape, to minimize paint bleeding for the subsequent colors Silver went on next, this is Tamiya Flat Aluminum Then the silver areas were masked off, and Lifecolor Orange went on. One thing I discovered ... thinning ratio is very important to Lifecolor, you must experiment on a scrap piece of plastic. I'm used to thinning paints heavily and building up the color layers, no such luck here. I waited for this to dry a bit, about 2 hours, then went back with less thinning and lower airbrush pressure ... and eventually produced something acceptable. And after another 2 hours of drying, the part that fills me with anticipation and dread starts ... removing the masking! Fortunately, the paint bleeding was minimal ... and it was all orange, as the Lifecolor paint went on a bit too thick. I think I'll stick to Gunze and Tamiya from here on, you just have to stay with what you know. One other thing I discovered ... Lifecolor odorless thinner doesn't have any effect on Gunze Hobby Color paints (perhaps because it's lacquer-based), but will remove Tamiya's water-based paint. So the white is unaffected when I used a wet q-tip to wipe the orange off, but I'll have to touch up the silver. And this is likely where I stop for this GB, though I'll complete this and post another thread in BM later. I'll have 1 day between business trips next weekend and will not have time to fix it up (i.e. re-mask and re-spray, plus decal). Thanks for the encouragement, guys, I look forward to more of you completing your builds for the GB! Link to comment Share on other sites More sharing options...
Alpha Delta 210 Posted August 26, 2012 Share Posted August 26, 2012 She's looking great, Eric! Shame that you won't be able to finish her in time, but don't forget to continue posting in the WIP area of the forum. Have a safe trip. Link to comment Share on other sites More sharing options...
EricP Posted August 26, 2012 Author Share Posted August 26, 2012 Thanks, Alpha-Delta ... you've been a great host to this GB! Link to comment Share on other sites More sharing options...
Alpha Delta 210 Posted August 26, 2012 Share Posted August 26, 2012 Aw, shucks! I'm blushing! It has been great fun and a real pleasure. I have loved the variety of models and the esprit de corps amongst the participants. It's a shame you can't finish yours, Eric but I really look forward to seeing it in RFI sometime soon. All the best. Link to comment Share on other sites More sharing options...

Recommended Posts