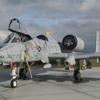
Shaun Posted March 4, 2012 Share Posted March 4, 2012 (edited) Latest one off the bench (finished today!) Probably the brightest model in my collection Details- Hasegawa 1/48th F-16A kit brought up to MLU standard by borrowing an IP panel from the Hasegawa "C" kit,Pilot and nose IFF bird slicers from the Tamiya F-16 kit and Orion self adhesive scab plates. Scratch built smoke winders and base. Decals from Syhart, main bright orange paint also from this company. The sun was out this afternoon, so took advantage of shooting the model outside in bright natural light No more decal projects for while, this one almost burnt me out I'm pleased with the final model, but it's been an effort to get this one done! Shaun. Edited March 4, 2012 by Shaun 2 Link to comment Share on other sites More sharing options...
jimbuna Posted March 4, 2012 Share Posted March 4, 2012 She's a stunner. Link to comment Share on other sites More sharing options...
Julien Posted March 4, 2012 Share Posted March 4, 2012 Very nice indeed Julien Link to comment Share on other sites More sharing options...
ChocksAway Posted March 4, 2012 Share Posted March 4, 2012 (edited) Shaun Excellent job. Edited March 4, 2012 by ChocksAway Link to comment Share on other sites More sharing options...
Alan P Posted March 4, 2012 Share Posted March 4, 2012 Looks really beautiful (as long as you don't look at it for too long! Love the sheen and glossy finish, great work Shaun. Al Link to comment Share on other sites More sharing options...
Shaun Posted March 4, 2012 Author Share Posted March 4, 2012 Thanks for the replies folks, glad you like the finished Viper The scheme was a challenge Shaun. Link to comment Share on other sites More sharing options...
General Jumbo Posted March 4, 2012 Share Posted March 4, 2012 Very, very nice! I saw them at Leuchars last year. Link to comment Share on other sites More sharing options...
Paul Posted March 5, 2012 Share Posted March 5, 2012 That's come out very well Shaun I'm going to do one of these in 1/72 shortly, any tips for the Syhart paint? Link to comment Share on other sites More sharing options...
SaintsPhil Posted March 5, 2012 Share Posted March 5, 2012 Great job! Phil Link to comment Share on other sites More sharing options...
Stephen Posted March 5, 2012 Share Posted March 5, 2012 Fantastic work. Stephen Link to comment Share on other sites More sharing options...
GH05T8 Posted March 6, 2012 Share Posted March 6, 2012 That is a thing of beauty Shaun. The way you set up the base looks awesome too. Thanks for sharing, Justin Link to comment Share on other sites More sharing options...
Metallicus Posted March 6, 2012 Share Posted March 6, 2012 Fantastic build!! Link to comment Share on other sites More sharing options...
Shaun Posted March 6, 2012 Author Share Posted March 6, 2012 (edited) Thanks folks That's come out very well Shaun I'm going to do one of these in 1/72 shortly, any tips for the Syhart paint? For those that are interested, this is how I painted my J-015. Once model was constructed I primed the model in gray to check the joints. I had read on the forum that a single jar of Slyhart metallic orange only just covered the model in 1/48th scale, so with this in mind I came up with a plan. I had a look though my paint rack and found jar of Humbrol Matt orange no 82, I used this to provide a solid orange base coat. Once the matt orange had dried, I polished the paint ready the metallic paint. The syhart paint was sprayed straight from the bottle though a medium sized nozzle. One thing to watch for when spraying is that the paint may settle in the spray cup, I quick stir with a cocktail stick every so often helps here. Also the paint builds up at the airbrush tip, so keep the paint moving. With the above method I covered the model easy with a single jar and had a little spare. Shaun. Edited March 6, 2012 by Shaun Link to comment Share on other sites More sharing options...
Basosz Posted March 6, 2012 Share Posted March 6, 2012 As an aerophile from the Low Countries... that is stunning. You've done her proud and now I want one too! Link to comment Share on other sites More sharing options...
Michaelvk Posted March 7, 2012 Share Posted March 7, 2012 That's impossibly orange! Great job! Link to comment Share on other sites More sharing options...
Paul Posted March 7, 2012 Share Posted March 7, 2012 Thanks folks For those that are interested, this is how I painted my J-015. Once model was constructed I primed the model in gray to check the joints. I had read on the forum that a single jar of Slyhart metallic orange only just covered the model in 1/48th scale, so with this in mind I came up with a plan. I had a look though my paint rack and found jar of Humbrol Matt orange no 82, I used this to provide a solid orange base coat. Once the matt orange had dried, I polished the paint ready the metallic paint. The syhart paint was sprayed straight from the bottle though a medium sized nozzle. One thing to watch for when spraying is that the paint may settle in the spray cup, I quick stir with a cocktail stick every so often helps here. Also the paint builds up at the airbrush tip, so keep the paint moving. With the above method I covered the model easy with a single jar and had a little spare. Shaun. Hi Shaun Thanks for that, orange undercoat it is then. Paul Link to comment Share on other sites More sharing options...
the MDman Posted March 7, 2012 Share Posted March 7, 2012 Great job on that nice bird m8 Link to comment Share on other sites More sharing options...
Jim Saudi Posted March 7, 2012 Share Posted March 7, 2012 Nice work. I love to see models in the flight config. It's where they belong! Love it. Jim Link to comment Share on other sites More sharing options...
Bri48 Posted March 8, 2012 Share Posted March 8, 2012 Very smart scheme and display. Brian Link to comment Share on other sites More sharing options...
goose Posted March 8, 2012 Share Posted March 8, 2012 That is a fantastic piece of work, i bet you have gone of orange for a short while. Link to comment Share on other sites More sharing options...
Shaun Posted March 8, 2012 Author Share Posted March 8, 2012 i bet you have gone of orange for a short while. No more Orange or large decals for the near future!! Shaun Link to comment Share on other sites More sharing options...
Greased Lightning Posted March 13, 2012 Share Posted March 13, 2012 Great job, lovely scheme. Link to comment Share on other sites More sharing options...
Shaun Posted July 24, 2013 Author Share Posted July 24, 2013 After seeing the Dutch team at Fairford, It reminded me of my build of the Orange lion. Just thought i would share my build once again Shaun Link to comment Share on other sites More sharing options...
RNoAF Aerobatic Team Posted July 24, 2013 Share Posted July 24, 2013 That I just a wicked result. Just stunning. Link to comment Share on other sites More sharing options...
Tabio Posted July 25, 2013 Share Posted July 25, 2013 Great job, as you can see in the photos section I really love this aircraft! You've done a great job here, now for the Apache? Link to comment Share on other sites More sharing options...

Recommended Posts
Create an account or sign in to comment
You need to be a member in order to leave a comment
Create an account
Sign up for a new account in our community. It's easy!
Register a new accountSign in
Already have an account? Sign in here.
Sign In Now