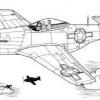
ajcm Posted February 8, 2012 Share Posted February 8, 2012 I bought the 109 F6 Hasegawa 1/32. All models are Germans that I did with the camouflage RLM 74, 75, 76. To avoid repeating the model or the colors I intend to do a F2. The F6 is an F2 with different weapons. I'll make two or three changes. The model will be Bf109F of Hannes Trautloft-2, JG 54, 1942 Russia. Only the colors still do not know. There are many doubts as to the colors of the aircraft. Some say it was painted in RLM 76, 02 and 70. others with RLM 78, 79 and 70 still others with RLM 76, 79 and 70. Any help is welcome. The model The decals sheet of Aero Master. Link to comment Share on other sites More sharing options...
ajcm Posted February 11, 2012 Author Share Posted February 11, 2012 (edited) I made changes in F4 to a F2 with the help of a book of the Squadron and the instruction sheet of Zvezda's Me 109 F2. I deleted some panels at the bottom of the wings and open wells of the landing gear. Eliminated the line of the panels does not belong to the series F. I added some cables. Thanks for watching. ajcmac Edited February 11, 2012 by ajcm Link to comment Share on other sites More sharing options...
Iain Ogilvie Posted February 11, 2012 Share Posted February 11, 2012 (edited) Good progress! I build an F-2 last year - panels and gear bay openings caused some concern - but we got there in the end. Personally I think the 'F's are the best looking 109s by far. Iain Edited February 11, 2012 by Iain (32SIG) Link to comment Share on other sites More sharing options...
ajcm Posted February 14, 2012 Author Share Posted February 14, 2012 The interiors are ready. The wheels. The exhaust pipes. Flaps Link to comment Share on other sites More sharing options...
ajcm Posted February 20, 2012 Author Share Posted February 20, 2012 Another advance in the Me 109. I painted the propeller hub (still with Future, missing matt varnish). Then I glued wings, fuselage and rear stabilizers. And then simulates the rivets. It is the first time I do. I made some mistakes but for the next already know how to avoid them. That is all. Best regards ajcmac Link to comment Share on other sites More sharing options...
Deacon Posted February 21, 2012 Share Posted February 21, 2012 Lovely paint job on the tub and hub sir. Deacon Link to comment Share on other sites More sharing options...
Tim B Posted February 21, 2012 Share Posted February 21, 2012 Nice start on the Friedrich. I was tempted by this one myself so will be watching Tim Link to comment Share on other sites More sharing options...
Iain Ogilvie Posted February 29, 2012 Share Posted February 29, 2012 Looking good - rivets have come out very well! Iain Link to comment Share on other sites More sharing options...
ajcm Posted March 1, 2012 Author Share Posted March 1, 2012 And is ready to start painting. Fuselage closed, interior ready, wings and stabilizers glued. The propeller hub also ready. Best regards ajcmac Link to comment Share on other sites More sharing options...
ajcm Posted April 24, 2012 Author Share Posted April 24, 2012 Lack of space in my showcase forced me to stop with the models in 1/32 scale and back again to the scale 1/48. I found a alternative solution and I'll, at least, try to finish the F2. I painted the front of the fuselage and stripes of yellow. Regards ajcmac Link to comment Share on other sites More sharing options...
ajcm Posted April 26, 2012 Author Share Posted April 26, 2012 I painted the RLM76. Regards ajcmac Link to comment Share on other sites More sharing options...
ajcm Posted April 27, 2012 Author Share Posted April 27, 2012 Lights and shadows. Now RLM 79. Regards ajcmac Link to comment Share on other sites More sharing options...
Iain Ogilvie Posted April 30, 2012 Share Posted April 30, 2012 Looking great! Iain Link to comment Share on other sites More sharing options...
ajcm Posted May 25, 2012 Author Share Posted May 25, 2012 Camouflage ready. Regards ajcmac Link to comment Share on other sites More sharing options...
calimero Posted May 26, 2012 Share Posted May 26, 2012 I like your work, it will be a nice 109 Link to comment Share on other sites More sharing options...
Will Vale Posted May 26, 2012 Share Posted May 26, 2012 Agreed, looks very nice! Love the shaded paintwork. Link to comment Share on other sites More sharing options...
Iain Ogilvie Posted May 27, 2012 Share Posted May 27, 2012 That's looking ace!! Recon you'll finish by midnight? Iain Link to comment Share on other sites More sharing options...
ajcm Posted May 28, 2012 Author Share Posted May 28, 2012 Do not like what I did on the engine cover. Yellow painted again. Also painted a patch of green that was forgotten. The dotted line painted red. I put the decals Hannes Trautloft. Regards ajcmac Link to comment Share on other sites More sharing options...
ajcm Posted May 28, 2012 Author Share Posted May 28, 2012 That's looking ace!!Recon you'll finish by midnight? Iain Ian, I think two more days and finish the model. If I can not continue in the GB, I end model in the «Work in Progress». My apologies for failing to finish the model until May 27. Regards ajcmac Link to comment Share on other sites More sharing options...
ajcm Posted May 29, 2012 Author Share Posted May 29, 2012 Decals applied and a layer of Future. Another day and the model is finished. It now remains to apply the oil, then the clear matte and paste everything (landing gear, propeller flaps and canopy). Regards ajcmac Link to comment Share on other sites More sharing options...
ajcm Posted May 30, 2012 Author Share Posted May 30, 2012 Missing glue the landing gear and the exhaust pipes. Regards ajcmac Link to comment Share on other sites More sharing options...
ajcm Posted May 31, 2012 Author Share Posted May 31, 2012 And is finished Hope you enjoy. Regards ajcmac Link to comment Share on other sites More sharing options...
Iain Ogilvie Posted May 31, 2012 Share Posted May 31, 2012 Looks lovely! Iain Link to comment Share on other sites More sharing options...
calimero Posted June 1, 2012 Share Posted June 1, 2012 Nicely painted, so beautiful Fversion Link to comment Share on other sites More sharing options...
Will Vale Posted June 2, 2012 Share Posted June 2, 2012 Agreed, that looks really nice. Neat and tidy with some very delicate shading. Link to comment Share on other sites More sharing options...

Recommended Posts