
Search the Community
Showing results for tags 'tanker'.
Found 20 results
-
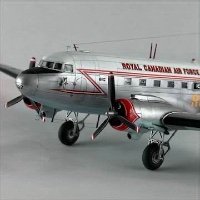
I want to present report from work on my new project - Tanker from "Always" Steven Spilberg's film. I base on Italeri kit - quite old, but not vintage. I hope it's better base than Airfix kit from '70 Unfortunately plastic used by Italeri wasn't too good and a lot of parts have rounded edges (even in places where you'll expect square ones). I have a decal set for "Tanker 59" from Draw Decal, but I plan to build "Tanker 57" - she had a nicer tank on board. Because tankers are most interesting on the bottoms I started some works on landing gears and their wells. Next I decided to replace "engines" to better ones (ok, only front halves), but I see no sense to try find a space for whole. After that I filed cowlings For now one side is ready for assembly
-
Hi, Here's my Hasegawa F/A-18F that I started over 10 years ago, intending to build it as BuNo 166616 AG206, the tanker during VFA-103's first Super Hornet cruise. I looked for some pictures today to confirm that the refueling pod at the time had the older type of turbine. The Wolfpack set has both styles of turbine. Here's one I found: 166616 (cn F109) Boeing F/A-18F Super Hornet Photo by Peter Boschert | AIRFIGHTERS.COM I also discovered today that the aircraft was lost in 2013. Ironically for an aircraft that had served as a tanker, she ran into trouble while refueling over Afghanistan. The basket from a KC-135 broke off and got stuck on the refueling probe of 166616, making further refueling impossible and some debris caused damage to the starboard engine. A diversion to Oman was initiated, but they weren't going to make it with the fuel they had. Just before they reached the carrier, the port engine also quit. Both crewmembers ejected safely and were rescued. Cheers, Stefan.
-
Hi all, back with another long term, finally completed project Completed the Corsair and fuel tanker, both Tamiya, at the start of the year. But working on the base got delayed due to lack of shelf space (never enough ><). Now that I have some freed, I could finally finish it off. Feel the scene is lacking a little something, and in hindsight would've liked some 1/48 Marsten mats. But, tis what it is. Bonus cockpit shot at the end. Thanks for looking Gaz
- 7 replies
-
- 22
-

-
- Tamiya 1/48
- Corsair
- (and 1 more)
-
Looking for inspiration for a new project I found photo of Texan used as a crop duster. Searching for next photos resulted info, that this same airframe was used as... air tanker. For me it was obvious that I have a topic for a new project I bought a HobbyBoss Easy Assembly kit (sorry - only this was available), planned "some" changes and after few days (easy kit ) I can present to you my try to build Tanker #8 And at the end "family" photo with Avenger in Oranges
-
 Today I want to present "civilian" version of TBM-3 - Tanker 74 Model is based on Hobby 2000 TBM-1C (#72010) kit, decals from Draw Decal (No. 72-TBM-1) with some scratch added (to be honest - some decals are home-made too; Draw Decals set have not enough digits to make a complete miniature). There's no WiP from that build but if someone will be interested in short story - I've some photos in backup Some data (and photos) about this Tanker you can find e.g. HERE. Back to model (LARGE photos - click on miniatures)
- 25 replies
-
- 40
-
-

Thompson Brothers refueling tender
fjaweijfopi4j48 posted a topic in Ready for Inspection - Aircraft
Scratch-built, with decals from Arctic Decals of Finland. There were several models and modifications. I scratched this model a few months ago, posting some images of it still without decals here in Britmodeller in the "British Heinkel" post: http://www.britmodeller.com/forums/index.php?/topic/235025835-the-british-heinkel/- 20 replies
-
- 33
-
-
Morning all! This is my quick OOB (almost) build of the Roden VC-10 K3 1:144 kit. Nothing much more to say so lets get on with it : Kit: Roden VC-10 K3 1:144 (From my LMS- Mike's Models) Paints: Vallejo Model Air custom-mixed grey (based on reference photos) Vallejo Model Air black, Model Color silver Washes: Vallejo Model Wash-dark grey Additional Details: Refuelling basket (inside the central refueling pod) made from rolled up tissue paper Spare RAF roundels had to be used on the side of the fuselage due to an error made by myself Flaps were produced, cutting out the kit's flaps on the underside of the wing and using plasticard to make up the rest of the structure Spoilers/speedbrakes were produced from paper Pros: Great recessed panel lines on the wings and rear control surfaces Nicely detailed engine pods (especially the thrust reverser gratings) Lots (and lots!) of decals, especially on the refuelling pods, which were not all used in this build Window masks (which i stupidly put on every single window and ended up running out of masks half way down the other side!) Relatively cheap- depending on your LMS/supplier Numerous tiny aerials and probes supplied Cons: Very shallow panel lines on the main fuselage body Ejector pins on fuselage join, when these were removed I found that there was a poor fuselage join Very unusual scheme, I can find only one image of this scheme on the internet-apparently the crews "were not a fan" Decal placement sheet was sometimes difficult to interpret Base kit does not have an option for spoilers or flaps Quite a few decals were out of register, but this shouldn't really matter Thanks for having a look Kind regards, Sam
-
The Roden Vickers Super VC10 K3 Type 1164 Tanker Jet Model Kit has now arrived, furthermore the Vickers Super VC10 Type 1151 BOAC kit is now back in stock too! For full details, please see our newsletter.
-
 Roden have a nice bit of kit coming soon; the 1/144 RAF Vickers Super VC10 Type K3 1164 Tanker! For full details, please see our newsletter.
- 1 reply
-
- 2
-
-
- new releases
- roden
- (and 8 more)
-
Hello! This is the first 'proper' build i've done for a few years, I'm rusty but back with vengeance. Far from perfect re: paint job, but it's a notorious kit to build. I've neatened up the cockpit and airbrake since I took these pics too. Can't wait to get my hands on the new tool Airfix kit! Up next: 1/200 Vulcan in anti flash. If anyone can tell me what image extensions i can use here, i'd be grateful. They all reject for me! In the meantime, pics here: http://postimg.cc/gallery/2lgjzw3xg/31c2f0a1/ Chris
-
 NF130FF is an Ex USN EC-130Q TACAMO aircraft. Modified for the Air Tanker Fire Fighting role by Coulson Aviation USA Ltd. This aircraft is FAA Certified for 3,500 USG Retardant. Pics thanks to Iwan Bögels.
 -
Hi all, I ordered an Italieri KC-135A Stratotanker today for £32.50 (bit of a bargin I thought) and was looking for some background to get me in the mood etc. Does anyone know what the airborne deterrent formations of B52s and KC135s would consist of? (How many of each, where they would be based, what their routes would be and so on). Advice on the kit would also be much appreciated! Many thanks.
-
Russian GAZ-66 Oil Tanker Trumpeter 1:35 History The GAZ-66 light utility truck entered production in 1964 at the Gorky Automobile Plant, where it replaced the earlier GAZ-63 on the lines. Originally produced for both civilian and military use, the military versions gradually became paramount. The overall design follows the usual Soviet guidelines of relative simplicity, strength and versatility. There are no design frills on the GAZ-66 as it is an orthodox forward control design capable of being produced in, or modified into, many different versions. This truck had been produced for 35 years. It's production ceased in 1999. Nearly 1 million of these trucks were built. The GAZ-66 is still used by the Russian Army, many ex-Warsaw Pact armed forces and wherever Soviet influence has spread. Many are used throughout the Middle East and nations in Africa. The GAZ-66 was simple in design and technology. Also it was easy to maintain. The basic cargo/utility model has an all-steel cargo body with an optional canvas cover over bows mounted on a chassis frame that can be arranged to carry any number of body styles. Cab is mounted over the engine and provides seating for the driver and one passenger. Standard equipment of the GAZ-66 includes a powerful cab heater and an engine pre-heater but these are omitted on models intended for tropical use. The GAZ-66 is powered by a 4.2ltr V8 petrol engine developing 115 hp. The truck has a full-time all-wheel drive and made a name for itself as a superb cross-country vehicle. Models produced from 1968 onwards, the GAZ-66A, have a central tyre pressure system and may feature a soft-top cab. Different variants have been produced specifically designed so that, over the range of vehicles, they can operate in climatic conditions ranging from -50°C to +50°C. There are numerous sub-variants of the GAZ-66, with or without winches, and with many equipped for special roles such as oil supply vehicles, the subject of this kit. A follow-on GAZ-3308 Sadko was developed as a replacement, however Russian Army preferred the KRAZ-4350, which offers more payload. However the GAZ-66 remains in widespread use and full replacement may take some time. The Model The kit comes in a sturdy top opening box with a artistic impression of the vehicle on a snowy airfield with a Mig 31 taking off in the background. Opening the box reveals ten sprues in various sizes in a nice light grey styrene, one sprue of clear styrene, three small photo etched brass sheets, five vinyl tyres and a small decal sheet. The mouldings for all the parts are superb, with no sign of flash or other imperfections and very few moulding pips. As with most truck kits there are a lot of parts that will probably never be seen, particularly the nicely detailed chassis, suspension and engine, but in my view it’s better to have them than not. There also lots of very thin parts such as the handrail across the top of the tank, which seemed to snap as I looked at it. This and other bits of pipework and rails do appear to have quite a few sprue gates and moulding pips, so take great care when removing them from the sprue and cleaning them up. The build begins with the several sub-assemblies, beginning with the superbly detailed V8 engine. The engine block is provided in two halves, which, once joined together, are fitted with the sump and intake manifold. Each of the exhaust manifolds are provided in two pieces, these are fitted to the upper sides of the engine block, with the two cylinder heads fitted above them. The crank case and two piece starter motor are then attached to the rear end of the block, whilst the ancillary drive plate is fitted to the front. The two piece alternator is fitted to the right hand front with the water pump fitted to the front. On the top of the engine the six piece throttle body, three piece oil filter and single piece distributer are attached. The inner drive belt is fitted along its idler and tensioner wheels, followed by the outer drive belt and its idler and tensioner wheels and completed with the fitting of the cooling fan. The last part of the engine is the air filter, and this is made up from six parts before being fitted to the top of the engine. The next sub-assembly is for the peddle box, which consists of two halves, between which the brake and clutch pedals and a spacer bar are sandwiched. Each of the pedals are then fitted with their respective pads. Support bracket and box structures are then attached to the top of the box, followed by the steering column and steering wheel. The centre console of the cab is the fitted with the lid of the large storage box, whilst the two seats, each made up form three parts are also assembled. Each of the cab doors are also assembled, each with from the outer skin, clear part, door card and associated handles. The centre console is attached to the single piece floor moulding along with the accelerator pedal and seats. On the outside of the cab, just behind the rear of the centre console a selection of five levers which make up the oil tank pump controls are fitted. The instrument binnacle is fitted out with the various instrument decals, gear stick and the co-drivers grab handle before being fitted to the raised section of the floor moulding in front of the centre console. The single piece cab is then fitted with the two door assemblies, two windscreens, two rear screens, two quarter screens, a vent cover and the grille. The cab and floor assembly are then attached before the roof is fitted, followed by the headlights, with their clear lenses and side lights. To finish off the cab, two, two piece frames for attaching to the chassis later on, are attached to the underside, followed by the windscreen wipers, mud flaps, spotlight and two, three piece door mirrors. The completed cab is then put to one side to dry properly. Moving on to the running gear and each of the five tyres are fitted with their two piece rims, with the driving wheels also fitted with centrally mounted caps. The spare wheel frame is now assembled with the two frame rails joined together by seven crosspieces and two wheel supports and trough. The frame also carries the three piece pump unit for the oil tank and a two piece tool box, oh and the spare wheel, or course. The next sub-assembly is that of the winch unit. This is made up from the drum, to which a universal joint if fitted, this attaches to the four piece gearbox and three piece support frame. The front and rear differentials are assembled next, each from two halves, and fitted with the over and under spring clamps. There are two large air accumulators, and each of these are made up of two halves, to which a two piece valve is fitted as well as the support frame. The large oil tank consists of two halves split horizontally, which, when joined together are fitted with the rear mounted two piece hose box, followed by the two top mounted hatches and their frames. The tank assembly is then fitted to the supporting frame/walkway, which has two grab handles attached on top and two light clusters to the rear underside. The tanks two pipes are fitted between the tank and the hose box, and the underside is further fitted out with the front wheelarch sections which are held in place with two PE support struts. On top of the tank there is a long pipe attached, and fitted with to tap pipes connected to the hatch frames, whilst on the opposite side there is a long handrail. Usually assembled at the beginning of most truck kits the chassis construction finally takes place. Each of the chassis rails are fitted out with the air accumulators, cab suspension springs, suspension mounts, and two, two piece oil tanks. They are then joined together by five cross members, with the front capped off by the winch assembly and the rear capped off by the hook mounting strut and its associated braces. The tank supports braces are then attached to the rear of each rail and fitted with U clamps, whilst at the other end the engine assembly is mounted to the front cross members. The front bumper is then fitted along with its PE brackets, along with a PE footplate and a PE tow eye. There is a small power take off box fitted to the rear of the engine which will eventually connect to the pump unit on the spare wheel frame. On the underside of the chassis, the four leaf spring units are attached along with their respective clamps. The exhaust pipe is then attached to the exhaust manifolds of the engine and clamped to the right hand rail about half way down the chassis. The front differential is fitted with the two, five piece hubs and ball joints, along with the steering rack. The two differentials are then glued into position along with the three piece transfer box and joined together by the three drive shafts, each with separate universal joints. The radiator housing is made up from the housing, radiators rear mesh, front mesh, and top cap, along with the intercooler and two support struts. The assembly is then fitted to the chassis in front of the engine. On the upperside of the chassis, several support frames are attached, along with the rear PE bumpers, which need to be carefully bent to shape using the jig provided, as well as the four shock absorbers, and anti roll links. Each of the two petrol tanks is made up form top and bottom halves, two piece filler caps and their respective pipes. These are then fitted to the support frames fitted earlier. Tow small two hooks are fitted to the rear chassis cross member via two PE plates. The truck really starts to come together now, with the fitting of the four wheels, oil tank assembly, spare wheel rack and finally the cab assembly. There you have it, one complete GAZ 66 model. The model only comes iin one colour scheme, that of overall light green with a black chassis. Decals are provided for the number plates and that’s it, no placards or anything that I would have thought an oil truck should have, but then it is Russian and they never seem overly concerned with the sort of signs we in the West go mad for. Conclusion As trucks go, this one is rather cute and will look great in a collection or in a diorama with one of Trumpeters big 1:35 scale helicopters. There is an awful lot of detail that is lost once the cab and tank go on, but if you do a bit of research then you may be able to display the cab open and the beautiful engine on display, although you will have to add some more pipes and wires to do a proper job on it. Also the hose box could have done with the option of having it open with all the valves that are necessary for pumping the oil out. That said it’s a great looking kit and I can happily recommend it to truck modellers and normal modellers alike. Review sample courtesy of UK Distributors for
- 5 replies
-
- 2
-
-
- Pocketbond
- GAZ-66
- (and 2 more)
-
GMC CCKW 750 Gallon Tanker Model: HobbyBoss 83830 Born into battle during World War 2 this warrior fought it's way across Europe with the 3rd Army and kept the Army Air Corps fighters fueled. But, as with all old warriors and with the wars end it was put out to pasture. It's now 1949 and along comes Army Mechanic PFC Alvin King, demobbed from occupation duties and now an ex-GI looking to use his GI Bill to start a business. So, he looks for a truck to keep the locals back home supplied with fuel oil. On going to a surplus sale in Memphis he picks up this old tired tanker. She needs a little work, but it's a start! Using his old contacts at home he gets some contracts to deliver heating oil and starts to earn a steady income for himself and his new wife Milly. King Gas is born! Alvin gets some surplus blue and white paint, mixes it together and paints the truck to cover up the now faded Army Olive Drab. It's now 1951 and the fuel tanks have had their day, they're starting to leak and that's costing Alvin money. So, it was off to another sale at a scrap yard where he found a wreck of a truck but it had 2 good fuel tanks. He bought the tanks and had his own replaced. They were a hideous red colour but once he had them installed he had every intention of repainting them into 'his' distinctive blue colour – no more blue left! Milly had taken it for the house porch. While he was at the yard, Alvin also replaced the drivers side door and wing mirror damaged the year before. His fuel truck was now a mishmash of parts but he could still go about his work. He needs the work, he and Milly are looking to start a family but times are hard in the mountains. Another year passes and the bodywork on the truck is now starting to really show it's age although the engine and chassis are still OK, and spares are becoming short at the yards. It'll soon be time to get another truck but not right now, need to earn a few more bucks and get some savings. Milly is expecting their first baby and cash is tight right now! Alvin is doing 14 hours a day and just keeping his head above water but his customers are loyal and he keeps soldiering on ….......... This model build was an exercise in weathering and distress but over the time of this build a story was born. I used this story to place the model in context and with it came the amount of weathering needed. The story of Alvin is fictional but cannot be so far removed from the times that some of it must have a ring of truth to it. I hope you have enjoyed following this build and may join me again on a future project. Constructive Comments Appreciated Build shown in Work in Progress Also featured on our website at Leicester Modellers
- 11 replies
-
- 18
-
-
Been off the scene for a while sorting things out following my Redundancy (a good thing actually!) So, here we go with a new build using the recent HobbyBoss release of the GMC 750 Gallon Tanker. Over the last few days I have been putting together this really good kit This is a busy kit! And has plenty of parts but, there are NO rubber tyres (I know some of you hate those) There is quite a detailed engine which is an integral part of this build and you can't get past this. The chassis has 17 parts + the engine which in itself comprises 20 parts This construct is very stable and sits very flat giving a good base to ensure that all the wheel seat correctly. Note: the location of the exhaust as shown in the instructions below shows a much shorter tubing either side of the silencer box and it is, on checking, incorrect for this version. When assembling the exhaust, (unlike the instructions) the supplied kit parts are correct. Incidentally, the large vehicle fuel tank seen at the start of Step 4 is shown as part M12 however, it comprises parts M1 &M2 (the ends) and M12, the centre section along with M10, the filler cap. To also note here is how the exhaust should be for the 750 gallon Fuel Tanker. Believe me, I checked several times and changed the exhaust a couple of times. Here are the main elements assembled (not glued) This kit really does assemble very well Yesterday I completed the engine bay construction which can be seen below Now then! The Tanker kit has 14 Jerry Cans to assemble but, you can save yourself all the bother AS THEY'RE SO WRONG! Below you can see the HobbyBoss can (Yellow) and the Italeri one (Grey) The dimensions and based on the conversion of the dimensions of a real WWII pattern US 5 gallon Fuel/Water can from inches into millimeters and then converted into 1/35th scale. The real can is (width 13.75"x depth 6.75"x height 18.75") which equates to 9.98 x 4.90 x 13.60 The yellow can (HobbyBoss) at 11.00 x 4.49 x 14.71 The grey can (Italeri) at 10.04 x 4.49 x 13.25 This then means that the HobbyBoss can is at least 10% larger than the Italeri one, and although it isn't completely accurate, it is noticeably closer to the correct dimensions. Make of that what you will! I now have the model at the painting stage and further postings will follow that stage
-
All, I've never done any maritime modelling before but I'm looking for some kits of modern tankers to build for the office where I work. I've been doing some aircraft for a while and thought it might be an interesting project to have a crack at. That said, I can't actually find any kits of modern tankers anywhere? Do such things exist? I see that Revell do a T2 tanker that seems rather difficult to come by, but I can't find anything else. Any suggestions, tanker or other merchant ships, would be appreciated. Cheers, Richard
-
Dodge L-700 Tractor Unit with Chrome tanker or Box Van Trailer 1:25 Plastic kit from Lindberg Models The Dodge L700 is a medium duty truck manufactured by Dodge trucks in the USA using components from there A100 light duty trucks. The L-700 was available with either a Dodge, or Cummins V8 engine. The L-700 had a smaller sibling , the L-600, that was outwardly similar but designed to pull smaller weights, this had the option of straight 6 diesel of a V8 Gas engine. The Dodge L-700 was available as a tractor with a very short 89inch wheelbase, and a steering angle of 50o for great manoeuvrability in towns and cities, where this truck was designed to live and work. The L-700, and L-600 could also be specified with a longer rigid chassis up to 192inch wheelbase and the Dodge had various bodies, and pulled a variety of trailers. Lindberg have now re-issued the Dodge L-700 in 1:25, this is an old kit but a welcome re-issue.A couple of versions of this kit have arrived on the review bench and as they are very similar I will start by looking at the cab and tractor as they are the same in both boxes. The cab comes as a single part cast in white plastic, the doors are separate to the shell to allow them to be posed open. The cab has some reinforcing bars cast across the door apertures to help the cab hold its shape, take care when removing so not to damage the frame, the cab is nicely done and captures the complex shapes on the cab. The doors are moulded on a different sprue, and they have separate interior door cards. A quick check shows them to be an OK fit, will need some work but I don’t think it will be too hard to get them in and straight. The parts on both kits are nicely cast with very little flash anywhere. I will guess Lindberg have cleaned up the moulds for this re-issue. The interior and floor are cast with the big wheel arches, there is some nice engraved detail on the cab floor showing the rubber footwall covering and some rivet detail on the cab floor and wheel arches. There is no detail on the underside and this is a shame as the Dodge L-700 is a tilt-cab, and on this kit the cab can be tilted to show off the V8 engine. No doubt the detailers will go to town here, Ill add some foil for the heat and noise shields and a few wires and cables under here. The cab interior parts include the basic dashboard as found in this truck, there isn’t allot of detail on the part but in reality the real truck is basic, there are 3 seats that have some nice engraved detail to simulate the stitching in the covers. Some careful painting will bring the interior to life, and I would add some scale cab junk to be viewed through the big windows. Also found on this sprue is the engine parts. This is a small V8 diesel engine, the truck had the option of 2 engines and I’m not sure what is depicted in the kit, but a quick search will pop up some images of either engine to allow you to detail and paint the parts to depict your choice of power. The parts are well moulded with a fair amount of detail on the parts, some extra cables and wires will bring it to life when painted. Also seen in the sprues above is the rear axle, the Dodge has a choice of a single or 2 speed axle, and my guess is a twin speed example is tooled on this build again there is good detail with the rough cast housing and some bolt details on the parts. The chassis is made up from 2 rails that look very short for a tractor unit in this scale, but a quick calculation and looking at side on shots of the real deal on the net show them to be correct as it is a very stubby tractor, and I guess this makes it more use in an urban setting. The chassis is made up from the 2 rails and 5 cross members so you will need to take care to get it all straight and true so you build isn’t twisted. The truck is suspended on 4 multi-leaf springs and 2 axles, the two speed rear axle is described above, and the front axle that is supplied can be build working so move the steering lock. Personally I pose the wheels turned a bit then glue solid for strength. Fuel tanks, air tanks and the exhaust are in 2 parts each so will need gluing sanding and filling before painting and adding to the chassis. A pair of large rear spray flaps is included, they are quite thick and have the IPC logo cast on the parts so I will remove them from the mounting and replace with some thin plastic painted black. The wheels are the trilex style, popular at the time in the States, and they have nice detail on the parts with some bolts in the appropriate places. Also on this sprue is the internal door cards for the cab, again basic as is the real truck with some winder handles for the opening door windows and rivet detail on the parts. There is a clear sprue for the cab glass and lights, they are packed in their own bags and don’t look too thick. A small chrome sprue covers the shiny bits for the cab, the bowls for the headlamps come on this chrome sprue and they include the bezels for the lamps and these are a big feature on the Dodge cab. The cabs bumper is also chromed along with the regulation cab roof marker lights along with wipers, and handles for the cab outside. The chrome is nice and not too heavy but along with many others Ill strip and re-do this anyway. A bag of rubber tyres are enclosed, 14 are included for the tractor and trailer. There is some flash on the tyres that will need a swipe with a knife or sandpaper, nothing too major though. The detail is nice, I would say a little heavy on the sidewalls but as I rub the rubber with some sandpaper to dull and weather it a bit and I’m sure this will subdue this. This now concludes the parts for the tractor units for both kits as I said you get all the above plastic in both boxing. I will now look at the trailer parts from the two kits. Trailer parts Chassis The chassis and running gear is also the same in both kits, both trailers run on two axles sitting on multi-leaf springs. The tanker version does have some basic detail on how to convert to a single axle trailer, but as I said this is basic detail and not complete! The parts are again cast in white plastic and there is some minor flash on some of the parts, You start by making a small chassis frame that holds the suspension and axles. A single air tank need gluing together and adding before the suspension and axles. I would pop some wire in to simulate the airlines for the braking system, and also some cables for the electrical wiring on the trailer. The axles include the hobs and brake chambers, I’d drill and plumb these to the air tank to give extra detail on these parts. The wheels are the trilex style to match the tractor unit with the same rubber tyres shown above. You have optional long or short landing legs so you can hook it to your tractor (short legs) or have it as a solo model (Long legs) Tanker The first trailer I will look at is the chrome tanker, this can be built as the long version shown on the box, or a shorter single axle version. As I said the instructions on how to achieve this is sporadic and you will need to take care and take your time if doing this conversion. The tank comes in 4 main parts, 2 upper and two lower with a joint both horizontally along the tank, and vertically in the centre. The parts are designed to hide this with overlaps on the parts. To build a short tank you need to forward upper and lower parts and in the upper section you need to cut a hole for the manhole, this is shown on the underside with an engraved circle to follow with your knife. There is a lot of chrome with the rear locker, hose lockers and ladders all being chrome. It wouldn’t be hard to strip and re-paint either as a lower spec painted trailer of using your choice of chrome paints. Box Trailer. The second trailer on the review bench is a box van style. This is very 70s in style with its vertical beading on the side walls and the twin axle design. The body is supported by the same chassis and running gear as seen above on the tanker so I won’t go over this again. The body is split across the middle with the roof, floor and sides split needing a centre support part. You start by building the chassis and running gear, adding these to the 2 floor parts to create a flat bed, there is some basic detail on the floor, and if you add a small headboard you could leave it as an open flat trailer. The rear doors and frame is build next, the doors and be left to swing on the hinges if wanted to allow you to open and close them to show the inside of the trailer. The sides, back door section and front bulkhead are then added to the floor using the central support to hide and reinforce the joints, take care to keep it square and straight before adding the two roof sections. In this kit you get a couple of scale wood pallets for the load, they come in a light brown and are made up from slats of plastic glued together, painted and weathered they will look good with their fine engrave wood grain surface. You don’t need to worry about making them too square or straight either! A small decal sheet includes some logos for the box van, the Lindberg logo for the two sides and rear along with some US flag and the ‘Made in the USA’ legend under the flags. Conclusion A very welcome re-issue of some classic kits, they will need some work to get tighter being older mouldings, but them where a popular little truck and this can be converted to other L-700s and even the smaller L-600 trucks. Look forward to getting it on the build bench. UK distributors for
-
-
This is the RAF's Tactical Aircraft Refueler version. Pics thanks to Mike (the gaffer)
-
Mercedes Benz Axor 6x4 ridged and Whale tanker


