Search the Community
Showing results for tags 'noob'.
Found 2 results
-
Hi guys i bave recently got into airbrushing so i am getting to grips with priming my models i was just wondering do i need to thin the vallejo primer or should i spray from the bottle ? and if so what PSI should i be spraying ? thanks brandon
-
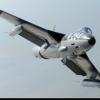
Nothing special here, really, just wanting to participate! My Eduard 1/144 FW-190 started to annoy me and, after a visit to Hyperscale, I realized I should've completely assembled it before priming instead of trying to paint some parts while still on the sprue. Oh well. This build is the first one I'll have completed after 20+ years away. It's not perfect by any means. Nor is the kit. It's a Hobby Boss "Easy Assembly" so it's not really a "serious" kit. That's fine by me because all I'm doing is getting my basic skills back and learning how to do things I'd never done as a kid (like filling gaps). It went together very easily, and dry fit together pretty well. In hindsight, I should not have painted the nose gear before assembly, since I'll probably just have to repaint it after priming and painting, but it's part of the cockpit assembly so I ended up painting it. Cockpit was brush-painted with Tamiya acrylics and a Vallejo umber wash, so you're not missing anything - and there is literally no cockpit detail. A seat, a control stick, and a blank "instrument panel" that I painted gloss black. No raised detail, no decal for gauges. Nothing. I got overzealous on some parts, particularly one of the tailplanes, and sanded the detail right off it (see Pic #2). Oh well. That's why I'm starting on a cheap kit! Same with scribing. It's just a little too small for my Trumpeter scriber, I think, and I ended up leaving the panel line in some places and scribing the plastic. Guess I'll touch with thinned Tamiya Basic Putty and try to scrape off any excess with a #11 blade instead of sanding. This baby, unsurprisingly, is an awful tail-sitter. I'm gonna try coating some fishing weights in PVA glue and rolling them into the nose and hopefully they'll stay put after a couple hours in the same position. The instructions have some pin and tube assembly fitting into the back of the propeller spinner so it can spin after construction, but it's too loose and sloppy. I'm just gonna tack it in place with CA and then run Extra Thin around the rest of it. Pointers and constructive criticism are much appreciate, as like I say, I'm just trying to rebuild my basic skill set after a couple decades! Cheers, lads. Gonna try to finish filling, do more sanding, and try rescribing with a template tomorrow.
- 7 replies
-
- 3
-

-
- easy build
- p-39
- (and 1 more)