Search the Community
Showing results for tags 'Xh558'.
Found 25 results
-
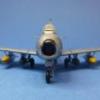
Just finished the first of two Trumpeter Vulcans today. I'll write a brief summary review of the kit after the images as it's fairly new. I used aftermarket decals from Fündekal and some spares from a GWH Vulcan to improve on the kit, such as the wheels and pipes under the engines. Some small mods were made such as reprofiling the nose to remove the TFR blister and the tail cap to remove the RWR fairing. Ignore the incorrect engine type, these will be replaced with ones closer to Olympus 201s when I get another GWH kit. Next to my first B1a conversion One can never have too many triangles My model flying over RAF Waddington (thanks to @robvulcan for editing this) Here's the WIP thread, still ongoing as I have a second one of this kit I'll be starting on Friday and plans for even for Tin Triangles Brief summary review: Accuracy 4/5 Fit 4/5 (intakes 3/5) Detail 4/5 Quality of moulding 4.5/5 The good bits: .Well shaped intakes .Correct tailcone angle .Fairly easy build .Wing shape is spot on .Option for blue steel missile or conventional configuration .Well detailed IFR probe (not used on my build) .Correct landing gear length an't forget that beautiful box art! Main issues: .Incorrect nose profile .Poorly designed jetpipes, only has jetpipes for Olympus 301s, but decals for 201 engined Vulcans .Bomb bay doors lack detail and are incorrectly shaped. These need a rescribe at the very least. .Missing fin for the Blue Steel Missile (I didn't use this option) . Parts of the engine moulded too the ECM plates- these should be seperate as they should still be visible when the ECM plate is not installed under the left wing as was the case on most Vulcan B2s .Weak landing gear . Incorrect radome shape (corrected on my model) .Incorrect paint guides .Decals should be replaced with aftermarket Conclusion: Overall a good kit that can be built to a respectable level of accuracy with a little effort, although aftermarket decals are a must. Unfortunately, they only moulded one set of jetpipes which limits you to just under half the Vulcan B2s built, and if you can't find a replacement for the pipes under the engines which are moulded to the ECM plates you're limited to a very small number of airframes. Of course you could overlook the jetpipes as I have here. Compared to the Great Wall Hobby (Pit Road) Vulcan in the same scale, it's probably slightly better and slightly more accurate but both have their advantages and disadvantages. I would absolutely recommend this kit to anyone who's built a few kits and has some filler for the intakes- you will need it.
-
Finished at last, after a ten month build, and my first RFI. I really wanted to do this kit justice as the Vulcan is my favourite aircraft. My first encounter was in the early 70's when as a 9yr old we moved to Pontefract, Yorkshire and I remember the daily flights of Finningley's Vulcans over the town. Then there was the Vulcan scramble I witnessed at the 1977 Finningley air display to mark the queens Silver Jubilee. Anyone who has seen a Vulcan scramble will remember the sound waves travelling through your body and the ground shaking beneath your feet. The Vulcan was and still is, awesome in the truest meaning. I last saw XH558 flying at the Yorkshire air show at Church Fenton last year. I admit now that I had a tear in my eye as I watched it fly away for the last time until it was out of sight. So as you can appreciate I really wanted to do this kit justice, abs make it as accurate as I could as my own personal tribute. Hopefully I've achieved that. I started by rescribing the whole aircraft before I even began to glue anything together. I thought that it would be easier, then it would be a job of cleaning it up to make sure they meet when the parts were joined. I did think that I'd scribed them too deep, but looking at it now I'm happy with the results. Then there are the corrections to be made to the kit to accurately depict XH558 as she is now. First job was to remove the TFR radome off the tip of the nose. And at the other end, the cooling air intake (the elongated box) that fits on the right hand side of the tail is not fitted to XH558. I've also hollowed out many of the various air intakes and made the ducts inside the splitter plates inboard of the air intakes. I replaced the engine jet pipes with resin replacements. The kit comes standard depicted with Olympus 301 series engines and XH558 is fitted with Olympus 201's, the 201 jet pipes being narrower and longer. The other thing I wanted from the outset was to display her wheels up in a way that shows off the iconic Vulcan wing shape. I also wanted the underside to be clutter and hence stand free, so I had the idea of brass tubes up the exhausts and thanks to a friend who made the wooden base I have managed to achieve it. If anyone is interested, the work in progress thread is here - Vulcan WIP Here are the pictures I've taken so far. I managed to get some outside today as well. Hope you like. And finally here's a couple of pictures of her in her new home in pride of place. Thank you very much for looking, hope you liked it. Mark
- 79 replies
-
- 77
-

-

-
Hi all well this is my first post of the year I have been busy with a kit I have become particularly fond of and I have been looking forward to sharing these with you. I really would have liked to get some natural light shots but unfortunately I've had to resort to flash photography which I'm not keen on so maybe some better photos later should anyone like to see them. XH558 1992 scheme I tried very hard to get the cammo pattern right on this or as near too I tried to recreate her as I remember her when I was a kid and made up various decals for the entrance door script and large ejection seat triangles she used to carry I also extended the tail pipes. XM650 B2 a citadel wash was used for the panel lines XM605 giant voice markings citadel wash XM575 VX777 This one took 4 weeks to modify. the tail cone is wet finger shaped out of milliput using the supplied blue steel missile as a core and the tail extended using the spare supplied tail. the engine exausts were made out of airfix vc10 axle mountings. the air intakes were left as per kit. and the wings simply filled down to shape. the various parts removed from the engine tunnels and skybolt hardpoint plate plate removed. with XL321 from last year and with XH533 which i modded the rear to the type 2 cone last year and XL321 Group shots with others and a painted and restored wiking b1 xa906 Thanks very much for viewing look forward to your thoughts.
- 36 replies
-
- 11
-
-
- DRAGON AVRO VULCAN
- VX777
- (and 8 more)
-
This is my first build on the site, so it's in at the deep end with the Airfix Vulcan. I'm about 18 months into my rekindled hobby (after a break of about 20 years). I have recently invested in an airbrush and this will be my third airbrushed model. I am also going to re scribe the kit (only the second kit I've attempted this on). Other than that it's going to be pretty much standard kit. I've got a VIP tour of the real aircraft booked for mid April, so intend to take lots of photo's to assist with the build. This is going to be my big build for the year, taking my time, dipping in and out of it, so please don't expect rapid progress. I've made a start by washing all the parts and taking the wings and fuselage off the sprue's. As I'm re scribing, I though this would be more easily done as the first job. There's lots to do on the wings and it seems easier lying them flat on the desk. As a point of interest, this is my workspace. And this is the work I've done so far with the scribing, and removing some flash from around the edges. I've started on the wing on the right. I know there's been some epic Vulcan builds on here, I'm just hoping that mine doesn't let the standard drop too far.
- 114 replies
-
- 16
-
-
Here’s my second RFI on Britmodeller, and my second model since taking up the hobby again. A 25 Year Falklands Anniversary boxing of the venerable Airfix 1/72 Avro Vulcan finished as XH558. Have been working on it for ages – I didn’t really appreciate what a big bugger it was until it started to come together – it was entertaining trying to shoe-horn it into my extractor booth! The tool is 80’s vintage, dating back to just after the Falklands War and it’s really showing its age with nasty raised panel lines and more flash than Gordon! Also the fit of the wings was the worst I’d experienced, taking an awful lot of filling and sanding. I discovered Deluxe Materials Perfect Plastic Putty and happily ditched my nasty smelly Squadron White Putty. I syringed in the new filler with one of their Pin Point Syringe thingys and then smoothed it with a wet finger or paintbrush – hardly needed sanding. Pity I’d already sanded off most of the surface detail by then getting rid of the blobs of rock hard Squadron! Airfix really should do a new tool for this aviation icon. Loads more firsts for me with this build: First airbrush camo and so first time with yards of white-tac worms and Tamiya tape. I had to choose the largest surface area for a 1/72 model and both sides in camo for my first try. Should have tried a Spitfire first! First resin – Freightdog tail pipes – see below. And isn’t resin dust horrible! First panel line rescribing – again, I had to pick this model! More little bits of scratch building rectifying mistakes or lost bits. More confident weathering I’m quite a fan of Vulcans so have lots of reference materials. The VTTS’ own books were the most useful with hundreds of great images along with the Haynes Manual and Aviation Classics magbook. Postings on this forum were also a great assistance. Finishing off a 1/72 Airfix Control Tower next as part of a diorama build and then onto the Dambusters Lanc! So happy looking and thanks to anyone who cares to comment! Laying down the camo Time to play dirty! Flory Grime all over my pride & joy, sloshing into my laboriously scribed panel lines. And underneath, with loads of nasty raised lines ... The Grime wash gave the model a nice 'used' look. I know they keep XH558 nice & clean but you can't disguise the wear & fading of a rather elderly airframe. I finished it with a gloss topcoat as it always seems to be gleaming in the pictures! Didn’t have much fun with the decals. I don’t know what vintage they were in my 2007 25 year Falklands anniversary box, but they pretty much all suffered from silvering around the edges that no amount of MicroSol/Set could cure. Irritatingly some of the decals broke up on handling even after a coat of Humbrol Clear so there was a bit of patching needed. From photos, I noticed that there was some discolouration around the front cockpit windows so I tried to replicate that. You can just see the face of the co-pilot through the side window! Only noticed quite late in the day that there are two small side windows for the other crew shown as a recessed circle. Had I noticed earlier, I would have drilled them out & shoved some clear plastic in. I think I read somewhere that there’s a Deluxe Materials product you can brush on from the inside to imitate glass – would have been perfect for here. The numerous hours spent rescribing the panels lines on the top surface were worth it in the end. I wonder what that white/silvery panel along the spine at the top is for? Not sure what the odd shaped discoloured panel at the bottom of the tail fin is for – I saw it removed in a picture when they were doing servicing. Any ideas? I tried to replicate the fading seen on today’s airframe. For the rivet counters amongst you, I followed the instructions from my 2007 pre VTTS kit which told me to put the pod on the side of the taper behind the tail fin. Not sure what it is or what it’s for, but subsequently I saw from photos that XH558 doesn’t have it. Rather than prise it off and have more filling to do, I’ve left it as a tribute to other Vulcans and even adorned it with the appropriate decal! It also told me to paint the air intake interiors white so had the joys of trying to paint them in camo once assembled. The Freightdog Models tail pipes. I bought them after I’d assembled the wings to the fuselage but soon realised that they should have put in during assembly so my first experience of resin was a bit scary! Lots of sawing, hacking, sanding, filling, sanding etc. But I’m really happy with the result – much better than the originals. I retro-fitted some extra nose weight just in front of the bomb bay after fitting the resin tail pipes as per the Freightdog instructions but it’s still a bit tail happy & will tilt back with a bit of a nudge! I scratch built a sort of coffin with one half of a Blue Steel missile, filled it with lead shot and glued it under the front wheel well. It’s not quite forward enough and also partially melted the roof of the well! Couldn’t face the idea of rescribing the under-surfaces – would have taken me weeks! Apart from giving the surface a nice ‘used’ patina, hardly any of the grime wash stayed on the raised panel lines. The bomb bay was a big disappointment on this model – the doors were really thin & flimsy. I built some ribs out of sprue which helped but in the end they were held in place with filler more than anything else! After it was all sealed up I found that you can get after market bomb bay detailing – will save that for my next Vulcan build! Would have loved to have added some extra detail to the wheel wells – will save that for a subsequent build! Just a bit of dirty goo for this one. Thanks for looking!
-
Good morning, I just thought I might ask the advice and opinions of members of the forum in regards to a project i'm starting. I was thinking of doing a 1:72 Airfix Vulcan "properly"; with aftermarket engines, intakes (possibly, you'll see later) and the white ensign model (WEM) stuff. I've also thought it might be an appropriate model to do some rescribing for the first time, along with flory washes, photo etch and resin- I had to choose this model So the few questions I would like to ask are as follows: 1. Can you use a steel ruler and is it adviseable for linear panel lines as a guide- rather than masking tape? 2. (Perhaps the most important decision) Which Vulcan to do?! I've got a choice between XH558 and XL360- having been in XL360 and purely because I quite like the 617 tail marking (I might be turning into an "anorak" ) I feel a greater sense of attachment to her, although I have seen XH558 display at Throckmorton last year and so I am quite keen on her too! 3. Should I have "everything" open (gear down, airbrakes down, bomb bay doors open, crew hatch open)? Or should I save some money and (if I should choose XL360) build the Coventry Vulcan as it currently is (and save additional money with FOD covers for the ghastly kit intakes)? Note: I would have built the Cosford Vulcan but I'm not keen on the highly glossed finish of XM598 4. Any other advice for building the Airfix kit? Joins to watch out for, etc. I know that 2 and 3 are very subjective points but I would greatly value your opinions. Many thanks, Sam Edit: the 617 tail marking on XL360 Edit 2: -Are there any definitive colour matches out there for either 558 or 360?
-
 Good evening all, First of all, apologies about the photos-they're not the best.... Secondly, being a rather large Vulcan fan I thought why not try the Cyberhobby 1:200 kit, I would have never thought of buying one, but it was on Ebay for £5. And oh, my. What a kit! The panel lines are crisp, the decals are outstanding and the options available (shrike, blue steel, gear up/down, open crew hatch, etc, are quite varied. It even includes parts for the instrument panel and ejection seats-which shockingly also include control columns!!! A brilliant kit- the one issue being that the pressure needed in order the keep the upper and lower wing sections mated together while gluing is fairly substantial-requiring a clamp to get a good fit. Furthemore, it doesn't come with a bomb bay, so I've scratchbuilt a fairly crude bomb bay and managed to squash that into the aircraft. -Painted using an airbrush and Vallejo "Model Air" colours. Scratchbuilt bomb bay- including hand painted VTTS logo and a sponsor's logo inside (very messy, i know!) So, that's pretty much it from me, Thanks for having a look around Sam
 -
In honour of the lady herself, lets see the best of XH558, post what you have! Vulcan B.2 XH558 by tony_inkster, on Flickr Headcorn 2015 Vulcan B.2 XH558 by tony_inkster, on Flickr Headcorn 2015 Vulcan B.2 XH558 by tony_inkster, on Flickr Yeovilton 2015 V-Formation (Vulcan, Vixen, Vampire x 2) by tony_inkster, on Flickr Yeovilton 2015 Vulcan XH558 by tony_inkster, on Flickr Cosford 2015 Sneak attack by tony_inkster, on Flickr Throckmorton 2015 Vulcan B.2 XH558 by tony_inkster, on Flickr Throckmorton 2015 Dogfighting Vulcan style by tony_inkster, on Flickr Dunsfold 2014 Avro formation by tony_inkster, on Flickr Coningsby 2014 Cold War Warrior by tony_inkster, on Flickr Waddington 2014 Vulcan B.2 XH558 by tony_inkster, on Flickr Waddington 2014 Avro Vulcan by tony_inkster, on Flickr Waddington 2014 Vulcan_7 by tony_inkster, on Flickr Dunsfold 2012 Vulcan B.2 XH558 by tony_inkster, on Flickr Robin Hood 2011
-
Afternoon all, I was just checking twitter (I am not at any of the Vulcan's displays today) and it appears the Vulcan has returned to base at Doncaster with a possible fuel leak. I do hope they get it fixed so she can be ready for the planned "final tour" that the VTTS are thinking about. Thoughts? Sam
-
 Hi Everyone, I have rethought my post and have limited it to just the picture of XH558 that I took yesterday. I have deleted the Facebook album from my profile and will be deleting the photos with the exception of the one below from my photobucket account as well. This photo shows the last time I will ever see Vulcan XH558 flying where she belongs : IN THE AIR. I asked the staff at the Vulcan Village to pass along my thanks to the crew for doing this flypast. I will miss the sight of this aircraft flying and will never forget her. All the best, Rick
 -
 Well I have had a very stressful few weeks and in between my commitments went to Southport Airshow. I have just got to the stage were I have worked myself to illness and need to recuperation chill time and have decided to build yet another model of a Vulcan. This is the little Dragon Kit 1/200TH Scale and despite its size being about that of a 1/72 scale spitfire it is the most accurate model of a Vulcan available except for a strange extra 2 wheels for the front which you don't have to fit its got the shape right including the nose. and splitter plates. I wish they would blow this one up to 1/72 scale it would be fabulous. I am doing mine as XH558 (again) This time I really want to make her look as she did in 1992 when I first seen her I have got to an age where I am starting to feel old and nostalgic about that era I also wish to use her as a colour experiment for some paint I am hoping to use on a bigger project. So far I have: Cleaned up and primed then painted the intake halves using Revell Gelboliv with black added to deepen the tone. then glued them together and sanded the seams then painted them with a bit of sponge glued to a cocktail stick to get all the way inside them. I always add W&N Flow improver to the paint to stop streaks and make the paint level off. Then I sprayed the inside fittings and inner intake lips with HU64 as a Primer I also use this as faded MSG often and will likely do for this build. Then Painted it with the Darkened Gelboliv. Then I used a sewing needle for the IFR probe, I recently started fitting these to my older builds of this kit as for some unknown reason it never occurred to me before, The hole was drilled by hand with a 0.8mm bit from hobbycraft in a Pin-chuck its surprising how easy these drill bits cut in. I never fancied using the tiny plastic job which is less strong that a hair it seems. I fitted this with super glue after checking the length was right. This time I actually bothered to fit the seats just to mount the Sewing needle onto. After priming I brush painted the Engine faces with 3 coats of Revell Aluminium again with Flow Improver added, Its fantastic paint and brushes very well its also highly reflective. So I am back at it, I know I have lots of other threads started but I as I will be soon busy in a few days this is just a bit of much needed RnR as I love painting so much these kits offer just what I need. I wish Cyberhobby would continue their line of 1/200 models they are all wonderful and "Fun" kits. I also picked up cheap their premade model of XH560, I bought this out of curiousity to see how it faired against the kit, It is the same thing molded in ABS Plastic, Not totally satisfied with it I have started correcting it and the first thing I did was start breaking it down as it was just taked together with super glue, I have since repainted the Intakes LAG , These were not painted despite the design cleverly allowing you to paint them white or Light grey as on many Vulcans, I also obliterated the fin flashes which were reversed on one side and will fit new decals, I then Drilled and fitted the IFR probe again using a sewing needle, and removed all the awkward pitotube/aeriall thingys which were not all accurate and clumsily fitted, I will just fill the holes over and patch it up. I also removed the TFR Thimble as XH560 did not have this. I also patched up the green paint on the inner intake lips they missed off with Revell Nato Olive which matches the colour they used and looks like Faded RAF green. Then I super glued it all together again and now I am masking the the bottom off to spray grey instead of white and then go over with LAG, So its like a part build kit now. I had always thought that all vulcans that were in the original and later camo schems had white intakes (because airfix said so) but It seems looking at photos many of the 70s one had Light Aircraft Grey or white, I always thought it looked like that, Lesson learned don't always believe all you read, trust your eyes. I have had withdrawal symptoms,, Never knew modelling was truly "Adictive" Cheers Rob
- 122 replies
-
- 11
-
-
- Dragon Vulcan B2 XH558
- robvulcan
- (and 3 more)
-
XH558 pics thanks to Martin.
-
This is the Airfix Vulcan from the 50th anniversary boxing. I was bought the kit by my mum who wanted a model of the display Vulcan. How could I refuse! I remodelled the nose and refuelling probe to match the current look: The only aftermarket addition - Freightdog 201 exhausts It's such a familiar kit, I forgot how old it is and the building pitfalls are many. To Airfix's credit, the kit decals were very good, and this particular boxing donates £1 to the Vulcan to the Sky Trust. Not exactly a pleasure to build, but a really impressive result. My mum is happy!
-
Hi gang, I was very lucky last week to get the opportunity to see the two Lancasters with their younger sister at the RAF Waddington event. originally I had been slated for work but managed to persuade my boss that I could go in later and still complete everything. Fortunately I live quite close to the base so got dropped off on the A15 and walked in. There was a long queue of cars parked on the verge as I walked past. Once in I headed for the barrier and staked a claim. It was perishingly cold and the skies were leaden and threatening. Slowly the perimeter began to fill with expectant folk who had travelled from far and near. The atmosphere was so friendly. I conversed with complete strangers as we all waited in eager anticipation. After what seemed like an age a fellow I was stood next to spotted two tiny silhouettes loitering on the horizon. Two Hawk trainers flew over before the Lancasters finally made their way over from Coningsby. In line astern formation the two beautiful bombers made a single pass before breaking for landing. What a sound! I'd have taken more snaps but a, I did n't have a long enough lens and b, I wanted to savour the moment.... The aircraft were landing into quite a strong headwind so the BBMF landed with a chirp of rubber, a puff of blue tyre smoke and an uncharacteristic bounce. The Canadian touch down was a lesson in aeronautics, beautifully judged and gentle. The pair then taxiied back past the tower and waiting dignitaries to park up on the perimeter track. By luck more than judgement I had picked a great spot to stand and "Thumper" stopped right in front of me. Waving the Union flag and Canadian Maple leaf, the other Lanc parked and switched off. The Canadian skipper spent a few minutes walking the crowd line and chatting with appreciative fans. Class act! To complete the scene, XH558 was towed from her parking spot to join the cast. Three AVRO bombers together at RAF Waddington. A very fitting venue for a unique opportunity. I had to leave at that point to go to work but it's a sight I will remember for a long time. I hope this brief description allows those folk who were unable to attend just the slightest taste of what it was like and for those who were lucky enough to enjoy the spectacle, perhaps this will help you re-live it. Cheers.
-
Hi Everyone, I don't know how many are followers of Vulcan XH558, but the trust have just emailed a newsletter around advising that XH558 won't be displaying at RIAT this year. Apparently the display schedule for the Saturday and Sunday are completely full, so the plane won't be there at all. I have always wanted to go to RIAT, but won't go as I love seeing the Vulcan fly. Sorry to be the bearer of bad news. Rick
-
Hi Everyone, Well here it is. After more than a year spent on the back burner because of me being afraid of the camouflage painting, I have finally completed my Vulcan XH558 model. My wife helped me do the camouflage painting. She did it completely freehand, without any masking method. She had never touched one of my models before but she did say that she enjoyed painting it, but wouldn't want to do the building. Anyway onto the pictures. Upper Fuselage Tail Decals Side View : Comments welcome. Thanks to everyone who gave me advice and help during the build of this project. Cheers, Rick
-
Hi all good britmodeller folk welcome to this the first of my multibuild on th WIP section. It has been fun and long and its no were near finished yet so if you want to follow the rest here is the link: http://www.britmodeller.com/forums/index.php?/topic/234936632-1st-one-finished-dragon-vulcan-b1a-2-b1-big-surgery-for-3-small-kits/ This model is a holy grail for me with special significance and a funny ironic link that makes me smile. For when I was a kid I had bought for me a video called the vulcan story in the middle was full colour footage of very pretty white vulcans that looked somewhat different to the vulcans I'd seen. My dad told me "there're b1s",,,, I said "b1s?" He replied "yes b1s they were before the b2s and a totally different aeroplane much smaller" he then said "get your grandad to take you to raf cosford they have a white vulcan and victor there from what I remember" From there the fascination started and me and grandad went vulcan hunting at cosford. We walked around and found no white vulcan or victor but we did find camo ones outside along with a trident argosy vc10 and Belfast oh and a javelin and blue steel missile all rotting away. Me and my grandad were best mates went to cosford alot and other places he loved aircraft and my models he give me tools and taught me much. It was only about 10 years later through the Internet I learned there was indeed once a vulcan b1 and victor b1 at cosford as late as 1986 and they scraped them (great british preservation in action) the vulcan was xa900 the last of its type and a totally different to the b2. I see the comet that was displayed with them survived. Later on last year I made a model of xh533 I modded the back end to the b1 tail my grandad said I should do a b1 so I did and decided to do a WIP and ended up ironically getting invited to bring it any others to cosford show by britmodeller friends general melchet, cliffb, Canberrakid and others Ironic cosford will be my first model show were I will bring a b1 vulcan and were my fascination for the type started and were me and my grandad used to go. Were the last vulcan b1 was and my grandad would have been proud I was doing this. So I decided to finish ths one as b1 XA900 and I guess I finally hunted her down in the end lol. It's funny how these little links happen in life Ironic indeed and I'm really looking forward to going along to the show. Special thanks go to fellow britmodeller's pigsty for donating the cross of Lincoln badges from his airfix nimrod and to Doug rogers for his vc10 landing gear to make the exhausts Thanks for looking comments welcome good and bad. Hope you like this Cheers Rob And here is the last raf b2 xh558 with the last intact b1 Xa900 Thanks Rob
-
The Vulcan To The Sky Trust have posted on Facebook that XH558 will not be flying today due to a fuel tank leak. She was due to be displaying at the Bournemouth and Shoreham Airshows today. I was going to go down to Littlehampton beach and with her fly along the coast between Bournemouth and Shoreham especially a that would have been the only time I would see her flying this year. Slightly disappointed, but happier that they are protecting the aircraft and crew. Hope they get her in the air again soon.
-
G'day all from a cold Canberra (city that is, not bomber :-) ) I have the Airfix gift set of Vulcan XH558. I understand I have to change the exhaust nozzles to those of an Olympus 200 (I was thinking of using the Freightdog resin set). I also have replacement main wheels. Are there any other aftermarket goodies people would recommend? I know there's wheel well details but I'm not fussed - I won't be displaying it upside down :-( I'm mainly wondering about aftermarket intakes - what is the problem with the Airfix ones? Thanks! Malcolm
-
Hi all way back in Dec 2011 I bought my first of the now numerous Dragon 1/200 Vulcans I have now built. Back then the only boxing was the first blue steel one. this come with 2 options but i opted to do one that was not in the box options. I did XH558 but i did not have the right bomb bay as the original kit comes with only blue steel options. nor did it come with the later tail as a choice so i did an approximate XH558 as best i could and made do with decals that i had found to suit it. This is what she looked like back then. Now thanks to the spares and options of the later Falklands boxing I've filled off the tail top and replaced with the new moulding repainted the tail and updated the decals and added the small stencils. then sealed over with satin varnish. she now looks much better I reckon. She was initially brush painted with xtracrylix raf dark green and medium sea grey. here she is today Thanks for stopping by to look at her.
- 16 replies
-
- 2
-
-
- XH558
- AVRO VULCAN
- (and 3 more)
-
 This is my latest finished kit but is actually the first kit I did in my return to the hobby. It was bought about 6 Christmases ago by my Mum as a bit of a joke because I liked XH558 and was cheap on eBay! I got going on it using my limited modelling skills and threw the parts together, looking back I didn't do too badly considering it was my first model! Anyway I sprayed Citadel (Games Workshop) black undercoat and then hand painted (very badly!) the grey camo on the top side. This was the brick wall that I hit. The finish was crap and the colour was nothing like correct! It was put on the top of the kitchen cabinets and languished there ever since. When I got it down, the undercarriage had been broken at the bogies but luckily as it had been sat in the box they were still with the model, as were the undercarriage doors and the access ladder. The only thing missing is the IFR probe from the front. I decided to finish this as XH558 so removed the thimble TFR probe from the nose. I realised that the ECM cooling vent was added to the rear fairing of the tail but no amount of persuasion would remove it without surgery and I didn't want to risk ruining it so left it in place. I know it is not correct but its not a massive part so I can live with it. I started this yesterday morning around 10am, removed the rest of the undercarriage to make masking easier then free-hand sprayed the Medium Sea Grey on. Next came the masking, I chose the blu-tack and tape method and after nearly 2 hours had the top masked off ready for a spray of Green. Once this was on I moved to the underside but I decided to swap to a more 'mask as you go' method that was quicker and easier as you just mask off each bit of green as you are spraying it and mask the general area around it. The green finished I moved to the undercarriage bays, these were masked off and sprayed white. The undercarriage itself was fixed, with the bogies being drilled to accept wire axles and the wheels put onto these for extra strength. The legs were then sprayed NATO black and had the hubs and oleos painted silver, then glued into the now dry wells. The gear doors were sprayed as a seperate part and then glued into place. The ladder was painted in Yellow and added to the front access door, I had toyed with making this myself out of brass but it looked good as it was so kept it. Finally the canopy was masked and sprayed and then added with CrystalClear. Decalling did not start well with the Port wing roundel breaking up as it was slid from the backing, the transfers having dried up and not been the best in the first place (far from the Cartograf quality we are now used to!) but I managed to get everything else on without too much of a hassle. The finishing touch was a spray of varnish to seal everything in and I am now calling it done. The only fly in the ointment is that it wants to constantly pretend it is a WW2 fighter with its tail firmly planted on the dirt! In my haste to build it I missed the weight addition. To remedy this I am going to build a base for this to sit on with a hard standing and maybe some scenery. Here is the finished model, it was 0130 this morning when I took the image so there is only the one but I will hopefully put up more when it goes onto the base. **UPDATE** I have now finished the base and mounted the aircraft on it. It is a 'representation' of the apron at Doncaster Robin Hood Airport which is XH558's current base and was taken from a photo of it when it arrived there. I may add a few little detailing bits later on but this is it for now.
- 6 replies
-
- 4
-
-
- Vulcan
- Airfix Vulcan
- (and 1 more)
-
Happy new year from me to all of you in advance. I've not been on much for various reasons and had a dry patch for 7 months after I finished my 1/144 tornado on the 1st of jan. until I did xm655. It's been a difficult Xmas as I lost my grandad he was my best mate but at 86 he had a good innings. Most these models were made in his presence he loved airplanes having done training in the atc he had affections for seeing views from a Blackburn Botha. Here are my models for this year I've actually achieved more than I though but I missed all but one of group builds I was looking forward too. So here they are.... The first vulcan b1 xa889 My 1/144th collection the vc-10 is the worst build I've done since I was a child decals broke parts missing but looks ok I painted the cheat line from photos. Harrier and tornado are revell and vulcan pit road need a globe master and a nimrod and Canberra oh a victor and valiant wouldn't hurt in really getting into this scale. The harrier and tornado are joyous kits as is the pit road vulcan here depicted as xl427 around 1981 the vc10 is a good kit it just fought me every step of the way Next up we have dragon vulcan b2 xh533 which I modded the end tail and tail cone with a restored very rare vulcan b1 produced decades ago by wiking as a fight recognition model the wing had been broken and therefore I painted here as xa906 both are 1/200 you can see how different and smaller the b1 was here Vulcan xl321 dragon oob Here with 533 compare tails Dragon xh558 For me the best is last good old xm655 I'm a proud member of I intend to offer my help to them this year if they can find a use for me This was my first big build after 7 months of no time and entry for the group build camo pattern brush painted My fave photo of the year xm655 with previous years builds. As viewed left row front to back xm655, xh558 vdf, xh562, Right row front to back xh557, xm648, and xl391 Got to have a happy gathering for new year right! Have a good one guys cheers rob
-
Hi there guys this is my entry for the vforce group build of the plane that im a proud member of. xm655 what a beast she is with her bigger 300 series engines and a joy to watch taxi such a shame she cant fly. here is my tribute to her made as if she could fly with 6 other vulcans. she was brush painted on the undersides and the camo. undersides hu166 and camo hu66 mixed with a dash of hu10 for a dark browny green. the medium sea grey is hu165 from a rattle can and has a nice blue hue to it that looks improved over there older tin offerings. the silver is revel aqua aluminium on the exausts and wonderfull stuff it is. many thanks for looking i hope you like her and look forward to comments good and bad. if you want to see her being built look in the group build section under vforce gb took me a week first model of the year and boy did i enjoy it. cheers rob Plus 5 other vulcans ,xh558, xh562, xh557, xm648, xl391
- 30 replies
-
- 4
-
-
- vulcan xm655
- xl391
- (and 8 more)
-
Hi guys I've not had chance to do much modelling this year infact I had until now only completed one build! which aint much for me. I got back into things with this little avro vulcan kit from dragon this was the falklands boxing with decals for 558 so i did 558. It is a fantastic kit the fit is great and a joy to build this one has took me about 3 days doing about 6 hours each day. I decided i wanted to try humbrol's new shades for RAF dark green and medium sea grey from the excellent rattle cans and i have to say im impressed the colours are bang on and seem different to the tins the med sea grey having that blue tone captured perfectly bleaching in the sun and going very blue in shade as you can see in the following photos. I did decide to skip the little refuelling probe as this currently is like other models at risk of being knocked by someone else so i built it to last and as its so small ....(I'm not that fussed) The exhausts were brush painted with revel aqua aluminium (wonderful paint). The model was masked with blue tak this time i tried green first grey second as its easier to visualize the dominant colour for me anyhow. I was sceptical about doing this as it should really be green last so it bleeds over the grey however i felt the inversion would help with the scale and i was pleasantly surprised with the results. The model was then given a coat of Klear and the windows painted black with thinned matt black paint with flow improver and a cocktail stick to flow into the window frame edges and built up any over spill being easy to wipe away with a cocktail stick if needed. then the decals were applied with pools of klear to suck them down and then finaly a spray over with humbrol rattle can gloss varnish misted from about 4 ft away and then a final wipe over of Klear with a bit of sponge and what a joy this thing has been This may only be 1/200th but it still took 2 packs of blue tak to do! I remember doing An airfix one with blue tack and that took many packs of blue tak. I dread to think how much the reall one would take haha! I hope you like it I am really chuffed with it if i do say so myself. Cheers Rob
-
need help, photos information on the first vulcan b2's
robvulcan posted a topic in Aircraft Cold War
Hi Folks I need some help, I would really like to know which vulcan b2s carried the original antiflash white scheme al la b1 style with full shade roundels black serials and which ones carried the serials under wing. Now as i understand it the first batch of b2s were actually going to be b1s and the centre section was built as a b1 and then in the factory the new lager wing fitted and some fitted with the new ecm cone some with larger intakes. as i understand it xh558 was one of these. im confident xh537 xh535 were in this scheme along with xh533 which i know had the serials under wing also and was basically a b1 with b2 wings. Im sure i have seen xh558 in white with full shade roundels and possibly the original larger cross of lincoln on the tail but im not certain. Id love to know which were in the original scheme and if anyone has any photos i really would love to see them. I hope someone out there can help. cheers Rob