Search the Community
Showing results for tags 'US'.
Found 15 results
-
https://www.zvab.com/buch-suchen/titel/fliegergeschichten/autor/supf/ Does anyone know that? Came acros in a bookstore of a sale of these books. Quite interesting easy to read! Recomended! Happy modelling
-
Hallo Since it is a new adventure for me to build a series of these fighter I want to ask if anyone has experience with the Tamiya kits. As well bubletop as well racorback. I have Eduard stuff to add. The instruction for the MinArt kit is a joy by itself! I always dreamed of. As far as I can read the instruction, they are quite straight forward. I want to explore weathering on this models. All sort of. Spraying, with oil, pencil anf brush. Has anyone done this? Or about any issues of the Tamiya kits to report? Any informationen are welcome. Happy modelling
-
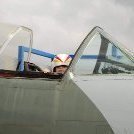
OK. So after my son's first build (and mine for many years) we took on the main event. A Hobby Boss 1:48 F4U-5 Corsair. Undeterred by the fact I had read somewhere the wings are historically inaccurate (too much canvas on the wings for this version?) we are going to crack on and make this OOB. Our main aims are: 1) Have a good time 2) Do a better job than last time 3) Experiment with exhaust and gun smoke, and try a little 'preshade' on the panel lines. 4) Not fall out about whether the undercarriage will be down or up (easier to display down, young boys want planes to FLY ) Yesterday we made a little start, painting some components on the sprue, the first two stages in the instructions are the cockpit and and engine assemblies. What I found interesting in this set compared to the Revell 1:72 is the detail in the painting (and the cockpit) seems a lot less. I'm glad we did the 1:72 as I took some of the detail / colours in the cockpit from that one. First win - thinned the paints a lot better this time. 4 coats and no detail lost, and just looking a lot better. First near win / miss. I was feeling really chuffed to find the thread in the tips about how to do perfect straight tyre lines by dripping a bit of thinner followed by the paint. Nice job. Reread the instructions and realised I should have painted the wheel first. Ah well at least I know the tip works 🤣 Next steps... Apply a decal to the forward instrument panel (the part had a spot of gloss varnish applied today). Decide if we're brave enough to maybe apply a little painted detail to the two consoles either side of the pilot and think about the cockpit assembly. First decision to be made... In the painting guide for this one if the undercarriage is down the 'struts' ((?) you know the bit the wheels connect to) are navy / sea blue. All the pictures I've seen they are white. Obvs hypothetical at this point as it won't matter if the undercarriage is up Thanks for reading this essay.
- 26 replies
-
- 10
-

-
- 1:48
- WWII Fighter
- (and 1 more)
-
Hi all. As I have got rather busy these days, I decided to make a small kit. I found this kit on Amazon at a reasonable rate and present it to you guys. It has 2 options, US Army and USMC. After the scientific decision making process that is heads or tails, I decided I will make the US army version. The box art. This shows the Marine Corps version. The sprues and instructions. And because nobody asked, a picture of my workspace.
-
First post here, I reckon since I moved to the UK, I should start contributing to the local scale modeling forums HEMTT M983A2 tractor by Model collect, with PE set by Tetra models, in 1:72 scale As this was my first modern vehicle model (and first model with tires and windshields), I'd be curious about some feedback, especially on things like: tires weathering - not really 100% with this, went with pigments and by the time I didn't like it, it was too late to go back windshield dust effect - I don't find the final effect particularly realistic looking, but not sure how to do it better. Any tips and feedback appreciated
- 11 replies
-
- 25
-
-
HELP....... Sorry guys need help. In the middle of an Airfix 1/48 Mustang. Have managed to scrape through the build so far with the last scraps of a pot of Humbrol 226 (interior green) for the cockpit etc. However, according to Humbrol site, no longer available in acrylic and not in the new style/formulation. So I need to replace. Would like to try Vallejo, but need a supplier where I can physically go and buy it rather than use online as I need it urgently to finish the build. Has to be acrylic - cannot use enamel for health reasons for myself or the wife (both have asthma!). Also don't like mixing as either have to mix a large batch, and then have it sit around for a long time between appropriate builds, or, have to mix fresh batch if not mixed enough and then not getting the same shade as not matching the exact same mixing quantities again. Any ideas? Milton Keynes or surrounding areas.
-
Hi guys, i am in need of a decent 1/48 US Navy "shooter" for an upcoming tomcat diorama. does anyone know where i can get just the one figure, or a set of deck crew
-
Hi, Just doing an LVT 4 at the moment, intending it to be a USMC one, ideally Pacific, 1945, but if not, Europe, 1944 at least. It’s all going well, but I cannot find out what colour they would of been. The instructions say Humbrol 86, but that’s a light green, when it would appear most where Olive drab, 155. However I also see pictures over grey American vehicles which would be 66! Yet still there are vehicles in 86. So I’m kind of clueless at the moment. If somebody could give me a decent insight or source to American vehicle paint scheme that would be very much appreciated. Many thanks, PlasticSoldier
-
I just found this photo collection; some of these photos I am sure many of you will recognize, but many of them I have never seen before; some great modeling possibilities here! If this has been posted before, please fell free to delete, Mike. I hope you all enjoy looking at them. Loved the factory-fresh B-26 in RAF markings! Mike http://www.mission4today.com/index.php?start=60&finish=15&name=ForumsPro&file=viewtopic&t=14429
-
Finally finished third piece of this Revell gift set. I think now i will take a break from airplanes for a few years, and focus on ships, haha. I won't write much about this model because I really debated with myself should I put pictures of it, because it is very bad with a lot of mistakes. I studied some real photos of this plane, but at the end i decided not to follow color scheme and made it by my taste Thank you, and until my next model
-
US 250lb Bombs 1:32 Brassin This set of two US 250lb M-57 bombs from Brassin are pretty much scaled up versions of the 1:48 set reviewed HERE. Due to the increase in size these bombs there is a little extra detail provided. The casting is just as well done, with some very fine details, such as the bomb lugs, with both US and British styles, (one or two lugs), moulded onto the bomb casing. Assembly is nice and simple, as once removed from the casting blocks and cleaned up it’s just a matter of fitting the etched “wire” into the rear of the casing, attaching the rear arming vane, sliding the box tail into place and attaching the front arming vane. Then it’s just a matter of painting, adding the supplied decals, and weathering. Since they were introduced in 1943 and weren’t removed from the weapons list until the 1960’s they can be used on virtually any WWII/Korean/Vietnam War aircraft, although with something like a Skyraider you will need to purchase quite a few two bomb sets. Conclusion As is becoming the norm for Brassin these bombs are really well manufactured. Great moulding, good attention to detail and since they were so widely used, they will make an excellent addition to any modellers armoury. Highly recommended Review sample courtesy of
-
 Special Forces Operatives (2 sets) 1:35 Legend Productions Two sets from Legend to test your painting skills and busy-up your dioramas. These guys are Special Forces, and sport awesome facial hair and all the personalised kit that you'd expect from Elite soldiers. Shemaghs and shades are the order of the day, along with a lot of kit stashed about their persons. C2 Element SF Team Leader & Sergeant This is a two-man set and arrives in Legend's usual small card box with a shrink-wrap outer protecting it from damage. Inside is a ziplok back of twenty six resin parts and a small fret of Photo-Etch (PE) brass for weapons slings. The bodies are cast as single items with separate heads sporting fine beards, arms, hands attached to the receivers of their weapons, plus the barrels, stocks, choice of sights and laser designators doubled up for each figure. The figures are wearing current MOLLE looped tac-vests with M4 ammo pouches, a secondary pistol in a paddle holster high on their chests, and camelback-style reservoirs on their backs with drink-tubes over their shoulders, routed through the shoulder-strap cover. The team leader has a radio mounted high on the front of his vest with coiled cabling and ear-piece, but the boom-mikes on the box art aren't included, so you'll have to make your own from fine wire and a blob of PVA glue. The flexible antenna is bundled up into shorter lengths for ease of transportation, and the third sling part can be used for this job. There is also a short corrugated gaiter at the bottom of the aerial, which is supplied amongst the small parts. The weapons are M4 derivative with adjustable stocks and foregrips, covered RIS rails for additional equipment, two choices of ACOG sights, and the aforementioned laser designator box. Their straps are supplied as half-thickness PE, of which there are three lengths. You'll need to do a little research on the slings though, as some wear single-point, while others prefer two point, or even three-point slings that have different plus-points. There are no instructions, but the pictures on the boxtop give you all the information you need to complete the builds, leaving you to personalise their weapons with the options on the casting block. Be sure to check the figures over before you start construction, as there are small moulding aids visible under magnification, such as a tiny wedge under a flash-bang that the commander figure is wearing, which is there to prevent bubbles forming and ruining the pour. A quick cut with a sharp blade should be all that is needed to remove these items, and the flash between the legs will disappear with similar treatment. "Commo Geek" SF Com. Sgt. Arriving in the same style box, this is a single figure of a communications sergeant, who is helmetless, but wearing a large Peltor-style headset and radio pouch on his front. His chest is also home to some ammo pouches, plus a couple of pistol pouches to feed his secondary pistol, supplied as a separate part in a paddle holster. On his back is a Camelbak daysack, and on his sides are a couple of general use pouches, grenade pouches and a flash-bang with large pull-ring. The same caveats about preparation of the figure apply, and he is broken down the same way as the others, with an identical set of weapons attachments. The same PE sling/aerial set is included with this figure, and his radio has the identical corrugated gaiter supplied. Conclusion A lovely and quirky set of figures that would look great either in a vignette, diorama, or just perched atop a piece of armour having a meeting with the vehicle commander. Their gear is well represented, and their almost obligatory facial hair is well rendered. Clean-up should be easy, and remember to wash the parts in warm soapy water to remove any mould release, or your paint won't adhere very well. Highly recommended. Review sample courtesy of
 -
US Type One Insignia Super Scale International 1:48 New from Squadron Products in their Super Scale International range of decals is this sheet of National Insignia. These are the type used on USAAF aircraft between 1919 and 1942. Printed by Cartograph they are beautifully done. Quite glossy, and with minimal backing film they are bold, totally in register and very opaque. Each insignia is identified by its size being printed next to it and the instruction sheet shows which size went on a selection of aircraft and where they are positioned. There are forty one individual decals and represent insignia ranging from 25” all the way up to 50”. Conclusion This is a lovely sheet of decals, beautifully printed and well presented. If you need, or indeed want to produce an early USAAF aircraft and you can’t find the correct size of insignia then this is the sheet for you. Recommended. Review sample courtesy of
-
AAVP7 Stowage Set 1:35 Legend Productions This huge resin set will be extremely useful in personalising your Hobby Boss (or other brand) AAVP7 amphibious troop carrier with the seemingly endless supplies and stowage they are often seen carrying. The kit contains the following: 1 x 40 gal drum on a palette with two sacks 1 x spare tyre (no hub) 1 x barbed wire roll 1 x large covered load with tarpaulin 3 x small day sacks 4 x kit bags 9 x large MOLLE day sacks with bed rolls 3 x large MOLLE day sacks 4 x large MOLLE day sacks with side stowage pouches 4 x bags 1 x tarpaulin 1 x tarpaulin, folded over 4 x go-bags 6 x MRE ration packs 3 x boxed MRE ration packs 4 x MOLLE side stowage pouches 6 x MOLLE pouches 4 x entrenching tools with cover 2 x large go-bags 2 x bed rolls 3 x narrow cylindrical canisters 7 x MICH helmets with interior straps & padding 1 x mechanic's toolbox 4 x water jerry can 2 x fuel jerry can 2 x wide cylindrical container 42 x clear water bottle In addition there are the following in pre-printed paper form: 10 x brown MRE ration boxes 4 x brown "Nada" branded boxes 18 x white boxes with Arabic logo (2 types) Accessories as follows: 2 x bags - heat shrink wrap 1 x white braided rope/string The water bottles are supplied as individual bottles in clear resin that just need their caps painting a suitable colour. Glue them in packs of 12 (usually 4 x 3) and wrap some of the clear shrink-wrap around them, tying the bottom off with some wire. Then play the blast from a hair-dryer over the part in order to shrink it to fit snugly around the bottles without melting them - remember resin is heat deformable, so too much heat is a bad idea. Once the pack has cooled off, trim the excess off the bottom. All this is covered in the small sheet of instructions, which as usual with Legend are full-colour photographic style. The ration pack boxes and the other boxes all work the same way, and are first cut out from the backing paper, then folded along the lines, with the thick lines cut to create top and bottom flaps. Then use a non-wicking glue like GS-Hypo cement to glue the tab at the end of the body of the box, and fold in the flaps, gluing them in place too. No further work is necessary, although you could pack them out with some material of some sort to give them weight & prevent them getting too badly crushed during handling. Three of the ration packs have resin inserts provided, so you can depict them open with the MRE packs in place, while there are enough loose packs (6) to portray one or more boxes open & part used. Placement of the other parts is up to you and your references, although seven photos of an example in fetching pink resin are provided on the website, which I have pinched and reproduced here for your ease. Conclusion A huge quantity of resin, and some clever tricks for creating the water bottle packs and boxes. The resin is well sculpted with excellent casting, and the mould blocks are placed sensibly for the most part to permit easy clean-up. Don't forget to protect your lungs by wearing a mask in a well-ventilated room when doing any fine sanding though, as small particles can be bad for you if inhaled. You'll need some tape, lead or pewter sheet to finish off some of the pieces with straps, but other than some painting skills, that's about all you'll need. Very highly recommended. Review sample courtesy of
-
M1126 Stryker Stowage Set 1:35 Legend Productions AFV Club and Trumpeter have both released a number of variants of this well-used vehicle from the US armed forces inventory, and Legend have produced the perfect personalisation package for anyone wanting to depict a Stryker "on tour", which usually involves festooning the vehicle with acres of baggage, rations, ammunition, water and fuel cans. The kit arrives in a sturdy brown card box with a glossy photo of the set installed on a kit to show what you get. There are more pictures to help with construction on Legend's site, but I've lifted them and brought them over to save you the leg-work. Inside the box is a large bag full of resin, a small sheet of malleable pewter sheet, and a sheet of brown paper with ration pack shape and markings printed on it in black. 1 x large stack of stowage with tarps, kit bags, ammo etc. moulded in a block 1 x long tarpaulin 1 x spare tyre (no hub) 1 x roll of barbed wire with covering material over the spikes 6 x kit bags 3 x large daysacks 4 x daysacks with bed roll 4 x daysacks 2 x daysacks with waterproof covers 4 x short kit bags - 2 large, 2 small 2 x folded cot beds 4 x MICH helmets (covered) 2 x binoculars 6 x ration packs (MRE) loose 2 x open boxes of ration packs (MRE) 6 x 40mm ammo box 6 x 0.50cal ammo box 6 x 7.62 ammo box 10 x water container 4 x bedrolls - 2 large, 2 small 144 x tie-down buckles 15 MRE boxes (self-heating field rations - Meal Ready to Eat) The large pack of stowage moulded en-bloc is designed for the centre of the vehicle, and the pewter sheet is to be cut into strips to represent a tie-down net, with the resin buckles applied to the end of each strap - hence the large number. There should be enough left to be applied to the spare tyre, holding the equipment within its centre in place, with more buckles added to the ends. The ration packs are quite cleverly done too. The loose packs can be used however you see fit, while the two "boxes" of packs are sized to fit within the pre-printed brown paper shells that are provided with the set. Here is the only downside of the package - the printing is not of the best quality, but from a distance, that shouldn't notice. The variety of packs and daysacks is welcome, and should prevent your Stryker from looking samey, as even within the broad types mentioned in the list, there are variations in small details, and with careful usage, only the most determined viewer will notice you've re-used the same moulding on each side of the vehicle. The pictures show you how to assemble the stowage, but they are just a guide, and you can add as much, or as little of it as you see fit. Check the myriad photos of these vehicles on the web and as long as your final fit has those elements, even if they're in different places, you'll not go far wrong. Conclusion A great set that will probably leave you with some stowage to use on some other project down the line. The sheer weight of gear is surprising on opening the box, and all of it is well sculpted and cast. Very highly recommended. Review sample courtesy of