Search the Community
Showing results for tags 'Tunisia'.
Found 10 results
-
 Finally finished this one. Enjoyed this build a lot, but it took sooo long to finish it. I think that this was my longest build ever, not sure why, maybe I'm just getting slower You can find the WIP thread here. Anyway, the model should represent Tiger No. 112 of s.Pz.Abt.501 in North Africa. The 501st Heavy Tank Battalion was formed in mid-1942 and spent a few months training in Germany. This tank was one of the first two Tigers delivered to s.Pz.Abt.501. Battalion, including Tiger 112 arrived in Africa in Bizerte on November 1942. Its first combat engagement was the Battle of Tebourba. At this time, the 501 Battalion still had only four Tigers in Africa, of which only three were in working condition. They fought American tanks on 1st December, in the olive groves east of Tebourba. During the next few months, between December 1942 and March 1943, Tiger 112 participated in several engagements, of which Operation Fruhlingswind and the battle of Sidi bou Zid were the biggest success when heavy losses were inflicted on American armor. At the end of February 1943, the 501st was attached to the 7th Panzer Regiment and sent to capture Beja. The mission was a disaster, with seven Tigers lost in the battle of Hunt's Gap. The eleven remaining tanks, including Tiger 112 which survived the battle, were attached to the newly arrived 504th Heavy Tank Battalion and continued fighting until the surrender of Tunisia. After being transferred to 504th, Tiger 112 was renumbered 724. The damaged tank was abandoned and left by the main road, somewhere in north-eastern Tunis. There are few photos of the soldiers posing by the abandoned tank in the spring of 1943. This model should represent this tank while it was still Tiger 112, in its condition sometime around January 1943, before Operation Fruhlingswind. The kit itself, "Tiger 1 Tunisian Initial" from Dragon, No. 6608 is a great kit. The only bigger drawback being the DS tracks. I replaced them with the absolutely fantastic T-Rex 3D printed tracks. I also used two E.T. model PE sets, one for sideskirts and the other for details. These tanks were probably painted in Tropen 1, so combination of 2/3 RAL 8000 and 1/3 RAL 7008. Model was painted with a combination od Gunze and MRP paints, and some Mr. Metal Color and Vallejo for detail painting. It is very hard to notice the disruptive color due to the low contrast. Especially when covered with some dust. On bw photos, almost impossible I would say. Side of the tank had some repaired battle damage that was brush painted after repairs probably with RAL 8020. Model was weathered with some pigments and MIG's nature effects. And here are some details shots. This tank was photographed a lot, so abundance of reference material. Here's a compilation of few shots: And of course, tiger1.info was and amazing source of reference material. My longest build would be twice longer without it Thanks for watching and thanks for feedback. Cheers, Nenad
 -
According to @Mike Starmer during last weeks of fighting in Tunisia in 1943 the new camouflage standard has been introduced for the British AFV in MTO. The new base tone was to be SCC5 Light Mud with SCC7 Dark Olive Green or SCC14 Charcoal in bold patterns. Lend-Lease vehicles should use used Light Mud over the US No.9 Olive Drab but applied according to the drawings. Limiting my search to the tanks only I have found this scheme applied only to the Shermans. Thus my question is whether were there any Grants, Churchills or Matildas painted in this new scheme? In my opinion the "Monty" T-24539 Grant is presented by Amercom/de Agostini in SCC5+SCC7 https://www.flyingmule.com/products/AM-ACCS28-1 but Star Decals describe it as SCC11B Desert Pink+SCC7, while Tamiya and Mirage suggest SCC11B over the US Olive Drab. What do you think about it? Cheers Michael
-
Hello folks, While building my Tiger 112 of the s.Pz.Abt.501 a few months ago, I ran into a few interesting photos of Panzer III Ausf. Ns that were assigned to the same battalion in a supporting role. Having this Tamiya kit on the shelf for far too long, and a need for relaxing build after my Ark Model adventure, I decided to build Tiger's little buddy. The first elements of the battalion arrived in Africa in Bizerte on November 1942, and until the end of the year, there were 12 Tiger Is and 16 Panzer III Ausf. Ns. Its first combat engagement was the Battle of Tebourba. Ausf. Ns 75mm short-barreled guns were excellent infantry support weapons, and their speed and reliability rendered effective assistance to the high-maintenance Tigers. They were mostly firing high explosive rounds against the infantry and soft targets, making them a great addition to the heavy battalions. They were also used occasionally for resonance roles. This model should represent the first company tank no. 124, but is rather inspired but photos of a few different Panzer III Ausf. Ns from an s.Pz.Abt.501 battalion. The build was straightforward, as one should expect from a Tamiya kit. The only additions are Master Club tracks, a wooden box on the fender specific to s.Pz.Abt.501, jerry can rack (Def Model) and various stowage items, mostly Value Gear and Reality in Scale. Also, rearranged fender items a bit to match the photos. The model was painted with MRP RAL 8000. Although it should be expected that those tanks should be painted in RAL 8020, it seems that both Tigers and Pz IIIs of this battalion were painted in RAL 8000. These tanks were not used for too long, so I wanted to keep weathering subtle. Mostly weathered with Mig's pigments (a combination of a few earth and sand tones). Here are some additional detail shots: I couldn't find DAK tropical helmets anywhere to buy so I bought 3D models and printed them. I didn't have decals for them though, I'll add them once I have them. I really like those Master Club tracks. They are a bit stiff and those resin pins are PITA, but the details are fantastic. And here it is with his buddy: And these are some real-life shots. This one is from the Battle of Tebourba: And one more: Thanks for watching and for your feedback. Cheers, Nenad
-
Hello everyone, This time, here's something very different. It is an AS.42, 'Sahariana'. I don't have much experience with wheeled vehicles, built just few of them so far. So it was quite an interesting build for me. You can find WIP thread here. I really like this vehicle. Wouldn't mind driving one to my work It was designed during 1942 as a response to LRDG. Initially planned as an unarmed reconnaissance vehicle, with range as it's main focus, it was soon armed with a few different options: Breda 20/65 Mod. 1935 gun, AT 47/32 Mod. 1935 and Solothurn S18-1000 20 mm anti-tank rifle. The one I built is armed with an 47/32 Mod. 1935 anti-tank gun. Each vehicle could carry 20 fuel jerrycans, 20l each, on it's sides, extending the range to a very solid 2,000 km. It was extremely maneuverable as well, and the 110hp engine gave the AS.42 a top speed 84 km/h. The model I built is based on a vehicle that was part of the initial batch delivered to North Africa in December 1942. It was assigned to the The Raggruppamento Sahariano AS and participated in the final stages Libyan Campaign and the entire Tunisian campaign. There were only 10 vehicles in this group and only one of them, with registration number 791B, was armed with 47mm AT gun. Saharianas were mainly used for raids deep in the desert and to counter LRDG actions. They performed very well and were praised both by the Italians and the British. At one point during 1943, LRDG was ordered to attack only if there were no high numbers of AS42 in the area. Most of AS.42s in Africa were lost at the end of Tunisian campaign. However, Sahariana and its successor Metropolitana continued to be used in Sicily and Italy, and even in Soviet Union, until the end of the WW2. Some of them even so service after WW2 as a part of the police force. Model is painted with Hataka's version of Khaki Sahariana. Some Gunze and Vallejo Model Color were used as well. Weathered mostly with MIG's and VMS pigments. And here's the reference photo of this particular vehicle: Thanks for watching and thanks for all the help in my WIP thread, I really needed it Now that I'm addicted to these wheeled vehicles, I'll used it a lot in my AB 41 build that I'll do sometime soon. Cheers, Nenad
-
Bf 109G-4 R6 Trop Oblt Frank Schiehs CO 8/ JG 53 Tindja, Tunisia April 1943 After a hiatus post the Battle of Britain GB thanks to a combination of family and work commitments, I’m hoping to get back in to the GB groove! Now bottom line upfront.... I know absolutely zip about the 109, so I’ll be reliant on Eduard’s research, t’interweb and fellow BM’ers! This 109 (potentially the first of a few!) is an Eduard weekend boxing and I’ve chosen the desert scheme, partly because I think they look cool, but mainly because I’m a little nervous about mottling for my first one for this GB so applied the ‘Keep it simple, stupid’ rule! On to the line of departure.... This will be pretty much straight from the box - although I have a cockpit mask (for a G-6) and an instrument panel and belts (for a G-10). Hopefully those will be ok (close enough for Government work) but if I’m about to set myself up for a drama please do let me know and I’ll see if I can find the appropriate variant extras.
- 83 replies
-
- 20
-

-
M3 Lee Mid Prod. Interior Kit (35209) 1:35 MiniArt via Creative Models Ltd In the years before WWII America realised that they were lagging behind in respect of armour, a fact that became especially clear when Germany came out from under the Versailles treaty to show off and then use their new tanks and Blitzkrieg tactics. The M3 Lee was conceived in 1940 as a medium tank carrying a powerful 75mm gun, partly for manning by their own crews, but also because Britain had requested a large number of tanks to make good their losses from Dunkirk. The Lee was a decent tank but suffered from a high silhouette and limited traverse of the sponson-mounted 75mm gun, but was still widely used. In British service it was known as the Lee if it was fitted with the original American turret, or the Grant when using the lower-profiled British specification turrets. The Lee was used primarily in Africa and the Pacific theatres where the 2nd line equipment seemed to be fielded (for the most part) by the enemy, and against the Japanese who were far behind with their tank designs and tactics. It underwent some substantial changes including cast, welded and back to riveted hulls plus changes in the power pack and loss of the side doors to stiffen the hull. The riveted hulls suffered from rivets popping off and becoming projectiles when hit, which could be just as lethal as a penetrating round and was never fully eliminated. The Kit MiniArt began 2019 with a new tooling of the M3 Lee and are expanded their range by adding new parts as they go along. We've come to expect great things from MiniArt's new kits and of course this one is no different with a ton of detail included both externally and internally, as it is a full-interior kit with the increased part count that comes with that. The box is standard MiniArt fare with an attractive picture from their usual artist, and inside are a huge number of sprues of varying sizes with 68 in grey styrene, a single sprue in clear, a fret of Photo-Etch (PE) brass, decal sheet and the instruction booklet with painting guide at the front and rear completing the package. Construction begins with the vehicle floor onto which the transmission and final drive assemblies are fixed along with a long drive shaft. The front crew stations are installed around the final drive, and in the centre is the ammo storage with a tread-plated top with the engine firewall behind it. The ammo bin can be posed open or closed using the same door parts, exposing the striking plates moulded into the assembly, and more shells are added to the firewall in racks. Just in case the tank isn't quite flammable enough, a spare fuel can is strapped to the firewall, as are a couple of radiators which I'm hoping can be switched off or redirected in the desert! Moving to the lower sidewalls, these are separate parts and are fitted out with equipment such as fire extinguishers, ammo and a Thompson machine gun with plate mags with the bow gunner's bench seat added to the starboard side as they are joined and the sponson floor fitted at right-angles using slots and tabs. Take care here to clamp them firmly against the bottom of the firewall to prevent them from drooping while setting, which would open up a world of pain if they set-up out of position. The rolled lower glacis part is also added, and the final drive bell housings that are incorporated into the sidewalls mate with these to complete the shape of that area. The Lee/Grant and to an extent the Sherman were powered by radial engines that sat vertically in the hull and can be blamed for their slightly tall hull shapes. This is provided in detail with the kit with all the cylinders, push-rods and exhaust tubing, plus the tin-work that helps cool the engine all mounted to a sturdy lateral mount that goes around the ancillaries at the rear. Two cheek parts are added into the engine compartment first, and the engine rests on the brackets protruding from the walls. Various tanks and reservoirs are squeezed into the remaining space along with piping for the twin airboxes and the general "spaghetti" that's seen on this kind of engine. The supports for the engine cover are fitted to the sides and the aft bulkhead with access hatch and twin exhaust stacks close in much of the hard work, with twin doors (open or closed) at the back and a PE mesh grille completing the top of the area, allowing the rising heat to escape. The lower hull is finished off with a pair of short arches over the drive wheels and a host of additional equipment filling up the interior with more shell storage, tanks and auxiliary generator. The big 75mm gun and substantial casemate are built up next for fitting into the hull front and the curved splinter shield that allows 14o of traverse to either side to counter any errors in position from the driver or enemy movement. The breech is surrounded by a shield and has the manual traverse wheel and other driver controls plus his seat and sighting gear included, as well as another box containing the 75mm shells peculiar to his gun. Before it can be installed the super-structure must be built up to accommodate it, including the sidewalls, the curved surround and the angled front panels of the glacis. The various hatches can be posed open or closed, and an instrument panel is fitted to the inside of the glacis. The bow machine gun is actually a twin mount with two .30 cal M1919s firing through a hatch near the port sponson. The rest of the hull is then built up in much the same manner as the real thing, but with glue and the rivets only there for show. Fuel caps and another Thompson are added along the way, and when we reach the engine deck there are two large panels, the smaller of them having PE grilles and more filler caps, with both of them covered in small PE tie-down lugs. The rear of the deck overhangs the hull and a small armoured "skirt" protects the tops of the exhausts from stray rounds where PE brackets are used to hang the aft lights. The completed deck is then covered with pioneer tools and their PE tie-downs, plus the towing cables that you need to source yourself to go with the plastic eyes at each end. A scrap diagram shows their location and how to fix the PE straps to the tie-downs and eyes, with a length of 145mm suggested. At this stage the majority of the hull is built, but it is likely to fill with rain until the roof is fitted. Before that the surround to the turret basket is completed with stowage space for six canteens moulded into the parts. The stiffening plates to the lower glacis are also glued to the hull and then the roof is made up from a large main part that is stiffened with more ribs, and a small periscope in the roof of the main gun mount. The three square access doors for the crew can all be posed open or closed with latches and small viewing hatches within that can also be posed open. A short break has you fitting the driver's hatch and optional clear window with a PE wiper blade, plus a couple of towing eyes with shackles under the glacis and some truly tiny parts in plastic and PE between them. After fitting the armoured cover to the main gun's periscope, the main gun in short or long version, two large stowage boxes for four of the decal options, and a few grab handles, you get to build up the running gear. Aren't you lucky? The Lee's suspension is very similar to the Sherman's with two fat wheels on a bogie with a return roller at the top, and there are three of these assemblies per side. The wheels with their moulded-in tyres are attached to the bogies via swing-arms that pivot inside the cast bogie with an additional arm linked to the compressible rubber towers. Before the front of the bogie is fitted the return-roller is installed so it is trapped between its two bearings. Repeat that six times and then make up the idler wheels, which have PE edges and separate hub caps. The bogies are attached to the sides of the hull on their mounting plates, and two stiffeners are added to the top of each one, while the idler wheels are attached to their axles on the adjustable tensioners. At the front the drive sprockets are made up from two parts with an internal collar allowing them to remain mobile if you're sparing with the glue. Tracks. Love 'em or loathe 'em, they're a necessary part of most tanks and you have to do them eventually. There are 79 track links per side, and each link is made up from four parts. The pads are split to accommodate the links between them, and this is a little fiddly. I built a test section up with the earlier interior kit, and each link is good looking with fine detail at the ends, flexing well as per the real thing. It'll take some time to complete them, but they will be excellent as long as you're careful with preparation and the glue. Now you can start the turret, most of which is held within the upper part, and that has some very nice casting texture moulded into it that should look great under a few coats of paint. The frames for the small hatches are first to be added, then the hatches themselves are fitted in the open or closed position with small stays holding them at the correct angle for the former. The sighting equipment, racks, and fume extraction equipment are then fitted before the breech is built up and fitted, making adding parts after that more fiddly. The breech is started by joining the two main parts together, adding the surround, the coax machine gun, then setting it aside while the mantlet and elevation mechanisms are made up. This all fits in the back of the riveted mantlet cover and includes a periscope next door to protect the viewer from being injured by direct small arms fire. The breech is slid into the mantlet and an ammo box is attached to the starboard side then the completed assembly is inserted into the turret from the outside. More equipment is fitted into the lower areas of the upper turret and into the lower turret part, including the increasingly important radio gear and their aerials once the two halves are joined. The turret basket is bucket-shaped with a cut-out to one side to allow entry and exit, plus stowage space for more ammo for the guns and the machine guns, fire extinguisher and small button-seats for the crew. Additionally, there is an opening door to the basket that widens the aperture and contains a pair of tanks for the electro-hydraulic rotation equipment. A studded bezel is installed in the top rim and the rest of the traverse equipment is put in place along with a bit more wire that you'll need to provide, then one more seat on a pedestal is put in the centre of the basket which is then set aside while the little machine-gun turret is made. It has its internal structure added along with some PE vents then the upper gun with its tiny mount, vision port and a short length of ammo on a top hopper is made up and inserted from the inside into its slot, then closed in by the turret ring underneath, and on top the bi-fold hatch, which can be posed open or closed. A pair of armoured covers for the PE vents can be posed open or closed on the outside, completing the assembly. The three sections are joined together, then dropped into the turret ring to complete the model. Markings The decal sheet is quite large for an AFV model and you can make one of five options from the box, as shown below: 2nd Battalion 13th Armoured Regiment, 1st Armoured Division, Tunisia, Souk Ek Khemis, Nov.1942 2nd Battalion 13th Armoured Regimennt, 1st Armoured Division, Tunisia, Sened, Feb. 1943 2nd Battalion 13th Armoured Regiment, 1st Armoured Division, Tunisia, Souk El Arba, Nov. 1942 Combat Command A, 1st Armoured Regiment, 1st Armoured Division, Bizerte Tunisia, May 1943 2rd Battalion 13th Armoured Regiment, 1st Armoured Division, Tunisia, Spring 1943 The decals are printed by DecoGraph as usual for MiniArt, and have good register, colour density and sharpness, with thin matt carrier film cut closely to the printed areas. Conclusion The parts count is large thanks to the inclusion of the interior and engine, which will keep you modelling for a good while, and the temptation to leave the doors open to show off the innards that you slaved over off to your viewing public. Highly recommended. Review sample courtesy of
-
This is my first armour post here, Tamiya's 1/35 Tiger 1 (Afrika). Lots of mods to portray an initial Tiger 1 of the 501st Battalion in Tunisia, AFV workable early Tiger tracks (plastic), photo etch screens, and painted in a "troppen 1" scheme of RAL 8000 and RAL 7008 using Tamiya acrylics, Hope you like. I wasn't sure how much could be seen through the screens, so I scratch built fuel tanks, rads, and fans - as it turns out not much is visible - Oh well ... Comments always welcome, thanks for looking, Colin
- 20 replies
-
- 23
-
-
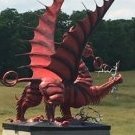
Hello everybody!!! Now, this is my third tank I've ever done, and, being a very young modeller (not telling shush shush) the standard obviously isn't AMAZING like some of the beautifully constructed kits various other people on the forum have made. Enough of that, here's what I built; Make: Forces Of Valor Scale: 1/72 Model: German Tiger I (WW2 Obviously) Other Specs: 504th Schwere Heeres Panzer Abteilung Date: Spring 1943, Tunisia. The build was really easy for me, perfect. The painting - Well the kit came with no decals so I just painted normally + heavily weathered with some recently purchased paints as I've just got into modelling - still a beginner + can't really name anything I'm good at but I still like it Yeah so here: On la bookshelf ^ From the front ^ Hope all the fellas like it, my first tank + not up to a standard of ANY kind due to terrible lack of budget, skills and time. I tried my best - still enjoyed making it though - very quick build and I hope to do some more soon Ordered MasterBox WW1 Male Mk1 Tank to get started on next, lets hope I don't destroy the poor kit as much as I did with the Tiger ey?
-
Hi All. This is my Churchill Mk1 Infantry Tank that I built about 7 years ago. This is the Cromwell Models resin kit that was mostly OOB but the filters were replaced with the later type that I also got from Cromwell Models, and the resin tracks were replaced with Friulmodel metal ones. Painted with Humbrol bronze green and weathered using acrylic pastels but kept to a minimum. This tank represents one vehicle from the North Irish Horse, Tunisia, 1942. Thanks for viewing. C&Cs welcome.
- 1 reply
-
- 6
-
-
- Churchill
- North Irish Horse
- (and 1 more)
-
 Inspired by robvulcan and PC2012's builds it is now my turn to have a bash at a large scale detailed Spitfire. This is another in my series of builds "Aircraft my Father Fixed". Up to now I've built mostly the aircraft my Father worked on while in Burma in the latter half of WWII while attached to 5 Squadron. before that he was with 81 Squadron from their entry into Operation Torch at Gibraltar Oct '42 up until Sicily had been pacified in Oct-Nov1943 whereupon he was transferred to Cairo en-route to India and 5 Squadron. Funnily enough, 81 Squadron followed his his wake a couple of weeks later and ended up based 5 miles down the road in India, re-equipping with Spitfire VIII, hence why I have a Christmas dinner menu from 81 Sqn in 1943: Anyway, back to Tunisia in the spring/summer of 1943. Up to that point, the squadron had been equipped with Spitfire Vb Trop and Vc Trop (hence my earlier abortive attempt to convert the Hobbyboss Vb Trop to a Vc Trop), however these were beginnign to be outmatched by the German aircraft. The Tropical filters used on the V series had an unfortunate side-effect of reducing overall performance of the engine. So in May '43 81 Sqn started receiving Spitfire IXs. At this point they were based in Tunisia at Souk-el-Khemis airfield and subsequently moved to other airfields in the general vicinity. From reading Alan Peart's book "From North Africa to the Arakan" you get to see that conditions on these airfields were basic to say the least. So I want to try to capture a snapshot of the activity of the groundcrew in these conditions in my diorama. So to begin with, the model - you've all seen plenty of sprue shots so I won't bother here, but at least here is the box: For the base I'm using a 300x300 wooden base supplied by one of my IPMS Farnborough colleagues from his website: http://www.ema-heritage.com/displaybases.html That should give enough space for the aircraft and some activity around it. Speaking of which, the donor kits for figures, materials etc include this lot: Yes I know there is 1:35 scale figures in there but my Dad was only 5' 5" tall, so they'll be okay On th eleft you can see some of the ValueGear stuff that I used in my Hurricane diorama earlier in the year. This stuff is superb, huge variety and excellent casting and detail. I picked up a set of crates as well which you can see in the glass ashtray in the top left. Above that is the IconAir accumulator trolley I built originally for the Hobbyboss build. I've added a small engine on the top of it to represent the generator that was fitted to many of them. This was sourced from the US Maintenance Yard kit from the compressor you can see at the bottom right of the box top picture. For the Spitfire I've got a collection of Decals for the inside and outside that will allow me to represent EN204 FL-L: (from the Osprey book "Spitfire Aces of North Africa and Italy) Note how the original "E" lettering has been badly overpainted to turn it into a "L" Here are the decals I'll use: There is a huge amount of aftermarket stuff for this kit and here is a selection of what I may or may not be using: There are wheels, seat, large cannon wing covers, cockpit door with seperate crowbar (not to be painted red!!), Cockpit upgrade set, cockpit stbd sidewall, "cloth" seatbelts PE Toolbox by Aber (just like the one I have in the Hurricane dio) and finally the PE set for the Hobbyboss Vb, but which contains some very useful bits for this build, eg the PE radio hatch door which will be used elsewhere on this build! I actually started this build a couple of weeks ago but haven't got very far because in the weather we've been having the man-cave shed is to flipping cold!! So I've come up with a cunning plan... Part of the delay was waiting for all the parts to arrive and also to do the research for the various things I want to do. Here is a sample of some of the reference material I've collected: This of course doesn't show the e-book PDF of Monforton's book or the other reference photos, sites etc that I've used and will be using. I've printed some of the engine photos and stuck them up: which gives away my cunning plan to get around the cold weather situation... move a lot of the modelling stuff into a temporary table in the lounge! All the airbrushing will still have to be done in the shed, but at least I can build and brush paint in comfort! I began on the figures as I was waiting. I picke dout two from the 8th army set and one form the Tank riders set: The Tank rider figure in grey had to have the top of his head rebuilt as I won't be putting a steel helmet on him, instead he'll get an RAF side cap at a suitably rakish angle! I began work on the engine and my aim is to add as much detail as I can bear to. The inspiration for that is the amazing Hornet build being undertaken by airscale in another thread here: http://www.britmodeller.com/forums/index.php?/topic/234950214-hph-de-havilland-hornet-sea-hornet-f-mk22-tt202/ Truly magnificent stuff and if I can get anything approaching this, I'll be very happy! Progress so far: Its all a bit bland and OOB so far - well apart from the replacement resin rocker covers with the Rolls Royce logo on them. This will change as time progresses I hope. Now since I've got an accumulator trolley in The diorama, there should be somewhere for it to plug into: Voila! So of course there is also the question of the starboard rear panel I've been pestering people about on another thread... this one: As you can see I've successfully cut it out without causing damage to the surrounds and next to it is the PE Radio access panel from the VB PE set which is near enough the same size (its about 1.75 inches too tall, but that won't be noticeable when its hanging open. Here is the inside of it: which has superb fine detail. One of the things that my researches show for this access hatch is that the inner frame is very visible, with all its lightening holes present. So I'm going to have to scratch build that so that means removing the existing rib detail in the kit: So thats where I stand so far - bloody hell its taken an hour to write this post! I'd better get on with the rest of the day...
- 57 replies
-
- 5
-
-
- Spitfire
- Spitfire IX
- (and 4 more)