
Search the Community
Showing results for tags 'TOJO'.
Found 5 results
-

Double Japanese build! Ki-44 and Ki-84 -- 1/72
opus999 posted a topic in Work in Progress - Aircraft
I've been planning to do the Ki-44 Tojo for a couple of months now and it has finally bubbled up to the top. This *might* be the kit that I've had longest in the stash. It was from my first year of college when my parents gave me all the Hasegawa fighters for Christmas (my recent Tony was also from that Christmas). There are a couple other in the stash that are about as old, so I'm not certain. At any rate, I also have a Ki-84 Frank sitting around (also from that Christmas, but made shortly after that) waiting to be rebuilt. I realized that most of the painting tasks would be the same on both models, so it's a double build. About a week ago, I put the Frank in the freezer and after sitting there overnight parts were actually falling off! I took it apart as much as I could and then gave it a bath in Simple Green, which made short work of the paint. I left the landing gears alone as I usually end up breaking them somehow. Here's where it was at when I started this build: The decals are from the replacement Frank build I did a couple months ago. Before disassembly and stripping, the Frank looked like this: The prop was unpainted because I'd already nicked it for the replacement build. It wasn't a bad build or finish, I just know about NMF now and the old kit was just spray-bombed with Testors rattle-can silver. I've spent what little time I've had this week making cockpits. I think it was mostly a fool's errand, especially for the Tojo because it has such a small opening. 😕 But I really couldn't help myself, first because I got some new tools and supplies and second, this was the stock cockpit: I just couldn't let that be. A few minutes with my files, Dremel and razor saw and I had this: The floor was very narrow compared to the width of the fuselage, so I had to make a new floor: I then fabricated a new seat mainly by eyeballing some pictures and using various thicknesses of sheet styrene: Using reference photos of mainly aftermarket model cockpits, I started making the various levers and doo-dads to go in the cockpit. I was having fun with my new micro drill bits an lead wire: The Frank cockpit is not nearly as bad, but the seat isn't terribly accurate: I decided not to put too much effort into it because, looking at my other Frank, it's hard to really see how inaccurate it is when installed. I used my new drill bits and hand drill to put the appropriate holes in. As with the Tojo, I used reference photos of mostly aftermarket model cockpits to make all the necessary levers and such. The Tojo and Frank cockpits are very similar (probably since they're from the same manufacturer) which is a good thing because when I was done with the Tojo cockpit I realized that I was looking at the Frank cockpit picture! 🙄 So, the Tojo cockpit has an extra lever on the floor. Turns out you can't see it anyway. Here's where they were at when I was done slinging the styrene around: Frank on the left, Tojo on the right. I then turned to the side walls. Here's the Tojo sidewalls: The Frank was a bit of a challenge because I was not able to get the fuselage halves apart without a lot of force and I didn't want to break anything. So I added the side wall detail from underneath. So last night I painted and added tape seat belts and here's where I'm at now: Frank: Tojo: The Frank sidewalls: And the Tojo sidewalls: Sorry for the picture heavy start, but I may not see the cockpits again! My plan is to paint the national markings on both aircraft. Both have the Hinamaru with the white "bandages" and the Tojo decals are too yellowed with age, while the Frank's Hinamaru were used a couple months ago! After getting the fuselages together and seams prepped, I'm going to primer, paint the white "bandages" on, followed by the Hinamaru, and then mask those prior to starting the NMF.- 83 replies
-
- 13
-

-
 This model is built from the venerable 1/72 Hasegawa/Mania kit and represents a Ki-44-II Hei Shoki, flown by Captain Yukiyoshi Wakamatsu, 2nd Chutai Leader, 85th Sentai, Canton, China, during the summer of 1944. I also used a very nice True Details resin cockpit that I bought years ago, but the cockpit opening is tiny and the canopy quite thick, so little can be seen of it - at least I know it's in there. There's a colour profile of this aircraft in Nick Millman's Osprey Aircraft of the Aces #100, Ki-44 'Tojo' Aces of World War 2, and I based the underside colour and the heavy mottle on that profile and used Print Scale decals to finish it. Paints are Tamiya, Gunze and Vallejo acrylics, and Humbrol enamels for details. The gun barrels are Master .50 calibre Brownings masquerading as Japanese 12.7mm. Macro photography certainly leaves nothing to the imagination - it looks significantly less dusty in real life. Cheers, Jeff
- 12 replies
-
- 40
-
-
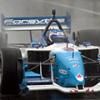
Another bulk post here. A few fairly quick builds while I mentally prep for the Zvezda PE-2 - the part count of which is making me a little anxious. Looks amazing though... Anyway - here are my 3 last builds. As always - brushes and rattle cans on these. All 1/48. Thanks for looking - all criticism and notes welcome! Bruce 1ST : was Airfix's new tool Hurricane. I wanted to try something a little less standard, and had some decals for this left over from... I think a Hase Hurricane kit. This kit really throws itself together. Real joy to build. I had a nightmare with the yellow band on the nose - which I had to sand down twice and re-do, albeit because I was cack-handed and kept touching the thick layers of yellow spray paint too soon. Chipping on this was done after main paint with Vallejo aluminium paint on a thin brush. 2ND : Eduard's lovely Trop ME109. Off the bat - this was a joy - and I buggered it up at the last moment... Last thing to do was the canopy, which I masked off then confidently hit with a lovely coat of WHITE primer... So - forgive the horrible internal white on this. Was exceptionally annoying after all the work. Panels were primed both white and black before Tamiya's dark yellow went on - slightly breaking up the model. I also tried weathering with undiluted oil paint on this one - the desert colours lent themselves to it. So along major panel lines, and on the flaps for example I blurred in umber and white. Was quite happy with the result, but think it would be harder on a camo aircraft, or anything not yellow for that matter... Decals were lovely. Really liked the chipping on the decals. Lovely touch I thought.. unless of course you aren't trying to build this EXACT plane. 3RDLY : Hasegawa's Ki44 kit. This was actually the version including contra-rotating props. But I elected to go for a normal set. Was a very nice build. No fit issues at all... Markings were all painted on. With masking fluid sponged on before the red went down to emulate wear. The rest of the plane was painted in a combination of Tamiya bare metal silver and titanium. Then I sponged on some vallejo aluminium to try and replicate the patina I saw in some photos...
- 13 replies
-
- 27
-
-

-
Hi, Today was a sunny spring day in Krakow - good to make some removing of dust and do photos of archive models from shelvs. Especially because the "current production" slowed down a bit... This is Nakajima Ki 44 II Shoki (Tojo) - kit from Hasegawa, almost OOB except painting scheme which presents machine from 85 Sentai JAAF, China 1944 - with rare blue patches. I made it in 1993 Comments welcome Regards Jerzy-Wojtek
-
Nakajima Ki-44 Shoki, (Tojo) 70th Flight Regiment Hasegawa 1:48 The Nakajima Ki-44 Shoki (Demon) was an unusual fighter by Japanese standards, with high speed and a good rate of climb emphasised at the expense of manoeuvrability. Work on the Ki-44 began in 1938, at almost the same time as the Ki-43. The Japanese Army Air Force decided that it needed two types of fighters - the manoeuvrable dog-fighter for normal use and a defensive interceptor for use against high flying enemy bombers. As a result Nakajima were asked to design a fighter that could reach 13,120ft in 5 minutes, with a top speed of 373mph at that altitude, and armed with two 12.7mm and two 7.7mm machine guns. The Ki-44 was a low-wing monoplane, with short stubby wings. The wings had a straight leading edge but a tapering trailing edge. The fuselage was circular near the engine but narrow and flat-sided near the tail, a design that helped to improve its stability in the air. The aircraft carried two guns in the wings and two in the upper fuselage. The first prototype Ki-44 (serial number 4401) was completed in the summer of 1940, and was rather heavier than expected. The new aircraft handled well, but its performance was not quite good enough. A series of modifications were tried out on the three prototypes, and eventually a top speed of 389mph at 13,120ft was achieved (although with all guns removed). With the guns installed the aircraft was expected to reach 360mph, and the new design was accepted by the Japanese army. Compared to the Ki-43 the new aircraft was heavier, slightly shorter and had a 4ft narrower wingspan. As a result the Ki-44 had a higher wing loading than the Ki-43, and was thus less manoeuvrable, but its top speed and rate of climb were both better. The Ki-44 entered production as the Army Type 2 Single-Seat Fighter Model 1, and a total of 1,225 were built by the time production ended late in 1944. The Model Another kit that Hasegawa have released before with different marking this doesn't alter the fact that its a nice kti of a sharp looking aircraft. Arriving in the standard Hasegawa style of top opening box with stylish representation of the aircraft on the front, the five full sprues and two sub-sprues of grey styrene are well protected in poly bags, as is the clear sprue, although thankfully separately. The slightly glossy styrene is up to the usual standard with the slightest amount of flash and a few moulding pips. The clear parts arent as clear as some Ive seen recently and there appears to be a fair amount of distortion on the main canopy and side screens on the alternate front canopies. Whether this will be sorted after a dip in aqua gloss or Future, Im not sure, but it certainly wouldnt do any harm in trying. The cockpit is quite well detailed, and whilst there is some detail within the main undercarriage bays they could do further enhancement with some lead/copper wire for pipework. Its not a complicated kit by any standards and even just looking through the box it should be quite a fun build. Construction starts with the pilot office, as is normal. The front bulkhead has a main and a sub instrument panel attached either side of which the breeches of the upper cowling machine guns are glued into place. The panels have moulded detail which will need to be removed if the supplied decals are to be used instead of careful painting. The completed bulkhead assembly is then fitted to the cockpit floor along with the rudder pedals, joystick, rear frame, seat support and seat. The completed bulkhead can now be fitted into one fuselage half with the nose wheel bay attached to the rear. With the addition of a control box to the starboard side and the throttle quadrant to the port, the fuselage can now be closed up. At this point the engine, consisting of front and rear cylinder banks, prop shaft ferrule and crank case and the propeller, with separate blades, backplate and spinner can be assembled. The engine may have extra detail added, but there is not a lot visible once the cowling has been fitted. The wings, one piece lower and two uppers are glued together and fitted to the fuselage assembly along with the single piece horizontal tailplanes and forward upper fuselage panel. The previously completed engine is then attached to the fuselage once the collector ring and exhausts have been fitted. The single piece cowling is then fitted, followed by the prop assembly. The main undercarriage, consisting of single piece un-weighted wheels are fitted to the axles of the oleos, onto which the scissor links are also added, as are the undercarriage doors, these can then be glued into place with their associated inner doors, actuators, tail wheel and its bay doors. The optional auxiliary tanks can also be built. These are made of two front halves and a single piece rear section to which the front and rear struts are fitted along with the re-fuelling cap. Once complete these too can be fitted to the main aircraft assembly. There are several unidentifiable parts fitted just aft of the undercarriage bays which look like auxiliary doors of some kind. The two part oil cooler is attached to the join between the cowling and fuselage. The final parts to be added are the wing machine gun barrels, pitot probe, aerial mast and landing lamp glass. The sliding canopy is the same for both options out of the box, with the option of having either a windscreen and telescope sight through it or solid windscreen and gyro gunsight. Decals The decals provided give options of two aircraft from the same regiment, the 70th Flight Regiment, one flown by Major Atsuyuki Sakado, June 1945, the other flown by Sgt Sadao Miyazawa, February 1945. As mentioned above there are decals provided for the instrument panels. There are also decals given for the anti-glare panels around the cockpit and the yellow identification markings on the fronts of each wing, but these may be painted if desired. There does appear to be some sort of glossy residue on most of the decals which may cause problems when soaking, otherwise they are clearly printed, with good opacity and density. Conclusion This is a rather nice kit of a good looking aircraft. As stated earlier, not complex or difficult kit, but it looks like it will build into a lovely looking model. Although both options are painted in overall aluminium, there is enough colours in the markings to lift them out of the ordinary. Recommended Amerang Hasegawa Review sample courtesy of UK distributors for


