
Search the Community
Showing results for tags 'Magister'.
-
Fouga CM.175 Zéphyr (SH72323) 1:72 Special Hobby Zéphyr was the name given to the maritime variant of the Magister by Fouga, which benefitted from a strengthened airframe, arrestor hook, had no ejection seats, sliding canopies to facilitate take-offs with the canopy open, and a nose-mounted light to assist with night landings on carriers. It was tested on two British carriers late in the 1950s, with only a small number of airframes delivered, totalling 30 production aircraft and two prototypes. Only one squadron was formed at the end of 1959 as a consequence, with the active airframes rotated into storage to even out the flight hours and prolong the length of service of the airframe in French service. Although the Zéphyr was capable of carrying gun pods under the wings, they could also carry guns in the nose, although they were seldom used in practice due the type’s given task, and weight savings also saves fuel. They were used as aircrew trainers at Hyéres, where they taught the novice pilots the intricacies of the perishable skill that is carrier landing at the Deck Training School. In the 60s they also formed an aerobatic team by the name of Patrouille de Voltige d'Hyéres, which translates as Hyéres Aerobatic Patrol, who took over the name of the Patrouille de France during austerity cut-backs to retain the prestige of French aviation, using the less expensive Zéphyr, and freeing up the costly front-line capable fighters that they previously used. The Kit This is a reboxing of the 2015 kit from Special Hobby with new decals and some optional extras that you can pick up while you’re shopping to improve the kit further. The kit arrives in a small end-opening box, as the Zéphyr is a small aircraft, and inside are four sprues in grey styrene, a separately bagged clear sprue, and a decal sheet in yet another bag. The instruction booklet is portrait A5 and printed on glossy paper with colour profiles at the rear, and adverts for other SH products on the rearmost pages. Detail is excellent for such a diminutive aircraft, although as with many 1:72 kits the panel lines could be deemed a little deep, although they will doubtless reduce under several coats of paint. Construction begins with the double cockpit, which is well-done with separate seats, instrument panels with decals, plus control columns and throttle levers completing the appointment of this key area. The fuselage halves are prepared with intake trunking inserts that slot inside the engine nacelles after being painted the correct colours, and having the front and rear engine faces emplaced. Externally, the intake lips, exhausts and a number of other small parts are fitted, then the cockpit is trapped between the halves and glued together, adding an equipment deck behind the crew stations and cutting off a blade antenna just behind the cockpit near a small intake. More detail parts are scabbed on the underside toward the rear along with a central strake, two-part tail-cone and the arrestor gear that slots into a triangular aperture. At the front, the nose gear bay is made from a tapering L-shaped former that is trapped between the two nose-cone halves that are then joined to the fuselage after painting the interior while you still have the chance. Returning to the rear, the diagonal tail fins are fitted using pegs with tiny inserts at the root, and actuators near the tips. Each wing is made from a top and bottom surfaces, but first the gear bay inserts are added to the lower part, and a choice of deployed or flush air-brakes that apply for both sides of each wing. The upper wings have the top of the tip-tanks moulded-in, and have separate lower halves added once the two wing halves are mated, with a pair of clear parts for the lights. The nose gear leg has a two-part wheel that slots onto the leg, plus a small front bay door and two side doors, then the two main gear legs are installed in their bays with retraction jacks and wheels, plus a pair of doors on the outer edge, and a single inner door with separate double retraction jack. The model is completed by gluing the rails to the edge of the cockpit and adding the fixed windscreen, central and rear portions to the fuselage, then deciding whether to close up the sliding portions or leave them open, which is done just like the real thing, remembering to add the periscope to the central section, which has parts inside and outside of the canopy. Markings There are four options on the decal sheet, all of which are painted overall with aluminium paint rather than bare metal, and each has a red lower nose, rudder and elevator fins on all but one of the options, which is almost totally aluminium. You can build one of the following from the box: S/n.4, ex-Escadrille 59s, BAN Hyéres, latterly on display in Belgium S/n.4, ex-Escadrille 59s, BAN Hyéres, France late 1970s to 1994 S/n.16, ex-Escadrille 59s, BAN Hyéres, France, late 1970s to 1994 S/n.4, ex-Escadrille 57s, Ecole de Chasse de la Marine, Khouribga, Morocco, 1959-60 and Port Lyautey, Morocco, 1960-62 Decals are by Special Hobby’s usual partners, and have good registration, sharpness and colour density, with a thin gloss carrier film cut close to the printed areas. Conclusion The Zéphyr was a niche type that saw extended service in predominantly French hands, and Special Hobby have done a great job of rendering the details of this diminutive early jet. Highly recommended. Review sample courtesy of
-
 Source: http://www.britmodeller.com/forums/index.php?/topic/234949713-any-other-new-telford-news/page-3 Kinetic - and obviously later Wingman Models (http://wingmanmodels.com) - is to release a 1/48th Potez-Air-Fouga CM170R Magister kit - ref.48051. Any pictures from this Kinetic 1/48th Fouga Magister test build/test shot? V.P.
 -
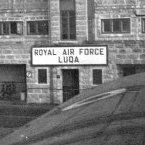
I scanned one of these a few weeks ago so I thought I may as well scan the others from this display at Fairford, 1997:
- 7 replies
-
- 2
-

-
- Irish Air Corps
- Silver Swallows
- (and 4 more)
-
DACO products would like to produce a 1/32nd Potez-Air-Fouga CM.170R Magister kit - ref.KDCC3201 Market enquiry Source: http://www.dacoproducts.com/KDCC3201.php V.P.
-
High pitched wail of Fouga's 'hairdryers' is quite familiar to me - restored Fouga Magister used to fly in the skies of Pori quite often. Contents of the box, with some aftermarket wheels. It's a fine looking kit, this Special Hobby Fouga. I will be doing my hometown planes for this GB. So this will be Fouga Magister, FM-5 (in the front of the pic) in the mid 1960's. So it will be all silver with no orange markings. Photo was taken after the parking area got new tarmac in mid 1960's. It was not too uncommon in th e 1950's and 1960's that the parking areas or taxiways were gravel and in many times the planes were pulled to the runways.
- 29 replies
-
- 12
-
-
 Hi All, Here is another bird completed this year. In fact I finished this one back in August but have not made a photosession until yesterday. So here it is - Fouga Magister in IDF demonstration team colours: Not much to say about the prototype as its history is pretty well-known. A training aircraft that flew with numerous air forces for many-many years as a basic trainer. In IDF though it made quite a career serving not only as a trainer but also as an attack aircraft and a demonstration team airplane and was further upgraded to Tzukit standard with updated avionics, engines, etc. The kit used is a newly released Special Hobby option. Overall a nice kit with impressive level of details in cockpit, undercarriage bays, full engine details are also provided. Fit is good but tight at times. Pay attention to cockpit as after closing the fuselage you may find out that the canopy is too narrow. Cockpit interior needs to be carefully trimmed to make sure it does not stretch fuselage sides. Also I would advise to start canopy attachment with front and rear sections, then install two-part middle section and finish with opening sections which you may trim as appropriate if they do not fit. More construction details are available at the WIP thread. Very minimal aftermarket sets were used - resin wheels from CMK (although kit wheels are not at all bad either), seat belts from spares and that is it. And I do not think I made any substantial improvements either as the kit looks very convincing out of the box. The kit I had was for exotic African Air Forces but my intention was always to make an Israeli machine, so an Isradecal set for Fouga Magisters was bought. That one unfortunately was a disappointment almost ruining the whole project... Large white decal stripes turned out extremely brittle. While I was able to deal with them on flat surfaces, on curved area around V-tails that broke apart and in fact did not fit the area well too. Particularly poor result is on port side where I had to overpaint cracks with white paint and still not super satisfied with outcome. Paints used are Hobby Colour blue H328 (FS15050) well diluted with white - I tried to be as close to the blue colour of Stars of David, obviously black, white and silver from Vallejo and lastly H318 tan for undercarriage interiors. I was matching this to the photoes of real French Magisters and that seemed to be the closest match. Final finish with Gloss Tamiya clear. Now there are couple more shots "with others". My full IDF collection firstly: And all the bright jet trainers secondly: Hope you like it Kind regards, Dennis
 -
Hi all! After getting ready with my Spitfires I decided to start a quick and easy project. I looked through the stash and picked this one: Some goodies that I have are CMK wheels (really only front wheel is a reasonable replacement but I will use all three), Pavla seats (bought them because no seat belts are in the kit. Unfortunately Pavla seats are too narrow and have wrong harness anyway so likely I'll not be using this), and Isradecal set for training Magisters. Kit contents: Quite a few parts for a small airplane? In fact many parts are not used. What is interesting - this kit contains full set of parts for navalised Zephyr version (right side of upper right sprue). The sprue seems to be designed for molding only part of it. Why the guys packed the full sprue in the kit? Some shots taken after closer examination of the kit: The molds are crisp and clean. The main problem is noticeable molding seams elsewhere. These are typically easily removable on most parts. Still the quality of molds is impressive and is definitely a quantum leap over older MPM/SH kits. Some resin bits supplied with a kit are intended for Algerian version that had some wire antennae set on the bottom side. An IDF version that I'm planning to build did not carry these parts. Kit's decal is near perfect: Isradecal set is probably not as crisp but is not bad either: Couple shot of decal's instruction sheet: As I'm heavily interested in IDF history and try to build more planes operated by Kheil Ha'Avir I'm closely watching what's released by Isradecal and try to buy interesting sheets even if I do not possess necessary kits yet. That was the case with this sheet too. My plan is to build an ultramarine blue demonstration team bird. And my goal is to try to do this fairly quickly as the kit seems quite simple, really none scratchbuilding needed, painting is going to be quick and easy. So full speed ahead! Best, Dennis.
-
 Fouga CM-170 Magister Canopy Masks (M72017) Special Hobby 1/72 Special Hobby are now also offering a new set of tape masks for their excellent Fouga Magister kit which will help a great deal with the masking. Review sample courtesy of
 -
Fouga CM.170 Magister, , pics thanks to Sergey (mr_stomach)
-
.thumb.jpg.3d6eff3e2f6cc042679bca864bcb2b1a.jpg) Hello all, Today I have for inspection one of the old FROG / Chematic 1/72 Magisters, in the markings of an Irish Air Corps bird. Originally I had planned to build a RAAF in overall aluminum, but the included Techmod decals enticed me to build something a little more colorful. All in all, I'm glad I did. I started this kit in the same way as the MB Gladiators - by adding some conjectural interior framing, as seen here: Unlike the Gladiators, the final result is actually visible, and makes the interior looks much better in my opinion. Control sticks were also added. The final result looks like this: The eagle-eyed will observe that the front windscreen was sourced from a Revell 1/72 P-26 - the included piece wasn't fully molded, and so wasn't usable. Thankfully, the Revell piece more or less looks the part and fits well. Next is a 1/72 Spitfire Ia, followed by a DH.60G in Belgian markings and then a Mig 17 for a change of pace. Thanks for checking in, Stay safe, Tweener
Hello all, Today I have for inspection one of the old FROG / Chematic 1/72 Magisters, in the markings of an Irish Air Corps bird. Originally I had planned to build a RAAF in overall aluminum, but the included Techmod decals enticed me to build something a little more colorful. All in all, I'm glad I did. I started this kit in the same way as the MB Gladiators - by adding some conjectural interior framing, as seen here: Unlike the Gladiators, the final result is actually visible, and makes the interior looks much better in my opinion. Control sticks were also added. The final result looks like this: The eagle-eyed will observe that the front windscreen was sourced from a Revell 1/72 P-26 - the included piece wasn't fully molded, and so wasn't usable. Thankfully, the Revell piece more or less looks the part and fits well. Next is a 1/72 Spitfire Ia, followed by a DH.60G in Belgian markings and then a Mig 17 for a change of pace. Thanks for checking in, Stay safe, Tweener- 4 replies
-
- 17
-
-
- Magister
- Irish Air Corps
- (and 1 more)
-
BAF Fouga Magister - 1:72 Heller 1980
AdriaN (MLT) posted a topic in Ready for Inspection - Aircraft
The Build: Notes OOB, Scratch built seatbelts, BAF decals - Airfix 1975, Re-scribed panel lines, Paints used: Revell enamels/luminescent & acrylics, mr surfacer 1500 primer, mr mark setter & softer, old humbrol enamel, Klear, W&N artists water colours+oil paints, vallejo wash, Alclad, Fading orange was done by first having an acrylic yellow base. Then removing the enamel orange by rubbing a brush with thinner over surface. The result.... 😎🥳- 25 replies
-
- 44
-
-
Been secretly working away at this 1980s kit. After building the 1975 Airfix Magister, I thought id try another Magister! Model was painfully & slowly re-scribed & sanded. Seat belts made form tape. Given a coating of mr hobby 1500 primer, thinned around 60% cellulose thinner (otherwise it would stick). Then 'polished' out before paint. Not happy with the result. I used revell acrylic silver. Fantastic paint. It almost as shiny as Alclad polished aluminum. BUT in my opinion it came out TOO shiny for a tiny 72nd model. Out of scale. Also every mistake, gap, scratch, orange peel, depression in plastic/filler came out magnified. I gave it another soft sanding/buffing session and am considering either... 1) use same silver and finish with a light matt coat to dull it down OR , 2) trying revell enamel silver (different to acrylic) OR , 3) Model master aluminum. Something not as shiny. These aircraft were not polished metal, but a dull silver. Model re-scribed and sanded a few times! Pretty good canopy. Raised details. Just needed a dipping in Klear. Masking was tough. Im sure the glass is all blade scratches. Primer on and polished. Way too shiny???
-
Hi folk's, This is one of those GB's where I could easily slip into double figures with builds, there's so many subject's I love in their range and at the moment most can be picked up for very little money.But I decided early on to go for something out of my usual area of interest and picked up this set for a meagre thirteen quid from e-bay all sealed in mint condition. https://www.scalemates.com/kits/heller-80399-patrouille-france--167958 inside are the three bagged kit's in a beige plastic and a huge decal sheet.
-
MikroMir is to release a 1/32nd Miles M.14 Magister Mk.I kit - ref. 32-002 Source: https://www.facebook.com/story.php?story_fbid=2607434466000940&id=1416295571781508 V.P.
-
Old 1975 tooling of airfix fouga magister. For such an old model surprisingly good fits and still good decals!
-
Fouga CM.170 Magister "French, Belgian & Irish Service" 1:72 Special Hobby (72371) The Magister is probably Fouga's most well know design even though they had been producing aircraft since 1936. Post war the company was working on sailplanes and the heritage from this can be seen in the Magister design. In 1948 the French Air Force were looking for a jet powered aircraft to replace the then piston engine trainers. Fouga's original design the CM130 was underpowered with two Turbomeca Palas engines. Fouga then re-designed their aircraft to incorporate the more powerful Marbore engines, et voilà the CM170 Magister. The distinctive V tail, and slender wings bear testament to Fouga's sailplane designs. The prototype Magister flew in 1952 with an order for the first 10 being placed in 1953. The Magister was the worlds purpose designed/built jet powered trainer. It is also worthy to note the Magister made it into carrier aviation. With a few changes to the structure and undercarriage, the addition of an arrestor hook, and sliding canopies the CM175 Zephyr was born. Interestingly carrier trials took place on HMS Bulwark and HMS Eagle. The French aircraft industry in parallel with the UK went through many mergers with the aircraft being known as the Fouga Magister, Potez Magister, Sud Aviation Magister; and finally The Aerospatile Magister; though always actually being called The "Fouga" Magister. Development of the aircraft continued right up until the French selected its replacement, the Alpha Jet. Overseas sales proved popular were made to primarily to Germany, Belgium, Finland, and Israel; with Germany, Finland & Israel building them under licence. Of a total of 929 aircraft built, 286 were built under license. The basic jet was very affordable to operate for smaller Air Forces. Other users would include, Algeria, Austria, Bangladesh, Biafra, Brazil, Cambodia, Cameroon, El Salvador, Gabon, Katanga, Lebanon, Libya, Morocco, Nicaragua, Rwanda, Senegal, and Uganda. Many counties including Austria, Belgium, Brazil, France, Germany, Ireland, Finland; and Israel would use the aircraft for their National Aerobatic display teams. Even though primarily a trainer many of these smaller nations would use the aircraft for its light strike capacity as well. Israel would use them in combat during the 6 day war, El Salvador saw them used during its civil war, and aircraft used by The Katangese Air Force were used against the UN during the Congo crisis in 1961. The Kit The kit arrives on four sprues of grey plastic, and a clear sprue,. The plastic parts are of excellent quality, the panel lines are engraved and deep enough to be seen after painting without being trenches. Care will be needed to take some of the smaller parts of the sprue, and it might have been the case that these would have been better in photo-etch? The clear parts are crisp, clear and thin. The resin parts are for the under-fuselage antenna fitted to the Algerian and Moroccan examples. Some of the smaller parts will need careful removal to avoid damage. Construction starts in the cockpit area. The front and rear instrument panels are fitted (instrument faces are provided as decals), along with the seat supports for the front cockpit. The seats are added along with the engine and flight controls. Once complete the cockpit can be set aside. Attention then moves to the engine pods on each side of the fuselage. Engine fan faces and exhaust need to be placed inside and then the inner side of the engine trunking can be added. At the rear of each side the final exhaust section is added. Once the engines are complete then cockpit can be placed inside the main fuselage, and this then closed up. The radio equipment area to the rear of the cockpit is also added at this time. Various antenna behind the cockpits then need to be added and/or removed depending upon the version being modelled. Once the main fuselage is together work needs doing on both ends. At the rear the tail cone is added along with ventral strake. The 'V' tails are then added, care being taken with the small hinges for these. At the front the first part to me made up is the underside of the nose where the nose gear mounts. This attached inside the nose cone and the appropriate gun/no gun insert is attached to the top of the nose. The prominent nose mounted VOR antenna loops are added and the nose attached to the main fuselage. Construction then moves to the wings. These are of conventional upper & lower construction. The wheel wells are mounted into the wings before they are closed up, along with the wing mounted air-brakes. These can be modelled in with the deployed or retracted positions. The wing end mounted fuel tanks are in two halves, with the bottom being moulded to the upper wing, and then a lower fuel tank part is added. The clear noses can then be added to the front of the fuel tanks. The landing gear is then added to the model. The front single nose wheel is two parts and this is added to the main leg, this is then mounted to the nose of the aircraft. The single front gear door is added. The main wheels though larger than the nose wheel are single parts. These are fitted to the main legs, the legs along with their retraction struts are added into the main gear bays. The three part main gear doors are added. If needed armament can now be added to the model. Bombs and rocket pods are included to be used as wished by the modeller. To finish off the model the canopies can be added in the raised or lowered positions. Markings The decals are printed in house and look to be good. They are crisp, clear and in register. The dayglo stripes for the French Aircraft are not supplied when I thought they would be in this scale. Markings are provided for four examples; 315-PA French Air Force Sqn 00/315 Cognac, 1970-80 312-TX French Air Force, Tan & Light Blue markings for 25th Anniversary of GERMAS (Group d'Enteriten et de Reparation du Material Specialise) Salon de Provence, 1989 MT13 Belgian Air Force advanced flying school Belgian Congo 1960 (Aircraft armed with nose guns) 220 Irish Air Corps 1976 to 1999. Aircraft now used by the Carlow Institute of Technology. Conclusion This is a welcome new tool of an important and widely used trainer/light attack aircraft. The kit is highly detailed and should build upto a good looking if small model. Very highly recommended. Review sample courtesy of
-
Fouga CM.170 Magister "Exotic Air Forces" 1:72 Special Hobby The Magister is probably Fouga's most well know design even though they had been producing aircraft since 1936. Post war the company was working on sailplanes and the heritage from this can be seen in the Magister design. In 1948 the French Air Force were looking for a jet powered aircraft to replace the then piston engine trainers. Fouga's original design the CM130 was underpowered with two Turbomeca Palas engines. Fouga then re-designed their aircraft to incorporate the more powerful Marbore engines, et voilà the CM170 Magister. The distinctive V tail, and slender wings bear testament to Fouga's sailplane designs. The prototype Magister flew in 1952 with an order for the first 10 being placed in 1953. The Magister was the worlds purpose designed/built jet powered trainer. It is also worthy to note the Magister made it into carrier aviation. With a few changes to the structure and undercarriage, the addition of an arrestor hook, and sliding canopies the CM175 Zephyr was born. Interestingly carrier trials took place on HMS Bulwark and HMS Eagle. The French aircraft industry in parallel with the UK went through many mergers with the aircraft being known as the Fouga Magister, Potez Magister, Sud Aviation Magister; and finally The Aerospatile Magister; though always actually being called The "Fouga" Magister. Development of the aircraft continued right up until the French selected its replacement, the Alpha Jet. Overseas sales proved popular were made to primarily to Germany, Belgium, Finland, and Israel; with Germany, Finland & Israel building them under licence. Of a total of 929 aircraft built, 286 were built under license. The basic jet was very affordable to operate for smaller Air Forces. Other users would include, Algeria, Austria, Bangladesh, Biafra, Brazil, Cambodia, Cameroon, El Salvador, Gabon, Katanga, Lebanon, Libya, Morocco, Nicaragua, Rwanda, Senegal, and Uganda. Many counties including Austria, Belgium, Brazil, France, Germany, Ireland, Finland; and Israel would use the aircraft for their National Aerobatic display teams. Even though primarily a trainer many of these smaller nations would use the aircraft for its light strike capacity as well. Israel would use them in combat during the 6 day war, El Salvador saw them used during its civil war, and aircraft used by The Katangese Air Force were used against the UN during the Congo crisis in 1961. The Kit The kit arrives on four sprues of grey plastic, a clear sprue, and a small resin block with 5 smaller parts on it. The plastic parts are of excellent quality, the panel lines are engraved and deep enough to be seen after painting without being trenches. Care will be needed to take some of the smaller parts of the sprue, and it might have been the case that these would have been better in photo-etch? The clear parts are crisp, clear and thin. The resin parts are for the under-fuselage antenna fitted to the Algerian and Moroccan examples. To be honest these parts are very small and I am not sure how you would remove them without damaging them. In this review sample one of the parts has broken off at some time and there is no sign of it despite the parts being in their own separate bag. Construction starts in the cockpit area. The front and rear instrument panels are fitted (instrument faces are provided as decals), along with the seat supports for the front cockpit. The seats are added along with the engine and flight controls. Once complete the cockpit can be set aside. Attention then moves to the engine pods on each side of the fuselage. Engine fan faces and exhaust need to be placed inside and then the inner side of the engine trunking can be added. At the rear of each side the final exhaust section is added. Once the engines are complete then cockpit can be placed inside the main fuselage, and this then closed up. The radio equipment area to the rear of the cockpit is also added at this time. Various antenna behind the cockpits then need to be added and/or removed depending upon the version being modelled. Once the main fuselage is together work needs doing on both ends. At the rear the tail cone is added along with ventral strake. The 'V' tails are then added, care being taken with the small hinges for these. At the front the first part to me made up is the underside of the nose where the nose gear mounts. This attached inside the nose cone and the appropriate gun/no gun insert is attached to the top of the nose. The prominent nose mounted VOR antenna loops are added and the nose attached to the main fuselage. Construction then moves to the wings. These are of conventional upper & lower construction. The wheel wells are mounted into the wings before they are closed up, along with the wing mounted air-brakes. These can be modelled in with the deployed or retracted positions. The wing end mounted fuel tanks are in two halves, with the bottom being moulded to the upper wing, and then a lower fuel tank part is added. The clear noses can then be added to the front of the fuel tanks. The landing gear is then added to the model. The front single nose wheel is two parts and this is added to the main leg, this is then mounted to the nose of the aircraft. The single front gear door is added. The main wheels though larger than the nose wheel are single parts. These are fitted to the main legs, the legs along with their retraction struts are added into the main gear bays. The three part main gear doors are added. If needed armament can now be added to the model. Bombs and rocket pods are included to be used as wished by the modeller. To finish off the model the canopies can be added in the raised or lowered positions. Markings The decals are printed by Cartograf and are excellent. They are crisp, clear and in register. The dayglo stripes have been washed out by the scanner but they are as you would expect on the actual sheet. Markings are provided for four examples; Ugandan Peoples Defence Air Force School, Entebbe late 1960's. Supplied by Israel along with training personnel following Congolese attacks in 1965. In Israeli camo. NT-44 Algerian Air Force, Air Force School at Tafraoui, early 1980s. L602 Lebanese Air Force. Ex Luftwaffe aircraft delivered in 1965. Now on display at the Air Force museum in Rayaq. Royal Moroccan Air Force, used in the 1963 war with Algeria. Conclusion This is a welcome new tool of an important and widely used trainer/light attack aircraft. The kit is highly detailed and should build upto an impressive if small model. Very highly recommended. Review sample courtesy of
-
RS Models is to reissue its 1/72nd Miles M.14 Magister kit - ref.92167 Source: http://rsmodels.cz/en/modely-letadel/plastikove-modely/1-72/92167/miles-magister Previous boxing ref.92120 (http://rsmodels.cz/en/modely-letadel/plastikove-modely/1-72/92120/miles-magister-maggiebomber) and 92117 (http://rsmodels.cz/en/modely-letadel/plastikove-modely/1-72/92117/miles-magister) V.P.
-
 Hello! This is the 1/72 Heller kit and i tried to give this oldie a go. I rescribbed it and chopped the flaps to give it a little rupture around the wing shape area, and also cutted the canopy and done the interior. It was painted with vallejo acrilycs. The Magister with it's distinctive tail always looked odd to me but after this one I will try one in 48 for sure. This machine was based upon on a scheme of the Berlin Gatow Magister and the whole point was to get the worn out look and the hi vis orange. Your comments are welcome!
- 12 replies
-
- 38
-
-
- Magister
- doubleseater
- (and 1 more)
-
Miles M.14 Hawk III/ Magister Mk.I "Egyptian, Turkish and Thai" Special Hobby 1:48 The Miles M.14 Magister was designed to meet the Air Ministry Specification T.40/36. Miles based the Magister on their existing Hawk Trainer. The Magister was a tandem open cockpit design with a low wing cantilever monoplane. The main structure was Spruce with a covering of plywood. The centre wing section was of constant section, having no dihedral. The outer sections had dihedral and tapered towards the tip. The undercarriage was fixed on the main and tail wheels. The main wheels could be covered by spats. Production was started in 1937 and by the start of WWII over 700 Magisters were in RAF service. As well as the central flying school 16 elementary flying schools used the type. By the time production ended in 1941 1203 aircraft had been built. As well as these 100 were licence built in Turkey. As well as use by the RAF the aircraft were used primarily by The Irish Air Corps, The Egyptian Air Force, and The South African Air Force. Other users Were Thailand, Portugal, New Zealand, Malaya, Latvia, Estonia, Belgium, Canada and Australia. The Kit The kit arrives in a standard open-ended box from Special Hobby. They must be trying to economise as the box is the old release Magister box with a cover glued on, so you can only open one end. The kit comes as two main sprues of grey plastic, one clear sprue, one vac formed clear part, one bag of resin parts; and two photo etched frets. Also there is one small sprue of a light grey plastic, this seems to be a harder plastic than the kit and this is used for the landing gear struts. Shockingly construction starts with the cockpit! This area of the kit is highly detailed, most of which will be seen through the open cockpits. Many photoetched parts are added to the inside of the fuselage halves and to the resin cockpit floor. Resin seats attach to resin seat backs. Four part seat belts are provided for each seat, and the small rudder pedals are made up of four separate parts for each cockpit. Instrument panels are made by laminating the photoetched parts. Once the cockpit has been completed the rest of the airframe does not take much work. The fuselage halves are joined and the engine section is joined and added. Following the the tailplanes are added along with the rudder. The aircraft in this boxing had different rudders so please chose the right one. Next the landing gear is added. The Egyptian machine has Spats while the other two options do not. The tail wheel is added along with the propellor and its boss. Some small parts of photoetch details are nearly the final parts added. The last stage is to add the blind flying hood (not used on the Egyptian Machine). This can be added in the lowered or up position using the appropriate parts. I am sure if not wanted it can be left off as I doubt they flew with it attached all of the time. Photo-etch Two small frets of photo etched parts are supplied.These contain most of the parts for the cockpit, instrument panels and seat belts. Other parts are for the landing gear, small metal airframe parts; and attachments for the blind flying hood. Canopy Small injection windscreens are provided for both cockpits. As well as this a vacform part is supplied which is the blind flying hood in the open position. The parts are clear and well formed. Decals Decals are provided for three aircraft. Black 4/L-204 Light Training School, Egyptian Army Air Force, Almaza, Egypt 1938 (trainer Yellow). White 2, Initial Flight Training Squadron, Turkish Air Force 1944 (Olive Green/Light Blue. Black 116, Royal Thai Air Force 1951/52 (overall Silver). Decals are printed by Avi Print, look to be in register with good colour definition. Conclusion The model is a typical shorter run multi-media kit we would expect from MPM. The plastic has some nice detail if sparse (but then the real aircraft did not have too much in this respect). The resin and photo etched parts are well made and will add interest to the open cockpits. Some thought has gone into its production with the harder plastic for the landing gear legs a nice touch. This would be a good level entry kit into the world of mixed/multi media kits. Overall highly recommended. Review sample courtesy of
- 7 replies
-
- 5
-
-
- Special Hobby
- Miles
- (and 2 more)
-
I must say, a very fun 3-4 month build. Even though it is 43 year old kit! (made/boxed in 1975) it went together quite well and detail was quite good for an old kit! In fact i found it better than some kits today. Way better than a Heller kit. It was fun spraying blue paint and i really liked the rivet details, so i left them and did some re scribing on wings. Ooh yes and canopy cracked while putting on masks ;( Feel free to comment: 'Patrouille De France' family...
-
Fouga CM.170 Magister "German, Finnish & Austrian" (72373) 1:72 Special Hobby The Magister is probably Fouga's most well know design even though they had been producing aircraft since 1936. Post war the company was working on sailplanes and the heritage from this can be seen in the Magister design. In 1948 the French Air Force were looking for a jet powered aircraft to replace the then piston engine trainers. Fouga's original design the CM130 was under-powered with two Turbomeca Palas engines. Fouga then re-designed their aircraft to incorporate the more powerful Marbore engines, et voilà the CM170 Magister. The distinctive V tail, and slender wings bear testament to Fouga's sailplane designs. The prototype Magister flew in 1952 with an order for the first 10 being placed in 1953. The Magister was the worlds purpose designed/built jet powered trainer. It is also worthy to note the Magister made it into carrier aviation. With a few changes to the structure and undercarriage, the addition of an arrestor hook, and sliding canopies the CM175 Zephyr was born. Interestingly carrier trials took place on HMS Bulwark and HMS Eagle. The French aircraft industry in parallel with the UK went through many mergers with the aircraft being known as the Fouga Magister, Potez Magister, Sud Aviation Magister; and finally The Aerospatile Magister; though always actually being called The "Fouga" Magister. Development of the aircraft continued right up until the French selected its replacement, the Alpha Jet. Overseas sales proved popular were made to primarily to Germany, Belgium, Finland, and Israel; with Germany, Finland & Israel building them under licence. Of a total of 929 aircraft built, 286 were built under license. The basic jet was very affordable to operate for smaller Air Forces. Other users would include, Algeria, Austria, Bangladesh, Biafra, Brazil, Cambodia, Cameroon, El Salvador, Gabon, Katanga, Lebanon, Libya, Morocco, Nicaragua, Rwanda, Senegal, and Uganda. Many counties including Austria, Belgium, Brazil, France, Germany, Ireland, Finland; and Israel would use the aircraft for their National Aerobatic display teams. Even though primarily a trainer many of these smaller nations would use the aircraft for its light strike capacity as well. Israel would use them in combat during the 6 day war, El Salvador saw them used during its civil war, and aircraft used by The Katangese Air Force were used against the UN during the Congo crisis in 1961. The Kit The kit arrives on four sprues of grey plastic, and a clear sprue. The plastic parts are of excellent quality, the panel lines are engraved and deep enough to be seen after painting without being trenches. Care will be needed to take some of the smaller parts of the sprue, and it might have been the case that these would have been better in photo-etch? The clear parts are crisp, clear and thin. Construction starts in the cockpit area. The front and rear instrument panels are fitted (instrument faces are provided as decals), along with the seat supports for the front cockpit. The seats are added along with the engine and flight controls. Once complete the cockpit can be set aside. Attention then moves to the engine pods on each side of the fuselage. Engine fan faces and exhaust need to be placed inside and then the inner side of the engine trunking can be added. At the rear of each side the final exhaust section is added. Once the engines are complete then cockpit can be placed inside the main fuselage, and this then closed up. The radio equipment area to the rear of the cockpit is also added at this time. Various antenna behind the cockpits then need to be added and/or removed depending upon the version being modelled. Once the main fuselage is together work needs doing on both ends. At the rear the tail cone is added along with ventral strake. The 'V' tails are then added, care being taken with the small hinges for these. At the front the first part to me made up is the underside of the nose where the nose gear mounts. This attached inside the nose cone and the appropriate gun/no gun insert is attached to the top of the nose. The prominent nose mounted VOR antenna loops are added and the nose attached to the main fuselage. Construction then moves to the wings. These are of conventional upper & lower construction. The wheel wells are mounted into the wings before they are closed up, along with the wing mounted air-brakes. These can be modelled in with the deployed or retracted positions. The wing end mounted fuel tanks are in two halves, with the bottom being moulded to the upper wing, and then a lower fuel tank part is added. The clear noses can then be added to the front of the fuel tanks. The landing gear is then added to the model. The front single nose wheel is two parts and this is added to the main leg, this is then mounted to the nose of the aircraft. The single front gear door is added. The main wheels though larger than the nose wheel are single parts. These are fitted to the main legs, the legs along with their retraction struts are added into the main gear bays. The three part main gear doors are added. If needed armament can now be added to the model. Bombs and rocket pods are included to be used as wished by the modeller. To finish off the model the canopies can be added in the raised or lowered positions. Markings There are 3 marking options on a sheet printed by Cartograf which guarantees there will be no issues with it. Finnish Air Force - Aircraft licence built in Finland 1968 German Navy 1968 Austrian Air Force Silver Birds Aerobatic Display Team 1966-1968 Conclusion It is great to see more versions of this new tool from Special Hobby becoming available. Highly recommended. Review sample courtesy of
-
Hi folks! I've been lurking here for several months now and I decided to join in and show my latest build, A 1/48 Flashback Miles Magister depicting a machine from the No.15 EFTS at Carlisle during 1940. Hope you like it! P1080218 by clkal, en Flickr P1080220 by clkal, en Flickr P1080233 by clkal, en Flickr P1080224 by clkal, en Flickr P1080226 by clkal, en Flickr All comments and critics welcome
- 13 replies
-
- 35
-
-
Magister Figure Set 1:72 Special Hobby Special Hobby have released these figures under the CMK label to accompany their new Magister kit which we reviewed here.The set consist of two standing pilots and a kneeling ground crew figure. There is one standing pilot with his helmet and parachute on, one lounging on the airframe with his helmet off and no parachute. The ground crew member is franticly fixing something that pilots probably broke . The figures are very well sculpted with separate heads for the guys not wearing helmets. These figures are excellent and just what is needed to bring a Magister model to life. Highly recommended. Review sample courtesy of
-
 This is a amazing kit for me, I love it! I suggest everyone who is in fond of aircraft should try ihis kit. Not satisfied with painted, but Magister is a beautiful plane. Thanks guys.


