
Search the Community
Showing results for tags 'Han Solo'.
Found 6 results
-

Carrera Revell Millennium Falcon Gift Set (05659) 1:72
Mike posted a topic in Sci-Fi & RealSpace Kits
Millennium Falcon Gift Set (05659) 1:72 Carrera Revell The YT-1300 Millennium Falcon was one of the key ships of the beginning of the Star Wars legend, and gained a special place in a lot of hearts then and since, becoming a true icon of science fiction in the process. As well as being the main mode of transport for Luke, Old Ben and the droids for much of the first film, its gritty, poorly maintained style, and asymmetric design appealed to filmgoers and modellers alike. She was the fastest hunk of junk in the galaxy, although we’ve since seen her in better condition before Han wrecked her during Solo: A Star Wars Story, which covered Han Solo’s early career as a smuggler, and how he came to own the ship after a game of Sabacc with his friend and rival Lando Calrissian, where in a brief moment of overconfidence, Lando bet his ship on a hand that later proved not to be as good as he thought. When Han took over ownership of the Falcon, she was pristine Star Wars white, with blue accent stripes, plus an escape pod that nestled between the halves of the cargo mandibles. Of course, he almost destroyed her during the Kessel run, and it arrived at its destination in a sorry state of disrepair. The Falcon we know and love is a result of this and continued attempts by Han and his co-pilot Chewbacca’s attempts to put her back to her previous gleaming white appearance and functionality. She’s fast at sub-light speeds, and Han’s piloting skills, which mostly consist of lazily banking to one side or another to avoid destruction, means that she’s a surprisingly safe ship to fly on, if seat-of-your-pants travel is your thing. She can defend herself too, having a pair of crewed self-defence cannons in the top and bottom centres of the hamburger-like hull, plus a couple of pop-out weapons under the hull for defence from ground-based threats such as the Snowtroopers that were setting up an E-web cannon at the beginning of The Empire Strikes Back (TESB) as the Rebel Base falls to the Imperial invaders. The Kit This is a reboxing of Revell’s 2006 kit that originally hit the shelves as a snap-together Easy Kit, and can still be built that way, although it arrives unpainted for this edition and includes a decal sheet to create the accent panels and other details. The kit arrives in a large top-opening box with a painting of the Falcon cruising past a planet, and with a 40th Anniversary of Return of the Jedi (ROTJ) badge in the top right corner. Inside the box are four sprues in a pale chewing-gum coloured styrene, a small vinyl sprue with two figures, clear sprue, decal sheet and instruction booklet printed in colour that has three pages of painting instructions in the rear for your guidance. This is not a complex kit, and the sprue count is an indicator, as is the original form that the model came to market, but detail is still pretty good for the style of kit. The two hull halves have the loading mandibles and most of the detail moulded-in, so a little simplification is bound to have happened, but the detail is still appealing. As this is a gift set, it comes with a selection of acrylic paints in small “thumb pots”, a Revell No.2 paint brush, and a 12.5g bottle of Revell Contacta Professional glue, which is well-liked by many, partially due to the precision metal applicator needle that makes it easy and accurate to use, avoiding wasting glue in the process. There is also a poster of Return of the Jedi, which is very tightly rolled and secured with an elastic band, so we’ve not even tried to photograph it, and would refer you to the box art, which has a photo of the poster on the front left side. I’m not sure, but it doesn’t seem like one of the original posters that were around at the time, but if you like it, it doesn’t matter when it was created! Construction begins with the cockpit, installing the moulded interior and separate bulkhead into the lower half of the cockpit cowling, with a decal to add detail to the bulkhead, which is highly visible in most of the interior shots of the films. The (optional) landing gear is next, making up three sets of legs, which consist of the vertical struts, a circular cuff, and the landing pad itself, and there we have an issue that the purists may spot. The Millennium Falcon kits that I have, all have five gear legs, one in each corner, and one toward the “nose”, if you can call it that. There was a change from three to five at some point, and although I am quite the Star Wars fan, I can’t remember the details. Most people won’t care though, providing it doesn’t topple over, and it won’t. The struts that actuate the boarding ramp are fitted to a carrier plate for later installation, as is the original circular dish that sits on the upper deck of the Falcon, and was knocked off during their escape from the exploding Death Star II at the end of ‘Jedi. The lower hull is prepared with paint, plus the cannons for the central defence station, and the boarding ramp, which is a single part. The coloured accent panels are shown being painted at this stage, but that’s optional thanks to the decals already mentioned. Another two drawings show the other colours that are used on different panels in order to keep the process straight forward, after which you have the choice of installing the landing gear assemblies, or plating over the shallow bays with alternative parts to depict your model in flight. If you have opted for that route, you don’t need to build the gear at all. The next step shows the interior of the model being painted black all over to hide the lack of detail, as well as adding the inner horizontal face of the centre of the mandibles, a small flat part near the boarding ramp, and inserting the pegs at the ends of the ramp supports into turrets moulded into the hull. The inner surfaces of the mandibles are completed by adding the sides, the small front panels, and a bulkhead between them, then continuing down the tapering sides of the mandibles adding the “greeblie” strips to the vertical space between the hull halves. The docking adapters at the mid-point of the hull sides are fitted along with their returns, with a short curved section behind them, and the clear curved exhaust aperture completes the sides. You are advised to paint the exhaust part light blue, and apply the comb decal that was another later addition to the Falcon’s design to depict the engine glow, but there are always LEDs for that sort of thing. The upper hull is painted and accented next, with just the guns added to the centre, and the same three drawings break down the different colours and location of the panels. The interior is painted black again, inserting the cannon glazing into the hole in the centre of both hull halves, plus another mandible interior cover panel, and the cockpit that was made at the beginning. Han and Chewie are both painted and fixed to their seats, then the canopy is fixed over the cockpit, and on the opposite side of the hull the dish is push-fitted into its socket moulded into the surface without the need for glue. The model is completed by bringing the two halves of the model together, and pushing the pins into the turrets within. Markings This kit represents the Millennium Falcon at her prime from a filmic point of view, as she appeared through the exploits of our heroes during ROTJ, the culmination of the original trilogy of movies. There is just one scheme included in the box because she’s unique. There were variations from shot-to-shot and between films however, as cinema model makers and directors are human and change things, or make mistakes. From the box you can build the Millennium Falcon: Decals are by Cartograf, which is a guarantee of good registration, sharpness and colour density, with a thin satin carrier film cut close to the printed areas. Conclusion The Millennium Falcon is an awesome ship, and we are quite fortunate to have many models in various scales and for various skill levels. This kit will suit the beginner or novice modeller perfectly, and if you want a kit of the Falcon without putting together hundreds of parts, this is the one for you. Highly recommended. Carrera Revell model kits are available from all good toy and model retailers. For further information visit or -
Millennium Falcon (01211) 1:144 Carrera Revell via Bandai Spirits Starting Christmas 2015, a new trilogy of Star Wars movies began that were set 30 years after the original, with new peril, new characters and new hardware, all of which we’ve now seen for better or worse. It also marked the return of the fastest hunk of junk in the galaxy – The Millennium Falcon, which is perhaps the most widely recognised and iconic space craft, even though it's a work of pure fiction. Although she’s grubby, broken-down and looks like she’s flying backwards or sideways, she became one of the most-loved ships of the Star Wars universe, and now after seeing her in pristine condition with her original shuttle between the loading mandibles, we know just what a hard life she’d had before we met her in the summer of ’77. I'll not bore you with more of the history of this customised Correllian cargo ship, but in the years since she previously graced our screens by participating in the destruction of the second Death Star with Lando Calrissian back at the controls, there had been some changes, the most notable of which was the replacement of the old circular dish that got obliterated whilst escaping from the Death Star inferno with a brand new low-profile rectangular unit, which IIRC didn’t last very long itself. There had also been some minor detail changes to the "greeblies" that festoon the exterior of the ship, but from a distance she's pure nostalgia. Han was bang-on when he said "Chewie, we're home" at the beginning of The Force Awakens. The Kit Bandai attained the license for the new trilogy Star Wars model kits in the Far East, and trotted out kit after kit, beginning with some 1:12 figures that you really should check out if you haven't already. With the subsequent Star Wars properties that have been heaped upon use, such as movies Solo, Rogue One, series The Bad Batch and The Mandalorian, which is also having a number of spin-offs of its own, Revell have obtained a license that has enabled them to release their own original toolings, as well as some reboxings of previous Bandai releases, of which this is one. The Millennium Falcon is one of the larger kits in the range, despite its smaller scale, and it arrives in a much deeper box that has the same footprint as the other Bandai sourced kits, which is very handy for stacking as far as this Star Wars kleptomaniac is concerned. Inside the deep black box are seven sprues in light grey styrene, although one of these ingeniously has the clear and transparent blue parts moulded into it, which is a technique that Bandai use a lot in their kits, injecting one colour and then changing the configuration of the gates to inject further colours, which adhere to the other styrene and make up one multi-colour sprue. If you've not seen it before, you’ve missed out. Another sprue is moulded in a putty-colour and holds the base and stand parts, with both decals and stickers included to cater for the modeller and the younger audience that perhaps just want to knock up a kit with their dad to play with. The instruction booklet follows the design cues of the box, and is printed on glossy paper in colour, but has additional English captions here and there, although it tends to rely heavily upon diagrams, icons and a pair of “snap” triangles where something of interest is to be noted. The kit is designed to snap together without any glue, but don't be fooled into thinking that will mean a compromise in detail, because I was utterly stunned by the level of detail that Bandai have achieved with this kit when I first saw it. Having built the older Finemolds kit of the original Falcon that purports to be 1:144, it is officially left for dead in the detail department. The first thing I noticed about the Bandai kit is that it is substantially larger and deeper than the Finemolds kit, with a distinct curve to the top and bottom surfaces that is much greater than the older kit. I did a little looking around, and it would appear from the data held on the Star Wars Wookipedia, that the Finemolds kit is underscale by quite a margin, leaving it 2cm shorter from the rear to the tips of the loading mandibles up front. It is also shallow, but as the figure included the dish that isn't present on this kit, it's more difficult to decide by how much, however when placing them side-by-side it’s very noticeable. Another thing to notice is that the new kit is designed to accept a modular lighting kit that is available separately, but there are plenty of third-party lighting kits that are now available. The official set comprises a battery box that slips into a compartment in the underside, with a number of LEDs threaded through holes in the model to clip into holders within the important areas such as engines, cockpit and gun turrets. There are also some fun poseable parts such as the crew access ramp, the turrets, dish, and the option to install landing gear or have the bays closed over. Construction begins with the cockpit, which although it comprises only two parts, has a full tub with four seats and instrument panel, plus a busy bulkhead and access door that will look great painted up. There are also a set of seated figures that are surprisingly recognisable at the scale, but Bandai have been producing these tiny figures for their Gundam kits for years. You get one each of seated Chewbacca, Han, Rey, and Finn, the outcast First Order Stormtrooper that tags along in the first movie. The cockpit interior slots into the lower part of the cabin, which has a separate conical nose part, is joined by the upper tunnel that disappears into the hull, and then you have a choice of either a clear canopy with decals applied to the raised framing, or a styrene part that has no glazing, which is truer to the filming miniatures of the original trilogy. The loading mandibles are next, with each one almost a mirror image of its opposite number. The two circular cut-outs are filled top and bottom by an assembly that snaps together from three highly detailed parts, which give a busy, layered look, and are held between the top and bottom halves, with the sides filled by detailed inserts, over which additional pipework and detail parts are installed. These parts are incredibly detailed and delicate, so will need handling with care when removing and cleaning them up. The lower hull has various cut-outs for access areas and the optional battery box, which receive the same treatment as the cut-outs on the mandibles, after which the side detail parts are clipped into the hull on each side, with the lower gun turret detailed with a tub into which a seat is dropped, then covered with the clear glazing. Detail in there is superb for its size, and it really deserves some lighting. The docking ports on the sides are built up from an inner and outer part, which again has two layers of detail moulded in, and they clip neatly in place in their recesses. At the rear is the engine exhaust, which after the first films had a design created by ILM that has been replicated ever since, and here by a styrene outer part with rows of rectangular holes, through which the inner clear blue part will be seen. If the kit is subsequently lit, the blue glow will flood from the rear, amplified by the tubular ridges moulded into the blue part. If you elect to depict the engines shut-down, you replace the blue panel with three styrene parts that have extra detail moulded in that represent the exhaust ports. At this stage, the battery box is inserted if you have one, and the LED holders are slotted into position, which the LEDs push into, holding them firmly and directing the light accordingly. Fine exhaust petal actuators are added to each section of the outer lip, as well as the larger parts that appear along the underside, and the battery box lid is slotted into the aperture, with details added around it. The upper hull's turret is identical to the lower, and fits into the central hole in the same fashion with the cabin and seat under glazing, which have decals on the sheet if you don't feel like masking and painting them. The upper hull has cut-outs to fill with equipment from layered parts, and the six circular vents on the rear deck have some exquisite detail moulded into the hull under them, so it's a shame and a bit of a head-scratcher that it'll never be seen again. More detail is added to the engine deck in the shape of actuators and general greeblies, and it's then time to bring all the assemblies together after threading an LED through a pre-cut hole for the cockpit lighting if you have it. The mandibles are trapped between the two halves on sturdy pins, which are also used to hold the hull halves and the cockpit assembly in place, relying on friction-fit to hold them together. This of course means that you could build your Falcon now and add lights later if the need strikes you. Final construction begins with the new three-part rectangular dish, the cannon assemblies top and bottom, and ends with a choice of gear up or gear down. If choosing the gear up option, simple clip-in blanking plates are installed over the five bays. The gear down option is more complex, and involves building up seven two-part legs, then joining them to the upper gear legs and bay insert pieces, to which you add the gear bay doors. The double legs have one slightly different leg each, but the same process applies. When they are complete, you just slot them into the bays, and they're done, remembering to keep the gear-up covers in case you change your mind. The crew access ramp has a retracted option too, and a three-part assembly that includes the ramp walls, actuator struts and the walkway itself. Detail here is great, looking just like the movie, and as with the landing gear you can swap and change at whim. The stand is typical Bandai cleverness, and although it only consists of four parts, it allows movement in all axes to pose your Falcon as you wish. There is a removable panel in the lower turret under which you'll find the socket for the stand – another nice touch. The counter-balanced base has moulded-in terrain, and is of the same interlinking type that is seen throughout the whole Bandai range, so you can link some or all of them together for a display, using the little clips supplied in the box. Markings As already mentioned, there are both decals and stickers in the box, but we'll concentrate on just the decals for this review, which are of good quality, if a little thick like some other Japanese decals you might be familiar with. They respond well to decal solution, but their thickness can limit your success, and I'd be a little wary of using the decals for the cockpit glazing, using paint and masking instead. As well as the usual accent panels of various shades of grey, yellow and red there are also small decals not seen before, and six dark grey circles to use on the engine deck vents, which I'd much rather paint from a personal point of view, as the detail of the mesh is very fine and would be likely to trap bubbles, ruining the detail for good. Decals Stickers It's possible to build and decal/sticker the kit without a single lick of paint if you're so minded, but most modellers will probably give her a coat or two, as the light grey styrene is a little stark and far too clean, plus paint would give a better key for the almost obligatory weathering. I used Xtracrylix Light Gull Grey (XA1137) on my old Finemolds Falcon some years back, and was very happy with the results, which you can see by following the link in my signature strip. If you're going for ultimate authenticity, some of the weathering on the built-up kit in the instructions looks a bit bland, so you may wish to check your references. Conclusion If you want a 1:144 Millennium Falcon from the new trilogy, this is a highly detailed kit that's true to the published sizes and looks right. I'm hugely impressed with the kit (I’ve got four, plus the big 1:72 one!), and as it’s now available through Revell’s excellent distribution network, it should do well for them. Extremely highly recommended. It’s the Falcon after all! Carrera Revell model kits are available from all good toy and model retailers. For further information visit or
-
YT-1300 Millennium Falcon FruitPACK (FP-04) 1:144 GreenStrawberry We're back to Star Wars again! It's pretty certain that GreenStrawberry are clearly SW fans, as they have released a substantial number of sets for the various kits, including the big and the little Falcons. Now they're offering the little Falcon sets in a super-set, which gives you both sets and offers a discount on the individual purchase price. The set arrives in a thick card envelope with the details on the front on a white sticker. Inside are the two individual sets in the usual GS themed dark grey, green and red, each with a header card, the Photo-Etch (PE), instructions and any ancillary parts hidden within a resealable clear foil envelope. The following sets are included: Detail Set (01616-1/144) If you read my review of the FruitPACK for the big Falcon, you might be expecting a re-tread of that, but this one's a little different due to the way that Bandai engineered the kits separately to cater for the differences in scale. This is patterned on the Force Awakens Falcon, which has the new-style dish after its removal in ROTJ during the second Death Star battle. The set contains a large fret of Photo-Etch (PE) and a sheet of self-adhesive stickers, and construction begins with the dish, replacing the chunky kit mounting for a more accurate one. The central gun emplacements are also heavily modified, with new parts added to the cut-down seats, and a complete emplacement with self-adhesive printed details supplied for your ease. This is topped off with a bezel that attaches to the rear of the glazing so that it can be easily installed top and bottom, as the two emplacements are identical. The landing gear has a new set of scale-accurate doors, plus the "cuffs" that sit above the gear legs. The cockpit is also heavily augmented, with the kit instrument panel cleared of all the moulded-in detail, and the three joining studs removed to make room for the new detail. With that done, the glazing receives a quilted headliner, and a new ceiling is folded up with panels added, then more stickers added for detail. The rear seats get new headboxes to correct their inaccurate appearance, and the side consoles with sticker instruments are added, with a new bulkhead plus surround and door, and of course another sticker for the busy light infested detail. The new roof is added to the lower part of the cockpit, and faced off with a small faceted modesty panel before the glazing is put in place. The final few parts include an edge panel for the access walkway roof, and a blanking plate for the end of the walkway inside the hull. Grilles (01715-1/144) Two small frets with 32 circular parts that laminate up to make the six vents on the aft of the Falcon's deck. Each one is made up of four layers – a lower circle, the grill section, the raised divides, and a final detailed bezel that sits on the top. There are two types of grille, with the two on the left (looking from behind) differing slightly from the other four. Their location is shown clearly on the last diagrams, so there should be little room for confusion unless you try really, really hard! These will improve the detail on the aft deck immensely from the original kit parts. Conclusion Lots of extra detail to improve this gem of a kit and make it more impressive than it already is, with a modest discount on buying them separately thrown in as a bonus. Review sample courtesy of
-
YT-1300 Millennium Falcon Upgrade Sets(for Bandai) 1:144 GreenStrawberry The Millennium Falcon is perhaps the best known and most recognised of any spacecraft real or imaginary, with a number of kits popping up over the years in different scales. Bandai's recent release of a raft of new kits has been great for anyone wanting to build a collection of Star Wars related models in a couple of consistent scales, rather than box-scale as seems to be the way with Revell, the main European license holder of late. The Bandai kits are snap-together, but don't let that fool you. They are the pinnacle of the injection-moulded art, and you'd wonder initially how they could get any better with the addition of Photo-Etch (PE) parts. These sets from GreenStrawberry are engineered to appeal to the more advanced modeller who will end up painting their creation, and you WILL need Super Glue (CA) to attach the parts to your model. The sets arrive in a flat re-sealable pack, with a black themed backing card, a chunk of thick cardboard to keep the PE safe, a set of instructions (both of which are hidden within), and the sheet of PE brass on display in the front. They are designed to improve both detail, accuracy to the scale/CGI models, and add a scale-thickness to otherwise over-scale parts. Millennium Falcon Upgrade Set (01616 for Bandai) The main set includes a large sheet of brass PE, plus a small set of instrument panel parts that are printed on sticky-backed paper, to give your interiors a huge lift in detail. It provides a welcome lift to the interior of the cockpit and the gun ports on the top and bottom, as well as some structural parts. It begins with a complex replacement of the mount for the prominent oblong dish that now adorns the Falcon's topside, replacing all the thick bracketry with more delicate parts instead. The base of the dish is also augmented, and the two assemblies are then brought together into one. The kit has a simple plug-in seat with controls for the gun turrets, which is slimmed down and has its lugs removed top accept a new control column/trigger, which is then placed inside the compartment that is folded up from brass parts, with stickers providing the instrument panel detail on the various facets of the walls. These are further enhanced by relief panels added within, and the finished assembly is fitted to the rear of the glazing with a flange around the outside. This is of course repeated for the other turret, giving you two in total. The main asymmetrical cockpit is also upgraded in a similar way, removing the kit instruments from the main panel and roof along with the three lugs that hold the top to the bottom. The canopy has a skin with insulation quilting etched into it, and all the panels are replaced with new ones that have stickers applied with instruments. The roof has a faceted liner folded up, with additional panels and stickers added, which is added to the lower cockpit along with the new replacement rear cockpit bulkhead that is so often visible in cockpit shots from the movie. This is a lamination of three parts onto which the appropriate stickers are fixed after painting, with two location holes included to register the part on the rear of the cockpit assembly. The rear seats are provided with headboxes that are missing from the kit parts, and the front of the cockpit roof is finished off with a "hoop" that bridges the space between the curved wall of the kit and the faceted inner skin. As a point of interest, you can see that all the instrument panels are perforated where there are usually lights on the various boards, which will show through the stickers if you position some LEDs behind them, making for easy lighting of the busy areas in the various cockpits. The landing gear for the SW:TFA Falcon has the now-standard five legs of two types, both of which get new scale-faithful doors to replace the chunky kit parts moulded into the legs, and the struts themselves are fitted with the perforated circular frames that can be only approximated in styrene. The final job is to fold up the insert that shows at the end of the entry ramp, requiring you to remove the blanking plate moulded into the lower hull. This and another part in the roof will add to the look of the area. Millennium Falcon Grilles (01715 for Bandai) The Falcon's prominent exhausts on the top deck are part of what makes it what it is, and this set provides six new mesh grilles to detail this area. Each circular grille is made up from a bottom hoop, a sheet of louvers, then a sheet of framework, with the top layer a frame around the outer edge with details etched in relief. Alignment is key, and there are two styles of top frame, with a distinct forward direction marked on the assembly diagrams. Four of the siz are identical, with the two leftmost (from behind) having a different pattern on the framing, all of which is explained on the last two instruction steps, as well as showing that "forward" in this context actually points toward the centre of the ship in a fan shape that matches the general shape of the engine deck area. Conclusion Another superb pair of sets to upgrade these Star Wars gems, just remember they're only suitable if you're planning on painting your model. Very highly recommended. Review sample courtesy of
-
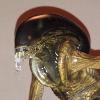 I was asked last week to build a blaster prop for a friend. He's off to Secret Cinema's showing of Empire Strikes Back this weekend, and has been told he has to dress as a 'mercenary' - basically a Han Solo-type. He's got enough clothing to pull of the general look, but doesn't want to spend silly money on a prop on Etsy or eBay. "Pete, can you finish it in 10 days?" he asked me. Challenge accepted. A DL-44 Heavy Blaster Pistol. Not screen accurate, but more 'look and feel'. First job - I told him to order a toy Mauser from eBay. £4.99 and quick delivery It arrived last weekend, so I only got it Monday. Han Solo's gun came from a Mauser C96, and is quite distinctive. This thing makes a clicky noise when you pull the trigger. Cheap, plasticky rubbish. Let me give you a quick rundown of my schedule. 10 day turnaround was a pipedream. By the time this arrived, it was already 5 days after the initial conversation. He's going Sunday. I work from home on Fridays, which meant bringing in a finished prop on Thursday. Which means finishing it Wednesday. 3 day turnaround. First job on Monday night. Assemble the gun. On my way out of the office, I asked the IT department if they had a PC graveyard I could defile. I got a couple of heatsinks and a knackered GPU filled with capacitors and microchips. Win. I also found a toy sniper scope - my stepson broke the scope off his toy rifle, and it had been sitting around for 6 months. He said I could have it The batteries are flat, but I think there's a laser pointer (red light) in there. Next - shave the unnecessary bits off the pistol Glue the scope in place. JB Weld is strong, but takes a long time to set. Gaffa tape will help, and hide unwanted gaps. It's a prop, not a showpiece. 3 days, people - gimme some slack. I know, I know - gaffa tape. Add some capacitors and other greeblies to hide the tape, and give some visual interest, and we're nearly there. I even got some Warhammer on it. The problem was the muzzle - although not a replica/facsimile of Solo's weapon, I wanted it to look as part of the same custom-built family. There are at least 5 different versions used in the films - some of the early production photos don't even have a scope! What they all have in common, though, is the flared muzzle-end - a drilled I found the answer in the supermarket. A bottle of mouthwash had the perfect shape lid. Worth 65p, I think. I drilled the muzzle holes and found a couple of other bottle lids to glue it to, cut the main barrel and attached. This was Tuesday night. I ran out of JB Weld as well, so Araldite was found in the garage recesses. I gave it 24hrs to cure, and then set about painting. Mixed materials on the gun, so Alclad II lacquer primer and gloss black, and metals, and acrylic brown for the handle. A few touchups here and there where the silver oversprayed, and it's done. 1am tidy up, but 3 days from start to finish. Fun little build. Next one will be tidier, I reckon. I'll post a photo of this one in use after Sunday's event (if he send me one)
 -
Millennium Falcon and X-Wing Revell EasyKit Pocket The Falcon and Luke's X-Wing need no introduction, but if you're looking for a stocking filler for your son, daughter, nephew, niece or family friend that just happens to love Star Wars, look no further. The kits are ready to build, and purport to be snap together without glue – I do wonder however how long they'd last if you didn't glue them. That's an issue for the parent/impatient child though! Each kit is presented in a vacformed package with the major parts laid out within the pack in a vacformed tray. The smaller parts and instructions are held in bags within the lower part of the pack, hidden by the card insert. They're sold as "pocket", and you'd need pretty big pockets for the unbuilt box, and still fairly voluminous ones for the finished article by children's standards. It's probably more of a "pocket money" association however, so we'll let it slide. Inside each pack is a really rather nicely moulded little kit of these famous space craft from the Star Wars franchise, and they are immediately recognisable. The parts are moulded in that Star Wars chewing gum coloured styrene, and are detail painted with appropriate colours to give them extra realism. Clear parts are supplied for the cockpits and the exhaust of the Falcon, and the Falcon also has a gloss black stand supplied because it has no gear legs. The X-wing is Luke's Red 5, and is posed with its spoilers in attack position, living up to its name. A couple of lugs hold the wings open, and even when removed they still want to remain opened, but would glue together if you were minded. The kits take moments to put together, but some of the parts are tricky to get in place, such as the exhaust glazing on the Falcon, and the cockpit of the X-wing, and certain similar looking parts won't fit in the wrong places, which although that might be frustrating for a child, ensures the model goes together correctly. The parts are all numbered on the instructions, but it's anyone's guess why, because all the parts are loose and don't seem to have numbers moulded or painted on them. It's fairly easy to work out which is which though, and I would suggest that an adult is present during construction for the younger and less experienced builder. When complete, the kits are surprisingly faithful models of the "real" things. I grew up with Star Wars, and built many of the AMT kits, and have a whole bunch of the new Finemolds kits still to make, and I recognise the shapes of the details immediately, even though some of them are simplified for moulding considerations. I built them both in a few minutes, and found that they fitted better when the remains of the sprue-gates were removed. Whoever had cut mine off was clearly in a bit of a rush, so there were plenty of bits needing tidying up, and annoyingly, a small section of the Falcon's exhaust ripped off along with the sprue-gate. That won't matter one jot to a young'un though. I glued the parts in place, but they have clever friction posts that once installed should stay put unless you apply some serious pressure, and the fine parts of the Falcon's sides are held in place by tabs and the curve of the top and bottom parts, although I suspect that the two front parts of the loading jaws would have come off fairly quickly if not glued. Conclusion Marvellous! They're great little kits to occupy small fingers for a while, and possibly give them a taste for modelling without appearing too obvious. The newer films have given a whole new generation a taste of Star Wars, and they should sell well. I'm not entirely sure how long the slender prongs at the end of each wing of the X-Wing will last, and I suspect that won't really matter much either. Be aware of the small parts that might represent a choking hazard to younger children, such as the R2-D2 figure in the rear of the X-Wing, which could easily be removed if not glued in. For that reason they are marked as suitable for ages 6+. Highly recommended for stocking fillers. Revell model kits are available from all good toy and model retailers. For further information visit

