
Search the Community
Showing results for tags 'F-105G'.
Found 9 results
-
 Never created SEA camouflage before, never built a Thud before, so yes, this is THE opportunity to do so. Here‘s the victim: As the kit decals do not offer a sharkmouth option I shall go ahead and purchase this from a well-known online shop from the UK: It will most probably be the „white lightning“ from 17 WWS in RTAB Korat. Looking forward to another great GB with you guys!
 -
 My second Republic F-105G Thunderchief build of this year, the Revell 2007 issue of the classic 1/48th Monogram kit that dates back to 1982. She is F-105G 63-8336 'Patience' coded 'JB' operated by the 17th WWS / 338th TFW out of Korat Air Base in Thailand, January 1973. She is built OOB and uses one of the kit's five decal options and I am happy with the final result 😎 xIMGP4303 by Ghostbase, on Flickr The old Monogram 'Century Series' model kits were a breath of fresh air in their time and, apart from raised panel lines (which don't bother me), they still hold well today. The fit is mostly superb, for example I built and painted the wings as complete units and added them to the fuselage very late in the build and no filler was needed. xIMGP4306 by Ghostbase, on Flickr Painting was by airbrush using the Hataka acrylic USAF Paint Set (Vietnam War Era). Initially it went on well but I had major problems with a clogged airbrush and thinning issues. In the end I changed to Vallejo acrylics and a medium airbrush nozzle and the issue was solved. However the model did sit on the shelf-of-shame for quite a while! The paint was finished with an application of Humbrol Acrylic Satin varnish. xIMGP4308 by Ghostbase, on Flickr The decals are entirely from the kit and Revell really excelled themselves with this issue, with five different options from 1970 to 1980. I chose 'Patience' because I liked the artwork and that she actively served in the Vietnam War. The amount of detail was amazing with up to 228 decals on the one sheet. The decals went on generally ok but decal solution helped them to adhere properly and avoid silvering. xIMGP4312 by Ghostbase, on Flickr I tried not to overdo the weathering. I made a homemade wash using dark grey acrylic paint and thinners on the few recessed panels lines on the kit. I also used a set of Tamiya weathering powders to simulate hydraulic oil leaks as well as soot. I am still finding my way on this though. xIMGP4316 by Ghostbase, on Flickr Detailed armament - one AGM-78 Standard ARM and two AGM-75 Shrike ARM. The decals were from the spares box. xIMGP4318 by Ghostbase, on Flickr Detail photo of the rear fuselage and tail fin. I used Lifecolor metallics for the jet exhaust areas and inside the undercarriage doors. xIMGP4317 by Ghostbase, on Flickr A top view showing the SEA paint scheme and some weathering. xIMGP4320 by Ghostbase, on Flickr My final photo, the F-105G has joined her sister on the display shelf 👍 Michael xIMGP4322 by Ghostbase, on Flickr
- 17 replies
-
- 37
-

-
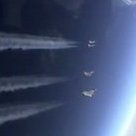
Weasels of the 128th Tac Fighter Squadron, 106th Tac Fighter Wing, Georgia Air National Guard out of Dobbins AFB at the Red Flag 81-1 exercise, Nellis AFB, November 1980. 62-4423 62-4444 63-8304 63-8313 63-8328 Thanks for looking, Sven
-
Here's my 1/48 F-105G, which I was building in the Sharkmouths GB. Build thread is here. It's the Hobby Boss kit, which I thought was pretty good but unnecessarily fiddly in a few places. Decals are from Caracal and were excellent, cockpit is Aires, and I used MPR paints. thanks for looking Julian
- 18 replies
-
- 43
-
-
Time to make a start on my shark mouth GB entry - the F-105G from Trumpeter in 1/48. I have a Caracal sheet which includes a few shark mouth options - not decided which one yet but that can come later - I'm torn between one with a bigger shark mouth in standard SEA camo, or one with wraparound camo (which I think looks great on the Thud) and a smaller shark mouth. Here's the box shot: I'll be putting an Aires cockpit in it, so I've started today by playing around with the cockpit and thinking about how I'll fit it, and how much plastic I'll need to remove from the fuselage. I'll make a proper start tomorrow. cheers Julian
-
I have had a number of Monogram F-105 kits of various marks in the stash for several years and finally managed to start work on one of them, the F-105G. I wanted to do something different so I am doing it as a RAAF Wild Weasel being flown in support of a Canberra Strike mission. It is going to be in Gray/Green camouflage as the Canberra's were for a period of time. I am going to arm it with a pretty standard weapons load as it is in the kit. I have only added an Eduard PE set for the instrument panels and everything else in OOB at this time. It is a relatively straight build with just the canopy being a little upsetting as it can't be put in the down position as it won't fit, the canopy is too narrow for the opening.
-
 Wild Weasel 1 began with five F-100F aircraft and five aircrews. The Weasel crews began their mission in December 1965, with Major Willard leading the first strike into North Vietnam. The Weasel missions were code named Iron Hand missions, and their purpose was to lead a strike force into North Vietnam and pave the way for the strike force to drop its bombs. They did this by going out in hunter/killer teams. The Weasels would pair up with a flight of F-105D fighter/bombers and try to locate a SAM site. The Weasels would then attack the site to mark it and the F-105D's would finish it off. With Operation Rolling Thunder (the bombing campaign of North Vietnam that began in 1964) in full effect, the Wild Weasels were about to prove their worth in combat for the first time. On December 22, 1965, the Wild Weasels scored their first SAM kill in North Vietnam. Captain Al Lamb the pilot, and Captain Jack Donovan, his EWO led the mission into North Vietnam that day and when they encountered a hostile NVA SAM site, they engaged and destroyed it. With this success, the Weasels demonstrated their worth to the Air Force and from then on, the Wild Weasels were in Vietnam to stay. Despite the early success however, the original Weasels suffered a fifty-percent casualty rate in their ranks and it was clear that new tactics and equipment would have to be developed. Here we have the Trumpeter 1/72 F-100F Super Sabre shown in the markings of the aircraft that delivered the first SAM site kill. Also presented is the Trumpeter 1/72 F-105G with a standard load out for SAM Hunting. Both models have the Eduard photo etch cockpit sets, have been airbrushed free hand using Xtracrylix and Vallejo paints. Flory Grime and Dark washes applied and finally sealed with Xtrcrylix Flat. The reason that both aircraft were in the skies over Vietnam, the Gran 1/72 SA-2 Guideline SAM. I have shown the models as they are displayed on my shelf along with a die-cast F-105D and F-100D. Well done if you have got this far!! Here is my tribute to the Aircrews who were ‘First in – Last Out’ A little diorama play: Thanks for looking, Phil
- 23 replies
-
- 62
-
-
 Happy to show my first model after joining BM. This old kit, intended as a quick build for training freehand added airbrush camouflage, surprised me with robust quality plastic resulting in a very smooth build. Despite the age (1980's) and the raised panel lines I started to like it more and more during the construction period. The model is build in the colors off the 17th Wild Weasel Squadron based at Korat Royal Thai Air Force Base, (1970-1974). Plane no. 291, was nicknamed "Muttley the Flying Dog". A famous cartoon in that period. Crew chief Bob Wood himself painted the cartoon on the air intakes. The upper camouflage pattern is created with free hand airbrush. The transition line to the lower hull is created with help from "Tacky-Gum". Used paint: Gunze MR Hobby Brown H310, (FS 30219), light green H303, (FS 34102) and dark green H309, (FS 34079). The lower hull in grey H311, (FS 36622) except for the center-line tank. This is a non standard and own creation. Weathering washes from Flory Models and water paint, (from the kids). All finished with a layer Revell enamel matt 2. Metal exhaust painted with HK's "True Metal line Gun Metal Wax", protected by Tamiya's X-19 smoke. So the plastics turn out to be still fairly competitive with modern kits. The decals are definitely not. They are not as sharp printed as we used to nowadays. Little struggling on some spots with silvering effect despite using a base off Alclad Aqua gloss, (ALC600) and "emergency" help from SET and SOL. So if you thinking about a Monogram F-105 take a look at Revell's one. It is the same plastic but with more modern quality, (and a more extensive) decal sheet. Kind Regards, Rudie
- 30 replies
-
- 41
-
-
 Lockheed F-104G Detail Sets Eduard/Brassin 1:32 The release of the big 1:32 Starfighter was met with some disappointment from some quarters for various reasons. If you have got one or are thinking of getting one, then you might want to get the most out of the kit with the addition of these two sets from Eduard. (32869 - Electronic Equipment) – This set contains two small sheets, one pre-painted, whilst the other is unpainted. Naturally there is quite a bit of the kit detail in the area that will need to be removed first, and these areas are clearly marked on the instructions. The pre-painted sheet contains the equipment faces, placards and circuit breaker panels. The unpainted sheet contains the central spine of the bay, an empty bay to be fitted in the open space in the left hand bay, along with the strip that goes around the bay, complete with screw holes to affix the removable panels. The panels themselves also receive new parts, such as bulkheads, fixing strips, internal access panels, and strengthening plates. (632047 - Ejection Seat) – Contained within the now standard Brassin blister pack the resin parts are very well protected with quite a thick layer of foam, whilst the etched sheet is separate by a card backing. There are four resin parts that include the seat, the seat rail and two styles of PSP pack. The seat is beautifully detailed, but some care will need to be exercised when removing from the moulding block as areas such as the leg restraint points might get damaged. The rails, whilst more fragile are only held to the moulding block by quite thin webs, so shouldn’t cause too many problems with removal. The etched parts are used for the finer fittings, such as seat firing handle, PSP release handle, seat rail cross beams, and thankfully a full set of seatbelts. There is also a small decal sheet which provides the various placards for around the seat. Once assembled, it’s just a case of gluing the rails and seat into the kits cockpit. Conclusion Here we have another pair of useful items from Eduard/Brassin. Although I think the seat set will probably be more popular the electronic bay set will certainly give someone looking at the completed model something different to view. Review sample courtesy of


