Search the Community
Showing results for tags 'Elefant'.
Found 7 results
-
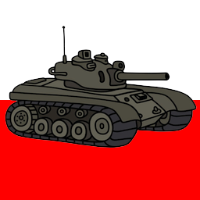
Hi, This is a 1:35 model, the Elefant, German tank destroyer. This is Italeri KIT no. 0211. I made it as movable model. Additional parts are the Friulmodel tracks, towing cable and small accessories. I little modified the front fenders and replaced the shackles for a bigger one. At the bottom I added a short video how does the model ride. P.S. I just bought photo light tent and pictures of this model was taken in the my light tent for the first time. I forgot install an antenna in the model so I took couple pictures with it after I folded in my light tent models riding...
- 24 replies
-
- 58
-

-

-
Hello all Today I would like to present you my elephant, which is made by Tamiya just like Stef's model. However, I decided to use Friul tracks, because I think they fit better to this big giant because of the weight. The Zimmertit I have treated with damage and some parts like the front armour of atak not used. I am not really a Zimmerit fan and therefore less is more 😁 Have fun! MD processing of the Zimmerit edges modified clamping screw dremel tool as lathe pistol port was closed by the crew some simple modifications for better details a lot of flame cut marks and weld seams my welding tools the rear and the jack with more details Ciao e a presto 😎
-
SLT 50-3 "Elefant" + Leopard 2A4 (03311) 1:72 Revell The huge "Elefant" tank transporter was designed by Faun in the 1970s to meet a requirement for an all-terrain vehicle powerful enough to haul large tanks such as the Leopard. Over 300 have been produced and in the 1990s these massive machines were upgraded to the 50-3 standard represented in this kit. The Leopard 2 was developed in the 1970s as a replacement for the Leopard 1 MBT then in service with the West German Army. Throughout its service life, this highly capable tank has been upgraded through A1, A2, A3, A4, A5 and A6 variants. The A4 included some important changes over the earlier models, such as improved armour, targeting systems and crew protection systems. With over 2,000 on strength at the height of the Cold War, Germany sold off a number of this variant to other NATO countries, making it one of the most successfully exported MBTs of modern times. This isn't the first time that either of these kits have been released by Revell as both have previously been made available as separate kits. Both are original Revell kits and both are relatively modern, although the Leopard is the slightly more recent tooling. The elefant is a significant kit for me as it was the very first kit that I reviewed for Britmodeller, over 10 years ago. Just as it did back then, the kits arrive in the usual end-opening box with the sprues for the two vehicles bagged up separately. The two kits are spread across seven frames of plastic. Thankfully Revell have used a nice, neutral grey plastic instead of the horrid dark green plastic they used in 2010. the parts are all nicely moulded and look just as good now as they did when first released. There is no transparent frame. Instead, Revell supply a thin sheet of clear plastic from which you must cut your own transparencies. The Elefant tractor and trailer occupies the most space in the box and is composed of well over 200 parts. The tractor unit is very detailed, with separate parts for the steering and transmission. The interior is equally well-detailed, with crew seats all moulded individually and details such as the steering wheel all present and correct. Construction should be straightforward, although the plastic sheet transparencies will present something of a challenge. Construction of the trailer unit begins with the chassis before moving on to the suspension and wheels and ending in the loading ramp. The modeller has the option of building the trailer on its own hydraulic feet or attached to the Elefant itself. The loading ramp at the back can also be finished in the fully deployed position for loading or unloading, or folded and raised for transport. The trailer is quite a complex beast, so it should keep the builder occupied for a good while. The Leopard is just as impressive, if not more so. The hull features separate parts for the suspension and running gear and the road wheels are moulded in their inner and outer halves. Needless to say some care will have to be taken during assembly in order to ensure that all the wheels are in contact with the ground before the tracks are fixed in place. Revell took an interesting approach to the tracks supplied with this kit, swapping their usual link and length tracks for thin plastic tracks moulded in two halves. These have to be bent around the wheels and drive sprockets and then glued in place. They are made from the same hard plastic as the rest of the kit and rely on being very thin for their flexibility. The hull and turret follow the usual method of construction and feature plenty of nice details. Pioneer tools are moulded in place but pretty much everything else is moulded separately. Two different options are provides for the Elefant, for vehicles named "Hannibal" and "Kraftwerk". Two options are provided for the Leopards as well, for vehicles belonging to PzBtl 84, Luneburg 4. Kompanie and PzBtl 124, Kummersbruck, 4. Kompanie. All of the vehicles are finished in the usual Nato black/green/brown scheme. The decal sheet is small but nicely printed. Conclusion Revell have produced small scale armour kits of consistent high quality for several decades now. Both of these kits are beautifully made and highly detailed - in fact it's hard to identify how Revell could have improved anything about these models. For fans of modern AFVs this set represents a tempting proposition and should provide many hours of modelling enjoyment. Recommended. Revell model kits are available from all good toy and model retailers. For further information visit or
-
Pz.Kpfw.VI Tiger (P) "Truppenübungsfahrzeug" (35A023) 1:35 Amusing Hobby After encountering the T-34 during the invasion of Russia, it was realised that new tanks were needed to combat them, one of which was the Panther, while the other was already in development and eventually became the Tiger. There were two designs proffered for the contract, one by Porsche, the other by Henschel, and it was eventually the Henschel design that found favour with Hitler, after the Porsche design famously failed in a cloud of smoke whilst being demonstrated in front of him at Rastenburg. There were other reasons, such as the complexity of the design and the fact that its petrol-electric drivetrain required too much in the way of the strategically valuable copper. The Tiger (P) ran with a very similar turret as the Henschel design, with the name Tiger coined by Ferdinand Porsche himself. Where it differed was the forward positioning of the turret, which made for a long overhang of the main gun that was deemed a problem for descending hills or crossing large ditches. In the rear were two petrol engines that provided power to an electric generator that ran the two drive motors at the very rear of the tank. Although a mechanical gearbox wasn't necessary, the extra weight of the additional engine, generator and electric motors made for a very heavy vehicle and much added complexity. The road wheels were paired, and not interleaved like the Henschel design, which gave a higher ground pressure, but simplified maintenance at least in that area. It was not enough, so the design lost out and the name was transferred to the Henschel offering. Much of the chassis was reused however in the Ferdinand/Elefant Tank Destroyer, which shared the same track layout and lower hull, 100 of which had already been built at the Porsche factories. Only one Tiger (P) was ever built to completion, and it was pressed into service as a command tank late in the war. The Kit This is a complete new tool from Amusing Hobby, although there have been a number of kits of the type in 1:35. It arrives in a pretty standard looking top-opening box with a picture of Ferdinand Porsche next to his creation, a resin figure of whom is included in the box as a bit of bonus. The rest of the content consists of six sprues and a lower hull half in sand coloured styrene, eight sprues of track links in brown styrene, a pair of "rubber-band" tracks, a decal sheet, a fret of Photo-Etch (PE) brass, a small bag of springs, a roll of braided copper wire, the instruction booklet and the aforementioned figure. Detail is good throughout, and the inclusion of two styles of tracks should appeal to most, while the figure will look good next to the model, although you will need to warm his arms up to get them to fit properly in his pockets judging by my brief efforts. Construction begins with the paired road wheels that are built up, affixed in twos to three suspension units on each side of the tank, and then offered up to the hull with end-caps holding them in position, allowing them an element of movement to accommodate the ground, assisted by the custom springs that are inserted during assembly. The wheels themselves are also held on by end-caps, which allows them to rotate, and the same feature is visited on the idler and drive sprockets using an internal collar that is glued to the axle. Without further ado, the tracks are introduced, where you have a choice of using the supplied flexible tracks (which aren't mentioned in the instructions), or the individual links that consist of two parts per link. Each of the eight sprues contains a jig, which you can use to build the runs of 109 links per side, and as the jigs can be glued together, you can construct a long run at one sitting, up to 40 links if my maths is correct (it usually isn't). The links have two sprue gates per part, and clean-up is straight forward, so shouldn't take too long with a sharp knife. The contact ridge on each link is separate, and you glue these to the main part of the link to trap the pins inside their recesses. Using liquid glue may cause some issues with glue wicking into the joints and leaving you with unworkable track links, so for my test I used Super Glue (CA), which I dabbed on the contact points with a needle in small quantities. This worked, but CA is a little brittle for the task, so I would suggest getting some tube glue such as Revell Contacta with the precision applicator that will weld the parts together and give more strength. As already alluded, take care with applying too much, as the pins are very close to the contact points by necessity. When completed, the tracks have a great deal of movement available, so wrapping them around the road wheels should pose no issue. With the tracks on, the hull sides are added, with an insert on the diagonal panel next to the glacis added on each side. Taking care with alignment will benefit you here, as the hull top drops onto the side panels, so taping this loosely in place while the glue cures will ensure a good fit. The hull top is detailed with jack blocks, the front glacis with machine gun ball mount and driver's armoured vision port, and at the rear, two louvered panels to cool the engines, with each one having separate slats added before they are joined. The fenders are prepared with stiffeners and bumpers that take the wear from accidental track hits on the angled parts, with long tabs helping to make a good joint with the hull. Pioneer tools, PE engine grills, lights and additional spare track in a bracket along the rear of the hull are all added, and the towing cables are created from the braided copper wire with styrene eyes finishing off the ends, with a scrap diagram showing their arrangement. Now for the turret. The main part provides the turret ring and curved side-walls, into which you place the panel with the gun's pivot point engineered in, which is held in place by external pins. The vision ports, top hatch and commander's cupola are all fixed in place, and at the rear a special bracket allows the rear storage bin to fit over another two short lengths of spare track links. The bin has a separate lid so could be posed open if you wish. The barrel is made up from two tubular sections, with a three-part flash suppressor, the core of which is hollow. The rear of the barrel is inserted into the keyed hole in the mantlet, which is backed by another part for attachment to the interior, and a coaxial machine gun is threaded through the hole. All that is left to do now is to twist the turret into position where it is locked by a bayonet style fitting. The figures is cast in resin, and has already been removed from its pouring blocks, except for a pair of platform shoes that you will need to flatten off. The hat and arms are separate parts that fix to the body with square pegs for security. My sample had some issues with locating his hands properly in his pockets, so a little heat will be needed to coax them into position. I tend to use hot water and then plunge the parts into cold water to fix the shape, so it's just something to be aware of before you try to assemble and paint. As usual with resin, take the precaution of wearing a mask when cutting or sanding resin, as the tiny particles are harmful to your health if breathed in. Washing the parts in warm water will also improve the adhesion of paint, as there may still be some moulding release agent on the parts when you receive them. Markings Only two schemes are provided from the box, one being the initial prototype livery of Panzer Grey, the latter being a Dunkegelb, green and red brown camouflage. The paint call-outs are given in the AMMO range, which you can always convert using one of the many charts available if you don't use them. The decals are a generic sheet of white outlined red turret numbers, plus a choice of two styles of crosses in case you fancy doing a speculative colour scheme for a change. The decals are sharp and with good colour density, although the white is very slightly offset, but as many of these markings were hand-painted by inexperienced mechanics or crew, they're hardly likely to be pin-perfect anyway. Conclusion It's nice to see a new kit of the fairly well forgotten Tiger (P), and the inclusion of a choice of track styles will please those phobic about individual track links, with Mr Porsche in resin a bonus that if not used in this model can be pressed into service as a civilian at some point. A complete package too, with only glue and paint required. Very highly recommended. Review sample courtesy of Available from all good model shops soon
-
Sd.Kfz.184 Elefant Revell 1:35 The Elefant (German for "elephant") was a heavy tank destroyer used by German Wehrmacht Panzerjäger during World War II. It was built in small numbers in 1943 under the name Ferdinand after its designer Ferdinand Porsche, using tank hulls that had been produced for the Tiger I tank requirement which was rejected in favour of a Henschel design. In 1944, after modification of the existing vehicles, they were renamed Elefant. The official German designation was Panzerjäger Tiger (P) and the ordnance inventory designation was Sd. Kfz. 184. In September 1943, all surviving Ferdinands were recalled to be modified based on battle experience gained in the Battle of Kursk. During October and November 1943, 48 of the 50 surviving vehicles were modified by addition of a ball-mounted MG 34 in the hull front for anti-infantry ability, a commander's cupola (modified from the standard StuG III cupola) for improved vision, and the application of Zimmerit paste. The frontal armour was thickened and the tracks widened, increasing the weight from 65 to 70 t. The improved vehicles were called Elefant; this became the official name by Hitler's orders of May 1, 1944. Only two of these vehicles survived the war. One Ferdinand was captured by Soviet forces at Kursk, and is now at the Kubinka Tank Museum outside Moscow. An Elefant was captured at Anzio by the Americans, and is now part of the United States Army Ordnance Museum's collection at Fort Lee, VA. The example at Fort Lee was restored to display condition in 2007–2008, as documented on the show Tank Overhaul, but not in its original paint scheme. It was announced in 2016 that the Fort Lee Elefant would be loaned to the Bovington Tank Museum in Dorset, UK. The vehicle will be displayed as part of the museum's "Tiger Collection" display from April 2017. This display aims to bring all the members of the Tiger family together in one place for the first time. This has now actually happened, with the exception of one Tiger variant. The Model This kit has got to be one of the oldest moulds I have reviewed, being originally issued by Italeri in the 1960’s. Saying that, the moulds have certainly stood the test of time, as there is no sign of flash or other imperfections on the grey styrene. There are just two large sprues, two separate hull parts, four piece rubber tracks per side and a small decal sheet in the rather squishy end opening box. It looks like it will be a fairly simple build and there are still remnants of the old releases in the instructions where it tells you to melt the ends of the wheel within the hull so that they will rotate. Construction starts with the fitting of the axle inserts and gearbox covers into the lower hull. The sprockets, idlers and road wheels are all two part assemblies. The sprockets and idlers are then fitted to their respective positions, along with the mud scrapers and front stops. The six suspension units are each made up from four parts before being attached to the hull. The twelve road wheels are then fitted to the axles, followed by their hub caps. The four piece rubber tracks are joined together by melting the pins on each section, the tracks are then fitted around the sprockets and idlers so that the teeth on each mesh and around the road wheels. The driver is provided with a six piece seating arrangement which includes the control levers. This is then fitted to the bow section of the lower hull, with a separate seat for the machine gunner. Both crew members are provided each with separate upper and two lower body parts with separate arms. The driver is also fitted with a three piece headset. The upper and lower glacis plates are then fitted to the front of the lower hull along with the two piece vertical section which includes the machine gun position into which the MG34 is glued. The track guards are then attached, followed by the guard supports. The engine deck is then fitted with the centre grille; grab handles and lifting eyes, before being glued into position. The “turret section” is fitted out inside with the commanders seat and support, backplate of the gun and the two piece gun barrel which includes a large ball to fit within the fighting compartment. Externally the section is fitted with the commanders cupola, mantle cover, lifting hooks, gunners hatch and outer gun plates. The travel lock is made up from three pieces and glued to the front decking between the drivers and machine gunners hatches. The completed fighting compartment is them glued into position, and the commander figure assembled before he is placed standing on his seat. The rest of the build includes attaching the towing shackles, storage boxes, exhaust box, spare track links, stowage hooks and coiled towing cables. Decals There are two decal options, the decals are ok, although they appear a little fuzzy around the edges, and they have good opacity and are in register. The options are:- 1st Company of the 653rd Heavy Panzerjager Battalion, Soriano al Cimino, Italy, 27/06/1944 2n/3red Company of the 653rd Heavy Panzerjager Battalion, Eastern Front, Russia/Poland, 1944 Conclusion Considering how old this kit is, the moulds are surviving remarkably well, there is no sign of wear for flash on the parts and everything appears to be as crisp as the day they were made. It’s a relatively simple kit to put together, but with care, a good paint job and weathering, it can be made into a very nice model. Revell model kits are available from all good toy and model retailers. For further information visit
-
Panzerjäger Tiger (P) Sd. Kfz. 184 Elefant. This is one of only two surviving examples. This was captured at Anzio by the Americans, and is now part of the United States Army Ordnance Museum's collection at Fort Lee, VA. Currently on loan to the Tank Museum in Bovington as part of their Tiger collection. Pictures thanks to Dave Wardle.
-