Search the Community
Showing results for tags 'Dragon.'.
-
My GB Tiger entry is Dragon kit 6253 This original 2005 boxing Dragon kit is one I’ve had in the stash for a number of years now so I am really looking forward to only my second ever Tiger I build! There have been a few re-releases since, but this is the original with a host of addition multimedia parts. It’s not all doom and gloom if photo-etch is a turn off as there are styrene alternatives. So, let’s pop open the box and inspect what is reputed to be one of the very best of what this manufacturer produced back in the day. It’s a comprehensive 3 in 1 package in which you can build three different Ausf E variants. A late, a late command vehicle and the final version. There are five frets of photo-etch including track guards, exhaust surrounds, engine grills, command tank aerial and multipart tool clamps to name just a few. There is an additional turned metal barrel and muzzle brake and five different ammunition shell types, metal tow hooks and tow cables and yes, there is a metal bucket. There are individual magic track links and the option to build working torsion suspension. There are plenty of options depicting the differences between late and final versions including two turret roof types and final type patterned steel wheels. The box is packed with almost every conceivable extra and was considered back when released, everything you could possibly need. Well, almost everything. Unlike later releases with far less parts and rubber band tracks this kit does NOT have any Zimmerit. Although the inclusion of Zimmerit anti magnetic paste ended in Sept 1944, production of the Tiger I ended in August, so all late and final builds would have received factory Zimmerit. Why this kit didn’t come with any moulded on I couldn’t say. I know Dragon did release kits with it on, but I’m not qualified to say how successful it was. It’s not a massive issue as aftermarket manufacturers released their own not long after the kits release. I’ve gone for a safe pair of hands with the ATAK specific set. This includes two pattern types for the turret and two resin mantlets and turret escape hatches. I’ve also got a set of Friul metal tracks to add some heft to the build. Knowing very little about the production history of these big cats I’ve turned to David Byrden who helped the manufacturer with technical assistance for this particular kit. Along with a comprehensive history and insight into Tiger I production his excellent website https://tiger1.info/vehicle.html also lists the majority of Tiger I 1/35 scale kits and lists any issues that each might have. For this kit there are no major problems, just a few pointers to solve instruction discrepancies, and some small additions and modifications. With the choice of three, the first logical step is to choose a variant. I’ve always been fascinated with the Normandy campaign, so I will be choosing a vehicle from one of the heavy tank battalions below. The Tigers that were operating in Normandy fought exclusively, as far as I know, in the British and Canadian sectors around Caen where the German armour was concentrated. Three German schwere Panzer Abteilung fought in Normandy and a few Tigers may (or may not) have been present in the Panzer Lehr Division. Not all of them where of the late type and many had been re-built so a litte further research to find a suitable candidate will be required s.SS-Pz.Abt. 101 had 45 Tiger I and reached Normandy on June 12, travelling from Beauvais near Paris. Michael Wittmann and the 1st and 2nd Companies famously fought in the well-known battle of Villers-Bocage on June 13. s.Pz.Abt. 503 was transferred to Normandy with 33 Tiger I and 12 Tiger II in early July. s.SS-Pz.Abt. 102 was transferred to Normandy with 45 Tiger I in early July. They were engaged in the bitter fighting for Hill 112. Tiger 232 of SS.Pz.Abt 101. Larger pattern zimmerit on the turret, monocular gunsight and a centrally mounted loaders hatch handle. An MG AA mount is also fixed to the cupola Beat up Tiger 111. Concave type sprocket, large idler wheel and offset muzzle brake Tiger 211 of SS.Pz.Abt 102 commanded by Martin Schroif, The second highest scoring Tiger commander with 161 credited victories Tiger 222 of Schwere SS Panzer Abteilung 101 Towing Tiger 231 towards Caen on Route Nationale 175 out of Villers-Bocage. The next step was to decipher the infamously busy Dragon instructions. Credit to them they do break down the various differences for each of the three variants at each critical stage, but I still double checked that these were correctly picked out and made notes from the David Byrden website. CONSTRUCTION The first steps build up the running gear. The lower hull tub is a one-piece affair to which you first add the front tow hook extensions and individual torsion bars and inner wheels. After each torsion bar has been cleaned up, they fit snugly unglued through the hull, and the workable design means fixing the bar ends as instructed in the grooved slots to the small fixings added on the opposite wall. This system allows the suspension to compress and rebound as per the real thing and it works fairly* well. Although the instructions are not overly clear the track pin return plate is to be positioned slightly differently if the smaller idler is used. It fixes angled down at the rear to operate effectively on the smaller idlers. David Byrden points out that the smaller idler wheel was introduced about a month before the thicker roof so its very unlikely that a larger idler would have been present on any vehicle represented by this kit. I would recommend leaving the idler axle unfixed until the tracks are added to get the perfect fitment. There are two sets of both inner and outer wheels with one set representing those fitted to the final version. There is also a choice of two sprockets. As far as I can tell there is zero difference to the outer face other than the spokes on one are concave and the other convex. Inner and middle sets of wheels dry fitted *as seen in the images below, full compression isn't that effective. The second image shows the whole structure lifting at the rear, so to display a fully compressed suspension you would either have to add extra weights into the hull or despense with the working system and simply fix them in place. However, individual wheels do articulate seperately well enough to display over slightly uneven ground. Two lower hull rear plates are included, with one representing the different fixings used on the command variant. Before adding any additional components the ATAK Zimmerit will first have to be added and any location holes it covers, opened up. Any damage is also best added at this stage. There is the option of one plastic or two types of metal tow shackles and pins. I understand the squarer shaped ones were fitted to the final tanks. David Byrden points out two small updates required in step 5. Firstly, the exhaust muffler top guard is supported on pins (parts C3) and these are orientated incorrectly. These are easily repositioned using the guide on his website. Secondly the adapter plate that is positioned between the exhaust sits on two small posts moulded to the rear lower hull plate. These are 1mm too long so reducing their size allows the plate to sit as intended. The exhaust shields are offered in both plastic and pre-formed photo-etch. Whatever medium you choose the shields were actually mounted to small square spacers. This is not a detail added to the rear plate. Again, these are easy enough to scratch build out of plastic card. The jack brackets are offered in both plastic and photo-etch. Late gun tank rear hull plate fitted I have read that Dragon deliberately moulded the hull with a slight warp in the hull tub as a design intended to allow for a snug fit with the hull roof and side plates. The rear plate is big enough and strong enough to force the hull sides into the proper alignment, but at the front it requires a little help to overcome the warp. Using the roof plate moulding as a template, positioning a length of sprue or wood or brass etc, cut down to the necessary size, will brace the lower hull to allow the perfect fitment of the roof plate moulding. Images below taken from David Byrden's webpage to illustrate Roof moulding and turret shell dry fitted to the lower hull showing how much the lower hull bows in at the front without any bracing
-
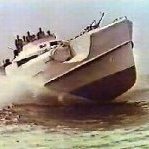
My first build in 30 years is going to be a Sturmboot, 14th May 1940 at Sedan. I have found one photo of the 1 Pz Div. crossing showing a Sturmboot in the background. Do anyone have more photos? The Dragon kit from 1999 has one big problem. It doesn't look like a Sturmboot (more like a bath tub!). The aim with this build is to try to get it to look a bit more like the original. I have only manged to find a drawing of a Sturmboot with decking. The obvius problem is the width of the boat (the length is ok). I have tryed to correct it with a wooden insert and boiling water.
-
Hi, guys! I'm happy to finally call this done. Here's the Sd.Kfz.252 ammo carrier of the second batterie of StuG.Abt.185. Build log can be found here: https://www.britmodeller.com/forums/index.php?/topic/235122916-sdkfz252-ammunition-carrier/ Here are the pics: And some with the StuG: Cheers! Kristjan
- 33 replies
-
- 59
-

-

-
Hi, getting started with a new one. I had a couple of StuG III Ausf.B's on my table a few years back. One of them was Dragon combo kit paired with a Sd.Kfz.252 ammo halftrack and I decided it's time to get it on the road at last. It's basically the same, as the Dragon 6718 kit. The vehicle is a bit odd conversion of the widely used Sd.Kfz.250 halftrack, It had an enclosed top and a sloped rear armor with a huge pair of hatches. There's not much material of this variant that I've found on the internet and basically no info about the interior, but I guess it was pretty close to the 250 that it was based on. The kit itself is a mix of newer and older sprues with a varying quality. Dragon has some of the details wrong there as well that I'll try to address on the way. I also have some Aber PE sets to it, a Friulmodel tracks that has a correct drive sprocket in it and the Quickwheel resin wheel set. The kit has Sd.Ah.32/1 trailer in it as well, that I intend to do as well. I've never done a halftrack before, so we'll see how it goes. For starters I made the front axle steerable. Axle details were the ones from the older molding and needed some serious work to achieve the task. The hull sides were a bit warped in my kit but after straightening went on quite nicely. The joint strip on the lower tub and the side panels was nonexistent on the kit, which seemed a bit odd, because the tub clearly had the place to add them, simply the details for the strip were not there. I added the styrene strips to the both sides and some bolt details too. The location of the bolts are more or less guessed. After the sides were fixed and dried, I cut off the location tabs inside and smoothed the transition. I also added a strip of resin rivets to both sides to liven the area up a bit. The hull interior has the Aber PE replacements in it that adds a lot of fine detail too. The running gear was also completed but there's not much in it besides a bunch of wheels and swing arms. Tracks went together nicely. No wire this time but simply gluing the upper and lower part together. Not much cleaning either, so good job, Friulmodel. Here's how it sits when dry-fitted. That's all I have for now. Cheers! Kristjan
- 84 replies
-
- 27
-

-
This project continued with a theme of creating a display to include a piece of space memorabilia and a model or models that are directly related to it. The piece of memorabilia is a commemorative patch that celebrates NASA’s 60th Anniversary. The patch spent approximately a year aboard the ISS. It was flown up to the ISS aboard an Antares-Cygnus flight (NG10) & returned to earth aboard a Dragon Capsule (CRS-19). Antares Launch vehicle is a 1-144th Scale resin kit from New Ware (NW120). With a few modifications Dragon capsule is a 1-48th Scale Resin 3D print, I have “designed” and drawn using Fusion 360 I did post part of the build on the forum, but didn’t get around to uploading the last section, if you have an interest in sing the complete build log it can be seen here https://www.tsmodels.co.uk/space-models/antares-dragon/the-build
-
After building the very impressive 1/16 Gecko Panzer II, I just had to make a downscaled version in 1/35 where I could use info learned while building the bigger kit and apply that to the smaller one. This was a fun project indeed (if only there was a half-decent 1/72 version of this tank!).
- 12 replies
-
- 25
-

-

-
- 1/35
- CyberHobby
-
(and 1 more)
Tagged with:
-
Good afternoon. Here are a few more photos of my latest finish from my ongoing project. A Dragon Stug A based on some well known photos of an LAH vehicle (No.5) in Ukraine. An old kit updated with some Voyager, T-Rex tracks, Star decals and other extras, including a very nice cable from Eureka. I've done it slightly battered and muddy/dusty using techniques I have been learning over the last few months. Anyway, thanks for looking and have a great remainder to your weekend.👍
-
Hello all. This one was finished a few weeks ago but I just got around to taking the glamour pics. This was an out of the box build of the venerable Dragon kit. All the markings are painted using masks created on my Silouhette cutter. The kit itself was ok, but the hard and brittle plastic made it a little tricky to work with. My interpretation of the markings are well detailed in the WIP thread, though I don't think there's much controversy there. Cheers.
- 18 replies
-
- 38
-

-
A couple of days ago I finished my latest build, the Finnish army's StuG. Ausf. G III .These assault guns played a very important role in halting the red army's massive attack in the Karelian isthmus near Leningrad during June-July, 1944. The fate of Finland was at stake. If the Russians had been able to break through they would have marched directly to Helsinki and conquered the whole country. It would have been the end of Finland as a nation. But the advance of the red army was halted in fierce fights. One important element were the 59 German assault guns that were bought just in time to strengthen up the Finnish defence. These StuG III's destroyed in total 87 Russian tanks while own losses were 8 StuGs. My model is a kitbashing build of the Dragon 1/35 scale StuG III kit and the Tamiya Finnish StuG III special edition. I vandalized the Tamiya kit of its Finnish modifications, for instance the large tool box in the rear, the spare wheel racks on the sides of the StuG,, the modified shield for the machine gun and the DT assault rifle as well as the C-shaped hooks. The tracks are white metal ones of Master Club. The problem I noticed too late was the size of the tracks.They didn't exactly fit the teeth of the drive sprocket. I will have to fix that problem going forward. For the markings and the Finnish swastika (nothing to do with the nazi one, though) I bought the very good decal set of Echelon. Building the model was straightforward and maybe the hardest part was painting the complex green, brown and beige camouflage. I used Vallejo color's paints for the job. I finished the build by weathering the model with several AK's pigments. Many of the StuGs had a wife's or girl friend's name written above the visor of the driver. My model was named "Liisa" and it was one of the highest scoring assault guns with nine tanks destroyed.
- 29 replies
-
- 33
-

-

-
Hello, My next thread will be StuG III Ausf.B. I have chosen Tamiya kit for this one and since I have few leftovers from Dragon's Panzer III family kits I've built before, I use them wherever I can. I have few Aber upgrade sets also to use and aftermarket decals, as I'm going to one of the StuG Abt. 185 vehicles. I'm not very happy with the Tamiya kit, but there are not many options when building Ausf.B. Bolts are rounded and need to be replaced, weld seams are often missing and need to be reproduced, fit is loose and need a lot of filler. But main problem with this kit is that upper hull, when removing the molded fenders, appears to be 1mm wider than lower hull. I really don't know what to do with that yet. Here is the front driver's plate compared to hull: But Aber's etched sets seems to be awesome and offers a lot of fun. Here's the assembled ammo storage cabinet. And yep, the lid is movable: Tracks are from MasterClub this time and oh are they awesome. Compared to Friuls, these need very little cleaning and go together with little resin pins. Til' next time, Kristjan
- 66 replies
-
- 14
-

-
Hi, finally got finished both of my early StuG's. Buld log can be found here: https://www.britmodeller.com/forums/index.php?/topic/235058462-stug-iii-ausfb-both-of-them/ These are depicted as they were used at the end of the summer 1941 at Estonian area. Both of them belonged to the 2. battery of StuG.Abt 185,
-
Hello to all! Take a look at my german destroyer type 1936 A mob Z 37 from Dragon. It was initially the Dragon Z39 Kit with some modifications (less small AA Guns) The Dragon German Destroyer Kits have also its flaws! The left anchor winch turns in to the wrong direction. The platform for the front Rangefinder is wrong. The degaussing cable is missing The searchlight on the mainmast is to big, the big one is installed near the aft funnel. I do not understand why they have done this mistakes. The Trumpeter Kits are right. The small AA 2cm Guns are also wrong - overdetailed! I used the trumpeter light AA guns with the PE Set from White Ensign! The rigging was difficult! The front Rangefinder corrected. the anchor winches View of the anchor winches as per official plan official plan showing rangefinder platform and small searchlight I still need to place the Destroyer on the "Cathedral Glass" look at Topic "WAVES" Hope you like it. Thanks for viewing. Cheers Andreas.
-
Hi All, it's been quite a while since I posted anything on BM. I've finally sorted out a new photo hosting source after the PB debacle (thanks to the very useful articles posted elsewhere on BM) and thought I'd share a few things I've been working on. This is the old 1/35 Dragon Sherman Firefly VC Kit no. 6182. It's built OOB apart from the decals which came from a Bison set. The kit was ok apart from those tracks! They turned out ok in the end but with 3 pieces per link I was almost losing the will to live by the time I'd finished them. Never again! Hope you like it. Bandit1250
- 12 replies
-
- 26
-

-


.thumb.jpg.d3635a7ef6507d35f372dd09671fe96f.jpg)
