Search the Community
Showing results for tags 'Dassault'.
-
Another 2023 build I'm catching up on posting is this Revell boxing of the old Hasegawa Mirage F.1C. Despite its age, I think this kit holds up well in terms of shape and fit. I augmented mine with a Pavla cockpit (which is a huge improvement on the very basic kit cockpit), ResKit wheels, Master pitot tube, a CMK jet exhaust and Quickboost air scoops. The air scoops and the exhaust are for the Special Hobby kit, and just a few simple mods were required to the Revell fuselage to get the latter to fit nicely but is a nice addition I think. The Hasegawa/Revell kit has raised details so I rescribed some of the most noticeable panel lines. Colours are Ammo MiG Mirage Blue over Vallejo white aluminium. Again, apologies for the quality of the camera phone photos
- 12 replies
-
- 45
-

-
 Having already edited Rafale B and M kits in 1/48th Revell has surprisingly not yet in its range the most produced variant I mean the single-seat Rafale C. This will be done in 2018. Don't forget the Korean mix (B+M=C !) edited once upon a time by the Revell plastic injection contractor: ACE (Link) - ref. 3901 - Dassault Rafale C Source: https://www.hannants.co.uk/product/RV3901 V.P.
 -
 IAF Mirage IIICJ Pilot & Female Ground Crew (F72387 Special Hobby etc.) 1:72 CMK by Special Hobby Israel was a long-term operator of the Mirage III, and Special Hobby have created a series of kits in 1:72 that depict many variants, including those used by the Israeli Air Force (IAF). Their figure sculptors have also been hard at work creating figures to go with these new kits, this set including both a pilot and female ground crew. This set arrives in Special Hobby’s yellow themed blister pack, with a header card and the instructions forming the slot-in back to the package, and holding the resin in place within the blister. The two figures inside are attached to their casting blocks by the soles of their shoes for minimal clean-up, plus a little fine flash between their legs, arms and other places where they will benefit from support during casting, especially the lady with her hands clasped behind her back, where they would have otherwise been the potential for bubble catchment areas. These fine areas of flash can be removed quickly and cleanly with a sharp blade, scraping or sanding away any residual flash until you are happy with the finish. The pilot is wearing a flying suit, boots and life vest, and is holding his helmet with mask and oxygen hose spilling over the edge, with both hands by his side, looking up and to one side as if admiring his aircraft or watching others from his squadron coming back in to land. The female ground crew operative is dressed smartly in a knee-length skirt and jacket, plus a cloth forage cap, and her hair pulled back into a short ponytail at the rear. Her hands are clasped behind her back as mentioned, and she is wearing a pair of low-heeled court shoes that might benefit from thinning of the soles to a more realistic height. Adding figures to a model or diorama brings that human scale to it, and these IAF crew are perfectly suited to the Mirage IIICJ in 1:72. Highly recommended. Review sample courtesy of
 -
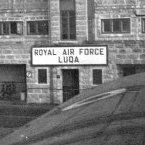
Mirage F.1EQ/ED (SH72386) 1:72 Special Hobby The Dassault Mirage F.1 has been a successful point defence fighter for over thirty years, and was developed initially as a private venture by Dassault as a replacement to their ageing Mirage III fighters. It is a single-engined, single-seat fighter aircraft with a high-mounted delta wing and capability of reaching mach 2.2 in short order. Dassault soon found an eager customer in the shape of the French Armée de l'Air, who bought various versions over the years. The B model is a two-seat variant that is 12"/30cm longer than the single seater, sacrificing some fuel capacity to house the second cockpit, and weighing in heavier due to the two Mk.10 ejector seats that were installed. The cannons were also sacrificed, but cannon pods can be used if required. It is predominantly intended as a trainer, but other than the lack of cannons, it is fully mission capable and is wired and rated for munitions identically to its single-seater sibling. The F.1 was an export success, bought by twelve nations, most notably and somewhat infamously, to Libya, Iraq and Iran, some of which were destroyed in the conflicts in the 2000s. The two seat B was sold in smaller quantities to Libya, Spain, Kuwait, Jordan and Iraq, although not all the airframes were delivered to Iraq before they fell from grace internationally. The EQ was sold to both Iraq and Iran, ironically, and the ED was used by Libya, one of which famously defected during the fall of Muammar Gaddafi in 2011. The F.1 is still in service with a few nations although France retired theirs in 2014, and before its retirement it earned the nickname Grandma with the Spanish Air Force due to its advancing years. At time of writing, they are still in use with the new Libyan government, Morocco, and Iran, to name a few. The Kit This is a straight-forward reboxing of the 2021 edition of the kit, the original tooling released in 2016 but with additional parts added along the way. It arrives in a modestly sized top-opening box, and inside are six sprues in grey styrene, a clear sprue, and two bags with twelve resin parts inside, a tiny Photo-Etch (PE) sheet that is bagged with the decal sheet, and the instruction booklet that is printed in colour on glossy paper in an A5 format. Detail is good, and the inclusion of resin and PE add to that, resulting in a well-detailed model. Construction begins with the cockpit, starting with the tub that has the side consoles moulded-in, to which is added a rear bulkhead, instrument panel with HUD that includes a clear lens, the former having a decal that portrays the dials and other controls. The ejection seat is fitted near the end of the build, with a choice of two designs for different decal options. The starboard fuselage half is prepared by installing the three-part exhaust, which starts at the bulkhead with the rear of the engine moulded-in, a straight exhaust tube that has a corrugated and stepped inner face, followed by the exhaust that has petal details engraved to complete the look. The nose gear bay is a single part that also has plenty of detail moulded-in, and that is integrated under where the cockpit is inserted as the fuselage is closed, after painting the side walls and their ribbing detail. There is a choice of two nose cones, each in two halves with probes to the side, one fitted with a refuelling probe, the other without, but a probe on the very tip of the cone. There is a resin replacement for the tip of the refuelling probe that is installed after cutting off the plastic tip according to a scrap diagram, adding extra detail to this prominent area. A pair of inserts under the intake trunks depict the perforated surfaces of the air-brakes in the stowed position, and there is a circular light under the nose with a couple of small clear parts on the front ends of the spine behind the canopy. The intakes and their shock-cones are each moulded as a single part, and they have a small window insert glued into a depression at the rear of the parts, leaving an oval window into the trunking. Each wing is made from top and bottom halves, the upper surface larger to obtain thin trailing edges and the dog-tooth leading edge, cutting off a small raised section near the tip. There is a choice of two styles of tail fin, which is achieved by cutting a section out that is marked in red and extends to three parts, slotting into position on two tabs and inserting a blade antenna near the tip on each side. A pair of strakes are fixed under the aft fuselage, and for some camo schemes, a small resin bump is glued under the fuselage just aft of the wing trailing edges. The landing gear is next, each of the three legs made from one part with extra struts supporting it, and twin wheels all round, each one a single part. The main gear bays have three doors that are curved to the shape of the fuselage, fitted to the top and bottom edges of the bay, while the nose bay doors consist of a solid Y-shaped front door, and a large side-opening door that has a choice of a styrene blade antenna or a PE triple antenna for one decal option. There are two choices of ejection seats that are made from four parts each, two for the frames, one for the cushion, and an inverted and sloped L-shaped rail at the rear. Detailed painting instructions are included, and the finished seat is placed in the rear of the cockpit before the windscreen and canopy are installed, choosing to pose it open or closed. The rest of the parts are a mixture of styrene and resin, creating a pair of two-part drop-tanks with two fins to the rear, another for the centreline with an H-tail on a shallow pylon with two more for optional mounting under the wings. A pair of Matra A2A missiles are fixed to rails on the wingtips, each missile having a pair of perpendicular fins attached to the tail. The infamous Exocet missile is supplied in resin for one of the decal options, with separate exhaust part and four forward fins that fit into slots in the body of the missile, and a resin pylon to mount it under the aircraft. There are also a pair of Super 530F missiles with separate perpendicular fins front and rear, and its own pylon for under the wings. There are a smattering of additional weapons and sensor pods left on the sprues that can be allocated to other projects or left in the spares box for later. Markings There are four decal options included on the sheet, as well as a lot of stencils to add realism to your model. From the box you can build one of the following: Mirage F.1EQ, 4014, No.79 Sqn., Wahda Air Base, Iraqi Air Force, Sept 1981 to 82 Mirage F.1EQ-5, 4577, No.81 Sqn., Qayyarah Air Base, Iraqi Air Force, June 1985 Mirage F.1EQ-6, 3-6211, No.102 Tactical Fighter Sqn., No.10 Tactical Air Base, Chabahar/Konarak, Islamic Republic of Iran Air Force, 2011 to present Mirage F.1ED, 502 (and 508), Libyan People’s Air Force/Free Libyan Air Force, Luqa, Malta International Airport, 2011-2012 The decals are printed using a digital process and have good registration, sharpness, and colour density, with a thin gloss carrier film cut loosely around the printed areas. This means that the carrier film on their decals can be coaxed away from the printed part of the decal after they have been applied, effectively rendering them carrier film free, making the completed decals much thinner and more realistic, and obviating the need to apply successive coats of clear varnish to hide the edges of the carrier film. It’s a great step further in realism from my point of view, and saves a good quantity of precious modelling time into the bargain. Conclusion A welcome re-release of this long-lived fighter aircraft in service with nations that aren’t perhaps as popular as others. Detail is good, and there are some neat upgrade options from Special Hobby’s CMK line, as demonstrated in a little half-page advert at the end of the instruction steps. Highly recommended. Review sample courtesy of
-
Super Mystère B2 Early (FR7001) 1:48 Azur Frrom The Super Mystere was a successor to the earlier Mystere series of jet fighters, and was the first European production aircraft to be capable of supersonic speeds in level flight, thanks to its slender swept wings, and the addition of an afterburner ring to its Atar 101 engine. The prototype of the Avon-engined B1 first flew in 1956, with the French engined B2 flying a little later, and going into production for a run of 180 airframes. A further upgraded B4 was cancelled before it reached production due to the superior capabilities of the Mirage III that was coming into service at that time. The Super Mystère bears a passing resemblance to the North American F-100 Super Sabre of a similar vintage, which owes more to the direction of aviation and aerodynamic research at the time, rather than any sneaking about in balaclavas. The B2s entered service with three Escadres de Chasse in mid ’57, each of which adopted a colour and name for their subordinate escadres, and went on to serve in these roles until 1977 when they were withdrawn, a few going on to serve at a French technical school. The Israelis also bought two dozen airframes, and considered them a good match for the MiG-19s that they often encountered, particularly during the Yom Kippur and Six-Day wars when some were lost to enemy action. Another dozen aircraft were purchased by the Honduran Air Force, who later bought a few more, which went on to serve well into the 90s, performing ground support operations for their nation. The Kit This is Azur Frrom’s first 1:48 scale kit, and one of very few kits in this scale of the Super Mystère, the only other injection moulded styrene being from a company that has a reputation for being difficult to build. This is good news for “quarter scale” modellers such as myself, as it should be more widely available and much easier to build. The kit arrives in a top-opening box in their usual pale blue theme, with an attractive painting of the subject matter on the front. Inside are five large sprues in grey styrene in a resealable clear bag, a clear sprue in its own bag, decal sheet in another bag, and the instruction booklet. It is printed in colour on glossy paper with colour profiles on the rear pages, followed by a few more pages illustrating Azur Frrom’s range of products in 1:72 scale. Detail is good, including finely engraved panel lines, raised and recessed details in the cockpit, gear bays and air-brakes, and crisp clear parts to show off your work on the cockpit details. The kit is a cooperation with Special Hobby, as can be seen from the sprues, and that should give many modellers an idea of what to expect. Construction begins with detailing of the fuselage halves with exhaust cowling, air-brake bays and other inserts that are particular to this variant. The exhaust trunking is built up alongside, starting with the main tube with the afterburner ring suspended between the two halves, then top-and-tailing it with a split exhaust and a crisp rendition of the engine’s rear face. The cockpit is assembled on the floor part, which has the side consoles and front bulkhead moulded-in, adding the instrument panel with decal, rudders with supports, control column, and rear bulkhead that has the ejector seat ramp moulded-in, turned into a tub by the application of the cockpit sidewall inserts. The long intake trunking is made from top and bottom halves, with the front compressor face of the Atar engine blanking it off at the rear. This and the exhaust are inserted into the starboard fuselage half on a set of pegs, but the fuselage isn’t closed yet, as there is more work to do. The main gear bay is built from roof, two curved bulkheads front and rear, plus a divider down the centre, which is then inserted into the lower fuselage along with the nose gear bay, all of which is painted in a buff primer. The cockpit is glued into the starboard fuselage on a flat spot moulded into the intake trunking, the rudder is placed in slots in the fin, and the port fuselage half is brought in, trapping the rudder and a small insert behind the cockpit, and being joined by the lower fuselage to form the full profile. There is a choice of inserts under the fuselage depending on when the aircraft was built, fitting the intake lip to the nose to tidy the area up, with a small clear light inserted into a depression under the nose. Although the Super Mystère was a low-wing monoplane, the lower wings are separate, plugging into slots in the wing roots that are moulded into the fuselage sides. My example had a small short-shot in one wingtip, but it’s nothing a little styrene sheet and some filler can’t fix during the build, but you may wish to check your example to be sure. An insert with ribbing is placed inside to form the outer portion of the gear bay, then the upper wing is glued over it, with more of the primer used throughout. They are slotted into the fuselage, whilst adding clear tip lights and small round lights in the upper trailing edges, and the low T-tail is created by inserting the two elevators into their fairings near the bottom of the fin. The landing gear comprises three straight struts, the nose gear inserting into the bay by twisting is through 90°, then fixing the retraction jack into the rear of the bay. The main gear legs are inserted into their sockets with the retraction jacks inboard, and each gear leg is tipped by a wheel, using two halves for the main gear and a single moulding for the nose. The gear bay doors are attached to the sides of the bays, adding retraction jacks to them along the way. Numerous small parts are attached under the fuselage, including a pair of probes under the intake, giving it a catfish appearance. Turning the model over, the ejection seat is made from eight parts, slotting into the cockpit with a piece of head armour behind it, the instrument coaming and gun sight at the front, including two tiny clear panes on the sight. The canopy can then be fitted over the cockpit, starting with the fixed windscreen, and a choice of open or closed canopy, which opens in a non-standard manner, raising at both ends. If posing the canopy closed, there are small pips on the bottom rail of the clear part that need removing, but if posing it open, the rectangular section behind it raises up, and the front is supported by a pair of rods, giving the canopy the impression of hovering over the pilot. It is quite easy to imagine a pilot banging their head if they were incautious when leaving their aircraft. A pair of rear-view mirrors are supplied for the front of the canopy, and the rear support is detailed with its own jack that is visible when completed. Markings Depending on your point of view, there are either two or three decal options on the sheet, as the first option was seen with differing tail decoration during its career. From the box you can build one of the following: SM B2 No.110, 10-SB from 24/04/59 to 20/11/64 EC 01/10 ‘Valois’, Creil SM B2 No.110, 10-SB engaged in SEATO Cruise top Bangkok in March 1961 Sm B2 No.60, 5-NJ from 03/05/61 to 06/04/64, EC 01/05 ‘Vendée’, Orange-Caritat The decals are printed using a digital process, and have good registration, sharpness, and colour density, with a thin gloss carrier film cut loosely around the printed areas. This means that the carrier film on the decals can be coaxed away from the printed part of the decal after they have been applied, effectively rendering them carrier film free, making the completed decals much thinner and more realistic, and obviating the need to apply successive coats of clear varnish to hide the edges of the carrier film. It’s a great step further in realism from my point of view, and saves a good quantity of precious modelling time into the bargain. Conclusion A great many Francophile 1:48 modellers will be very happy with this new release from Azur Frrom, as it fills a gap in early French jet aviation, and fills it with a well-detailed model of this important mark. Highly recommended. Available from collaborators, Special Hobby Review sample courtesy of
-
Mirage IIIRS/EBR/5BA/50C (MKM144168L) 1:144 Mark 1 Models The Dassault Mirage III is one of the most recognisable aircraft to emerge from the Dassault Aviation stable in post war France with its distinctive delta wings and sharply pointed nose. The Mirage III grew out of French government studies for a light weight all weather interceptor able to reach an altitude 18,000 meters (59,500+ ft) in six minutes and able to reach Mach 1.3 in level flight. The tailless delta combined the wing with an area ruled Coke bottle-shaped fuselage to achieve such speed, minimising buffeting and other compressibility related issues that had plagued early supersonic designs. The Mirage IIIC would remain in French service from 1961 until 1988, and although the largest export customer for the Mirage III was Israel, there were many other smaller operators over the years. Switzerland flew eighteen RS variants, the export variant of the reconnaissance aircraft that was in turn based on the E that was used by the French Air Force. The EBR variant flew with the Brazilian Air Force in small numbers, and was also based upon the E, but was built locally and referred to as the F-103E in their service. The 5BA was an R that was built for the Belgian Air Force, while the Chile flew 50Cs, which were similar to the IIIBE. The Kit It’s probably been a long time since anyone wrote this in a review, but this kit arrives in a Ziploc bag with a card header, and is a rebagging with new decals of a recent tool from Mark I, originating in 2019, with new parts in 2022. The header has a profile of the Swiss Mirage IIIRS on the front, and the decal options printed on the back, so make sure you keep it after opening. Inside are two sprues of dark grey styrene plus a pair of canards on a length of sprue, a small clear sprue, and instruction sheet on folded A4 in colour, with profiles on the rear that show all aspects of the camouflage for completeness. The four decal options are split two by two by their tail fin fillet, as well as their operating nation. Detail is good, and I’m starting to sound like a broken record when I marvel at the amount of it that the designers can squeeze into these small-scale kits. Construction begins with the cockpit, starting with the seat on an L-shaped floor that receives the seat and control column, with a spacer and partial bulkhead below at the rear. The pilot’s instrument panel has a decal with dials applied, and is inserted below the coaming during fuselage closure. With the cockpit painted, the exhaust is made up from top and bottom halves with a cylindrical tip and a bulkhead on which to mount it that locates on a rib inside the fuselage. The fuselage can be closed then, installing the intakes from splitter and trunk on each side behind the cockpit and gluing the single part wings under the fuselage. The afore-mentioned fin fillet is cut from the spare fuselage half for decal options C & D and applied after removing the moulded-in section from the destination fuselage, all of which is marked in shades of red. The canopy is a single crystal-clear part, and fits over the cockpit cut-out in the closed position, showing off your work in there, and slotting the pitot into the tip of one of two choices of nose, which are installed after removing the moulded-in nose from the fuselage for all but one decal option. All decal options utilise the canards from the extra piece of sprue, fitted to each of the intake trunks with the aid of dotted red lines on the diagrams. The three landing gear struts are each one part, and has a wheel fixed to the axle, with captive bay doors on the main legs, and two smaller doors on the nose, which also has a captive door moulded into the front of the leg. A strake under the rear of the aircraft is removed using your favourite method, to be replaced by a new one from the sprues after making good. While you have the styrene removal tools out, if you are planning on using the Sidewinders, you will need to remove the forward section of the outer flap actuator fairing before fitting the pylon to the front of it. The AIM-9s are fixed to the rails after gluing two extra fins to the rear, then the characteristic fuel tanks under the wings are made up, with a choice of a single part, or a three-part option with aerodynamic fins at the rear, their location shown in dotted red lines on the drawing. The last part is a twin landing light that is fitted to the nose gear strut, with one decal option having a domed fairing under the nose that has a grey dielectric panel painted in its centre. Markings There are four options included on the sheet, which will dictate whether you use the fin fillet during construction, with plenty of variation in schemes and operators. From the box you can build one of the following: The decals are printed in good registration, sharpness and colour density, split into subjects by dotted lines, with a number of stencils provided despite the small scale. Conclusion A great new bagging (instead of boxing) of this single-seat supersonic fighter that saw a great deal of service with smaller operators in the 70s and beyond. Detail is good, decal options interesting, although the pitot probe would look better replaced by some fine brass rod for scale. Highly recommended. Review sample courtesy of
-
A close inspection from the soon to be released 1/32nd Italeri's Mirage IIIC sprues pics (http://www.britmodeller.com/forums/index.php?/topic/234975571-132-dassault-mirage-iiic-by-italeri-box-artdecals-release-late-september-early-october/?p=2112443) show clearly the typical MIIIE wheel brakes as an option. A new variant in view? Time will tell. V.P.
-
SEM Super Étendard Modernisé (K48140) 1:48 Kinetic Model via Luckymodel The Super Étendard (SuE) was a development from the original Dassault Étendard, after the Jaguar M was killed off due to its poor handling with one engine stalled, which led to its replacement by this, a single engined design. The logic behind that one is a conundrum, to be sure. The SuE had a new more powerful engine, modernised and more capable avionics, plus a new wing design, all of which made it a more capable aircraft. Later upgrades saw the integration of additional new technologies to improve its lethality, plus a vastly improved radar for threat detection. Although the original French purchase order was scaled back due to unforeseen budgetary restrictions, there were some modest export successes with sales to Argentina and a small loan of aircraft to the Iraqi Air Force, which still led to a total build of less than one hundred airframes. The Argentinian SuEs are perhaps the most infamous, after one of their aircraft unleashed an Exocet missile that hit the Atlantic Conveyor during the Falklands War, which brought the name of the Super Étendard to the everyone’s attention, but that didn't result in any further sales. The later Super Étendard Modernisé extended the service life of the ageing airframes, although their eventual drawdown in favour of the newer Rafale M took place in 2016, around the time that this kit was first released, flying its last mission from the carrier Charles de Gaulle, thereby ending a lengthy 42 year career. The Kit This is a reboxing of a 2016 tooling from Kinetic that was warmly welcomed and applauded due to the age of the only other SuE kit in this scale at the time. It arrives in a large box with a painting of the aircraft in flight with a wingman against a background of fluffy clouds. Inside are and increased seven sprues in mid grey styrene, one in clear, a small fret of Photo-Etch (PE) brass, a large decal sheet plus another smaller one, and the instruction booklet with greyscale profiles on the rearmost pages. Four of the sprues are taken up by weapons, as Kinetic tend to be on the generous side in this department. The kit is well detailed throughout, with plenty of raised and engraved areas on display, especially in the cockpit and landing gear bays. Construction starts with the cockpit, and there is plenty of detail moulded in, with instrument panel decals included on the smaller of the two sheets. The tub has side console detail moulded-in, and you add rudder pedals, control column, and a two-part aft bulkhead, after which you can insert a choice of SuE or SEM control panel and Martin Baker Mk.6 ejection seat. It is a nice rendition of the seat, with a choice of headbox toppers that include either a one- or two-loop ejection handle, but doesn't include the forest of seat belts that typify modern fighters. The nose gear bay sits directly behind the cockpit, so that is built up at the same time, from a three-part assembly, which requires you to insert the nose gear leg into holes in the sides before you install it in the fuselage. This should survive handling during the build, as it is sturdy due to the navalisation of the real thing. For completeness the main gear bays are built up as a single unit with a bulkhead between them, with lots of detail within. Before the fuselage can be closed, you must decide whether you will be depicting the engine in operation or not, as this affects which inserts you use for the blow-in doors of the auxiliary intakes on the sides of the nacelles. The air-brake bays are also added from the inside, just under the wing-roots. The last item for construction before closure are the intakes themselves, which extend to the face of the engine, and use some sensible seam-lines to ensure that there is nothing to sand inside. Each intake has a D-shaped profile, made from a C-shaped section with a single flat wall making the inner face, with one intake being the mirror image of the other, converging toward the rear to make a single trunk that feeds the engine with air. The main gear bay attaches to the underside of the merged intake trunk and the engine front blocks the view into the fuselage for those that actually peer down these lengthy tubes. The cockpit, nose gear bay, intake/main bay assembly and a single piece exhaust tube are all then inserted into the starboard side of the fuselage on their various location points, after which you can close the fuselage. A scrap-diagram shows how everything should look when assembled, so check it and make any necessary adjustments during the dry-fit phase to ensure a good overall fit. After closure, the instructions invite you to detail the fuselage with canopy, refuelling probe, lots of aerials and blade antennae, plus air-brakes and their struts, but much of this is probably best left for later once you have the wings on and have any visible seams dealt with. The intake lips, tail-bullet and windscreen/canopy are probably all you will fit before adding the wings, but that's entirely up to you. The wings can be depicted folded for under-deck stowage, or deployed for flight, and can also be shown with the flaps up or down, just by swapping out the straight actuator fairings for cranked alternatives. The leading-edge slats are separate, and fit onto tabs at the front of the main wing area, adding clear wingtip lights as you do so. The spoilers are PE parts and can be posed open or closed, although you may have to add a little detail within the bay if you do. With your chosen wing position complete, they are fitted to the fuselage root via a pair of short tabs, which means that you might need to keep an eye on the joint as it sets up to get the right anhedral as it is in this case. The elevators have PE swash-plates and separate rear sections, with pins that project through the PE and into the base of the tail. The main gear legs are single struts with moulded-in oleo-scissors, plus an additional damper strut that assists the main oleo during heavy landings, and of course a set of wheels with separate hubs. The finished assemblies fit into sockets in the drop-in outer bay sections moulded into the wings. The inner bay doors are captive to the centreline under the fuselage, and the outers hinge at the outboard edge of the bay. This boxing adds a crew ladder to the kit along with the new weapons, which is built from six parts at the end of the instructions. As usual with Kinetic there are a plethora of weapons and pylons included in the kit, and with these being French specific types, the spares could well be useful later if you build more French subjects. In the box you get: 4 x R550 Magic 2 2 x In-Flight "Buddy" refuelling pod 2 x Damocles Pod 2 x Barracuda ECM pod 2 x PHIMAT pod 2 x underwing fuel tanks 2 x under fuselage fuel tanks 2 x 625 litre fuel tanks 2 x AM39 Exocet anti-shipping missiles 4 x GBU-49 on twin-adapter rails 2 x Chaff & Flare dispensers A full page shows what goes where, and illustrates the appropriate pylon or adapter that is used, but as always – check your references to see what constitutes a realistic load if you are aiming for a real-world load-out. Markings The box includes a large decal sheet, which will allow you to model one of three options from the box, although the decal sheet is identical to that from the previous boxing, so more are possible if you download the relevant instructions from Scalemates (the Kinetic link is broken at time of writing). From the box you can build one of the following: SuE Aéronavale 1980s – grey over white. SEM Aéronavale Afghanistan Missions, 2008 – all over grey. SEM Aéronavale Libyan Missions 2001 All over light grey with dark grey camo on upper surface. 6 airframes of 17F aboard Charles de Gaulle. Apologies for the black & white profiles. That's how they come on the instructions. The addition of a substantial number of serials offers more that could be depicted if the urge takes you. The decals are designed by Cross Delta and printed by Cartograf with the usual perfect registration, sharpness and colour density, plus a closely-cropped glossy carrier film. The additional sheet isn’t marked with a printer’s name, but is of a similar quality, and the addition of instrument decals for the cockpit is a useful extra. Conclusion A welcome reboxing of a modern tooling of this intriguing aircraft, which should be simple enough to build into a good replica of this long-serving French carrier fighter. As well as being available from Lucky Model in Hong Kong, you can now select USA, UK, Australia, and Malaysia with local shipping when purchasing your model, as Kinetic now have local warehouses in these locations to reduce the postage costs for us modellers. Highly recommended. Review sample courtesy of
-
Mirage IIIDP/5SDD/5DM/Nesher T (MKM144133) 1:144 Mark I Models The Dassault Mirage III is one of the most recognisable aircraft to emerge from the Dassault Aviation stable in post war France with its distinctive delta wings and sharply pointed nose. The Mirage III grew out of French government studies for a light weight all weather interceptor able to reach an altitude 18,000 meters (59,500+ ft) in six minutes and able to reach Mach 1.3 in level flight. The tail less delta combined the wing with an area ruled Coke bottle-shaped fuselage to achieve such speed, minimising buffeting and other compressibility related issues that had plagued early supersonic designs. The Mirage IIIC would remain in French service from 1961 until 1988, and the largest export customer for the Mirage III was Israel, operating the Mirage IIICJ that had less advanced avionics and some aspects of the design removed or simplified. Nevertheless, Israel found these aircraft and weapons systems more than a match for anything her neighbours were able to field during the Six-Day and Yom Kippur wars, with the aircraft being a resounding success in combat with Syrian, Jordanian and Egyptian aircraft, many of which were of Soviet origin. Israel then sold some of these aircraft to Argentina when they had been replaced by more modern designs. The IIIDP was a short-run of five two-seat airframes that were built for the Pakistani Air Force, although they were used in other roles too. The Mirage 5 was externally similar to the Mirage III, but with a long slim nose that differentiates it from its earlier stable-mate, while the Nesher T was an Israeli development from the Mirage 5, the T variant predictably being the two-seat trainer, Nesher meaning Vulture. The Kit This is a reboxing with new decals of a recent tool from Mark I, originating in 2019, with new parts in 2022. It arrives in a small end-opening box with a profile of the Israeli Nesher T on the front, and the decal options printed on the back. Inside are three sprues of dark grey styrene, a small clear sprue, and instruction sheet on folded A4 in colour, with profiles on the rear that show all aspects of the camouflage for completeness. The four decal options are differentiated by their tail fin fillet, and there are three unused fuselage halves and a few other spare parts on the sprues, which are marked on the diagram in grey overprinting. Detail is good, and I’m starting to sound like a broken record when I marvel at the amount of it that the designers can squeeze into these small-scale kits. Construction begins with the cockpit, which is made in two portions, starting with the front seat on an L-shaped floor that receives the seat and control column, with another in the rear on a shallow floor with a partial bulkhead below at the rear. The pilot’s instrument panel has a decal with dials applied, and the rear seater’s panel is depicted by another decal that is applied to the back of the pilot’s bulkhead. With the cockpit painted, the exhaust is made up from top and bottom halves with a cylindrical tip and a bulkhead on which to mount it that ledges on a rib inside the fuselage. The fuselage can be closed up then, installing the intakes from splitter and trunk on each side of the rear cockpit and gluing the single part wings under the fuselage. The afore-mentioned fin fillet is cut from the third fuselage half and added to the fin for three decal options after removing the moulded-in section, all of which is marked in red. The canopy is a single crystal-clear part, and fits over the cockpit cut-out in the closed position, showing off your work in there, and slotting the pitot into the tip of the nose. The three landing gear struts are all one part each, and each has a wheel fixed to the axle, with captive bay doors on the main legs, and two smaller doors on the nose, which also has a captive door moulded into the front of the leg. A strake under the rear of the aircraft is removed using your favourite method of destruction, to be replaced by a new one from the sprues after making good. While you have the styrene removal tools out, if you are planning on using the Sidewinders, you will need to remove the forward section of the outer flap actuator fairing before fitting the pylon to the front of it. The AIM-9s are fixed to the rails after gluing two extra fins to the rear, then the characteristic gas tanks under the wings are made up, with a choice of a single part, or the three-part option with aerodynamic fins at the rear, their location shown in dotted red lines on the drawing. The last part is a twin landing light that is fitted to the nose gear strut, with a frontal scrap diagram showing the location and the correct angle of the gear legs to assist you. Markings There are four options included on the sheet, which will dictate the correct fin fillet you apply during construction, with plenty of variation in schemes and operators. From the box you can build one of the following: IAI Nesher T (Vulture), c/n T-05, Black 625, No.144 ‘Defenders of Arava’ Sq. (144 Tayeset), Israeli Air Force (Kheil HaAvir), Etzion Air Base (Bacha 10), Sinai, Israel, 1975 AMD Mirage IIIDP, s/n 67-301, Black 301, No.7 (TA) ‘Bandits’ Sq., No.32 (Tactical Attack) Wing, Pakistan Air Force (Pakistan Fiza’ya), Masroor Air Base, Pakistan, 2017-18 AMD Mirage 5SDD, c/n 2005, Black 2005, “Royal Saudi Air Force”, a/c purchased by Saudi Arabia on behalf of Egypt for service with the EAF (Egyptian Air Force), AMD plant, Bordeaux-Mérignac Airport, France, 1974 Mirage 5DM, c/n 202, Black M202, No.211 Sq., 21st Fighter-Attack Wing, Zaire Air Force (Force Aérienne Zaïroise, FAZ), Kamina Air Base, Zaire, late 1970s The decals are printed in good registration, sharpness and colour density, split into subjects by dotted lines, with a number of stencils provided despite the small scale. Conclusion A great new boxing of this two-seat supersonic trainer/fighter that saw a great deal of service with smaller operators in the 70s and beyond. The detail is good, decal options interesting, although the pitot probe would look better replaced by some fine brass rod for scale. Highly recommended. Review sample courtesy of
-
A new Ukrainian model company - name still unknown but reported linked to Art Model - is to introduce at the Nuremberg International Toy Fair 2017 (01-06/02/2017) a new tool 1/72nd Dassault Mirage IVA kit to be followed later by a IVP (P for Pénétration) the version carrying the ASMP air-launched cruise missile. Of interest in the picture 1 is the Hurel-Dubois CT-52 recce pod dedicated to the Mirage IVA & P fulfilling the strategic reconnaissance role. Another 1/48th secret project from the same company should be also unveiled at the Nuremberg Toy Fair 2017. Also a Mirage IV? That's the question. Source: http://www.greenmats.club/topic/2803-mirage-iva-в-172-масштабе/ V.P.
- 102 replies
-
- 9
-
-
- A&A Models
- Mirage
- (and 1 more)
-
Mirage IIIC Martin-Baker MK.4 Ejection Seat (Q72403 for Special Hobby) 1:72 CMK by Special Hobby We reviewed the kit for which this set is intended late last year, and you can find that here. We’ve also reviewed some of the resin sets that CMK have already released, and now we have a replacement seat for the kit from their Quick & Easy range. As usual with CMK's resin sets, they arrive in the familiar clear vacformed box, with the resin parts safely inside, and the instructions sandwiched between the header card at the rear. The Photo-Etch (PE) is separated from the resin parts by a clear piece of acetate to prevent scratching and damage during transit. Inside the box is a single resin seat that is attached to its casting block at the bottom to avoid damaging the detail, plus a small sheet of Photo-Etch (PE). The seat is easily cut from the block, and has the detailed PE harness, leg restraints and the pull-handles on the headbox glued into place with super glue to complete the task, with detail painting being carried out according to the kit instructions. The seat should then slot neatly into the kit cockpit, but test fitting is always advisable in these situations, and a highly detailed seat is always a great investment to bring the cockpit detail up to snuff in a single-seat fighter. Highly recommended. Review sample courtesy of
-
After the single seat variants (thread here: link) next Kinetic Mirage family will be the MIII two seats variants. First announced boxing: 1/48th Dassault Mirage IIID/DS - ref.48054 Other variants should follow like IIIB/BE, 5BD etc. Source: https://www.facebook.com/Kineticmodel/posts/530695333764249 3D renders V.P.
-
Mirage IIICJ (SH72352) 1:72 Special Hobby The Dassault Mirage III is one of the most recognisable aircraft to emerge from the Dassault Aviation stable in post war France with its distinctive delta wings and sharply pointed nose. The Mirage III grew out of French government studies for a light weight all weather interceptor able to reach an altitude 18,000 meters (59,500+ ft) in six minutes and able to reach Mach 1.3 in level flight. The tail less delta combined the wing with an area ruled Coke bottle-shaped fuselage to achieve such speed, minimising buffeting and other compressibility related issues that had plagued early supersonic designs. The Mirage IIIC would remain in French service from 1961 until 1988, and the largest export customer for the Mirage III was Israel, operating the Mirage IIICJ that had less advanced avionics and some aspects of the design removed or simplified. Nevertheless, Israel found these aircraft and weapons systems more than a match for anything her neighbours were able to field during the Six-Day and Yom Kippur wars, with the aircraft being a resounding success in combat with Syrian, Jordanian and Egyptian aircraft, many of which were of Soviet origin. Israel then sold some of these aircraft to Argentina when they had been replaced by more modern designs. The Kit This is a new tool by Special Hobby of this Dassault success story, and it shows. There is fine detail to be seen throughout all the sprues, including a crystal-clear canopy sprue, and a well-printed sheet of decals. The kit arrives in a modest top-opening box, and inside are five sprues in grey styrene, a small clear sprue in a Ziploc bag, a decal sheet in a resealable bag, and an A5 instruction booklet printed in colour on glossy paper. An insert within the booklet shows additional details for assembly of the wing, so bear that in mind when you get there. Construction begins with the cockpit, which consists of a tub with separate front and rear bulkheads that has the side consoles moulded-in, to which the rudder pedals, control column, instrument panel with decal, and the coaming with a clear HUD unit attached to the top. The exhaust is made up from three sections to obtain detail, with a two-part lip, and a single section representing the rear of the engine that has a bulkhead moulded-in to secure it within the fuselage. The intake bullet fairings have a small insert added to each one, and the nose gear bay is glued to an insert that forms the lower surface of the nose, after which you can begin to close up the fuselage, adding a two-part outer fairing to the exhaust before putting the trunk and cockpit between the two halves, adding the nose gear insert below once the halves are together. A choice of tail fins is supplied, as is a choice of bullet fairings for within the intakes either side of the cockpit. Once you have chosen, the outer fairing can be glued over it to complete the intake trunking. The lower wings are moulded as a single part that incorporates the underside of the fuselage, needing a few fairings removing before you can proceed. The main bays are added to the inside and the bays are painted along with the roof details that are moulded into the upper sides of the wings, which are separate parts. Flying surface actuators and a rectangular insert are fitted as the wing is joined to the fuselage, and a circular light is inserted into a hole in the bottom of the nose, leaving you with a very Mirage-shaped model that just needs the fine details and some paint to finish it. The nose gear is built from an A-frame to which the two halves of the yoke are added along with a rectangular bay door and the one-part wheel. The main gear struts are each one part with two-part wheels, and are attached within their bays with the addition of a retraction strut and bay doors on the outer and inner edges. The nose leg has a long retraction jack and another rectangular door, plus a third that sits on the side of the bay with a retraction jack projecting into the bay. A number of antennae, pitot probe in the nose and other small parts are dotted around the airframe, and the last act is to insert the ejection seat, which is made from five parts, and is covered by the fixed windscreen and pivoting canopy, which can be fixed in place in the raised or lowered position. A diagram shows the weapons locations for your ease, and many of these are included in the box, as follows: 2 x AIM-9D Sidewinder A2A Missile 2 x AIM-9B Sidewinder A2A Missile 2 x Shafrir 2 A2A Missile 2 x Shafrir 1 A2A Missile 2 x Twin 250KG bombs on a shared pylon 1 x Matra R530 A2A Missile 1 x 880L Fuel Tank for the centreline 2 x 625L Fuel Tank 2 x 1300L Fuel Tank 2 x 500L Fuel Tank Each one is provided with a pylon and/or adapter rail, with separate perpendicular fins on many of the missiles, and the 500L fuel tanks. Markings There are four decal options included on the sheet, and you are provided with a four-view page for each one, complete with colour call-outs in Gunze Aqueous and lacquer. From the box you can build one of the following: 52, No.101 Sqn., First Fighter Sqn.m Hatzor Air Force base, Israeli Air Force, 1967 745, No.117 Sqn., First Jet Sqn., Ramat David Air Force base, Israeli Air Force, 1967 60, No.117 Sqn., First Jet Sqn., Ramat David Air Force Base, Israeli Air Force, 1967 784, No.119 Sqn., Bat Sqn., Tel Nof Air Force base, Israeli Air Force, 1966 The decals are printed in the Czech Republic, and are printed with good register, colour density and sharpness, with a thin gloss carrier film over the printed areas. Looking at the carrier film I suspect that they are printed by Eduard, and have tested my theory once I’d scanned them for the review. Applying Tamiya tape over any of the decals resulted in the carrier film coming free with no resistance, which is exactly how Eduard decals behave. Why am I mentioning this on a Special Hobby review? As of 2021, the carrier film from Eduard decals can be coaxed away from the printed part of the decal after they have been applied, effectively rendering them carrier-free, making the decals much thinner and more realistic, and obviating the need to apply successive coats of clear varnish to hide the edges of the film. It’s a great step further in realism from my point of view, and having now tested them on my recent F4F-3 Wildcat, I’m a fan. Conclusion A very well-detailed and crisply moulded new tooling of this important French fighter in Israeli service that should sell well. Highly recommended. Review sample courtesy of
-
Mirage IIIC Wheels (Q72401 for Special Hobby) 1:72 CMK by Special Hobby We reviewed Special Hobby’s new Mirage IIIC in various guises, the latest to be found here, and while it’s a nice kit, resin can always improve the detail that injection moulded styrene is capable of. As usual with CMK's resin sets, It arrives in the familiar clear vacformed box, with the resin parts safely inside, and the instructions sandwiched between the green Quick & Easy branded header card at the rear. There are two casting blocks inside the box, one containing two main and one nose wheel, the other with two rear hubs for the main wheels that include brake detail and a keyed hole for the kit’s axle. The wheels are attached to the block via their contact patches to ease removal, and the hubs are flat on their block so you can remove them with a razor saw and not damage any of the fine detail. Super easy, and a simple improvement on the kit parts. Highly recommended. Review sample courtesy of
-
- 2
-
-
- CMK
- Special Hobby
- (and 1 more)
-
Mirage IIIC Atar 9B Engine Nozzle (Q72402 for Special Hobby) 1:72 CMK by Special Hobby We reviewed Special Hobby’s new Mirage IIIC in various guises, the latest to be found here, and while it’s a nice kit, resin can always improve the detail that injection moulded styrene is capable of. As usual with CMK's resin sets, It arrives in the familiar clear vacformed box, with the resin parts safely inside, and the instructions sandwiched between the green Quick & Easy branded header card at the rear. Containing just one resin part, it takes the place of two kit parts to depict the hot end of the Atar 9B engine nozzle that propels the Mirage IIIC and variants to supersonic speeds. The nozzle is mounted on a circular casting base, and should be easy to cut away due to the narrow supports that are holding it down. Sanding the surface flat should be all the preparation needed apart from a wash in warm soapy water to remove the rest of the mould-release agent. As well as not having to deal with a seam down the centre of the kit parts, you also get additional detail on the exterior in the shape of rows of rivets, and even more on the inside surface, plus the finesse of the lip. Highly recommended. Review sample courtesy of
-
Finished this kit in Decmber 2021. Ultra happy with the result! I will never build a Kitty Hawk ever again. Crappy kit from beginning to start. The fittings, the instructions, incorrect parts, the decals. I will also never used Agama acrylic again. Here are the final photos: First.. the build: ............ 🙌🙌🙌🙌🙌............ The Shoot:
- 29 replies
-
- 74
-
-

-
Italeri is to release a 1/32nd Dassault Mirage IIIC kit - ref.2505 Source: http://www.primeportal.net/models/thomas_voigt9/misc/ V.P.
- 85 replies
-
- 2
-
-
- Italeri
- Mirage IIIC
- (and 1 more)
-
Mirage 2000D Upgrade Sets (For Kinetic) 1:48 Eduard The Kinetic Mirage 2000D in 1:48 has been around since 2010, but has recently been reboxed in the D variant with new decals and GBU-12 and GBU-22 Laser Guided Bombs. It’s time for some new update sets, and Eduard's new range of sets are here to improve on the kit detail in the usual modular manner. Get what you want for the areas you want to be more of a focal point. As usual with Eduard's Photo-Etch (PE) and Mask sets, they arrive in a flat resealable package, with a white backing card protecting the contents and the instructions that are sandwiched between. Interior (491221) Two frets are included, one nickel plated and pre-painted, the other in bare brass, plus a small sheet of clear acetate with the HUD glazing shapes printed on it. A complete set of new layered instrument panels and side consoles are the primary parts on the painted set, with new rudder pedals; ejection seat details; coaming instrumentation; sidewall details and canopy internal structure also supplied. Zoom! Set (FE1221) This set contains a reduced subset of the interior, namely the pre-painted parts that are used to improve on the main aspects of the cockpit, as seen above. Whatever your motivations for wanting this set, it provides a welcome boost to detail, without being concerned with the structural elements. Seatbelts STEEL (FE1222) These belts are Photo-Etch (PE) steel, and because of their strength they can be etched from thinner material, which improves realism and flexibility in one sitting. Coupled with the new painting method that adds perceived extra depth to the buckles and other furniture by shading, they are more realistic looking and will drape better than regular brass PE. As well as the two sets of crew belts, you also get a set of pull-handles between the pilot's knees that gets him out of there in case of an emergency, and a set of cushioned backs to the harness, which is etched on the rear and you are advised to rub a soft styrene rod on the reverse to simulate the creases of the material. Exterior (481069) This larger bare brass set contains some important upgrades, such as delicate new multi-layer afterburner ring, and an interior surface skin for the area near the rear face of the engine that is rolled and slots inside the trunk; an upgrade to the detail in the landing gear comprising new oleo-scissors; landing light frames; bay door skins and hinges; a set of main gear bay skins; sensors and slime-lights for the fuselage; intake FOD guards; missile rail skins; exhaust rings for the missiles; filler caps and strake braces for the external underwing and centreline fuel tanks; spine details and more slime-lights; targeting pod details; more missile exhausts and a detail panel in the nose gear bay. Masks Tface (EX807) These pre-cut Kabuki tape masks supply you with a full set of masks for the canopy, with compound curved handled by using frame hugging masks, while the highly curved gaps are in-filled with either liquid mask or offcuts from the background tape. In addition, you get a set of masks for the clear parts on the intake trunking. The sheet also gives you another set of canopy masks tailored to fit the inside of the glazing so that you can paint the interior and give your model that extra bit of realism. Highly recommended. Review sample courtesy of
-
Hello guys, Here are the photos of my most recent model, Italeri's Mirage IIIE transformed into an EA by using the empennage extension and leaving out the Cyrano radar bulge. The kit was brushpainted with Revell Aqua acrylics. I used Condor Decals set 48054.
- 2 replies
-
- 9
-
-
- Mirage
- Fuerza Aerea Argentina
- (and 1 more)
-
Modelsvit is to release in 2018 (?) a 1/72nd Dassault Mirage IIIE kit - ref.72045 Source: https://www.facebook.com/136603423173762/photos/pcb.530194830481284/530194780481289/?type=3&theater V.P.
-
Super Étendard/Super Étendard Modernisé (48010 & 72010) 1:48 & 1:72 TG Decals There isn’t a huge raft of available kits of the Super Étendard in 1:48, but 1:72 is a little better served, although not very recently, so it’s a bit of a toss-up which scale comes off best - or worst. If you’re reading this and thinking 1:48, you’d better get your hands on a Kitty Hawk kit now if you haven’t already, as they’re not going to be around forever since their recent closure. The SuE was a development of the Étendard, and replaced it as France’s primary carrier-borne fighter from the late 70s to 2016 during which time it saw action in some interesting places, after which it was replaced by the Rafale M in French service, another Dassault design. There is a set in each scale, and both arrive in the same style packaging in the form of a resealable clear foil bag with a translucent white header, and the instructions and decal sheet(s) safely in the middle of the folded instructions. The number of sheets varies between scales from 2 for 1:48 to 1 for 1:72, whilst providing the same markings for both scales. Colours for the five aircraft are called out in Model Master, Humbrol, Tamiya, Gunze Sangyo, Vallejo, AMMO and Hataka codes, as well as swatches for colour matching. The quality of the instructions is excellent, printed on both sides of thick A4 glossy paper to a high standard, with additional notes near areas of interest. From either sheet you can decal the following: Super Étendard Modernisé 44, 2˚ Escuadrilla Aeronaval De Caza Y Ataque, Base Aeronaval Comandante Espora, Argentina 2020 Super Étendard 0752/3-A-202 Armada Argentina, 2˚ Escuadrilla Aeronaval De Caza Y Ataque, Base Aeronaval Comandante Espora, Argentina 2010* Super Étendard 41, Aviation Navale Flottille 14F Ban Landivisiau, June 1983 Super Étendard Modernisé 1, Flottille 17F Aircraft Carrier Charles De Gaulle, March 16, 2016* Super Étendard Modernisé 8, Flottille 11F Kandahar, Afghanistan, 2008 * There are alternate nose and tail markings for various periods of these airframes’ career, with scrap drawings showing the details, with alternate markings and information both about the changes and the reason for them. 1:48 (48010) 1:72 (72010) The decals are developed by TG in Guatemala and printed for them in the USA with good registration, sharpness and colour density, plus a thin matt carrier film cut close to the printed areas. In addition to the usual solid colours, there are also small areas of gold and silver on the sheets, the largest decal being the Super Étendard logo above the French and Argentinian flags, which are provided as optional extras for a name plaque or similar. Incidentally, the two sheets don't share the same numbering schema, so don't confuse yourself like I did when looking at both sheets with only one set of instructions Conclusion The detail visible on the sheets and the instructions for both sets are exemplary, and include a set of stencils and maintenance data blocks if your kit doesn’t have them, or the originals are a bit lacklustre. Highly recommended. Currently available from their Facebook Page Review sample courtesy of [img= https://www.britmodeller.com/reviews/tgdecals/logo.gif]
-
After the Mirage IIIE/5 family (link) Modelsvit is to release 1/72nd Dassault Mirage IIIC/CJ kits Source: https://www.facebook.com/modelsvit/posts/2682351568700544 V.P.
- 61 replies
-
- 13
-
-
Dassault Mirage 2000 family by Kitty Hawk confirmed - 1/48th or 1/32nd? Images look like 3D scans from M2000B 5-OW n°519 preserved at Espaces Aéro Lyon Corbas - EALC http://www.ealc.fr/ & https://www.tripadvisor.fr/LocationPhotoDirectLink-g1582569-d5979211-i156131920-Ealc_Musee_de_L_aviation-Corbas_Rhone_Rhone_Alpes.html Source: http://www.greenmats.club/topic/1267-новый-mirage-от-kitty-hawk-слухи-и-догадки/ Hey Tali, your source? I mean the Chinese forum link? Updt: Thanks Tali!!: http://tieba.baidu.com/p/4260567148 V.P.
-
Mirage 2000C (72073) 1:72 ModelSvit The Mirage 2000C is a forth generation Jet Fighter built by Dassualt for the French Air Force. Like its predecessor the Mirage III its main feature is a large delta wing. The aircraft was designed and built in a surprising 27 months by Dassault using a lot of data they already had developed for the "Future Combat Aircraft" and the so called Super Mirage, The C in the title for the fighter stands for Chasseur or Hunter. As well as two internal 30mm DEFA cannon the aircraft is armed in the air to air role with Matra R550 Magic, Matra Super 530D, MBDA MICRA Missiles. As well as the Mirage C there is a B model trainer, N model Nuclear Strike, and D model Ground attack version in service with the French Air Force. Mirage 2000 aircraft have been sold to Egypt, India, Peru, The UEA, Greece, Taiwan, Brazil, and Qatar. Kit This is the eagerly awaited new kit from Modelsvit. The kit resembles a high quality shorter run kit with fine surface details. While the parts resemble some more main stream manufactures in appearance they will no doubt need more care in the assembly. In the box we get seven sprues of light grey plastic, a clear sprue with both a one part and two part canopy, a sheet of PE and and a sheet of masks for the canopy, wheels, and false canopy for one of the decal option (these are not shown). La construction commence avec le cockpit (quelle surprise!). The seat is made up from 5 plastic parts with PE belts and seat cushions. Following this for some reason the exhaust nozzle is built up and put to one side. Once this is done its back to the cockpit. The cockpit floor is put together with the sides and the rear bulkhead. The cockpit floor also forms the nose wheel bay roof and the rear bulkhead for this needs to be fitted at this time. The instrument panel and control column need to be fitted. The instruments for the panel and side consoles are provided as either PE or decal, or a mixture of both if the modeller wants to do this. Lastly here the main coaming and HUD are built up from a mixture of plastic parts and PE. The cockpit can now be placed inside the main fuselage and it closed up. The inner parts of the main intakes are then applied to the fuselage sides. We now move onto the main wing. For the lower wing the main wheel wells are boxed in with the instructions showing where all the parts go, plus a view to show how it needs to look once its complete. Once these are boxed in the upper wing sections can go on and the whole wing joined to the main fuselage. The main burner nozzle is made up from 3 parts and this can be attached to the assembly made earlier and inserted into the back of the fuselage. Also at the rear the vertical fin is added (here tow are provided for different decal options). Different rear fairing parts are also used here depending on the decal option chosen. Moving back to the front the outer parts of the intakes are added. Flipping back to the underside of the aircraft the centreline fairing is aging different for the different decal option with there being 3 types, one of which includes a chaff/flare launcher. The flaps can be positioned up or down with different parts for each, the flap track fairings can then be added. The main under carriage is then next, standard two part wheels go on to the main leg with a separate retraction strut. The outer gear door attached to the main leg with the inner door attaching to the fuselage. Again these have retraction struts. At the front the nose gear leg goes in with its twin wheels. The gear doors are also fitted at this point. The last major item to complete the main aircraft is the canopy. A single part closed canopy and a split two part canopy are provided. Canopy masks for the edge are included and the centre will need to have the modellers own tape or masking fluid used on it. To complete the main airframe the re-fueling probe is added along with a selection of aerials and fences on the side of the intakes and tail. A nice selection of underwing/fuselage stores are provided in the kit. There is a centreline 1300L fuel tank, and two wing 1700L fuel tanks. There are two Magic-2, two Matra Super 530D, and four MICA EM.IR missiles provided in the kit along with their respective pylons. Decals There are 5 schemes provided in the kit; the decals are well printed by Decograf, the Indian Markings dont quite look correct with the colours. From the box you can build; Mirage 2000C 6-OB No.59 EC 2/5 "Ile de France" French Air Force, Saudi Arabia 1990 Mirage 2000C 5-OP No. 74 EC 2/5 "Ile de France" French Air Force, Saudi Arabia 1991 (Dessert camo) Mirage 2000C - 390-AS No.80 EC 5/330 French air Force 1993 Mirage 2000H (Vajra) KF123, 7th Sqn, Indian Air Force, 2012 Mirage 2000EG No. 226. 332 MPK (All weather Sqn) "Geraki", 114 Fighter Wing, Greek Air Force, 2014 Conclusion It is good to see a decent model of the Mirage 2000C available in 1.72, this should build up to make an eye catching model if care is taken with the build. Highly recommended. Review sample courtesy of
-
Doyusha is to rebox in April the HobbyBoss 1/72nd Dassault Rafale M kit - ref. Source: https://www.1999.co.jp/eng/10765250 V.P.