
Search the Community
Showing results for tags 'Control Tower'.
Found 2 results
-
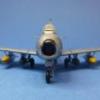
 Sources: http://tieba.baidu.com/p/4771394541 http://tieba.baidu.com/p/4761399568?pid=97150882936&cid=#97150882936 V.P.
- 5 replies
-
- 5
-

-
- Control Tower
- Hangar
- (and 1 more)
-
 Welcome to my latest posting- I'm going to win no prizes for speed modelling but I'm having fun so who cares! I'm working on a big long term airfield diorama project but it'll take me months/years to get all the components done so I'll post 'em as I do 'em. Here's the finished article (read down for WIP & more finished pics). I was inspired by an article by Richard Langford in Airfix Model World magazine, Jan 14 issue. The moulding is pretty ancient (I built one as a kid, it hasn't changed and I'm pretty ancient as well!) so I thought I'd have some fun super detailing it. As you can see, I got a bit carried away (considering most of it was inside and won't be seen when assembled) but it was a learning piece as much as anything, more scratch building experience and my first use of PE, which went pretty well in the end. I make no claims to historical accuracy with this model and some elements were made up as I went along, but I've enjoyed myself. DJ Parkins (www.djparkins.co.uk) supplied the PE set for the windows, doors, hand rails and watch hut and the maps/posters/blackboards etc were a custom set from Sankey Scenics. I found him on-line & asked if he had anything suitable. He does mostly model railway stuff (as well as being a professional model maker) but researched it for me and came up with a great little sheet of scale images that I've used all over the model. Check him out at www.sankeyscenics.co.uk. The sheet costs £5.00, which seemed pretty reasonable to me as he put it together from scratch. You can order by accessing the bespoke page of his website and by clicking the £5.00 button (towards the bottom). This will take you through the steps for the order. You can quickly access this by clicking the link below: http://www.sankeyscenics.co.uk/#/bespoke-items/4551163731. Based on Richard Langford's article, I fabricated a first floor out of styrene sheet, supported by styrene corner pieces. I then decided to put a dividing wall in made from more styrene and utilising a door & window from the Airfix set (redundant because of the PE set). I glazed it with clear acetate and used thin slices of Tamiya tape to represent diagonal blast taping. An assortment of notice boards, maps, pictures, chalk boards, clocks & signs were carefully scalpeled out of the Sankey Scenics sheet & glued in place. Very late in the day I decided to also build a desk/counter upstairs and some of Sankey's maps and documents decorated the surface. I decided to call it a day, furniture wise, as I had a life I had to get on with! Incredible detail on the maps & chalk boards! Having enjoyed that, I decided to build a room for the ground floor so built a floor and walls from styrene sheet and used the Airfix windows again. More posters/signs added a bit of interest downstairs. Those observant amongst you may have noticed that my super detailing may possibly have forgotten to build a staircase to get from the ground floor to the first, and then to the terrace and roof. Oops! I decided to let this one slip! I also decided to have fun with the watch tower on top. The phone was made from a bit of styrene sheet, the radio from a piece of sprue. The phone cord is a piece of thin fuse wire and the microphone boom from a slightly thicker piece of wire. More Sankey docs spread around the desks. I got a Master Tools PE bender thingy for Christmas and really couldn't figure out how it was meant to work, but a few goes with the thingy & a pair of flat jaw pliers & I sussed it! The watch tower was a bit fiddly with folds going in different directions but got there in the end with a bit of squeezing and swearing. I had to fabricate a pillar to join the edges and locate the walls as the Airfix location points were in the wrong place. The acetate proved tricky - it was hard to keep it free from scratches and glue. The handrails were an absolute bugger - microscopic folding, aligning, gluing, drilling and feeding through 0.31mm brass wire. Lots of patience required. They're not perfect but for a first go, I'm quite pleased. The stairs were also tricky, being made from folded side pieces and individual folded treads. Richard Langford suggested building a little jig, which I did and it worked well. The last thing was to slosh a load of Flory Models 'Grime' wash around the model in places where the day to day muck from a busy airfield would accumulate; on the flat surfaces, window sills, stair treads etc. Flat roofs are notorious for puddling so the Flory grime is spot on for this, although I kept it light on the higher traffic areas. The RAF figures came from a 1970s vintage Airfix set I had as a kid. They'd been painted in gloss enamels (I was young!) so I had lots of fun soaking them in white spirit and picking off the paint! Only later did I discover that Airfix still sell that set so I could have saved a lot of bother, but there's something nice about recycling a 40 year old toy! I think some of them might have come from a Bloodhound missile set - wrong decade but I think I got away with it! I chopped the bases off so they're secured with Deluxe Materials Tacky Wax - it's good stuff. Here are some other shots of the finished building: I broke the aerial thingy in the corner so had to botch up a new one from the spares box. I had to fabricate a new door for the emergency exit as the PE set didn't include one and I'd mistakenly used the Airfix door for my Amera Nissan hut! Always read the instructions! The bionic dog! One of his legs got broken off somewhere between the 1970s and today so I had to make a new one out of a piece of fuse wire! Thanks for looking and any feedback/tips would of course be appreciated. Andrew
- 25 replies
-
- 35
-
-
- Airfix
- Control Tower
- (and 4 more)