Search the Community
Showing results for tags 'AV-8B'.
Found 19 results
-
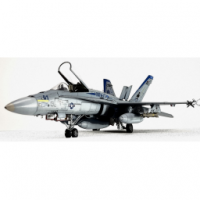
 AV-8B Harrier II Correct Air-Scoop set 1/32 Bandit Resin Factory for Trumpeter Kit Bandit Resin seem to be primarily producing parts you would see on normal peacetime modern jets as opposed to the weapons you would see on combat operations. This enables the modeller to build the jets they might see normally or at airshows. In a departure from their normal rails and pods, this set correct the air scoops on the Trumpeter AV-8B. The Resin These 3D printed parts give the modeller 2 small, and 2 large intakes for the top of the Harrier which are quite prominent which can be seen in this picture from our AV-8B Walkaround Conclusion These are great looking parts for your large scale second generation Harrier, Highly recommended. Review sample courtesy of Bandit Resin Factory, click on the logo to goto their Facebook Page
 -
BAe Harrier GR.7A/GR.9 (A04050A) 1:72 Airfix Developed from the prototype Hawker Siddeley P.1127, which astonishingly flew for the first time over sixty years ago, the vertical take-off Harrier has become one of the most famous post-WWII jet aircraft of all. Awarded what some would say is the ultimate accolade for a non-US designed aircraft – a purchase order from the United States Government – the first-generation Harrier was successful enough to merit the development of a second generation that although it was outwardly very similar to its elder, it was radically different in many ways. Despite a slightly troubled development, during which Hawker Siddeley pulled out of the joint Anglo-American project in 1975, only to re-join again as the newly merged British Aerospace in 1981, the resulting aircraft was a quantum leap in terms of capability compared to the original design, capable of a wider range of tasks. The second generation of Harriers, to which the GR7 and GR9 belong, feature a larger wing, substantially more powerful engine and extensive use of lightweight composite materials throughout the airframe. The GR9 boasted a wide range of improvements to avionics and weapon systems compared to the GR7 that should have seen it remain in service until the 2020s. The aircraft saw extensive combat service and both the GR7 and GR9 were employed over Afghanistan as part of Operation Herrick before they were prematurely withdrawn from Royal Air Force service in 2010 only 7 years after the last one was upgraded, under the guise of money saving, after which they were promptly boxed up and sold to America for a relatively paltry sum as “spares”. The Kit This is a reboxing of the 2011 tooling of this type, but with new decals. The kit arrived in a standard red-themed top-opening box, and inside are three sprues in grey styrene, a small clear sprue, and instruction booklet with colour (well, grey) profiles in the rear. Detail is still excellent for the scale, with finely engraved panel lines and raised details where appropriate, a set of 60% LERX as well as full LERX that was suitable for some airframes, and plenty of weapons for the aircraft’s pylons. Couple this with highly detailed exhausts, a visible intake fan, and flaps that can be posed deployed for a more dramatic look, and you have a model that punches above its scale. Construction begins with the Martin-Baker ejection seat, which is made of two side panels enclosed around the seat cushion with moulded-in headbox. The pilot figure can be used if you feel like it, then the seat is shoe-horned into the cramped cockpit tub and joined by control column and instrument panel. While there isn’t a decal for the panel, there is a detailed painting guide that should allow you to create a good replica of this MFD dominated panel, so get your fine brushes out. Once completed, the cockpit is trapped inside the two halves of the nose, which need a little paint on the interior before closure, and a tiny hole is drilled in front of the windscreen. A twin sensor slips into a depression under the nose, then the front of the Pegasus engine is laid into a circular surround and mated with a two-part intake trunk, the latter usually painted white. To close up the fuselage, you must first make up the combined rear wheel and air-brake bays if you are using the wheels, or just the air-brake if your Harrier will be wheels-up. This assembly is then fitted inside the fuselage along with the engine face, with two more holes drilled from within for the refuelling probe later. If you will be using an Airfix stand, a small part is inserted into the lower fuselage from above once the two halves are mated and the glue dried. The Pegasus ejects its exhaust from four angled nozzles situated on the side of the fuselage in pairs that are called the hot and the cold nozzles due to the temperature of the jet efflux that leaves them. Each nozzle is made from two halves and they have twin strakes inside them that should be lined up to create the visible louvers inside the exhausts. The exterior of the nozzles have some nice detail moulded into them just like the real thing, so take care with the seams and concentrate on the louvers, as they would be hardest to deal with later. The exhausts are inserted into their recesses in the fuselage sides at any angle between vertical and horizontal, depending in what you want your Harrier to be doing. Behind the rear nozzle a protective plate keeps the heat off the fuselage, and this has a pair of holes to locate it, with corrugations moulded into the front surface. At this stage your Harrier has no nose, but you first add the prominent tail “stinger” that contains sensors and puffer-jets that give the pilot fine control over the aircraft’s attitude. This is a two-part assembly that is inserted into the tail after adding the one-part elevator, which has a large pivot between the two fins, and is locked in place by the stinger. If you’re careful with the glue it can remain free, but in the real world it has a ±12° range of deflection. The wings of the Harrier are built as a straight-through unit, heavily utilising modern composites for strength and weight-saving, and the kit mimics that with the upper and lower wings both full-width, being glued together before they are attached to the top of the fuselage, where they are joined by a choice LERX (Leading Edge Root eXtensions), after which you can insert the nose assembly into the slot, mating the tapering trunking moulded into the rear of the nose with the centre of the intake fan. You then choose whether you want to depict the blow-in doors around the circumference of the intake lips in the relaxed position under gravity with the engine off, or pushed fully flush for in-flight operation. The doors are all attached to a carrier that slots inside the hollow back of the intake part, filling in the gaps on the exterior at the appropriate angles. These are then glued to the sides of the cockpit, butted up against the front of the fuselage. Your Harrier looks pretty Harrier-y now, but there are a lot of parts still to add before you’re done. A pair of pylons are fixed under the inner wing initially, then you have a choice of deployed or ‘clean’ flying surfaces all along the wings, using the appropriate parts to suit your needs. The Harrier is a real bomb-truck, and is outfitted with another six pylons under the wings, and a choice of another under the centreline, or two long strakes either side that prevent the jetwash merging too soon, thereby reducing the pilot’s control. The Harrier’s landing gear is unusual because it only has a nose strut and one central main strut with two chunky wheels. The aircraft’s balance is maintained by a pair of outriggers that were originally at the tip of the wings, but were moved inboard into a pair of trailing edge sponsons in the Harrier II. The nose gear leg is made from two halves that trap the one-part wheel, then it is inserted into the bay, or covered over with a single bay door part for wheels up. The main gear leg is a single part that receives the two wheels on a cross-axle, then two bay doors for the nose, and three for the main bays are added. The instructions don’t seem to include mention of the rear bay closure step for in-flight, but it's easily identified as part A4. The two outriggers can be depicted closed by employing different parts that have the two small bay doors moulded-in, while the ground-side option has separate and nicely-detailed legs with moulded-in tyres, plus a pair of narrow bay doors that are joined together by slender cross-braces. The next choice relates to the ventral air-brake, which can be posed closed, partially open whilst landed, or fully deployed during flight. Ensure you don’t opt for full deployment if you plan on putting your model on its wheels, as it hangs down further than the main gear, so will create a highly unsatisfactory “nose-sitter” that might also fall forward to one side. All options use the same brake part, but the two open options use different length actuators to obtain the correct angle. A brief break to build up the weapons sees you making up a pair of two-part fuel tanks, a pair of AIM-9L Sidewinders, two Paveway IV Laser Guided Bombs, a Sniper ATP and DJRP Pods, and a pair of CRV-7 rocket pods that can have frangible aerodynamic covers, or with their rocket tips exposed ready for action. After another detour back to put all the small parts, including deployed or retracted refuelling probe and canopy on, the weapons are shown around the aircraft with arrows leading to the appropriate pylons. Markings There are two decal options included on the sheet, with a full page devoted to each one, plus another page that shows the numerous stencils in isolation to reduce confusion. If you’re about to moan about grey jets though, go and look at my review of the US Chevrolet truck to get a fix of some vibrant colour, and come back when you’re happier. From the box you can build one of the following: ZG857/EB-Z, No.41 Sqn., RAF Cottesmore, Rutland, England, 15/12/2010 ZD437 ‘Michelle’, Harrier Detachment, Operation Herrick, Kandahar, Afghanistan, 11/2006 Decals are by Cartograf, which is a guarantee of good registration, sharpness and colour density, with a thin satin carrier film cut close to the printed areas. Conclusion A welcome reboxing of this great little kit of a much-loved, capable and sorely missed weapon from the RAF’s defensive arsenal. Excellent detail and plenty of weapons to hang off the pylons make it a well-rounded package. Highly recommended. Review sample courtesy of
-
There's a distinct lack of Harrier in this GB so far. There's also a distinct shortage of Harrier in my display cabinet. Let's try to rectify both these issues. This is Hasegawa's old but good 72nd scale kit first released in 2000 although this boxing comes from 2003 and gives two decal options for the machine in either the box-art scheme of VMA-231 'Ace of Spades' in the green/grey wraparound or the one I'm aiming for which is VMA-331 'Bumble Bees' which matched the green and grey disruptive camouflage with light grey under-surfaces as the initial service entry scheme. As you can see there'll be a measure of aftermarket goodies involved as well and I've made a soft start to this project by digging out some reference books but will show those later
- 58 replies
-
- 15
-

-
McDonnell-Douglas (McAir) and the Naval Aviation Test Center (NATC) deployed to the Edwards AFB to conduct stability and control flight test near Rogers Dry Lake. While a relatively rare occurrence, it was possible that engines might "flameout" due to compressor stall as a result of high angle of attack and/or yaw disturbing the airflow into the intakes. The Edwards airspace had four test areas designated within flameout landing distance of the local dry lake beds (Rogers or Rosamond) should the need arise for an emergency landing. While the "spin areas" might also be within flameout landing distance of the Edwards 'hard' runway (R22/04) The lakebed landing areas allowed greater tolerances for approach and landing. Images from from four safety chase missions All are fitted with a spin recovery parachute assembly on the tail... 7 May 1984 - On this mission, the jet has mounting pads for cameras above the wing roots, just inboard of the flaps. 8 Jun 1984 - Cameras installed on the mounting plates. Confirmed that the cameras are facing aft to record a planned deployment of the spin chute. Note the loads distribution strap running along the aft fuselage from the spin chute assembly to the wing root... 13 Aug 1984 - Cameras and mounting plates removed. Lower light grey areas repainted white? Previously camouflaged upper wing areas now painted white. 19 Jan 1985 - The orange-red and white scheme is to aid determining aircraft attitude by ground based optical trackers. Note the stripe on the lower right wing. An image of the AV-8B spin chute assembly taken at the 1884 Edwards Open House: Thanks for looking, Sven
- 19 replies
-
- 37
-

-
-
- AV-8B
- Edwards AFB
- (and 1 more)
-
I fancied a quick aircraft build without too much effort, so found this rather nasty harrier in the stash, there's so much wrong with this kit - shape of the nose, wings, pylons, errors in the gun pods, general lack of detail etc that is also hard to correct, so I was never going to build it properly. Instead I just lashed it together as a quick, fun build to get me back into aircraft, which it mostly was in fairness, apart from the canopy which has a big prominent seam down the centre and didn't fit especially well. I think It looks mostly OK and a bit like a harrier (from a distance!) so there you go Thanks for looking Nick
- 16 replies
-
- 33
-
-
 AV-8B Resin Accessories for Hasegawa Kit 1:72 Brengun Hasegawa's AV-8B Harrier has been around for a good while now. It represents classic Hasegawa in the sense that it provides everything you need to build a high quality Harrier while never going over the top in terms of engineering or detail. The kit has also been re-released by Revell on at least one occasion. Now Brengun have released a swathe of resin goodies to update and upgrade an already impressive kit. AV-8B Nozzles (BRL72183) This set provides nicely detailed hot and cold exhaust nozzles. Aside from the crisp detail, the parts are cast in one piece which will negate the need to spend ages tidying up the two-part kit items. I've used similar sets in the past and found them to be far superior to the kit items, as well as being much easier to use. AV-8B Cockpit (BRL72182) This set contains upgrade parts for the kit's cockpit. Unlike many upgrade sets, which contain a complete replacement cockpit tub, this set is designed to be used alongside the kit parts. Included in the set are sidewall details and consoles, a choice of instrument panels (for Night Attack and... um, Day Attack versions) and a fret of photo etched parts, most of which are upgrade parts for the kit's seat, as well as other bits and bobs. I personally would have preferred a resin seat, but that could still be an option as there are many of those available. AV-8B Night Attack Nose (BRL72184)] If you don't have the Night Attack version of the Hasegawa kit, with the FLIR bump built into the nose cone, then you can simply stick this bad boy on the front and hey presto. The resin is beautifully cast and nicely detailed and, thanks to the design of the Hase kit, you don't even need to saw off the old nose to use it. AV-8B Wheels (BRL72185) This set includes replacement wheels for the kit, including the outrigger wheels, as well as a replacement for the lower part of the nose gear leg. There is a tiny fret of photo etched parts that includes scissor links that can be added to the kit legs as well. The resin is nicely cast and includes fine detail on the tyres that is absent from the kit parts. Conclusion Hasegawa's AV-8B Harrier II is an excellent kit and I'm sure it will remain a popular choice with modellers for quite some time to come. While these sets join a somewhat crowded marketplace, the quality is sufficient for them to be able to hold their own and provide a useful option for modellers looking to upgrade their kit. Recommended. Review sample courtesy of
 -
Hi, after a couple of Mirage kits, I'm back to my beloved Harrier. This time she will be an AV-8B Plus finished in the Marina Militare Italiana (Italian Navy) markings. The kit is far from being a good model. Many details are completely missing or bad represented. Fortunately there are many aftermarket detail stes available for the interior and exterior. I've started dry fitting the cockpit tub and the front undercarriage bay from Aires. Very good fit and tremendous amount of details here. After a good session of paint the resin parts are ready to be glued inside the front fuselage. The plastic parts needs to be rescribed and detailed here and there on both side. CIAO! Piero
-
 On January 25, 1985, VMA-331 became the first fully operational AV-8B Harrier II squadron in Marine Corps service. The squadron deployed on the USS Nassau (LHA-4) to the Persian Gulf and eventually flew 243 sorties, dropping 256 tons of ordnance, and became the first Marine Attack Squadron to conduct combat operations from a Landing Helicopter Assault ship. While supporting Operation Desert Storm, an AV-8B Harrier II from the squadron was shot down by an SA-7 over Safwan, Iraq. This build was a passion for the aircraft a turning point in aviation technology as the AV-8B second generation refined the V/STOL ability paving the way for the F-35B. The low visibility paint sheme I first noticed in that great cameo in "True lies" Click on photos to enlarge l
 -
Harrier GR.7/9 Limited Edition (1166) 1:48 Eduard What does one say about the Harrier? It is the world's first and most successful operational Vertical Take-Off/Landing VTOL fighter aircraft that was originally designed back when jet engines themselves were new technology, so vectoring thrust was almost unheard off. Starting with a test rig nicknamed "The Flying Bestead", the engineers at Hawker Siddeley and Bristol Engines began design work on this inventive and ground-breaking jet during a period when Duncan Sands was putting the brakes on many manned aircraft projects in the mistaken belief that technology was ready for unmanned aircraft and missiles. The resulting airframe looked suspiciously like a Harrier, but was called Kestrel, and had some unusual features that wouldn't make it through development, such as the inflatable intake lips to shape the air at different speeds, which could give the aircraft a somewhat "jug-eared" look from the front. Some of the airframes were sent to the US for evaluation, and at the end of 1967 the Harrier as she became known first flew in its GR.1 guise. Various upgrades in service saw the GR.3 with an extended nose to house the laser tracker, with them seeing service in the RAF and US Marines as the AV-8A. As well as the substantially different Fleet Air Arm Sea Harriers, the Harrier II was developed between BAe and McDonnell Douglas, where it was known as the AV-8B. It had a new composite wing and heavily adapted composite fuselage, new more powerful Rolls-Royce Pegasus engines, as well as more modern avionics, while still remaining subsonic in forward flight. To confuse everyone, the RAF adopted the GR.5 as a continuation of the name of the original Harrier, and almost no-one refers to it as the Harrier II any more. The GR.7 added night operations capability, with the GR.9 finalising development and adding a whole host of new avionics to the platform. Sadly, and many would say before its time, the Harrier was withdrawn from service earlier than originally anticipated and barely after the upgrade programme had finished, leaving the UK without anything to fly off her remaining carriers while we wait for its eventual replacement, the F-35 Lightning II. The airframes were sold off to the US for a song, where they are still being used by the Marines, although some contention still remains as to whether they are flying or being used for spares. The Kit This is a reboxing of the excellent Hasegawa kit that is sometimes available and at other times harder to find, depending on where you look. Eduard have done their usual job of augmenting the original, and have included some additional parts in resin and Photo-Etch (PE), plus a new decal sheet with some interesting and colourful options. The tooling dates from 2004, so isn't up-to-the-minute new, but it has a good reputation as being accurate, with fine engraved panel lines on the surface, but contrary to the general rule with Hasegawa kits, it isn't short on weapons. Inside the colourful box are twelve sprues of light grey styrene of various sizes, which have AV-8B on the majority of the runners, and GR.5/7 on one. A clear sprue, a set of four poly-caps, two sheets of PE (one pre-painted), a slip of acetate for the MFD glazing, a bag of resin upgrade parts, kabuki masks, and a decal sheet are also included along with a glossy instruction booklet with painting and decaling guide at the rear. If you already have any of the later Harriers from Hasegawa you will know roughly what to expect, but the resin should address some of the kit's weaker points, and the additional parts that are available separately will take the detail up to the highest level, so you can put into it what you want in the areas that interest you. At time of writing, the following items are available, and I'll be reviewing these shortly, so will add links. TERMA Pod 648266 GR.7/9 Exhaust Nozzles 648267 Sniper ATP for Harrier GR.9 648273 GR.7/9 PE Upgrade 49784 Construction begins with the cramped cockpit, and here the additions start to make themselves known straight away, with a complete upgrade of the instrument panel and narrow side consoles with pre-painted PE that differs between decal options. The acetate sheet is applied behind the MFD bezels to give a shiny glazed look to the coloured parts behind, and later on a highly detailed resin seat with a full complement of resin cushions and crew belts is inserted once the majority of handling is over. The cockpit sidewalls are also upgraded with additional detailed skins, as well as some small control levers and canopy latching hooks. The nose is built up separately initially, while the main fuselage is closed up around the big Pegasus fan intake and the linkages for the vectored exhaust nozzles. They are brought together with the nose cone and the two intakes, which have their blow-in doors as separate parts at the top of the intake, which droop down after engine shut-down under gravity. The hot and cold nozzle pairs are built up from two parts each, and fix into the poly-caps within the linkages. They can remain mobile with careful gluing, and the rearmost nozzle pair have a protective heat deflecting plate installed behind them to protect the fuselage. The wings are next, with the top a single part, and the lower in two halves, with separate wing tips. The Leading Edge Root eXtension (LERX) programme gave the airframe additional lift by using either a partial LERX or full LERX, and both are included in the box, with your option dependent on which decal option you choose. The tail has a moulded-in rudder, while the elevators are separate parts with PE swash-plates between them and the fuselage. Additional small parts and mesh panels are added to the tail cone, and a number of small aerials, louvres etc. are dotted around the airframe throughout the build too. The airbrakes remain stock, although the ventral brake does receive an additional decal to detail it, even though it probably won't be seen. The landing gear of the Harrier is described as bicycle-style, with a single nose wheel and large twin tail wheel, both of which are replaced with resin parts courtesy of the goodie-bag that comes with the kit. The little stabiliser wheels half-way along the wing have their wheels removed and more detailed resin yokes and tyres added, with a number of small decals dotted about all the struts, which is a thing I'd like to see more on kits, as the devil is in the detail. The choice of weapons for the Harrier, as previously alluded, is fairly generous for a Hasegawa kit, with a pair of cannon pods, some Sidewinders, pylons, and of course additional fuel tankage for the centreline or underwing pylons. The AIM-9s would be better replaced by some from Eduard's Brassin line if detail is paramount, but the kit parts aren't too shabby. The two strakes under the fuselage centre that guide the jetwash downward when hovering without the cannon pods fitted are supplied with some small additional PE parts where they join the fuselage at the front, and a pair of adapter rails for the Sidewinders can also be found on the sprues. One of the most noticeable aspects of the Harrier when looking at it from the front is the large blown canopy that affords the pilot a good view. This is reproduced faithfully on the sprues, but it has to be done with a three-part mould, so there is a seam down the centre of the outside of the canopy. You can easily remove this by sanding it back with progressively finer grades of stick, finishing off with a buffing sponge and/or some plastic polish. If you're a bit wary of mucking it up, it's fine enough to leave and almost no-one will notice. The same occurs with the windscreen, so you might as well do the two at once. The additional parts include a decal for the det-cord canopy shattering device, a set of rear-view mirrors and some small levers for the inside front of the windscreen. These are installed at the last gasp along with the resin ejection seat and a bunch of intakes, antennae and a formation light. The masks are supplied on a sheet of yellow kabuki tape, these pre-cut masks supply you with a full set of masks for the canopy, with compound curved handled by using frame hugging masks, while the highly curved gaps are in-filled with either liquid mask or offcuts from the background tape. In addition you get a set of masks for the wheels, allowing you to cut the demarcation perfectly with little effort. A double mask for the HUD glass is also included to ease your painting experience Markings There are six options in the box, and the decals are by Cartograf, which is a guarantee of good registration, sharpness and colour density, with a thin matt carrier film cut close to the printed areas. From the box you can build one of the following: Harrier GR.9, ZD 406, Royal Navy Naval Strike Wing, RAF Station Cottesmore, 2009 Harrier GR.7, ZG 479/69A, IV (AC) Squadron, Operation Telic, Ahmed al Jaber Air Base, Kuwait, spring 2003 Harrier GR.7, ZD 464/54, 20 ® Squadron, RAF Wittering Air Base, 2002 Harrier GR.7, ZD 379/27, 1(F) Squadron, Barduffoss, Norway, January 2004 Harrier GR.7, ZG 501, SAOEU Boscombe Down, 1996 Harrier GR.9A, ZG 478/68, No. 41 ® Squadron, RAF Coningsby Air Base, March 2006 There are also copious stencils that are marked out on a separate page each for the airframe, pylons and weapons, all of which adds that extra bit of realism to any model. Conclusion Add a Hasegawa Harrier, some Eduard goodies and some lovely decals into a box and you've got a winner. If you're prepared to go the extra mile and treat yourself to the extras mentioned earlier, you have a superbly detailed model that should keep you busy for a good long while. Very highly recommended, and don't dally, as they won't hang around on the shelves for long, as it's a limited edition in case you didn't notice. Review sample courtesy of
-
This is AV-8B Harrier ll Hasegawa 1/72 box 00449, OOB build with some minor corrections. Vallejo acrylics.
-
 Very large - 1/18th ! - McDD AV-8B Harrier II kits are announced by Merit International in 2014-2015 - ref.61804 - McDD AV-8B Harrier II Source: https://www.facebook.com/photo.php?fbid=587326264692286&set=pb.117797744978476.-2207520000.1391410224.&type=3&permPage=1 - ref.60027 - McDDAV-8B Harrier II USMC Source: https://www.facebook.com/MeritIntlLtd?hc_location=timeline#!/photo.php?fbid=589304917827754&set=a.589304677827778.1073741854.117797744978476&type=1&theater V.P.
 -
These images were taken in 1983 and ’84. McDonnell-Douglas brought AV-8B ship #2 (USN Bu. No. 161397) out to Edwards AFB a few times to accomplish stability and control evaluations. Three different missions are shown here. The January 1983 mission has two Mk 82 500-lb Snakeyes on the centerline station. The June 1983 mission has the Snakeyes on the two outboard wing stations. On the February 1984 mission, all the pylons are empty. From our T-38A on his left wing over Tehachapi foothills. We do a ‘clean ‘n’ dry check”’ before test maneuvers are executed. No leaks, no loose panels, or anything else out of place. As I recall, all test maneuvers were accomplished in the lower southwest corner of the R-2508 complex north of Edwards AFB. The weapons are inert. I don’t know why they have a gold band around them rather than the usual blue nose bands. Maybe they are instrumented? Note the soot has been cleaned away from the fuselage star and bar. Descent to enter the Edwards pattern. Entering base leg of the Edwards pattern for Runway 22. Rogers dry lake below. Rejoin over one of the dry lakes. Taking position on our right wing. Over the east "shore" of Rogers Dry Lake. Thanks for looking, Sven
- 21 replies
-
- 19
-
-
-
- AV-8B
- Edwards AFB
- (and 1 more)
-
USMC Harrier AV-8B, pics thanks to member "Fights On" taken on board USS MAKIN ISLAND LHA-8.
-

Eduard Harrier GR.7/9 (648384 for Hasegawa)
Mike posted a topic in Aftermarket (updates/conversions)
Harrier GR.7/9 (648384for Hasegawa) 1:48 Eduard Brassin The Hasegawa Harriers are well-respected kits, but as moulding technology moves on, there are areas that start to look a little below-par, and coupled with the paucity of weapons in the box, a lot of modellers like to make some upgrades to the basic kit when building. Eduard have a number of sets available for this kit, and they have now released this set that contains a number of them, concentrating their efforts on the most obvious areas. The set arrives in the familiar Brassin rectangular profile box, with the resin parts safely cocooned on dark grey foam inserts, and the instructions assisting Exhaust Nozzles - Four resin nozzles, which are direct replacements for the two part kit nozzles, so not only do you avoid having to fill the seams, but you also get a much better level of detail into the bargain. Sniper ATP - Harrier used this target designation pod extensively, and this set contains all the necessary parts with the adapter rail that is required for attachment to the Harrier. The main body is cut from its pouring plug and the join is covered by a PE part, with an optional "black box" on the aft end, while the movable seeker head and PE lens is fitted into the recess in the front. Then the glazing parts in clear resin are prepared by adding a bevel to their edges as shown in the accompanying diagram, before gluing to the lip around the edges of the window. The adapter rail, sway-braces and pylon are fixed to the top of the pod body, with some small PE parts providing extra detail, and decals supplied for the stencils. If you wanted to pose the pod in its deployed mode, simply turn the seeker head windows to the downward position using your references. TERMA Pod – this defence pod isn't exclusively used by the Harrier, so it has uses with other aircraft, but it is carried by it, so it has been included here, and consists of two resin parts and a small fret of pre-painted PE. The pod is liberated from its casting blocks, then glued together to form the pod body. The PE parts are then affixed to the exterior, which is best done after main painting is completed due to them being pre-printed. Ejection Seat – a complete resin seat with cushions, plus PE belts and other details, plus a small number of stencils. Wheels - The landing gear of the Harrier is described as bicycle-style, with a single nose wheel and large twin tail wheel, both of which resin parts , as are the little stabiliser wheels half-way along the wing with detailed resin yokes and tyres added. Conclusion A great set that is pretty much a one-stop box for anyone needing to upgrade their Hasegawa Harrier. After installation and sympathetic painting, the difference will be plain to see. Very highly recommended. Review sample courtesy of -
 Sorry! It looks like the page has been withdrawn.
 -
 Sorry I'm late to the party but I've been very busy building a stupid amount kits for another group Matador... GR7
 -
Ejection Seats Quickboost 1:48 Quickboost have been really busy lately releasing all manner of add-on parts for various models. These three sets provide resin replacement ejection seats for three different aircraft. Each seat is moulded in grey resin and covered in some really great detail. Each seat is packaged in the standard poly sleeve but fortunately they don’t appear to have suffered any damage. All the modeller has to do is to remove them from their casting blocks, give then a nice delicate paint job and fit them to the chosen cockpit. F-100D Super Sabre (QB 48 509) is quite a simple affair, but still packed with detail. The seat appears to be pretty accurate when compared with research photographs, although the ejection handles look a little low. They do need to be more prominent and hollowed out a little more, but once fitted they probably won’t be seen much. The moulded lap belts look ok, but the shoulder straps look a little limp and need a bit more body to them. Quickboost haven’t forgotten the back of the seat and all the high pressure lines are well represented, as are the seat fittings and attachment rollers. AV-8B Harrier II (QB 48 522) is a very nice representation of the Stencil S III S seat, and also looks to be very accurate. The seat belts are very nicely done and even the rear of the seat including the aircraft interface and ejection tubes are shown. The seat pan appears to be shown in the fully down position as there is a large gap between the seat pan top and the head box, obviously for the shorter pilot. The only thing that does need altering is the firing handle needs to be opened up as there is some resin flash in place. Sea Vixen (QB 48 540) these two ejection seats have additional parts included on the casting block and protected by large extension on the block ends. Now while the seats are really well moulded with some great looking straps and belts, although minus leg restraints, there is something not quite right about them. The basic seat framework is ok but it goes a bit awry at the back. The barometric time release unit and drogue gun and piston are missing, and the frame at the top doesn’t look right which has a very poor representation of the prominent scissor shackle. The seat pads also look wrong as the pilots seat and the observer seta differed in pad style and therefore straps, whereas these two seats are exactly the same. They look to neat and tidy rather than the organised mess that the real seats looked like. Conclusion While the F-100D and Harrier II seats look spot on for accuracy unfortunately the same cannot be said for the Sea Vixen seats which is a shame really as they had promise. I guess they could be modified to suit, but why would anyone want to buy an add-on, only have to fix the faults. The other two seats will look great with some careful painting and due to the detail on the backs of the seats could even be used in a diorama with the seats removed from the aircraft. Review samples courtesy of distributed in the UK by Hannants Ltd.
-
 Harrier AV-8B II - 162074 / VL-07 of VMA-331 "Bumblebees", USMC, c1986 The latest model (build 13) in my Harrier Project is an AV-8B II of VMA-331 "The Bumblebees". It's an attempt to copy the aircraft as shown in some photos in the World Air Power Journal (Vol.6, 1991) and Andy Evans' BAe/McDonnell Douglas Harrier book (Crowood Press). As VMA-331 only flew the original AV-8B II variant before being disbanded, it was also an appropriate choice of VMA as I ultimately want to a Harrier from each VMA. The aircraft depicted, 162074 / VL-07, was later re-manufactured as an AV-8B II Plus, 165311. The original cockpit ended up back in the UK I believe. This is the Revell / Monogram kit and is pretty much built straight out of the box. I created some decals for this particular serial and modex and added some Verlinden Mk.82 Snakeyes and a couple of TERs from (I think as donated) a Hasegawa Weapons Kit. Harrier experts will notice a number of flaws, both in the kit and introduced by me. Assembly is pretty straightforward compared with the Hasegawa kit as it does not need to support the multi-variant build. In some ways I prefer it to the Hasegawa version, in others I don't. As i have two more to build, it's not wise to hate it! She's brush painted of course, using Life Color's acrylics: "Israeli Green" (FS34064) and "Extra Dark Sea Grey" (FS16099) for the upper surface camouflage and "Light Gull Grey" (FS36440) for the undersides. Pylons are painted in white (as per colour scheme set out in Aeroguide 16 for this specific aircraft). I used FS34079 for the Snakeyes. A coat of three of Klear sealed the paints ready for the decals (from the kit and bespoke as mentioned). Weathering from Tamiya and rounded off with a spray of Humbrol matt varnish to finish and seal. I'll close up the canopy once I've added an MDC (a story for another day). Things I'll "fix" for the next one ... re-position the nose formation lights and pitot tubes; extend the main undercarriage strut to make it easier to get it to sit firmly on the ground; re-shape the intakes where they meet the fuselage; heat the canopy to modify its shape for a better fit; get some sway braces for the TERs (I had to drill holes to use 0.15mm nickel wire to attach the bombs), fit the refuelling probe before painting and tone down the decals for the formation lights. Enough waffle, here she is ... Comments welcome as ever. Next up on the bench will be a Hasegawa AV-8B II Plus as flown by the Italian Navy (perhaps SaintsPhil and I can get our models together on the next Harrier SIG display at RAF Cosford - April 2013?).
 -
Hi all, Just put the finishing touches on this, first time I have put anything up for inspection for a while, had a bit of time out from building, but got on and finished this at the weekend. Its the Revell boxing of the old Monogram kit, so not a lot in the way of recessed detail on the kit, its built OOB and I actually enjoyed this. I couldn't bring myself to attempt a re-scribe as with my skill level it would just end up looking worse lol, but may bag myself a cheap Airfix GR3 or SHAR and have a go on that. cheers Simon