Search the Community
Showing results for tags '8th Air Force'.
Found 6 results
-
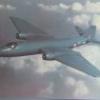
 Hi everybody; for those following the 453rd BG Museum builds, here's my second entry after the P-51D I built and delivered to the Museum in Old Buckenham last year. For those who don't know what I'm talking about, a search in the forum for "453rd BG Museum build" will provide the whole back ground story Anyway, this is the second kit Jim (the Museum curator) sent me a couple of years ago, and it's about time I started building it! The kit is the well known Tamiya 1/48 Republic P-47D Thunderbolt "Bubbletop": Let's have a look inside the box, shell we? Three main sprues with lots of details already (note in the last one there's a pilot figure and three different kinds of propellers), plus tow additional sprues with payload and tanks and other details Transparencies Huge decals/stickers sheet: (won't be using many of those.... ) Jim also added this AM PE fret: And this is the specific airframe I'm going to build: Also shown a this link: https://www.worldwarphotos.info/wp-content/gallery/usa/aircrafts/p-47d/P-47D_42-26637_Kokomo_Kepner_2.jpg What is peculiar about this aircraft, besides the nose art, is that it was used in a training unit and was the personal mount of Maj. Gen. Kepner; it was kept to a minimum load possible, so no drop tanks or any other hanging bits and pylons, and the outer gun barrels were removed and blanked out, leaving her with 6 machine guns in place of the standard 8. Construction has not started yet, but will soon with the cockpit; in that regard, there's a nice thread right here on BM on how confusing the situation about cockpit color is on this AC, but I think I'll go with the general consensus reported there and paint it Dark Dull Green; now, if only I had a clue about how that color looks like..... All comments and advice most welcome Ciao
 -
Here's my latest off the bench, the well known "Petie 2nd" Mustang (a P-51D-10, to be exact) flown by Lt. Col. John C. Meyer, as part of the 8 Air Force, 453rd Bomber Group (in detail, 487th Fighter Squadron, 352nd Fighter Group), whose museum this model is intended for. This is my first entry for the museum, the second will be a P-47D Thunderbolt, which I still have to begin working on. Back to this, the kit is the Tamiya one dedicated to this subject, in 1/48 scale; the only aftermarket addition was the Eduard PE set for the cockpit. Some minor scratch building was involved too, namely: - the gunsight reflectors, from thin acetate - the oxygen hose inside the cockpit, using thin copper wire winded around a thicker wire - the tail wheel arm, from a steel paper clip - the main struts brakelines, again with copper wire - the Pitot pipe, from brass tubes(because I lost the kit part in the process, it didn't really need to be replaced ) - the machine gun barrels, again from brass tubes - the tail light, from clear sprue - the main wheel wells back wall, from plasticard - piping and cabling inside said wheel wells, from various wires I also filled in (with PPP) most of the wing panel lines, according to the process used on the real bird to guarantee the lamina flow. I tried to keep them slightly visible though, as can be seen in period pics. Insignia and letters were airbrushed, using masks that I designed and cut with my Silhouette Curio, while the serials, stencils and all the rest came from the kit decals. Metallic paint is mainly Tamiya Gloss Aluminium from a rattle can, decanted and airbrushed. Variations were obtained with AK Xtreme Metal Chrome and Vallejo Silver. All other paints used were Lifecolor, Italeri and Tamiya acrylics. Weathering done with a mix of black tempera wash, oil wash and oil dotting (the latter only on blue surfaces), and some Tamiya Smoke liberally airbrushed on the metallic areas. The build thread is here: Here are some pics: Some shots of the interiors - they are over-exposed, I preferred going that way rather than using the flash Exhausts detail and machine guns Undercarriages And some from underneath All comments welcome Ciao
-
 Like many of us I'm a devoted fan of North American's fighter masterpiece. My very first kit in 1/72 was the infamous Revell proposition as was my first ever 1/32 model. I still remember how attracted I was by the striking box art of Don Gentile's Shangri La... Inspiring books like Roger Freeman's 'The Mighty Eighth' and Kit Carson's 'Pursue & Destroy' motivated me in the late seventies to start an Eighth Air Force P-51 collection in quarterscale. I have built Mustangs of 13 Fighter Groups so far, of which seven are presented in detail below. Only the 20th FG is missing. In the early years I had to get along with kits that are a little less sophisticated than the latest products from Airfix and Eduard. Most of my original builds are based on Monogram kits which, even with raised panel lines, are still an acceptable design. I hope you enjoy them despite their age. The first series of models represents the 65th Fighter Wing. There were only four Mustang groups in the wing as the 56th FG never abandoned their Thunderbolts. The four groups are - QP-B BEE 43-6819 P-51B-5-NA 4th FG 334th FS, Capt Duane W. Beeson - Squadron CO, F-356 Debden, April 1944 On 5 March 1944 Duane Beeson's well-known P-51B was severely damaged by flak while strafing. He limped home to Debden where BEE's tailplane was patched up. Exactly one month later, on 5 April, German flak hit again during a strafing attack on Brandenburg. This time Beeson was forced to crash-land and was taken POW. Credited with 24 aerial victories he was the second-highest scoring ace in the Eighth Air Force at the time of his capture. Monogram 1973 edition (first released in 1967) with aftermarket canopy, exhausts, tail wheel and wing pylons. Upgraded cockpit, propeller and 75 gal drop tanks. Modified gun ports and radiator ramp. AeroMaster Decals 48-213. More pictures here. OS-X MISS STEVE 44-13677 P-51D-5-NA (late) 355th FG 357th FS, 1/Lt William J. Cullerton, F-122 Steeple Morden, December 1944 After crash-landing MISS STEVE was repaired and - re-coded OS-N - was assigned to Lt David P. Watkins who named her FICKLE FANNY. The 355th FG was the Eighth's leading ground strafing unit, 15 of Cullerton's 20 claims were destroyed on the ground. The model is armed with two 500 lbs bombs. Monogram 1977 with aftermarket cockpit, canopy, exhaust, wheels and bombs. Decals from scrap box and homemade. E2-C LOU IV - ATHELENE 44-13410 P-51D-5-NA (early) 361st FG 375th FS, Lt Col Thomas J.J. Christian - Group CO, F-374 Bottisham, August 1944 Colonel Christian's P-51 is the subject of so many models that no more needs to be said here. This is my interpretation of his mount, particularly of the ATHELENE inscription which I styled after a blurred picture and similar decorations on other 375th FS aircraft (red letters - black outline - clean silver background). Fujimi 1987 edition (first released in 1973) with replacement parts from the scrap box (prop, cockpit, gear), Verlinden 75 gal drop tanks and substantial re-work around cowling, fin and air duct. Modified decals from Microscale and AeroMaster. L2-P Burn'n Bernie 44-15380 P-51D-15-NA 479th FG 434th FS, Lt Gail E. Jacobson, Sta. 377 Wattisham, May 1945 This Mustang was damaged in a landing accident on 25 December 1944. Subsequently repaired it served on until war's end. Note 'buzz' letters under port wing (barely visible on the pictures) and antenna for AN/APS-13 tail warning radar. Monogram again, Aires V-1650-7 engine, a few aftermarket items and homemade decals. 65th FW REFERENCES MARKINGS OF THE ACES, KOOKABURRA HISTORIC AIRCRAFT BOOKS SERIES 3 NO.1, THEODORE R. BENNETT, DANDENONG, 1970 (479th) VIII FIGHTER COMMAND AT WAR, AIRCRAFT OF THE ACES 31, MICHAEL O'LEARY, BOTLEY, 2000 (4th) YELLOWJACKETS!, PAUL B. CORA, ATGLEN, 2002 (361st) 'DOWN TO EARTH' – STRAFING ACES OF THE EIGHTH AIR FORCE, AIRCRAFT OF THE ACES 51, WILLIAM N. HESS, BOTLEY, 2003 (355th) 4th FIGHTER GROUP IN WORLD WAR II, LARRY DAVIS, CARROLLTON, 2007 479th FIGHTER GROUP – 'RIDDLE'S RAIDERS', AVIATION ELITE UNITS 32, JOHN STANAWAY, BOTLEY, 2009 The next couple of models shall commemorate the 66th Fighter Wing's contribution to the Eighth Air Force war effort. Starting with - SX-M LUCKY LEAKY II 42-103363 P-51C-5-NT 353rd FG 352nd FS, 1/Lt John E. Davenport, F-157 Raydon, January 1945 Transferred from the 339th to the 353rd Fighter Group in December 1944 this upgraded P-51C was assigned to 1/Lt John E. Davenport of the 352nd FS. The career of this beautiful Mustang ended with a belly-landing on 2 May 1945 when, on a training flight, Lt Leroy O. Pletz switched fuel tanks and the engine cut. This Tamiya 1995 edition (with Loon Models resin fuselage) was my contribution to the Mustang groupbuild in 2019. Decals from AeroMaster and many aftermarket items enhance the basic model. More pictures here. The next exhibit was introduced here a while ago. It's one of my restored P-51s, originally built in the 1980s, representing the first Mustang-equipped fighter group of the Eighth Air Force. G4-H U'VE HAD IT! 42-106462 P-51B-10-NA 357th FG 362nd FS, Capt John B. England, F-373 Leiston, June 1944 It was Johnny England's second P-51B in which he scored at least three of his 17.5 confirmed victories making him the second-ranking ace in the 357th FG. Re-coded G4-Y it participated in the shuttle mission to Russia flown by Flt Lt Eric Wooley, an RAF exchange pilot. On 4th October the fighter's life ended when its tail broke off during a training flight with Lt Richard I. Potter who freed himself just in time to escape the crash. Monogram 1973 with aftermarket and scratch parts and a new interior (from cockpit to radiator outlet). Decals from AMDG. REFERENCES P-51 MUSTANG IN ACTION, LARRY DAVIS, CARROLLTON, 1981 (353rd) P-51 MUSTANG IN COLOR, LARRY DAVIS, CARROLLTON, 1982 (353rd) SKYBIRDS - A PHOTOGRAPHIC ODYSSEY OF THE 353rd FIGHTER GROUP, GRAHAM CROSS, HITCHIN, 2017 TO WAR WITH THE YOXFORD BOYS, MERLE C. OLMSTED, HAMILTON, 2004 (357th) MUSTANG ACES OF THE 357th FIGHTER GROUP, AIRCRAFT OF THE ACES 96, CHRIS BUCHOLTZ, OXFORD, 2010 WWW.CEBUDANDERSON.COM/357FG.HTM (357th) Another one of my old Monogram P-51Bs, which passed through restoration recently, is from the 67th Fighter Wing. It joined my collection in 1995. CV-X (no nickname) 42-106702 P-51B-10-NA 359th FG 368th FS, Capt John B Hunter, F-133 East Wretham, August 1944 CV-X being bombed up for her flight of doom The aircraft was initially assigned to Lt Robert V. Beaupre and was later passed on to Capt John B. Hunter. The end came during a dive-bombing mission against railway targets near Strasbourg on 10 August 1944. Attacking the marshalling yard at Bischwiller Lt Lester W. Hovden overstressed the bomb-laden airframe in a sharp turn. Both wings folded up and separated from the fuselage killing Lt Hovden in the following crash and explosion. The model received an improved cockpit, detailed canopy, new exhausts and other areas of re-work. Decals from scrap box. REFERENCES P-51 MUSTANG, ROBERT GRINSELL, JANE'S, LONDON, 1980 359th FIGHTER GROUP, AVIATION ELITE UNITS 10, JACK H SMITH, BOTLEY, 2002 I hope you enjoyed this presentation. One day I will resume the restoration activity and more little friends will join up. Michael GENERAL 8AF MUSTANG REFERENCES THE MIGHTY EIGHTH, ROGER A. FREEMAN, NEW YORK, 1973 ACES OF THE EIGHTH, GENE B. STAFFORD & WILLIAM N. HESS, SQUADRON/SIGNAL PUBLICATIONS, WARREN, 1977 EIGHTH AIR FORCE STORY, KENN C. RUST, TEMPLE CITY, 1978 THE MIGHTY EIGHTH IN COLOR, ROGER A. FREEMAN, LONDON, 1991 MUSTANG ACES OF THE EIGHTH AIR FORCE, AIRCRAFT OF THE ACES 1, JERRY SCUTTS, LONDON, 1994 P-51 MUSTANG UNITS OF THE EIGHTH AIR FORCE, AMERICAN EAGLES 4, ROGER FREEMAN, HERSHAM, 2003 WWW.LITTLEFRIENDS.CO.UK WWW.AMERICANAIRMUSEUM.COM
 -
I have started my entry which is the Academy B-17E (Fortress II boxing). I gave the decals away some time ago but have sourced a set from a Frog kit. It started as an OOB build but I have already drilled out the turbocharger intakes on one wing and started to box them in. Pictures of progress to follow soon.
- 24 replies
-
- 4
-

-
- 8th Air Force
- B-17E
- (and 1 more)
-
US Legends: 8th Air Force Gift Set Revell 1:72 Neither the 8th Air Force nor the aircraft contained in this gift set need much of an introduction. The B17, P47 and P51 have all earned their place in history through the hard graft that both they and their crews performed in the face of daylight combat with Axis forces over Europe. The 8th Air Force was born in 1942 and soon after started operating from UK soil on missions over Europe with the B-17’s and later with B-24’s. Missions in late ‘42 and ’43 shown the vulnerability of unescorted bombers despite the fact that the aircraft bristled with defensive armament. The aircraft that were available as escort simply didn’t have the range to protect the bombers across the full mission, leaving them exposed over the most dangerous legs. The P-47 started to escort bombers in August 1943 and eventually equipped the 4th, 56th and 78th Fighter Groups, however despite admiral capability for such a large fighter at altitude, it still couldn’t support the bombers to the target. Initial Merlin powered P-51’s came to Europe initially with the 9th Air Force so it wasn’t until December 43 when they were available to the 8th. The impact of the P-51 was immediate. The bombers now had an aircraft that had the range to escort the heavy bombers right to the target and back. In fact, the P-51 could fly as far on internal fuel alone as the P-47 could with drop tanks fitted. Bomber and fighter crews referred to each other as ‘Big’ and ‘Little’ friends respectively indicating the huge respect that they had for each other. The 8th Air Force continued pounding German targets across Europe right until the end of hostilities in Europe. The kits I wasn’t sure what to expect when I opened the box of this gift set, but sure enough, the B-17G is the newest release. Initial inspection shows all three kits to be of pleasing quality, recessed panel lines, plenty of detail and a beautiful decal sheet. Given the price of this set, it is quite a bargain and I’m sure will appeal to beginners and experienced modellers alike. Included in the box are the three kits individually packed, a single decal sheet and a single A4 instruction booklet using clear monotone line diagrams and paint instructions. Revell have also included a set of paints, glue and paint brushes ideal for beginners venturing in to the plastic kingdom. B-17G I’m not going to review this kit as it was reviewed here on Britmodeller by Paul, so instead, here’s a LINK Needless to say though, in summary, it is a great kit, filled to the brim with detail both internally and externally and very well engineered which Revell have excelled at in recent years. There are some imperfections however. The canopy area can be questioned if you have a love affair with the old Fort, the panel lines are somewhat excessive and the clear nose cone looks thicker than the real thing! As the decals contained in the kit are of the infamous ‘A bit O’ Lace’, I’m also including a link to a stunning build by Roman Schilhart from 2013 HERE to put my comments above in to perspective Or if you want to go in a different direction as Paul our reviewer did, take a look at THIS P-47D This is the P-47D-30 that has been around for a few years, but not previously reviewed on Britmodeller. I did some research to see what has previously been said about the kit and found some criticism of the shape, notably the belly being too deep, wing chord too wide at the roots and the undercarriage being too short. To check this, I compared the main parts against profiles in the Squadron publications and come to some different conclusions. Obviously, there can be errors in the profiles, so I’m only indicating my findings, certainly not trying to create argument. From the profile comparisons, I believe the belly to have the right depth, however the rear under fuselage is somewhat anaemic, lacking the full extent of the curved profile but correct at the tail. The wing roots appear to be correct in chord width for a ‘D’ model, but much like the lower fuselage, the trailing edge isn’t as curved as it should be, giving a slight chord error most noticeable mid-way along the wing. I never checked the length of the undercarriage, but believe the legs are too short making it difficult (or impossible!) to fit the large belly tank. With the accuracy issues out of the way, let’s turn to the build. Assembly is quite traditional, starting with the cockpit interior. The parts are supplied on 4 silver grey sprues contained in one plastic bag. There are signs of flash in places as seen in the pictures, but nothing of major concern. Detailing of the cockpit is effectively done, more than enough detail for what can be seen once the fuselage is joined up. Moulded in detail includes the panel instruments, cockpit side walls and seatbelts. The aerial mast has to be fitted before the fuselage can be closed which is a bit of a pain if you are clumsy like me and prefer to leave the sticky out bits until last to avoid the obligatory break! A decision needs to be made at this point whether you intend to have the undercarriage raised or lowered. If raised, you need to fit the rear gear bay doors before closing the fuselage up. Surface detail on the fuselage is nicely done with recessed panel lines and rivet details. Next are the wings. A straight forwards stage. Again, detailing is nicely done with recessed surface details and framed wheel bays looking great in 72nd scale. The engine has individual banks of cylinders and gear box that are to be mated together on assembly. There is some fine flash on the gills that will need some delicate tidying up, but overall, the shape looks well against the drawings I used for comparison. The undercarriage wasn’t neglected when the detail fairy at Revell did her stuff. The inside of the gear doors is very well done which will come out well on a panel wash. The doors are moulded as one per side for the option of having the gear retracted, however a cut line is provided to separate them for having a lowered configuration. Just be aware of the legs being too short and the impact this will have on an unloaded stance. Extending the length of them would be fiddly but possible with the careful use of brass and plastic rod. An option of belly or wing fuel tanks is provided as well as bombs for the wings. As mentioned previously about the undercarriage, dry fitting will be necessary to determine what is possible if you haven’t addressed the length of the gear legs. The canopy is designed to be sliding using a clever feature of the internal frame that locates within the guide rail on the back of the fuselage. Whether this is useful or better off chopped to allow the canopy to be simply dropped on will be of personal choice. P-51B Again, the kit is supplied win one plastic bag containing but only 3 plastic sprues, this time in dark green. Again, detail is comparable to the P-47. I’ve read of quite a lot of criticism of this kit in terms of accuracy, so again, I compared the main profiles with drawings from the Squadron publications to form my own opinion. I found the fuselage profile to quite accurately match the drawings, obviously, what this exercise doesn’t do is reference the curvatures around the fuselage. Indeed as already known, comparisons of the wing profiles show the root leading edge extensions to be wrong in that they aren’t tapered enough. Again, traditional construction techniques mean that we start with the cockpit. Detailing is on par with the P-47, although less will be seen due to the canopy design being more restrictive than the ‘D’ model with its bubble canopy. Surface detailing on the fuselage is crisp, with cockpit sidewall detail for the interior and fine recessed panel lines and rivet detail for the exterior. The seat has moulded in seatbelts too. Obviously, we can debate the visibility of panel lines and rivets on a 1/72 scale P-51, but personally I believe that they add to the kit in the way Revell have produced them. The exhausts are added to the fuselage from the outside which means they can be fitted after painting. Prior to closing the wings up, choose if you will hang anything off the hard points. If you do, then the relevant holes need to be opened up. The carburettor and supercharger intake have separate one piece moulded parts to prevent an unnecessary join from being on view. A separate supercharger exit door for the lower rear fuselage is also provided allowing you to choose the position that you want to assemble it in. The wings are well detailed including beautifully moulded gear bays. As with the P47, the gear doors provide single parts for each side allowing for ease of assembly in the retracted stance, but with a clear cut line to open them up if you want the gear lowered. The propeller is a slightly more complicated affair due to individual blades, so extra care will need to be taken on assembly. Armament options are 75 gallon drop tanks or rocket launchers, again detailing is nicely attended too. In terms of moulding quality neglecting the accuracy issues discussed, the only real let down in the kit in my opinion is the canopy. The plastic is rather thick, coupled with quite a complex shape, can numb the scale representation down quite a bit. If there is a vac form replacement available, you may want to consider this as an option to do the kit justice, possibly with the panels opened to show off the interior detail. Decals The gift set has a single decal sheet for all three kits contained. Typical of Revells quality as of late, they are beautifully printed with excellent register and colour richness. Stencils for each aircraft are also included, so don’t think that any compromises have been made in producing a gift set. Schemes provided are: B-17G-40-VE: 42-97976 ‘A Bit O’ Lace’, 709th BS, 447th BG, Rattlesden AB, April ‘45 P-47D-30-RA: 42-28382 ‘Ole Cock III’ Major Donavon Smith, 61st FS / 56th FG, ‘44 P-51B: 43-6506 flown by Major John Bennet 487th Fighter Sqn, 352 Fighter Group, Bodney AB June ‘44 Conclusion If you look for faults with any of these kits, you will find them. Some issues are more noticeable than others, I for one dislike the overly thick moulding on the nose cone of the B-17 (fortunately, vac replacements are easily available) and the panel lines a bit excessive. Fixing the leading edge extensions on the P-51B or the rear belly on the P47 is going to be much more difficult if you would bother to attempt it, however I believe that this set delivers huge value for money and hits its target market perfectly. All kits can be built with pleasing results from the box. As a kid I was inspired by the kits I built which fuelled my interest in aviation, and I’m sure this gift set has that same potential for budding young modellers today. Revell model kits are available from all good toy and model retailers. For further information visit
-
Well this is my first build post for a few years, and this will be my 3rd build in 3 or so years (pics to follow of previous 2 builds). This landed on my doorstep last Thursday along with matching B 17G in 48th as well, although, this build will, once finished, end up as an airfield diorama (I HOPE!!! ) IMG_20140213_130907 by Bexy73C, on Flickr On opening the box, first impressions are HOLY :poo-poo: thats a lot of plastic and its huge so this should be a laugh a minute to say the least. The kit I reckon is donkeys years old but........ in for a penny in for a pound as they say, so, heres the gubbins before I got cracking..... Raised panel lines and a few details that are incorrect for the 24D, but it seems from researching the kit, Mr. Revellogram based their D on the later 24J, as such removing trim tabs and a few other silly bits is for me, a little beyond my skills, as I generally screw that sort of thing right up....... Besides, Im a Canberra and this is a new branch for me so Im still learning. The aircraft with be built as "Fightin Sam" 42-51457. 389th Bomb Group, 566th Bomb Squadron, Hethel, Norfolk, 1943 / 44 DSCF5491 by Bexy73C, on Flickr First up, the office section, which seemed a little basic, so after hitting google for some pics, I started adding a few details made from my trademark "Lolly sticks" and bits of scrap. IMG_20140216_122105 by Bexy73C, on Flickr IMG_20140216_122008 by Bexy73C, on Flickr IMG_20140216_121951 by Bexy73C, on Flickr The seat comes with the kit, but I added the back with bits of wood & scrap plastic and oxygen bottle is 2 bits of scrap sprue stuck together. Started adding bits of wood to form a basic airframe, the interior colour is as close as I could guesstimate with tamiya acrylics, as this is my first proper build using them (my Local dont stock Humbrols ) IMG_20140216_121851 by Bexy73C, on Flickr Ive also added arm rests to the seats, I still havent made my mind up if Im adding pilot & co pilot to the cockpit yet, so, belts are untouched right now. Fire extinguishers are made from sprue painted & a bit of solder. IMG_20140217_230246 by Bexy73C, on Flickr IMG_20140217_230221 by Bexy73C, on Flickr IMG_20140217_190327 by Bexy73C, on Flickr And this is where I finished up tonight (both decks dry fitted only) IMG_20140217_230404 by Bexy73C, on Flickr Well thanks for looking, more to follow Bexy