Search the Community
Showing results for tags '1:48'.
-
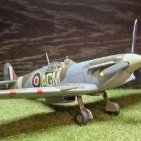
Another Bf-110 G-2/R3 in 1:48 from REVELL has just arrived in the workshop, a model I started years ago and which is currently sitting in a box on the cupboard, so the tidying up continues. And if all goes well I might be able to get it done this weekend, I have almost all the parts cut out and ready for assembly and painting. The extras are only the DETAIL SET from AIRESA and the masks from MONTEX-MASK, but only the cabin itself because they were in the box. The model will be in boxed painting and will depict a machine from 5./ZG 76 Reichsverteidigung, winter 1944.
-
Hi, I would like to start and share my new build of a De Havilland Mosquito 1:48 scale. The kit is the old, but still very nice Tamiya of the FB Mk VI. I believe that neither a presentation of this aircraft nor of the kit is necessary. Since long, I wanted to build a model of this aircraft because of its fame and because of its remarkable design. For me, this is the first mosquito build as a grown up modeller if I exclude the ancient Revell 1/32 kit that I built when I was a kid. To start my build, I followed to the letter the Tamiya instructions which called the engine nacelles as a first step: I just thickened the frames for added 3-D effect and added few interior details. The white panel shown on the inside of the walls is an artistic license of mine having used a piece of thin styrene to hide annoying ejection pin marks which I didn't want to fill and sand. In the following, the nacelles are shown completed: Finally, they are test fitted with the wings and the main undercarriage struts to check that no interferences with the new parts are present: That is all for this first instalment, I hope you will enjoy following it. Best regards, Dan
- 10 replies
-
- 16
-

-

-
Hi, on this group build I'm moving back to my preferred scale and also to the beginnings of NATO, and I'm building an Airfix 1:48 Supermarine Seafire F.XVII (A06102A). It is all too easy these days, seeing Leopard tanks and F-35s being presented in NATO social media posts, to forget that NATO was founded soon after the WW2 and thus most weaponry, aircraft, tanks and vessels included, that was used by NATO nations in those early years, was of similar vintage. Here is the box: It is a big box, and it contains big parts, which is a personal relief, having just built three models in 1:72... Speaking of parts, here they are: As you can see, I'm using aftermarket parts for masks and cockpit decoration. I plan to build the version on the box, from the No.767 Naval Air Squadron, Royal Naval Air Station Yeovilton, Somerset, England, 1950. /Jari
- 17 replies
-
- 12
-
-
And another model completed and the photos go to the gallery, S.M. 79-II "Sparviero", 283 squadriglia, 130 gruppo autonoma, Mediterranean 1942. feel free to visit the gallery.
-
 Finally managed to take photos for the gallery, I know photos taken quickly but you can see something on them. I invite you to view the gallery of the Northrop P-61 A "Black Widow" model. - "Lady Gen", Florennes, Belgium, december 1944.
 -
Having recently battled my way through an Eduard P-400 which took a looong time since I was not very motivated, I chose something that hopefully should keep my mojo tank from getting emptied this time. Even though there's lot's of colourful DR.I's schemes to choose from and quite a few comes with the Eduard Profipack, I have always liked Fritz Kempf's. There's just something about the "Kennscht mi noch?" statement on his plane, which should be "Don't you know me?", but I think it was meant as "Don't you know who you're up against?". Pretty bold stuff. It will also learn me to deal with the dreaded Fokker streaked finish, or have me fail my attempt. We'll see. This will also be the last time my workbench looks somewhat tidy. The Eduard kit is getting on in years now, but other than some slight flash here and there, it is still a very good model. But I will try to improve it where I can, and the first thing I did was to take a file to the rudder pedals and carefully thin them to look more to scale as there are no replacements among the photo etched parts. The right one is finished: Guess I could make it thinner, but it will have to do. It's not like it easy to see anything in the cramped cockpit anyway. Took a sandpaper to it and smoothed them out after the picture was taken. Next thing up was to add the missing frame part. Eduard chose for some reason to mould the rest of the interior steel frame with the fuselage half's, which I think is a bad decision given they are very prominent. Perhaps there's a reason for this and I will regret it later on, but in that case it is very easy to remove. Work has also started on the seat and cushion, which I'm quite excited about since I'm trying out a new technique for painting leather using oil colours. Mojo meter still at 100%
-
 Another Desert Storm warrior in my collection. Hasegawa kit, Aires avionic bays and exhaust nozzles, Eduard armament, Brengun wheels, Quickboost seats and Flying Leathernecks decals. Happy modelling!
- 19 replies
-
- 72
-
-
-
- Hornet
- Desert storm
- (and 1 more)
-
 Hi everybody, calling all Corsair maniacs experts for this build, such as @corsaircorp and @Corsairfoxfouruncle just to name the two I'm more familiar with I always loved the Corsair, but know very little about it, so any help, hints, tips, references and pointers will be greatly appreciated This is more of a bookmark than an actual start, I still need to study some proper documentation about the subject, anyway here are a few pics. The kit: It's the well known Tamiya 1/48 box - I don't think there's much to say about it, anyway here are the sprues: The second pilot figure, in the "jumping on board" pose, is very tempting... Clear parts Decals (as usual, I plan to use very few of them ) and the scheme I want to reproduce, Jolly Rogers' BIG HOG Actual works to start soon-ish, I may venture into a foray in another field of modelling before/along this, we'll see. Meanwhile, I'm all ears Ciao Edit: I almost forgot to add that my friend @corsaircorp had sent me some resin bits to tart up this build: I'm not sure if I'll be using the whole engine or just replace the crankcase of the kit with the resin one - definitely going to use the resin seat, though
- 168 replies
-
- 19
-
-
-
Hi, Here's my rendition of an Argentine F4U-5 late in its service life. Details of this build, together with an AU-1 (F4U-6) and a F4U-7 are found here: Kit: Hasegawa 09075 (JT75) - F4U-5N Corsair, 2001 Paints: Alclad - ALC 117 Dull Aluminum, ALC 121 Burnt Iron, ALC 309 Black Primer & Microfiller Mig - A.MIG 0047 Satin White Mission Models - MMM005 Aluminum, MMP063 Light Gull Grey FS 36440 Model Master - 4749 Engine Gray, 4757 Aircraft Interior Black, 4851 Yellow Zinc Chromate, 17178 Chrome Silver Polly Scale - 505096 US Interior Green A/N611, 505252 British Dark Earth, 505260 British Middlestone, 505264 British Extra Dark Sea Gray Tamiya - LP-2 White, X-10 Gun Metal, X-14 Sky Blue, X-17 Pink, X-19 Smoke, XF-1 Flat Black, XF-2 Flat White, XF-7 Flat Red, XF-16 Flat Aluminum, XF-19 Sky Grey, XF-26 Deep Green, XF-69 NATO Black, XF-85 Tire Black, TS-13 Clear, TS-80 Flat Clear, Fine Grey Primer Vallejo - 71.062 Aluminium, 71.065 Steel, 71.300 Glossy Sea Blue Johnson’s Future Aftermarket: Aztec Models 48-042 decals Ultracast 48192 - F4U Corsair / F6F Hellcat Wheels Radial Tread (32” x 8” late style wheels) True Details TD48497 instrument panel Scratch built: Seat armrests; reflector gunsight; instrument panel “eyebrow” switches and wiring bundles; drop tank vent, feed hose, and rear strut; tail gear holdback ring; DF loop cover; propeller governor; distributor and magneto covers; radio altimeter antennas; aerial wire antenna; wingtip navigation lights; main gear brake lines. On to the pictures. IMG_4420 by Wlad Franco-Valias, on Flickr IMG_4412 by Wlad Franco-Valias, on Flickr IMG_4411 by Wlad Franco-Valias, on Flickr IMG_4410 by Wlad Franco-Valias, on Flickr IMG_4409 by Wlad Franco-Valias, on Flickr IMG_4413 by Wlad Franco-Valias, on Flickr IMG_4419 by Wlad Franco-Valias, on Flickr IMG_4418 by Wlad Franco-Valias, on Flickr IMG_4417 by Wlad Franco-Valias, on Flickr IMG_4415 by Wlad Franco-Valias, on Flickr IMG_4407 by Wlad Franco-Valias, on Flickr Thanks for looking, and thank you all who contributed to the Work in Progress. Wlad
-
 Good afternoon, Usual thing: after several years in the modelling dark, I've accumulated all of my equipment and stash in one location and have been following lots of these builds with interest. I'm very much an OOB guy and after a recent visit to Ala 23 at Badajoz, Spain, I decided to make a 1:48 scale T-38 as a thank you to a member of the group. More to follow. So, let's start off with a photo of the box.
 -
Hi all, I would like to share some pictures of my model of a Starfighter 'S' in Italian Service as it appeared in 1981. It carries the insignias of an interceptors of the 51^ Stormo, based at Istrana in the North of Italy. The kit is the old 1:48 Hasegawa of the version 'S'. To improve the model, I sourced the following after market items: - Aires resin jet exhaust; - Master brass pitot probe; - Eduard resin ejection seat MB Mk7 and harness; - Eduard resin Sidewinder; - Aires resin Sparrow; - Skymodels decals. This kit is by now outdated by the newer 'state-of-the-art' Kinetic one, but I found that the plastic is still very nice with crisp and finely engraved surface details, thin and clear transparent parts and it well reproduces the distinctive forms of this aircraft. However, lazy Hasegawa didn't include the full range of modifications that are necessary for the 'S' version, hence I had to re-work the most obvious ones. The version 'S' was designed by Loockheed in answer to a specification from the Italian Air Force for a more powerful, faster and better armed replacement of the standard NATO version 'G'. The aircraft started to be built by Aeritalia in Turin (former FIAT) in the late '60. It was powered by a more powerful J79-GE-19 and was armed with the version B or L of the Sidewinder missiles and with Sparrow missiles (from which the letter 'S' in the designation). At take-off, the more powerful engine required a larger mass flow rate of air, consequently the air intakes were supplemented by rectangular openings on the sides that were not present in previous versions. In the picture below, I am showing the rectangular lids of these openings that I egraved on the sides of the air intake ducts. The colors that I used for the Italian NATO camouflage were Gunze H-69 (dark sea grey), Gunze H-309 (dark green) and Vallejo Metallic white alluminium for the underside. I think that this is still a good kit with a very good fit and I enjoyed building it. Beside the positive points, I am also listing what are, in my view, its few negative points: - Overstated rivets on the wings which shouldn't be there. - Incomplete range of details for the 'S' version. - Absence of external loads. - Decals with yellow/cream color in place of white for codes. I replaced them with after market decals. The building log can be found here. I hope you like my model, comments and suggestions are welcome. Best regards, Dan
-
G'day Pals, it's been a while since i posted a Model in the Aircraft section, i started this build already in 2021 and for some reasons i completely lost interest after i started with the engine and cowling section.... After a complete break in 2022 i exclusively built Tanks in 2023... I went on with Kate this year but to be honest when i looked at the parts i realized that i also had started to rivet the model which didn't really increase my motivation... After a while i brought myself into a ZEN mood and took the riveting marathon as a lesson in humility...and once started it surprisingly went on quite fast. I build the model OOB except for the engine which was a donation from Vector Models, which by the way was significantly larger than the kit engine, so a good amount of work was necessary to make it fit into the cowling..... Thanks for watching & comments! Cheers Hans Kate's Belly....
-
Hi all, I have recently been trying to find 1:72 / 1:48 Gripen C kits. I already have a post about the 1:72 kits but I’m still wondering what the best 1:48 JAS39c Gripen kit is, I have been looking at the KittyHawk kit as it looks to be the best however they seem like a very hard to find kit. Are there any other brands? Thanks, James
-
Honestly, I don't know what to write other than to show off my new acquisition and that is another 3D printed model from Art of Trans from the 3D Polish Wings series. It is a Polish bomber plane LWS-6 "Żubr" in 1:48. Compared to the first model I built from them, which was PZL.46 "Sum", you can see the improvement in the quality of workmanship. It is more precise, the vacu glazing is also very nicely done. In addition to the printout and the aforementioned vacu glazing, we also have decals in the kit and the instructions are in pdf. And how the model is put together will come out during construction. There are few pictures and the documentation is also very poor but I will try to make something from this kit to please the eyes. My model will represent the serialised version of the LWS-6 A. Below are two boxes of happiness because this is how the LWS-6 "Bison" arrived packed to me.
-
Kit - Meng Paint - Lacquer camo tones, W&N oils for all weathering effects. Decals - Kit Extras - Hasegawa AGM-84 Harpoon missiles. FA-18F Super Hornet VFA-2 'Bounty Hunters' USS Abraham Lincoln 2003/04 Other than the Harpoon missiles, what you see here is exactly what comes in the (very substantial) Meng box... and IMHO is one of the best 1:48 kits available today. Everything fits perfectly, I don't recall using anything more than a 'smear' of putty in any of the major construction (special mention to the design of the potentially problematic main undercarriage here as it's so precise that I was able to use the locators in the main gear bay as a jig to fully assemble the main units, then 'click' them out once the glue had set and paint/weather them off the kit which was a HUGE bonus). The overall detail is excellent - not perfect, but pretty close - the omission of the nav lights is quite noticeable for instance. Put it this way, every time during the build phase I was able to sit down with it, it was a hugely enjoyable experience, not once did it give me an 'eye roll' moment. And no, I'm not on Mengs' payroll, it really is that good. Lots of time put into the fading, spot-painting, weathering and generally dirtying-up of the paintwork - the basic tones are Mr. Color lacquers C307 & C308, from memory the (superb) Sidewinders are painted with good ol' Humbrol H127 to generate a greater contrast, and because I thought it looked quite cool ! - All of that fade and dirt was done with W&N oils and took a good few sessions, would love some feedback and thoughts from folks here, as I'm planning something similar for the Tamiya F-14 in the future. Not much else to say, so please feel free to ask any questions, make comments or criticisms. Cheers from a warm and sunny NZ. Ian.
- 14 replies
-
- 35
-
-
-
 ok here we go..... This is the version i'm going to do - as now restored at Duxford. No 3rd Party Items just things i had knocking around at home ... like the odd bit of wire Later found out that the IFF? tranmitter should not be there? oh well its there now! First time using photo eched parts ...interesting Just taped in place.... the fit is just great on this kit! Another day another few bits of primer... Mr Surfacer 1500 naturally Same bits detail painted Cut the tail elevators to droop a little. All orifices filled - ready for a coat of Tamiya Surfacer. The undercarriage covering panels are just blue tacked in place ... i thought better than having two undercarrige stalks poking out in the way. Never used Tamiya Surface Primer before .... lets see! Seems Ok... Its bought out some details i had not even seen before Thats it for now.....
- 10 replies
-
- 14
-
-
After my long absence I'm back with another workshop thread, this time I have a Northrop P-61A "Black Widow" from GWH and in 1:48 scale. The model straight out of the box I think, because I don't plan any additions to it. Unless something goes wrong. The model is familiar so I won't be taking photos of all the frames and will limit myself to just these photos. There are two camouflage paints, an all black Burma aircraft and a European theatre of operations grey/olive with invasion stripes and this is what I will be building. So much for the introduction.
-
Hello guys, today I started Meng's F/18F Super Hornet at 1:48 scale, I wanted the 1:32, but there were two options, the Revell one which is a pretty bad kit or Trumpeter (I will do the latter in the future ) I wish Tamiya decided to release an F18F at 1:32 (dreaming is free) Here I leave you a couple of photos of the almost finished cockpit, the photos are bad because I don't have a professional camera or all the photographic equipment behind me, the photos are taken with my cell phone. The only aftermarkets I'm using are Redfox Studios panels and ASK skins. By the way, the kit is missing the masks that come with the kit, the photo-etched parts and the small metal tubes of the pylons, the store where I bought it told me that it was Meng's fault and I will receive the missing parts.
-
.. hello? Here follows my latest .. and I thank you all in advance for not mentioning my numerous other unfinished WIP projects!! Ambrosini SAI.7 racer. 1939 IV Raduno Aero del Littorio 1939 FAI World Speed Record 302.58km/h (Category C, Powered, Multiseats, 6.5 - 9L, 100km closed circuit, no payload) The interwar racing predecessor of the SAI.207 lightweight fighter of WWII. So this will be a conversion, backdating LF Models resin SAI.207 (long-nose, single seat fighter) to the red racer (short-nose, tandem seat). Work has progressed enough that I thought I may now have something of substance to share. More to follow soon ...
- 107 replies
-
- 15
-
-
 Hi, This week I completed some figures from ICM's excellent 1:48 RAF personnel kit and created a grass field base for a Trumpeter Display case to display them together with a my latest creation, a pre-war 72 Squadron RAF Gloster Gladiator. It then occurred to me that the base and case could also be used to rotate the display of other aircraft in my collection from the late pre-war and early second world war period. Apologies for the striped backdrop, but I have yet to figure out the best printer quality settings, hence the vertical lines. Other than these, it is however a fairly accurate depiction of the skyscape at Church Fenton because its the upper section from a picture I took of the Spitfire line-up parked at Flying Legends here in July😀 Amazing how a simple backdrop can make a model pop! All photos were taken with an iPhone 11 Pro. First of all the 72 Sqn Gladiator based at RAF Church Fenton around 1938 Hurricane P3153 US-U for "Euthanasia" of 56 Sqn based at RAF North Weald in summer 1940 Spitfire Mk1 R6835 XT-W of 603 “City of Edinburgh” Sqn based at RAF Hornchurch in Summer 1940 Finally, some shots more featuring the Albion 3-Point Re-fueller. I based this on an example seen briefly in a British Pathe B&W Newsreel, but took some liberties with the brass radiator and red sun-rise Albion logo, which would no doubt in reality have been painted over when the vehicle was camouflaged.
 -
Hi, My priority is to finish my Tamiya P-47M, but I also have one of those new Mini Art P-47D's (basic kit). I thought about keeping it for the "Made in Ukraine" GB of 2024, but I see "Made in Poland" on the side of the box. And I guess you'll be interested in seeing one of them in the GB. My first impressions: some interesting features, like the option of having the landing gear hang down as if it's coming in to land. The clear part (canopy) is a bit distorted (like was said in the Rumourmonger thread). There are more parts to be used than in the Tamiya kit. Where Tamiya used one piece for a part, Mini Art uses three (like for the seat). No pictures yet, but you can see better ones than I'd take in the Rumourmonger thread. I've always wanted one from the 78th FG, so there's another reason to start it now. Cheers, Stefan.
-
 Hi here is my F-104 STARFIGHTER by Kinetic I stared this back in February and only just finished it due to my mojo waining and a few issues with the build along the way so wasn’t enjoyable as I’d of hoped. I brought this kit sometime last year and what seems to be a theme this year so far my wife picked this out of the stash to build next! I purchased a few aftermarket items for this build. Qunita Studio Interior 3D decals (QD48201) and very impressed with them MasterCasterS resin Martin-Baker Mk.Q7[A] Ejection Seat (MST48065) Master brass pitot tube (AM-48-044) Eduard TFace Canopy Masks (EX830) I decided to try Ammo-Mig paints with is build and this where I had the problems with paint peeling off with masking tape Tamiya and Vallejo paints also used thank for looking and enjoy
- 16 replies
-
- 58
-
-
-
Hi all I present to you my Airfix 1:48 Javelin FAW.9/9R I finished it back in October but only just got round to posting here It’s in the markings of no 64 Squadron Royal Air Force based at Tengah in Singapore during the 1960’s Aftermarket sets include Eduard cockpit interior and Master replacement pitot tubes Tamiya and Mr Hobby paints used throughout the build A throughly enjoyable build Thanks for looking and happy modelling
- 47 replies
-
- 95
-
-
-
Kit - Tamiya Paint - Vallejo metals (bomblet tubes) Tamiya acrylics (rest of loadout, interior, tail stripes) Mr Color lacquers (camouflage) Decals - Iliad Design Extras - Eduard etch cockpit details & harness, Bren Gun resin, loadout from spares box. A-1H Skyraider Assigned to Col. Sam Berman CO. 6th SOS Da Nang, 1969. A (relatively) quick project, finished just less than a month from opening the box, but it did have the bench completely to itself. Biggest challenge was finding the Minigun pod in my huge stash of spare ‘dangly bits’ that I’ve amassed over many year of plastic fettling. When I did I had to scratch the front cone from a lollipop stick and Miliput !!. Paint was a joy, I’m officially a lacquer convert & fanboy, yes I know it’s smelly and dangerous, but the results are undeniable and as long as you take sensible precautions… First time using Iliad decals and they were fine, I didn’t use the tail-stripes, preferring to simply paint/mask/repeat using the blue scalloped section of the decal as a template to make a mask. The ‘filth’ is all W&N oils, but I went back to Tamiya X19 ‘Smoke’ for the exhaust plumes as on this machine it just looks better to my eye. Very happy with the result. Please feel free to make any comments, ask any questions or post any crits. Cheers from NZ.
-
Kit - Eduard (Weekend Edition) Paint - All acrylics Decals - Freightdog Extras - Eduard kit-specific Zoom set. Grumman Hellcat II 800 NAS Trincomalee, Sri Lanka (Ceylon) Autumn 1945. Built this at the same time as the Hurricane I posted here a few weeks ago but only got around to finishing it this morning. Fairly straightforward build, could have done without the separate fin-tip antenna post which was instantly gobbled-up by the carpet monster but that may have been down to 'user error'. Paint is all Tamiya acrylics, as usual mixed by eye. Not too much else to say, very relaxing and rejuvenating project, now ready for something more challenging. Please feel free to comment, question or criticise. Cheers from NZ. Ian.