Search the Community
Showing results for tags '1/72.'.
-
Hi everyone, I wanted to add a French plane as I had not finished one in a long time. This one seems to fit the bill: small and potentially quick to finish building 🤫 This kit reached the middle of nowhere we call home all the way from Bonnie Scotland, courtesy of Pat, aka @JOCKNEY aka the Scottish Santa. Again a big thank you... It was timidly started and this KUTA seemed a great occasion to deal with it once and for all! A few photos: What has been done to date: not much. I worked on the wheel wells, that were just a big void looking into the cockpit area... As well, the ammunition covers were about 1 mm over the surface of the wing, which is wrong. They should be level with the wing surface. So out came the sanding pads. And that is where the work stopped for some forgotten reason. and from the upper side: So here is what is left to build: And I almost forgot the high tech instructions: Thanks for watching. JR
-
 This started life as an over-ambitious second build in the recent Blitzbuild GB here and didn't make it, so here we are. It's a kit with lots of lovely details, but it is undeniably short run. However, as I work through it I am beginning to really like and appreciate its finer points. I spent a fair bit of time thinning the interior of the wing trailing edge halves to get a thin trailing edge, and ended up with this after putting on some filler: After a little bit of sanding it has ended up like this: Not exactly razor sharp, but certainly good enough for me!
- 58 replies
-
- 14
-

-
I've finally settled upon a scheme, if not a detailed plan. But first a mardle Mardle- East Anglian word for a meandering anecdote 'The Brigadier had been something in the war in France, and brought a few nicknacks as he called them back with him'. Back being the family farm. Sadly all the wines were drunk long ago and his grandson wasn't interested in the taking on the farm preferring 'crypto' (whatever that was). This crypto thing hadn't gone so well and it was time for another desperate plundering of the estate. Rumour had it that there was a very special car in that barn down on Nora's field. Anyhow the land agent has brought his classic cars expert with him to see what they find.... The Scene It's going to be a decrepit barn, I've plenty to choose from around here so probably an amalgam of my favourites, very overgrown- which will be a challenge for the grasses etc. A group of men are entering the barn to see what there is in there. The Centrepiece https://www.scalemates.com/kits/ace-72273-traction-avant-11cv--138526 One of these, though as with crypto and all speculative things I'm undecided as to what condition it'll be in; that way none of us know what's going on in this build, which seems fare!
-
I recently tripped over the obtusely named Wings of Intent blog and then spent a very happy few hours enjoying a prolific feast of scratch built lovelies Well worth a visit for the serious modeller - lots of useful tips and hints https://wingsofintent.blogspot.com/2023/ Regards to all David
- 4 replies
-
- 7
-
-

-
- scratch built
- Golden era
- (and 1 more)
-
 Back in 1974 I came across a new Frog kit in my then "LMS" in Chester. As ever it was somewhat "exotic" - a 2 seat Dornier 335. It was a nice enough kit but I later decided that I would have preferred a single seat A-1 version, and having seen a conversion, probably in Airfix magazine, I picked another up in 1991 but never got round to building it. By this time the moulds were with Revell and they released it in their own name initially, but this 1991 boxing is under the Matchbox label for some reason - I believe they later started releasing a Dragon kit of the 335 under their own label. Anyway, here it is! I have glued the spinners to the props a few years ago but done nothing since. The box art is pure fantasy as I doubt that the V10, as the first prototype of the A-6 two seat night fighter, ever saw action. The colour scheme is problematic as they suggest "Matchbox" paint references and I have no idea what they refer to but they seem to be green uppers and a blue/grey on the unders . I believe that the original Frog kit had a "3 greys" scheme of 74/75/76 which I painted in the old Humbrol Authentic colour range but I suspect had they been built the production versions would have been all over 76 with a mottle of 75 on the upper surface as was standard on night fighters at that stage in the war. Having said that I have read that by that stage some night fighters were getting day fighter camo uppers, presumably to make them less visible on the ground given the risk of strafing. Of course prototypes were not always painted in the current paint scheme anyway but I will go into that in my other entry! Pete
 -
 Good morning, In agreement with Denis/Corsairfoxfouruncle, I present you a construction that I started in 1981 (!!! ), and that I resumed a little before the beginning of this group build. Revell had made several boxes in a series called Famous Air Battle Scene: Photo source: facebook I remember seeing a FW190 crashed and flown over by a Thunderbolt at a friend's house, and I was thrilled with the diorama. And I found the Midway's one, produced in 1976. Allan31 showed us the Battle of Britain diorama in his work in the previous Revell/Monogram build thread. (That is why I wanted to show you this subject ). I had built the zero, which I found hanging from the ceiling of my teenage bedroom when we sold the house this year: Funny, isn'it? 😋 This construction represents barely 25% of the total, there is still a lot to do: I started by building the diorama: I found my childlike soul again, and jumped forty years back in time by doing some cutting! I have consolidated the walls of the dio which present the external decoration with thick cardboard, So I finished the base: To be continued... Regards, Eric-Snafu35
 -
Hello, Here is a construction that I did for a group build about Midway. I have done the minimum to furnish this empty model which was designed in 1963: I used a dry point to engrave the structural panels of the model, and sanded the surfaces studded with oversized rivets. I interpreted the Aichi green with Gunze H302, and took the interior of the panels (wings and fuselage) with the colour added with yellow. Not obvious in the photos, but the effect is there. All markings are done with paint and covers, only the drift codes are painted decals. Here is the Airfix crude engine: I took the profile of the engine cover, as it looked very similar to that of an A6M2; The type 92 machine gun is made from scratch: I redid the fork of the bomb thrower: It is better this way, although the lower radiator should have been open in the middle. I added the gonio frame to the underside, too. On June 4, 1942, around noon, eighteen Val of the Koku Sentai of the IJN Hiryu attacked the aircraft carrier USS Yorktown. Will this Kanbaku escape the flak of the Yorktown and its battle group? 😋 Regards, Eric-Snafu35
- 12 replies
-
- 41
-
-
- vintage
- Midway battle
- (and 1 more)
-
Ok, The chances of me completing this before the deadline are slim unless we get granted an extension but after my struggle with the new Whitley I felt the need to get back to basics. Yes, there are a lot of parts but I will be doing it with the bombays closed and may not do the tractor and trailers so that so together with the parts specific to the Mk III cuts out about 100 of the 270 or so! The kit was originally released in 1966 according to Scalemates and was the second kit in Series 6, the first being the Sunderland in 1959. At 10/6 (52,.5p) it was at the time the most expensive Airfix aircraft kit and I got it for a Christmas present. I build that one as the later Mk III but I will build this as the early Mk I - more on that later as I think Airfix made an error with the decs. Compared with the most recent Airfix RAF Bomber release, the Series 5 Halifax, it was far better detailed to my mind, and streets ahead of the old Wellington and Lancaster (first moulding of course). This should be fun, but then I though that about the Whitley! Pete
-
Hi everyone, this entry in the Do 17 GB confirms that I am not playing with a full deck. Considering all the builds I have in progress, I should crawl back into my burrow and keep on modelling. But... So here is the Do 17 E/F from Airfix in 1/72. I bought this kit when it came out, in the early seventies, When I opened the box, the other day, my jaw dropped. On the wings the panel lines are very delicately engraved: definitely not the run of the mill, rivet-crazy Airfix kit of the days. The air vents have razor sharp lips, etc. Only a few minute rivets on the fuselage, easy to erase. This kit is a revelation! Bar for a few additions in the cockpit, it will be built OOB. Unfortunately the decals seem good for the bin. I will see if anything can be salvaged! Here are a few photos: A very surprising kit indeed Have fun! JR
- 12 replies
-
- 12
-
-
Nothing to do with fast food outlets but as a sort of postscript to my stash clearance articles last week featuring the Wellington II and III from Airfix, I thought it might be interesting to show how the two differ both as to detail and the finished look. This is particularly so as the aircraft is made by the same manufacturer albeit 60 years apart and put together by the same modeller and as such with the same tools and the same level of skill. I mentioned in the ‘stash’ articles how the more modern kit has much more detail. I’ve photographed the internals of the kits to show just how much. The black plastic is from 1959 and the grey from 2018 ( + the pictures of the latter don’t include the bomb bay added later in the build) I also placed the two finished models side by side. Even tho they are the same plane I hope you can see the seemingly different nose profiles and the fact the earlier kit seems to have a more ‘hunched’ sit than the later. 🤷🏻♂️ That’s it from me for a few months. Now, I am eyeing up my He.111P-2 and the H-20……
-
Not much I can add to all that's been written or all the builds that have been shared of this amazing kit. Even if the mandibles don't sit at the right angle, it's still a majestic piece of engineering; nearly a thousand parts - from the hull halves to a greeblie smaller than a nail paring - all of it fitting perfectly. It's a hypnotizing process to watch the layers and layers of detail build across the hull, and an epic process to paint it all. I learned more building and painting this one several years ago than I have on any other kit. My addiction to WW2 planes started here, which is perhaps the best tribute I can pay to the geniuses who designed the original.
- 7 replies
-
- 30
-
-
- millenium falcon
- Fine Molds
- (and 1 more)
-
It was my intention to build my family of Saab jets in chronological order, but delays in getting paint and bits for the Lansen have meant that plan has gone out of the window, so I will shortly be starting this. In 1977 Heller released their kit of a Viggen. The box did not say which version it was but the 1978 reboxing said it covered the AJ attack, SF recce, and SK 2 seat trainer. My boxing dates back to 1998 when they added new parts and started selling it as the JA fighter/interceptor version, and that is the version currently on sale. It appears that the parts for the 3 other versions are still included but Heller only provide one paint scheme and markings for a “Jaktviggen” as the AJ37 is known. They also have limited the armament options to the fixed cannon pod on the belly and 4 AIM 9 Sidewinders, which is a pity as the real thing could also carry Skyflash and later AIM 120 longer ranged missiles - I have a supply of missiles but would need to work out how the pylons and rails looked if I wanted to use them. The colour scheme is for one of the later grey machines. It looks as if I could probably still build any one of the previous versions, as it includes 2 different tails, two cockpit tubs and seats, both a short and long upper fuselage insert and transparencies for both single and 2 seater and parts for both normal and recce nose though it might be missing pylons and weapons for the attack version. I would love one in the splinter camo, but frankly I have neither the patience or time, so I will build this OOB if I can - perhaps I will buy one of the earlier boxings some time when I have some spare cash. Assuming I have all the bits and it fits reasonably well this does not look like a very complicated kit or colour scheme so I might get it finished before the "In the Navy" GB starts in the middle of February - I might even get the Gripen done as well, but first I have to finish the Lansen. So before very long I will be building yet another Viggen to join the countless ones already in progress - might even out the surfeit of Drakens a little. Cheers Pete
-
The smallest model I've built in ages and a very easy build. Thanks for looking. Steve
-
Friends, Due to long over due 1 / 1 scale 😉 home improvement projects, I have been absent from posting new content since my previous project, the Sword F3H Demon in July. Spurred on by a Caracal decal sheet that I came across, I wanted to go with the venerable Hasegawa P2V-7 Neptune anti-submarine warfare aircraft. Here are the highlights I found of this kit and project.............. 1. Paints used ( all acrylics ) : A. Mission Models White B. Model Master Engine Gray ( number unknown ) C. Other colors - Mission Models Aluminum, Tamiya Titanium Silver, Tamiya Gun Metal, Tamiya Metallic Grey, Model Master Dark Gull Grey, Model Master Flat Black, Mission Models Radome Tan 2. Dated molds with raised panel lines and select recessed lines for movable surfaces. 3. Uschi Bobbing thread “Fine” size for radio antenna 4. Caracal decal sheet P2V Neptune Part 1 #CD72055 ( option # 3 / VP-11 US Navy ) 5. References : Warpaint series Lockheed Neptune ( # 51 ) and internet. 6. Washes and chalk pastels used to lightly weather the Neptune. Unfortunately, this is not one of my better efforts. I started the kit and then set it aside as I focused on the home improvement project. Subsequently, I lost interest with the kit but I wanted to complete it before proceeding on to something else. I regularly fought with the two clear parts on the top of the fuselage and ended up cutting out the bomb bay doors to access the clear parts / windows from inside the fuselage. Then, inexplicably, the seams would crack open and reveal themselves during simple handling during construction. After spending an untold amount of time of back and forth corrections, I surrendered and applied a bead of glue and wiped the seam on the lower fuselage surface. Then, for some unknown reason, I had the decals “silver” after using my tried and true Tamiya Clear as the base gloss coat . Naturally, additional time was spent correcting the issues. I noticed that the top fuselage decal that wrapped around the circular some window did not properly align with the mid-gray wing section as I spent considerable time from my references to ensure proper alignment. Then, I noticed a second seam pop open as I was applying the decals. This one was located on the top of the fuselage . After removing the tape from the clear parts, I noticed the main cockpit windscreen was scratched from my efforts of trying to eliminate flaws. Frustrated, I pressed on to the finish line as I figure that the Neptune looks decent from a distant and in the display cabinet as opposed to being left in the box. Again, my apologies for the poor picture quality Thank you very much for your interest and I intend to present a much better subject after this less than stellar Hasegawa Neptune. Thank you in advance. With much respect, Mike Here is a view that illustrates the size of the Neptune as I posed it next to my 72nd scale Airfix B-17G.
-
Dave will be pleased - another Mirage IV, original ref 351 in 1979, this 1996 boxing is 80351. The first of only 3 Heller kits in my stash that will be eligible, I think I first came across this plane in a publication called "RAF Flying Review" back in the late 1960's. No longer have it but I rmember the article suggested it was built for a one way trip, not like some said of the British "V Force" because there would be no base to come back to, but because it did not have the range for a round trip. That may have been true initially, but then they got In Flight Refuelling - more later once I start. Pete
-
 Hi All, Eventually got here. Here is my recently completed 1/72 Marmon Herrington Mk.II Armoured Car using the Attack Hobby Kit. Never heard of this kit maker before, so didn't know what to expect. It's a limited run kit with the usual location issues but the detail was fairly nice. To the kit itself, the only improvement was to the drivers window which was solid plastic. So the plastic was removed and replaced with clear acetate. Painted with AK paints. Decals are of an unknown unit, North Africa, 1941. The metal figure is from Wee Friends and the accessories are from Milicast. WIP here: Stuart
 -
So this will hopefully be my second entry in this GB Being lazy the following is largely a copy of what I said in my MC 200 entry so if you have read that you may wish to skip this with the possible exception of the 2nd paragraph! As a teenager in the 1960's it took a while before I became aquainted with Italian aircraft from WWII. In fact I think it is true to say I had no knowledge at all until I started buying the fighter volumes 1-4 from William Green's series "Warplanes" published by Macdonalds starting in 1963 with Vol 3 Japan and Russia. Coincidentally I saw and bought the Frog MC 202 Folgore the same year, closely followed by Revell's Fiat CR 42 in 1965. The MC 200 from Revell and the Fiat G 50 from Airfix arrived I think in 1967, and I still have both somewhere in my roof space. This particular kit is a more recent boxing from around 1990 bought a few years back and I will build it over the next few weeks. It is as I recall a nice little kit though I seem to remember the fit of the wings was somewhat poor and I am not entirely convinced by the totally flat fuselage underside. The cockpit is non - existent as usual with kits of this age, but as with the MC 200 there is only a tiny opening so it will not be visible. I will box in the wheel wells and might do a modest amount on the cockpit but otherwise it will be OOB, and a fairly quick build. I do have some resin wheels and will spend a bit of time on the exterior finish which was pretty rushed on my original build. I now have access to rather more info so it should look a bit better. Like the Japanese, the Italians in the 1930's were used to light open cockpit biplanes such as the Fiat CR32 and were reluctant to move to closed cockpit monoplanes with reduced manoeuvrability. Add to that the problems the Italian Aero Engine industry had producing high powered engines (usually radials) and at the start of the war the Italian Airforce was still basically equipped with CR42 biplanes together with a few of the earlier CR 32, though the MC 200 and G 50 were steadily taking their place. With speeds in the region of 300 mph and light armament of only 2 Mg in the cowling, they were already obsolescent and only their manoeuvrability kept them just about viable. Later, both types would benefit from imported/licence built German inline engines which made them far more of a threat. Italian aircraft and pilots have received a bad press or been ignored but in truth they were generally as brave and skillfull as any allied pilots, let down by a underdeveloped aircraft industry and poor political management. Not sure exactly when I will start this but I should be able to slot it in whilst waiting for glue/paint/decals to dry on some of my other builds. More as and when. Pete
-
Hello, just a placeholder for my build which will start a bit later. I have the 1/72 Italeri kit and the Flying Colors Aerodecals tiny sheet for the ETPS logo, hope the box decals will suffice for the standard colour scheme.
- 47 replies
-
- 12
-
-
Hi everyone, I am a super fan of the Ju 87, but I was not supposed to enter this GB. That was the responsible route. Unfortunately, I could not resist any more, so, ever so typically, I am doing the unreasonable thing... but I am in good company! This is a place holder as I have 2 kits to finish first. That is the responsible route.... Here are a couple of photos: This Stuka will be built OOB, with the exception of some PE seat belts. I will be using as well the Xtradecal transfers. This kit is plain beautiful. It will be great! JR
-
Hello everybody, my first post here and first kit after a long long time so be gentle please🙃. Kit is mainly OOB with addition of some scratchbuilt details (door bays and landing gear, ejection seat, gun barrels). The idea was what if Republic of Singapore Airforce acquired F-20 Tigershark to replace it's F-5 Tigers🤔. Kit: 1/72 Hasegawa F-20 Tigershark Decals: Aztecmodels decals, Republic of Singapore Airforce, 141 Sqn Paint: Vallejo primer and Ammo Mig acrylics & varnish Weathering: Ammo Mig washes and Oilbrushers, AK Interactive weathering pencils Extra's: Hasegawa weapons set https://photos.app.goo.gl/ks19Yjd2ZYoZWwvN8
- 7 replies
-
- 8
-
-
-
- F-20 Tigershark
- RSAF
- (and 1 more)
-
Hi, Never entered one of these before so I have a query. When I first started modelling over 60 years ago I always built planes with wheels down, but for a long time I went through a phase of building them wheels up - lazy I guess though it also had to do with storage space - one on a stand could fit nicely between two on their wheels. Since then I have gone back to wheels down and have replaced quite of few of my earlier kits, but some are either unavailable or ruddy expensive, so I have started refurbishing the old ones and at the same time fitting DIY undercarriages. To date I have done a Havoc, Hornet, Ki-45, Ki-46 and J1N1. This is my Ki-45. I have quite a few to be done as and when I have the time and inclination, including such as the Ki-21, Ki-48, Ki-49, and Ki-67, together with the G4M2 and P1Y1. The old kits will be stripped and repainted, any broken or lost bits repaired or replaced, an undercarriage and perhaps in some cases doors added, and improvements such as new guns etc fitted- would these be eligible for this GB? Pete
-
Hi, As I have just about finished the Bv138 I was building for another GB, I thought I might add this "problem child" to my rebuild of the Revell Frances I have already entered. Like many modellers I have an interest in post war British aircraft, particularly naval ones, but for many years there were gaps. I managed to get the Frog Attacker (very basic), Sea Venom (not bad) and Sea Vixen (shape problems but looks reasonable), together with the old Airfix Seahawk (needs work) but the only Scimitar available for a long time seemed to be the Contrail Vacform, which I built. So when Xtrakit produced their injection model I grabbed one at once, but then began to have second thoughts. It is a bit Jekyl and Hyde - not too bad a cockpit, considering it won't be seen anyway, with a resin ejector seat and side consoles, but little or no wheel bay detail (although the main gear doors are closed on the ground). I can live with that, together with the massive ejector pin marks in the wings and elsewhere, but then I saw some reviews! One said there were major shape and size problems with the wings, nose, vertical and horizontal tail and exhaust fairings so I was discouraged. Another I have seen more recently acknowledges these potential faults but says they have been overstated, and are capable of a fairly easy fix, except for the "area ruled" fuselage. As I recall I started on the cockpit a couple of year ago and then abandoned it, but I think I might dig it out and see what I can do - got to be better than the Contrail one anyway and I am not splashing out megabucks on the resin ones even if they are still available. I have got a fairly accurate Attacker kit to build now so I might as well see if I add the Scimitar to the Supermarine stable. It was a brute of a plane in some respects - big, heavy and agressive looking, and with the Sea Vixen it makes up the penultimate generation of what I think of as "proper" RN planes, with only the Buccaneer and, Phantom to follow on the "conventional" carriers, everything after that being STOL/VTOL. Together with the Swift it represents the end of an era as Supermarine faded out of existence. Assuming I can find the kit, I will post pics before long. I may regret this but what the heck. Incidentally at least one review says this was made for Hannants by MPM but I can no sign of that on Scalemates so I have no idea who exactly made it. I know my Xtrakit Meteor F8 was ex MPM, and their Vampire is ex Special Hobby, but both the Scimitar and the Swift are shown as Xtrakit "new tool" although another review says that the Swift was also made by MPM - anybody got any more info? Pete
-
Good evening fellow Froggers Seeing as everyone is getting excited and posting their intended builds, I thought I'd follow suit and put my name in with a Frog Grumman A6A Intruder, F272 from 1970 to start with Seeing how time goes I may do a Vampire FB5 and Meteor IV as well as I don't think they are going to be long drawn out builds Pics now uploaded, now Flikr has got it's act together Ian
- 36 replies
-
- 11
-
-
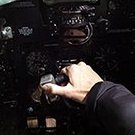
Hello All, I'm participating in the STGB on the C-47. Thought you would enjoy the pics also. The only thing I added was the seat belts from masking tape and various levers on the console. The one thing I have learned over the years is to check the fit of doors, windows etc and install them early in the assembly so you can fiddle with them easier...especially when the instructions tell you to put them on late in the assembly. I did that for all the doors, the two cockpit side windows and the wing fillets. I am glad I did quite a bit of fiddling was required and it is so much easier when the fuselage is not buttoned up. Even with that there is still some filling and rescribing required. In any case enjoy the pics...any comments or questions are appreciated. Sorry a couple are a bit out of focus..didn't notice until I after I had them on IMGUR. All the Best! Don
-
Hi folk's here's my marker for the GB,walked into the shop straight to the Airfix shelf no BF109 so grabbed this one before the endless deliberation of choosing what to do,nice kit,no vices and a simple scheme,going to have to go with last year's option of Sunday and Monday morning as work at 2 PM on Sunday and visiting family after lunch Monday. https://www.britmodeller.com/forums/index.php?/topic/235025882-achtung-spitfire-now-operational/& Last yer'sbuild.