Search the Community
Showing results for tags 'zvezda'.
-
Hallo This is my finished model now. The kit is from Zvezda. I used resin sets from Black Dog and Reskit. For the rotor and engine. Beside I used Eduard etched parts. Masks from New Ware. The building was not easy, since the fitting and assembling of resin parts took my patience. Since the building started from a flat hill to a steep mountain after some days, I decided to drop my idea of Afghan camouflage. So I chose the dark grey version. Well at the final stage I lost one pitot tube. Well, so have a look. Happy modelling
-
While the @Homebee sleeps, I'll crack his news - 4! 😎 On Moscow "МИР ДЕТСТВА 2021" ( WORLD CHILDHOOD 2021) expo , has announced a 1/48nd of Mill Mi-35 from Zvezda in 2022. B.R. Serge P.S. But if you think need to merge this branch with the Mi-24 from Zvezda in 1/48 - no problem!
-
Hallo This is the start of my Mi-24. All you see is the job from 08:00 until 15:45 this day. First of all I had to get a picture of this kit. How do parts fit, what is the overall design and how about handling. Well, after that closing up process, I got to the etched parts and made many cross switches between instruction from Zvezda to Eduard. In my mind I had to place two sets from etched parts in. Cockpit interior and cargo interior. With both in mind to check what makes sense, and what to leave out. Actually the instruction from Eduard surprised me until this hour. No flaw noticed and as you see all parts fit. The instruments at this set are much better from production as all seen before. However, I proceed that way, that I install prepainted etched parts before spraying. I mask them and this works well. So I can hide the gluing margin or leftover. · For tomorrow I have left some interior for the WO, still to finish and some electronic boxes from unpainted fret. · And to finish the big rear bulkhead from the cargo room. · The back seat cushion I will probably create by scratch. The next challenge is my resin rotor. Here I have to be careful. Since I am not sure if I will use the resin engine installation from Black Dog which I get by the end of this week. The rotor I think I will use in every case from the Reskit. The gear box from Reskit or Black Dog? This question I will decide at weekend. Happy modelling
- 16 replies
-
- 10
-

-
Hi guys. I started a new project a few days ago... It will become a Ukrainian Army Aviation Mi-24PU2. I started with the cockpit parts which were painted black. When the Ukrainian Mi-24s where upgraded to Mi-24PUs2 standard they got a new cockpit which give them night flight suitability. For the first time I got me some Quinta Studio decals. This set is for the M-24V and provides the needed black layout for my project. Applying them is very easy and worked very well from the beginning. Cut them out like normal decals, dip them into warm water for a few seconds and slide them to the plastic parts. Different to normal decals, the Quinta Studios 3D decals need an adhesive. Quinta recommends any PVA based glue, clear coat like Tamiya x-22 or cyanoacrylate glue. I used Micro Kristal Klear and it worked very well. The WSOs instrument panel is different in Mi-24V and Mi-24P so I had to use the kit decals here. In my opinion the seatbelts looks way better in vinyl than their etched counterparts from Eduard & Co. Regards Daniel
- 25 replies
-
- 20
-
-

-
Hello. I present you my latest finished model.The 1:72 Sale Zvezda Mi-24V in the colors of the Macedonian air force.I fully rescribed the panels because the kit ones are almost non existent.I also riveted the model to give it a bit more authentic look.The cockpit was upgraded by the eduard pre colored Pe set that is actually a bit bigger than the kit parts and needs quite the trimming with a metal file for it to fit properly.The paints used are revell enamels.I managed to scratchbuild the aso-2v Flares on the back and designed and printed the decals myself on a laser printer and microscale dekal paper.I couldnt reccomend the paper enouhg.One of the best I have seen.I will be definetley getting more of it in the futre.
- 21 replies
-
- 54
-
-
So here she is, my KV2. The Russian Juggernaut. If you are interested you can check my buildlog where you can see pictures of my various mistakes 😁 always nice for future reference. It was a nice build. I like Zvezda, they produce good kits for a good price. Nothing too complicated, just a straight foreward ootb build. I gave myself the extra challenge of adding figures and i really liked to learn new skills. I'm far from an expert but for a first time they look descent. Anyway, here are the pictures. Comments, tips, etc. Are more then welcome as always. Thanks for watching! 🙏🙏🙏
-
Wanting a rest from building aircraft I dug out a 1/35 Zvezda Tiger out of the stash to try some new weathering techniques and as a result this is simply a test vehicle, not a cabinet Queen, although I don't think it's too shabby. It's built from the box apart from the Friulmodel tracks and Aber aerial which I salvaged from an earlier kit that eventually ended up in the recycling. Paints are a mixture of Tamiya and Vallejo, Humbrol weathering powders and Windsor & Newton acrylic Matt varnish to seal everything in.
-
And on to the next build. While i'm gathering resources for my Tiger project, i started with this Russian Juggernaut, the infamous KV2. This is a kit from Zvezda. Never build one of their kits before so i really don't know what to expect. First impressions: the parts look fairly clean, little flash or excess sprue. The plastic feels a bit the same like Italeri kits. It's sturdy but soft enough to work with or clean up. Altough the instructions are in Russian, the pictures are very clear so building this kit is pretty straight foreward. Today i started with the assembly of the hull and there were no problems. Lot's of small parts that add detail to the model. i'll try to work in segments as much as possible. So that i can paint up certain parts before assembly. Downside to the kit are the link and length tracks. I need to come up with a method to soften the straight upper track part to create sagg. Maybe work it with a blowdryer. I haven't decided on the direction i will take this kit. I found some pictures of a winter camo so maybe that will be the theme but as i said, i'm undecided.....we'll see... As always, feel free to tagg along, comment etc. All input is more than welcome! I'll keep you guys posted. Cheers! 👍👍👍
-
Back at last after quite a while, hah. Finally completed this kit and diorama, plus another in a two-part series I'm basing around the Battlefield 2042 universe (hence the No-Pat NP logo on the sides of the vehicles, and their unusual camouflages). These vehicles are not present in the game, but they're of the era that would likely show up. First up, the 1/35 scale Zvezda Bumerang IFV. Thanks for checking it out ^-^ Gaz
-
 In 2021 Zvezda is to release a 1/144th Boeing B-757-200 kit - ref. 7032 Source: https://vk.com/zvezdamodels?z=photo-29859496_457589701%2Fwall-29859496_2617107 V.P.
 -
 Here is the Zvezda Tu-154M finished as LZ-BTX of Balkan Bulgarian Airlines circa 1994. The build is more or less OOB although I used BraZ engine fans in place of the unlovely kit items. Paint is Halfords Appliance Gloss White and Mr Hobby H338 grey with Humbrol and Tamiya metallics. Decals are by Two Six and are up to Ray's usual standards apart from a couple of minor points. The green sections of the two small forward doors on the right need to be shortened by just over 1mm otherwise the doors will be too tall and affect the placement of the main “Balkan” title. If you have filled the door outlines it’s easy to get caught out as I was. Also a bit of patching material would have been nice since the red and green stripes don’t meet under the belly and the green in particular proved difficult to match with paint. Windows are from Authentic Airliner Decals and I added a sensible modicum of stencils from the spares box. The obligatory soot staining was done with artist’s pastels. Thanks for looking and constructive criticism is always welcome Dave G
- 31 replies
-
- 62
-
-
-
- Tu-154
- Balkan Bulgarian Airlines
- (and 1 more)
-
 Hello Comrades! 😀 So let me show you the result of my last finished work in regular scale for me. Basically, I wasn't going to make another one of 737-series. That was finished with 4 ready models on the shelve. But one of them had found a new owner, and I've got some free space in 737s row. And after I've built Aeroflot aircraft, I've decided that UIA livery will be a good choice to place that models together. This was really quick built - it took only 2 weeks that is really "blitz-built" for me. (Usually I need at least 3 weeks or more). Zvezda-737NG kit is very high quality as always. And the only few words I'm going to say about the kit is that gradually the manufacturer upgrades kits. If the older 737-800 was accompanied with old-style Utair decals from the box, so fresh edition consists new-style Utair livery. Really it wasn't really important in my case, but by the way Zvezda upgraded the decal for pilots windows edges. Now they became thin and neat, despite the previous version that was too massive and non-scale looking. Paint-works in this built was as minimal as possible to create normal model. Usually when I need white and smooth surface, I apply a thin layer of Decorix from the can, and then use Mr.Hobby H-1 with airbrush. But in this case I've just covered plastics with three or four layers of Decorix primer, giving it some time for drying up between layers. And finally I've sanded the surface with sanding-paper (2500) plus a few water. The ready surface maybe is not as ideal as after Mr.Hobby paint, but really after covered with some Future, it looks similar. Blue tail was airbrushed with Master-Acrylic #36 (blue). Wing and stabs edges are covered with Tamiya X-11 chrome silver. Hot parts of engines are airbrushed with a mix of MAKR-aluminium plus some yellow and green Master-Acrylics. Tyres are Mr. Hobby H-77 tyre-black. Chassies I've painted with thin usual brush with Jim-scale light-gray. Decals I've purchased from Ascensio. I've used this production earlier (Norwegian 737MAX for example). So it's reach, good-quality decals. The only one thing is too thick white background for blue-area elements. In fact, the decal-sheet was enough to get ready model. But I've used some out-of-box elements as well. The technical stencils look more natural in Zvezda's decals, and also I've applied decal windows edges for passenger windows and for cockpit as well. I wasn't going invent a bicycle one more time, so the lacquer is Pledge Fuutre (two layers) under decals. After decals were applied and dried up, there is one more layer of Future, and a thin layer of satin lacquer (Future + 5% X-21 Flat base) as final coverage and to reduce surplus shine on the photos. As the model was finished, I've noticed some disadvantages as always. But generally I like the result. Hope you will like it too 🙂 The comments and criticism are welcome as usual. Respects, tMikha.
 -
Hello, it's me again 😃 So, finally I've finished with my last model of Airbus A-320 series, and with "parade" of 320's models as well. The main stages of the work you can find in WIP. And I want to tell a few words about the kit first. It was purchased about 1,5 years ago, that time there was no 320NEO in Zvezda catalogue, and this kit was named usual "Airbus A-321" (now it's named A-321 CEO and there is nice TAP-Portugal decal-sheet included). But that time it was provided with standard Airbus home livery out-of-box. So that time I had an idea to built the kit in Metrojet EI-ETJ livery in memory of that poor souls who were killed over Sinai in terrorist attack in 2015. But later I've refused from that idea, and kit was stored for all that time in reserve. Also I've "stolen" some parts to replace that I've lost during another 320's building. And now it's time has come! I've chosen Aeroflot livery as some challenge for myself: I've never done such difficult borders of colours on my models. Also, I work with Aeroflot every working day, I was their passenger for many times, but still I have no Aeroflot model on the shelve? Shame on me! 😁 So I think there is no need to tell about Zvezda kit - it's really high qulity product, as any other Zvezda civil liners. I've used only a few putty, to remove the slot between wings and fuselage. I think there is no need to tell here about painting progress in details. All that I've described in WIP topic. Only I will tell that most colours were Master-Acrylic and Mr.Hobby. The main gray-metallic was mixed from white and black MR. Hobby plus some MAKR aluminium. IMHO the result is not so far from prototype. BTW the prototype of the plane served in Aeroflot till 2018. Then it was transferred to Canadian Air Transat airlines. There it got a new livery and sucessfully flies till today. During the period it was in Aeroflot, it had VQ-BEI reg. number and personal name S. Korolev. And here I've to tell a few words about decals. I've purchased PAS-decals sheet. There were 6 variants of bording numbers but no one stencil for personal aiprlane's name. Really strange and upset fact. So I've used another one name-stencil from reserve out-of box sheet for A-320. So mu model now named Sofya Kovalevskaya. Let it be this way, BTW there are only 3 or 4 of Aeroflot planes that named in tribute of famous women, and Kovalevskaya is one of them. In conclusion I want to tell that it was another one interesting built. Though I see a lot of small disadvantages in the finished model, but anyway I like it and satisfied with the result. I'm really interested in your opinion about Aeroflot gray colour, whether it looks realistic or no. So criticism and comments are warmly welcome, as usual. Respects, tMikha. PS and one photo of my 320's finished collection on the shelve in concluding.
-
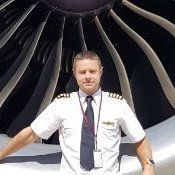
Hi Everyone Sure I'm not the only one, but got into modelling during the pandemic to stop myself going mad. Us pilots were regularly locked up around the world in various countries & hotels & sometimes quarantined back on arrival. I decided to make a model of every type of aircraft I've been lucky enough to fly so far in my career, these are the first 2 that I've finished building. These are also the first models I've made since I was about 12, I know they're not a patch on some of the fantastic ones I've seen on here but I did my best 😅. And yes I made some stupid mistakes, which I'm sure you guys will spot. The 757 was modified with some flaps by LACI with decals from Draw Decal, the 767 decals are from 26 decals Any comments welcome as I'm a complete beginner and looking to learn from the vast experience on here \
- 24 replies
-
- 51
-
-
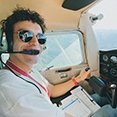
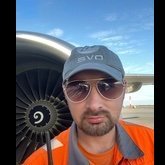
My trip to Germany in October/November 2021 was the trigger that I needed to start to really get into Soviet planes. When I landed in Berlin for my MCC/JOC courses I didn’t had in mind that same airport was somehow part of the old Berlin-Schönefeld airport (the old airport of East Berlin). On the next day I was ready to start my MCC in a Boeing 737-800 simulator in an airfield in the surroundings of Berlin (Schönhagen - EDAZ). One of my instructors after some sessions and morning coffees told me that my other instructor who was giving me lessons also, was a pilot for Interflug before the Berlin Wall collapsed. He flew Tupolev’s and Ilyushin’s for a brief time. After this I’ve asked him how it was flying a very complex Soviet plane and to share with me some Interflug memories. I didn’t had a very much feedback because he was a reserved person. Well… I will just wonder how those times would have been… After my courses done I’ve visited Berlin, and since I’m a huge fan and a curios person regarding history and politics I’ve went to the GDR Museum and I’ve tried to collect the most interesting facts and histories regarding the Wall and also the whole system that divided Berlin and also a country in two once. I’ve started to read more about Interflug and the German aviation at the time and I had the idea that since I went to Berlin, it would be a nice idea to built an East-German plane so I can also have some sort of a good thing to reminds me the good times that I’ve spend there! So, 1 week after I’ve arrived from Berlin I’ve went to Amsterdam for my birthday and its a mandatory stop to visit Aviation Megastore. Still with this Interflug vibes in my mind I wanted to buy a model that Interflug had operated. I didn’t liked the Tu-134 with their livery, so I’ve decided for the Tu-154. It is a nice plane and the Interflug’s livery was kinda pretty on it! Well I’ve talked that much already, so maybe is better to go straight to business. Let’s do this! This is the Tu-154 box, with the classic Zvezda drawings as a cover. With this model you have three livery options: Classic Aeroflot Livery, Current Aeroflot Livery and the Open Skies Livery with Yuri Gagarin Cosmonaut titles. Like I’ve said before, I will prefer to use the Interflug decals. Like normal, Ive started the model by glueing the windows in the fuselage. Since I’m gonna use decals for them later, I’ve just used the regular glue from Revell. After that I’ve filled a bit of the window holes with plastic putty in order to sand it with a 1000 sandpaper grid later on. Meanwhile I’ve also painted the “S induct” tube with a some sort of dark grey and since I didn’t knew how they would attach in the end (even with instructions), I’ve painted that whole area inside with Vallejo’s “Jet Exhaust” (77.713). It was also time for start the engines. And to be honest that was a bit demanding, when it comes to pick up the colors to apply. In the end, after watching so many pictures of the Tu-154 engines, I’ve decided to apply the “Engine Grey” (71.048) in the engine fans and the “Beige” (71.074) in the engine cones. After that, in the same way I’ve did with my Varig 767, the turbine outlets, I’ve painted them with the “Smokey Ink” (72.068). Heres the result: With them painted, I was able to assemble the S-Duct and finally attach the main fuselage together. The 20g weight was glued in front, the duct glued in place so as the exhaust tube that I’ve also painted with “Jet Exhaust” (77.713). With the windows already sanded and the main frame together as one, its time for sanding and putty! With the airplane sanded, it was time to give a first thin and irregular primer coat to check some imperfections. They appeared on top and a bit in the bottom of the fuselage. I’ve applied putty again and I’ve sanded it again. I think after these adjustments, the airplane is ready for the final paint job. I’ve started this with the elevators, because it would be easier to mask them in the end than if it would be the opposite instead. I’ve started with the same grey that I normally use for wings: 71.046 from Vallejo also. After this grey, I’ve masked again the elevators to paint the leading edges in aluminum and later on the sides in a red/orange shadow. I’ve also started to apply the main coats of white in the fuselage with the 62.001 shadow. I will continue with this process until I’ll have a consistent white layer. After this, I will use the same grey shadow as I used for the elevators and paint the lower parts of the fuselage. For now, let it dry and work on the other models (to make a better use of the limited time )
-
Yak-9D (4815) 1:48 Zvezda The Yak-9 was an evolution of the successful Yak-7 fighter, and was intended to retake the initiative from the Nazis new Fw.190 and improved Bf.109s, which it successfully did. Production started in late 1942, and by summer 1943 there were enough in service to make a difference, playing a part in the crucial Kursk battle, thanks to its agility in the thicker air at lower altitudes and the heavy armament it carried. It was made in a number of different variants with different intended uses, with the D fitted with additional fuel tanks for longer range, and the DD for longer range still. There were also other versions with a larger 37mm cannon in the nose, and even a 45mm cannon in one variant that had to be installed with a muzzle brake. Post war saw the continued development of the type, which involved the installation of a more powerful engine, and these were later hived off to Soviet-friendly satellite states at the end of the 40s, where they served into the 50s, although their unusual lubrication system saw accidents caused by engines seizing due to forgetful pilots neglecting the hand-cranked lubrication lever in the cockpit. Something that might not necessarily be top of your agenda during a hectic dog fight or tricky manoeuvre. The Kit This is a brand-new tooling from Zvezda, and as it comes from Zvezda’s home country, the boat has been fully pushed-out, with the result a highly detailed kit. It arrives in a flimsy end-opening box, with a top-opening tray inside that is tough enough to hold everything safely inside, firm up the outer box, and comes complete with an additional captive lid/flap. Inside are six sprues in grey styrene, a clear sprue, decal sheet and the black and white printed instruction booklet, which has a separate painting guide in full colour, printed on both sides. A quick look at the sprues reveals that the detail is excellent throughout, with fine engraved panel lines and rivets where applicable, which are noticeably absent from the wings due to their construction with metal framework and a Bakelite impregnated plywood skin that was responsible for a major reduction in weight between it and its predecessors. There is also a complete engine that has some stunning detail moulded-in and goes all the way back to the cockpit, for which there is a very nicely sculpted pilot that has separate arms, torso and a choice of heads with goggles up or down at your choice. Other options include having the gear down, the engine exposed or closed up, with the additional option of closing up the landing gear and purchasing a separate stand for an in-flight pose. Construction begins with the engine, which is made from a substantial number of parts, and has some super mouldings that would make it a shame to pose it closed up. You will need the engine whether you display it or not, but most of it won’t require painting if you leave the engine closed. The radiator bath is next to be made, with back and front surfaces depicted, after which it is inserted into the full-width lower wing, which has a riveted armour insert behind the chin intake, and that also has front and back surfaces, plus a two-part fairing around it that has a seam up the middle, so will need careful fitting to minimise the seamline for easy hiding. The radiator intake also has a separate lip added to the front before it is flipped over and the wheel bay walls are made up, with the rear wall also forming a short spar that extends to the outer edge of the bays. Behind the spar a box is made up from individual surfaces, the aft section again forming a short spar as well as having tubular framework raised up that forms the rear of the cockpit. The floor of the cockpit sits on the boxed-in area, and has details such as rudder pedals and a choice of two control column types added, with a fuel tank and bulkhead in front, which are joined to the rear with more tubular framing that supports the cockpit sides and instrument panels, as well as other equipment within the cockpit. The instrument panel is well moulded, and four decals are included as well as a part that boxes in the rear of the panel, and a flat cross-member on which it sits at the front of the cockpit. If you're after more detail, Quinta Studio have already released a 3D Printed replacement that you can see here. The afore mentioned pilot is similarly well-moulded, with enough leeway in his arms to allow you to fine-tune them to reach the controls, plus a choice of goggles up or down, and you could incline his head up, down or to the sides to give him a little bit of additional character. The completed engine is decked out with four individual exhaust parts per side, and as some of them are twin pipes, care must be taken to correctly orient them firstly, and put them in the correct order. They aren’t hollow-tipped, but are very small, so with a dab of your blackest black it’s unlikely anyone will notice. The cockpit assembly is completed by bringing together the frames, the lower portion of the seat on its cross-frame, the vertically roll-quilted seat back set against the rear frame, the large cannon breech that runs through the prop, and the pilot if you are using him. At this stage the instructions have you inserting the landing gear legs and their retraction jacks, but these could be left off until later if you wish. The upper wings are joined to the lower after painting the bay roofs on the inside surface, and adding a pair of intake inserts to the wing root leading edges, and a cooling flap at the rear of the radiator, which has its actuators pushed through two holes from above. Wingtips with clear lights, the tail wheel leg that has a separate wheel and yoke half, and rear deck with equipment added are all built up in preparation for fixing the fuselage to the wings and internals. The inner surface of the fuselage halves are painted and has an additional frame added to the nose area on the starboard side, while a floor insert is prepared with the tail wheel for insertion later. The fuselage halves are closed around the existing structure plus the rear deck and a short bulkhead that also has the antenna moulded-in, although I would almost definitely knock that off during handling, so would probably replace it and drill a hole for later insertion of the antenna or its replacement. The port fuselage half is missing its side cowlings to accommodate the display option, and this is prepared with an intake in the lower nose, with a frame added to the inside for the closed-up version. The elevators and their fins are each made of three parts with the flying surfaces able to be posed, as is the rudder and both the ailerons, all of which are separate individual parts with lightly engraved fabric detail visible on the surfaces. If you are opening up the engine cowling, additional parts are included for the port nose machine gun as well as its ammo supply, made from a number of parts and nestling in the top of the engine. The canopy and its companion piece are then inserted in place whether you are showing off the engine or not. The section of the cowling at the very tip of the nose is used if you expose the engine, and this too has additional parts fitted underneath before it is installed behind the prop. The full upper cowling is supplied as a single part if you choose to close it up, leaving you with a neat panel line and one less seam, which is always nice. The prop is moulded as a single boss with the three blades integral, and this is surrounded by the spinner, with the boss and a cannon barrel part to allow the modeller to leave off the spinner front if desired. The canopy opener and the fixed aft section are added behind the windscreen and in front of the aerial antenna. After adding in the main gear legs during earlier construction, the task is completed by adding a captive outer bay door and inner door with actuator, adding two bay doors to the side of the tail gear leg, oil-cooler flap on the chin-intake under the nose, then making up the main wheels from two halves plus inner and outer hubs, after which they slip over the axles to complete the build phase. Markings There are three decal options included on the sheet, with a separate half-page of the instruction booklet showing where all the stencils should go, while the main markings are given on the colour sheet. From the box you can build one of the following: 1st Separate Regiment Normandy-Niemen, Pilot Marcel Lefebvre, #14 6th Guards Regiment IAP of the Black Sea Fleet Air Force, Pilot Grib, #22 64th Guards Regiment IAP, Pilot Denchik #3 Decals are printed for Zvezda in a similar style to Begemot, although no logo is included to confirm. They are in good registration, sharpness and colour density, with a thin satin carrier film cut close to the printed areas. Conclusion This is a highly detailed model of this important WWII Soviet fighter that some may contend was the best of the war, and certainly one of the best Soviet fighters of the war. Lots of detail throughout, and with enough difference in personal markings to interest many modellers. Very highly recommended. Review sample courtesy of Alex at Quinta Studios
-
Hello everyone! Today I'm glad to introduce once more of my models, and to finish the "parade" of 737-family. The last one is most popular today type 737-800. Zvezda kit is neat, easy to build and needs only few putty, especially compared to previous EE 737-100. I've thought about livery choose for last one 737 for a long time. First I really wanted to build it in NOK-air bird livery, but later decided that it's too complicated for my skill till that days. Another one idea was Aeroflot classic old livery, but I am not a fan of "whatif" liveries. Finally I stopped choosing and purchased another one high quality and easy-to buy in RF livery from PAS. OK, it's another one standard and not eye-catching design. But first, I was a passenger on Nordwind couple of times (though flights were operated on 321) and the second and main reason that I've sent to trip this plane for great number of times as a handling-supervisor. Nordwind is one of Russian companies, far not the biggest but well-known inside the country. They operate park of different aircrafts (737's, A-321, 777-200 and -300). Mainly they perform domestic flights, and flights to Antalya (AYT) during high-season as well. In addition, I have warm feelings for this carrier for their easy-to-communicate and not arrogant flight attendants. Serving their flights, you will never be denied a cup of hot coffee in the cold season, a bottle of Cola in the hot, or some food if you feel hungry. So, enough lyrics, let's talk about painting 😁 First I've used ZIP-maket primer (that time I usually used it, but later replaced it with Decorix from a can). Grey colour of fuselage was mixed by eye from mr. Hobby #1 + Tamiya XF-24 Dark grey. Wings are painted by eye as well, the difference is in quantity of grey paint. Then I've chosen correct colour for engines, but finally stopped on Mr. Hobby H-18 steel. As I think, it's not far from real colour. Wheels, undercarriage and gear-flaps painted with zvexzda #30 light gray. Tyres covered with XF-85 Tamiya Rubber black. Wing-edges ant other heated areas painted with X-11 Chrome silver. Pledge future before and prior decals, as usual. And final layuer is mixed Future with 5% of X-21 Flat base. Decals from PAS are wery high-quality as usual. Technical inscriptions and others - from the included decal-sheet. (Basically it's Utair livery out-of box) Also I've added beacon on the top of fuselage (on the bottom there are a hole for the rack), and red and green lights on the wing-tips. Though highest quality, the decal has few minor disadvantages. For example, instead of "www.nordwindairlines.ru" on real plane, this inscription without WWW on decal-sheet. And what was pointed later by colleagues, I've applied some inscriptions not enough straight, and destroyed little red N logos on the engines. It's all on the side of my crooked hands 🙄 Model was finished in last days of 2021. The last two fotos is for compare with prototype of the model. Respects, tMikha.
-
My last of the 1/144 787s and probably one of the most attractive liveries for the Dreamliner. ANA had signed a 5 year contract with Disney and painted at least 4 of their aircraft in special Star Wars liveries. Maybe some of you remember that a few years back,I already built that model,then with a 787-8,streched with resin plugs. After I had finished that kit,Zvezda announced their -9 kit... I actually never planned to build the R2D2 livery again because of its complicated design. But a friend kept asking to sell him that model,so last year I finally gave in and sold it,which led me to the point to build another one for my collection again. This time I used the 787-9 kit from Zvezda and a decal set from PAS instead 8A decs. The decals were great to work with and are also durable enough to accept some heavy handling and trimming. Again for the windows Authentic Airliner windows were used and details come from the nice Zvezda decal sheet and the spares box. Painted with Gunze white surface primer 1500,clear coated with Gunze premium gloss prior and after the endless decal session. All other paints are Gunze as well. Now my Dreamliners are all done and the Star Wars jet is back in my collection. No matter what,there wont be ever a 3rd R2D2 build😉 May the force be with you Alex
- 31 replies
-
- 58
-
-
-
Welcome everyone involved in modeling and just interested as well! So.. this is my first "adult" airliner model. All previous attempts better to be called just "baby-toys". It was finished in fall 2021. Since my first practice in aircraft modelling I was in search of the way to get smooth gloss surface on my models. So finally I've discovered the way, that I use till today. It's easy enough - for gloss white surface I use airbrush with Gunze (Mr. Hobby) H-1 paint plus thinner for acrylis paints mixed up to the consistency of milk. Boeing 737-MAX is well-known and popular airliner. Most of us know about some difficulties with this type, that caused two air crash episodes. The main visible differences between MAX and NG are new big engines and new form of IPU exit hole. There are also some additional differences, but they're clear only for technical or flight staff. This built take a lot of time - more than one month - it's really long for me. The reason was that I've ruined first decal-sheet and had to wait till new order will be delivered. Zvezda kit is well-known and really neat and easy-to build, needs just a few putty (I use Tamiya Putty basic type) for connecting wings with fuselage. Unfortunately, my kit had manufacturing defect: right wing was twisted. I tried to solve the problem using hot water. It was successfully for about 50/50. It's not rule for Zvezda, but an exception. Also I know, I'm "lucky" guy 🤦♂️ First I've used ZIP-maket primer (really cheap but low-quality thing, later i refused from using it) Basic white, as I told upper, was Gunze H-1. Red-nose and winglets is master-acryl #12 Wing edges are painted with Tamiya X-11 chrome silver Undercarriage and wheels are MAKR #6 aluminium and Tamiya XF-85 rubber black. Flaps were highlighted with soft pencil. Gray color of wings mixed from Gunze H-1 plus a few dark gray Tamiya paint. Pledge future prior and after decals plus one additional layer for extra-protection. The livery I had choose once, while surfing model-store site. In my opinion it's one of the most interesting liveries (though some colleagues told it's odd and ridiculous). Very interesting idea with portraits of different famous persons on the tail. And mr. Oscar Wilde - is one of my favourite writers. "The picture of Dorian Gray" I've read two times, and saw cinema as well. His sharp quotes are brilliant! So it wasn't a long choice of person for Norwegian livery. Decals manufactured by Ascensio. Well and reach enough but too fragile. And another story that I've purchased two same sheets but white color of them was different. You can see it in word "Norwegian" for example. Technical inscriptions from default out-of box decal. Also there are some visible disadvantages I have made: -Sloppy painted engines - it was the most difficult part of painting for me - APU inlet is the same as 737-800 has. But really it's different. -Headlights on the wings also looks sloppy because first painted with brush in aluminium, then black and clear detail from the kit was mounted finally. - Too shiny (caramel effect) on the surface (That time I didn't use any flat base and covered model with 100% Pledge Future) Anyway, it was first warmy welcomed model on local thematiс resources. And now I'm glad to introduce it here. Feedback and criticism are welcome! Respects, tMikha.
-
Zvezda is to release in 2020 a 1/48th Ilyushin IL-2 Shturmovik kit. Source: https://www.britmodeller.com/forums/index.php?/topic/235061306-zvezda-2020/ V.P.
- 118 replies
-
- 2
-
-
- Zvezda
- Shturmovik
- (and 1 more)
-
Hello to all. This is my latest finished model.The Zvezda MiG-31.I have installed the Extratech Pe in the cockpit and added a pair of Resin K-36 seats.The rest is oob.I painted the kit in gunze and tamiya acryclis.The decals came from the spares box. Regards,Dragan
- 17 replies
-
- 37
-
-
-
Hello there! This is my first model on this resource, so i apologise if I have made some mistakes. So... all of us well know about A-320 plane - it's one of the most popular in the world. Model produced by Zvezda is very good about assembly and copyability. Some info about prototype: EX-32007 serves now in Kyrgyz republic Avia-Traffic Company. This is one of the oldest A-320 flying till our days - this plane in service since 1993. First operator was Sri Lanka airways. During that time plane was damaged in Colombo airport by terrorist attack. Later it was repaired and served in Danish air transport. At least in 2016 it was delivered to ATC - Avia-Traffic (ATC) based in Manas airport, Bishkek. In early march 2022 I've bought tickets for Aeroflot from Moscow to Bishkek (my parents live there). But for well known reasons, Aeroflot had temporary stopped flights to any foreign countries. And the only way to travel was ATC. So after good vacation with family, I had no doubt about livery for my new model. Materials: Zvezda kit 1/144 Decorix primer first Mr. Hobby H-1 for basic white Master-Acryl "royal blue" (Zvezda MAKR) paint for engines Also used some mr Hobby and MAKR (grey, aluminium) paints for wings, hot part of engines, undercarriage. Painted with airbrush. Decals ordered from avia-decal (Belarus) Pledge Future as basic lacquer and as well as a cover for decals. Final lacquer is Pledge Future mixed with 5% of Tamiya X-21 flat base. It's something near gloss lacquer, but helps to prevent excessive shine while photosession. PS Hope you will enjoy viewing this model. With respects, tMikha.
-
 Hawker Hurricane IIc British Fighter (7322) 1:72 Zvezda HobbyPro Marketing If one was to asked to give the name of a British fighter that took part in the Battle of Britain, the Spitfire would undoubtedly be the most common answer. However, the aircraft that provided the backbone of the defence in that infamous battle was the Hawker Hurricane. Designed in 1935, it was quite a step forwards to the existing front line RAF fighters of that era, key features being a fully enclosed cockpit, retractable undercarriage, 8 guns, powerful V12 engine and most notably, a single cantilever wing as opposed to a biplane configuration. Despite its revolutionary look though, the design and manufacturing techniques were old school, a steel frame with fabric skinning so in reality, it was very much a progressive rather than evolutionary design. This however was to provide useful in manufacturing and in the face of battle. The Hurricane was easy to produce, repair and maintain. This is in comparison to the birth of the Spitfire which used completely new manufacturing techniques which whilst offering performance, hindered early production. Early Hurricane Mk.I’s went through a series of design enhancements. Initial aircraft had fabric wings which limited the dive speed whilst the spin characteristics were a concern for test pilots. This was remedied by the addition of a strake below the rudder that became a key characteristic of the Hurricane. The fabric wings were also changed by 1940 for new metal skinned ones which increased the dive speed by some 80mph. Other notable improvements on the Mk.I were the addition of 70lb of armour plate for the pilot, self sealing fuel tanks and a 3 blade constant speed propeller. Of the 2700 victories claimed during this battle by the RAF, nearly 1600 ware at the guns of the hurricane. Whilst the Hurricane soon became outdated a front line day fighter in Europe, it went on to see considerable success in other campaigns throughout the war. The Mk.IIC was a much improved version, armed with four 20mm cannon and equipped with the Rolls Royce Merlin XX engine, capable of developing almost 1,500hp. These aircraft were generally used for ground attack and night fighting duties. With the addition of these bombs and cannon, it became an effective ground attack aircraft. It has its history firmly rooted in the battles of the Mediterranean, Russia and the Pacific, not to mention early night fighting over Europe where many aces earned their status. Over 3000 Hurricanes were sent to the Soviet Union under lend lease. The Kit This is a brand-new tooling from Zvezda, fresh off the presses in Russia, so it is a modern kit and has plenty of detail moulded-in, with fine engraved panel lines but very subtle fabric effects. certainly on the fuselage. It is designed to be assembled without glue, no doubt for the younger modelers out there, but I suspect it will also be be bought by some a lot older! The kit is quite detailed for an easier kit, there is even different pilots supplied for the RAF or Soviet marked aircraft. First of when building the kit the modeller needs to decide on gear up or gear down. The main gear well and ailerons are then added to the lower wing, with the radiator going underneath. The one part top main wing then goes on top being sure to add the clear parts for the navigation and landing lights before closing them up. We now move to the cockpit. A basic lower frame goes in which contains the rudder pedals and control column. A second frame then holds the seat and instrument panel, with a decal being provided for the instruments. The top frame clips into the bottom frame, and then the rear bulkhead goes in. Moving on to the fuselage sides tow A frames go in which allow the two sides to go together. Once together a 3 part propeller / spinner goes on the front. At each side a single 3 pot exhaust is fitted. If using a pilot then there are two choices if you are going RAF or Soviet. Once he is in (or not) the fuselage can be clipped to the main wing. The canopy then goes on. At the read the rugger an tail planes are fitted. If making the model gear down then a single part tyre is attached to a single part leg, and the gear door fitted to the outside of this. A single part closed door complete with wheel is provide for a gear up option. Markings There are three painting options included on the decal sheet. From the box you can build one of the following: KX471 from 78th Fighter Aviation Regiment, Northern Fleet, Vaenga Airfield, Summer 1943 Z3778 No.1 Sqn RAF, Tangmere 1942 BE581 No.1 Sqn RAF, Tangmere 1942 (Overall Black Night fighter scheme) The decals are well printed with a red band around the edge that is reminiscent of Begemot’s work, but that’s just my guess. The colours are dense, printing sharp, with a satin carrier film cut close to the printed areas. Conclusion It’s a very nicely moulded kit, A welcome addition to the range. Recommended. Available from all good model shops online or in actual buildings. Review sample courtesy of
 -
The Su 25 have always caught my eye, and I can't really explain why. Maybe I just think it looks brutal, specially when full loaded. I'm planning to make this kit as a Iranian Su-25, well-armed with rocket pods. The decals and instructions says it's overside is painted in FS20400 (sand from asia minor) and FS 20117 (a red/brown colour I dont know?) and the underside is painted in FS35414 (a blue'ish green). I think this is the Iraqi colours, but dont really know, so if someone know, please let me know I was planning on doing it in "full" Asia minor minor scheme (Sand,brown,green and grey), maybe I'm still going with that plan, because I supposed I can used the same decals, since the ID number for the aircraft does'nt change if the plane gets a new colour coat? Anyways, the kit does look fine, not much flash, the panellines is a bit crude to my eyes, but not the worst I've come across Looking forward to see how it comes together - lets get started The kit: The aftermarket parts (Rocket pods, mask, seat, stencils and pitottube): The sprues: The decals:
- 22 replies
-
- 10
-
-
Hello, Here is my recently finished model, the Zvezda 1/35 ural truck with trumpeter A/A gun. I hope you will like it. Thanks for looking.
- 9 replies
-
- 35
-
-
-
- Zvezda
- Trumpeter kit
- (and 1 more)