Search the Community
Showing results for tags 'whitley'.
Found 19 results
-
 Well I think I'm probably being over ambitious with thinking I may get these two builds done but I will try my hardest that's for sure. Will start with the Blenheim, I have the mask set and paints already and if I get time I will get Whitley done as well. Both will most likely be finished as the aircraft from the box art, I will definitely do the coastal command Whitley, perhaps a different scheme for the Blenheim. Looking forward to getting started!
- 7 replies
-
- 19
-

-
- Blenheim Mk.IF
- Whitley
- (and 1 more)
-
Recently I've been working on Airfix's 1/72 Whitley Mk.V for the Unarmed Group Build, certainly one of my favourite builds. It's a joy to build, totally recommend it. I'll have to build another at some point, but probably with a bunch of etch in the cockpit. Only issues were one small missing part which I easily made a replacement for (easier than bothering with Airfix spares) and there were holes for the aerials missing. The instructions tell you to drill some for the coastal command version, but there's no instruction or semi hollowed out bit to drill for one of the aerials that is needed for both versions. Also no hole for the pitot, easily fixed. This was replaced with a metal pin anyway, it just looks better than the plastic one provided. And here's the cockpit. Once I applied the map decal I wasn't happy with it at all, it just looked flat, oversaturated and out of place. So similarly to what I did with my Dambuster Lancaster last year I decided to replace it with paper. I cut the image of the decal from the instructions and used that instead. Airfix should just give a printed sheet of maps on paper to cut out and attach with a bit of pva or superglue or whatever instead of a decal. But this wasn't enough, so I made a book, perhaps a manual or logbook or something. Justwish I added seatbelts. WIP thread here
- 22 replies
-
- 67
-
-

-
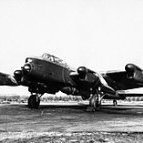
 Hi everyone! The recently completed Battle of Britain group build has left me with a few kits in my stash that I didn't get to, so here I will present one of them. The first kit I've decided to pull out of my stash is the Armstrong-Whitworth Whitley. The kit is 1/72 Airfix, for which I've purchased Eduard's details set and masks set. I gather from other builds Eduard omitted a couple of windows so I'll have to do some extra masking (not too much I hope!). A couple of photos: Now to the subject. The particular aircraft I've decided to build is probably quite a famous one, or at least, it should be. It started life as a bomber and participated in nine bombing missions over France and Germany. Then in February 1942 it was used on a highly successful paratroop mission. After eight more bombing missions, this aircraft, along with its squadron, was transferred to Coastal Command where it hunted U-Boats in the Bay of Biscay. It even managed to spot one, although the U-Boat spotted the Whitley in time to crash-dive and escape. Quite an interesting service history then! Along the way the Whitley I'm building was flown by a number of different crews. One of its pilots was particularly well known, but it was also flown by other crews including one less-known pilot who later had a very lucky and dramatic escape in after evading six German fighters in another Whitley. I'll relate more on the story of this aircraft and its crews during the start of the build very soon! All the best, Matt
 -
Dear Friends Here is the Airfix 1/72 Whitley MkV. Thank you Airfix for updating this classic British aircraft! Airfix are quite innovative in their kit engineering, which can be a mixed blessing as many of you will know. However, they do their best to be true to the original, and I love their wing spars going through the fuselage. The kit has Eduard photo etch, quickboost resin exhausts and Xtradecal decals to represent the aircraft of 58 Squadron based at Linton on Ouse in 1940. I love a story from the time of a leaflet dropping Whitley getting lost in I think in 1939 and landing in a field in Germany. The crew went to ask locals where they were and a helpful boy scout explained they were in Germany and which direction to fly in to get to France. I believe the take off was somewhat hurried! Later the local Pastor had to intervene to stop the Gestapo throwing the boy into one of their jails. Hope you like it? Andrew
- 22 replies
-
- 55
-
-
I know this question has been answered before, but I have forgotten the answer. The Whitley interior was natural metal, except the cockpit area visible through the canopy where it was painted the standard RAF interior green. But I have forgotten about the interior of the turrets; natural metal or green? Also Airfix says that the inside of the gear doors should be black, whereas the u/c bays and the u/c legs are silver/natural metal. I would have expected the inside of the doors to be finished the same way as the u/c bays. Can anyone shed some light on this? TIA
-
 Eduard Photo Etch detail sets for Airfix Whitley GR Mk. VII 1:72 Eduard There's no doubt about it, fans of early WWII types such as the Defiant, Blenheim and Whitley have been tremendously well served by Airfix in recent years. Important and interesting types that were previously the preserve of tired old kits from the 1960s or limited run kits from Eastern or Central Europe are now staple fayre in model shops all over the place. Naturally Eduard are now doing their bit to help us reach modelling nirvana by releasing a slew of aftermarket parts – on this occasion for the recent Whitley GR Mk. VII kit. Whitley GR Mk. VII 1:72 Eduard Unusually for a model of this size, Eduard have chosen not to issue separate sets for the interior and exterior, combining them instead into a single set. The first fret contains the mainly pre-painted interior details and, as you would expect, there is a natural focus on the cockpit area. Included on this fret is a pre-painted multi-layered instrument panel, harnesses for the crew seats, details for the throttle controls, control column and cockpit sidewalls. On the second fret are parts for detailing the tail turret, the engine nacelles and the landing gear legs. The bombs also benefit from photo etched fuses and there are replacement bomb shackles for the bomb bay. Whitley GR Mk. VII Landing Flaps 1:72 Eduard This set comprises a single, fairly large fret which contains everything needed to deck the kit out with a set of detailed landing flaps. In typical Eduard style, the part count has been kept quite low by making use of folds rather than individual parts. The instructions don't show these folds in great detail though, so you'll need to pay close attention. Although this set appears to be quite complex, the flaps should be quite straightforward to assemble provided the right tools are used. Note that using this set will require some moulded detail to be scraped away. You'll also need to stock up on thin plastic rod in order to complete them properly. Whitley GR Mk. VII Radar 1:72 Eduard This set is a direct replacement for the antennas provided in the kit. Naturally all of the benefits of photo etched parts are present and correct, including fine, sharp detail and greater resistance to accidental damage. The usual drawbacks also apply, however, as all of the parts need to be folded in order to create a realistic scale thickness. These will be fiddly to use, but well worth the extra effort. Whitley GR Mk. VII Masks 1:72 Eduard Most of us are familiar with Eduard's pre-cut masks, so I won't say too much about them here. You get everything you need to mask all of the transparent parts as well as the main landing gear wheels. While these masks may seem extravagant for a smaller kit, they are much less so for a large, extensively glazed aircraft kit like the Whitley. Conclusion Airfix's Whitley looks to be a very good kit indeed (I'm certainly going to savour building mine) and in typical Eduard style, these sets will add detail where it counts. Some of the parts may be a little intimidating for those not used to working with photo etched parts, but once you get the hang of folding them up, you'll be fine. Recommended. Review sample courtesy of
 -
Having joined the Bomber Command SIG with my Wellington 1C at Telford (and having built a Lanc and a Halibag) I've decided to do a Whitley as a break to all the Hercules rescribing for my Albert builds. I picked the new Airfix kit up cheap at the Norwich Air Museum in the summer when we took the Cadets there from Summer Camp at RAF Marham (and where they were suitably impressed by Ma'am's knowledge of the Nimrod ). The aim is to do it OOB but with the addition of some Eduard PE (the 'Zoom' set). My plan is to do it as a 77 Sqn machine based at RAF Driffield - Bomber Command Whitleys seem to have all been with 4 Group in Yorkshire and Driffield was the first turning point on my first medium level x-country in the JP5A at BFTS. A has been noted on this forum it's a nice kit that fits together well but is made up of some odd sub-assemblys which then slot together. At first sight this method appears a tad strange but presents its logic as the build goes on. Anyway, this is where I'm up to:
-
 Now that Telford is behind us, I've taken the first opportunity of daylight access since finishing the builds HERE. Whitley T4134 GE-T: This aircraft operated with 58Sqn in 1940 operating from Linton-on-Ouse. On the 10th September, it took off on a mission to Bremen, but was brought down by flak crash landing on Schonhagen beach near Lubeck in Germany. As you can see from the photo's above, the aircraft fortunately came down in one piece and the crew survived becoming POW's. I used the Xtradecal sheet as the basis for the scheme, however it only supplied two tail flashes. As the aircraft had the flashes on both sides of both tails, generic Xtradecals were used to accurately portray the aircraft. The 'T' code was cut from other letters on the sheet. Having built the Frog kit a few years ago with much scratch building, this was a pleasant build. Despite looking somewhat over engineered, it builds up beautifully and I will be building more, with both the maritime and civvy version on the cards. In hindsight, the Tamiya XF-81 dark green looks too light. I've got two bottles whit clearly different shades in them, however there is a possibility that I have added some white previously.....doh! Hampden P1355 OL-W (John Hannah VC): Operating from Scampton in 1940, this aircraft took off on the 15th September successfully attacking enemy barges at the port Antwerp in Belgium. On the return leg, the aircraft received a direct hit from anti-aircraft fire in the rear fuselage igniting a fire, the navigator Sgt. Hayhurst and rear gunner Sgt James bailing and becoming POW's out as a result. As well as the fire melting the aircraft structure, ammunition begun to explode, but Hannah reached for two fire extinguishers and proceeded to bring the fire under control, allowing the pilot P/O Connor to bring the aircraft back safely. Hannah was badly burned in the fire, which is sadly believed to of brought on tuberculosis a year later. Sadly, he passed away from the illness in 1947, his headstone inscribed "Courageous Duty Done in Love, He Serves His Pilot Now Above" The Valom kit is generally pleasant, although the lack of location pins and vague installation of the undercarriage need some care and attention to handle. The main challenge is the transparencies, so the new release with improve transparencies should be a good investment. The clear parts were cobbled together from a mix of Airfix, Valom and Falcon replacements for the airfix kit and really slowed the build down, as much due to motivation as fiddlyness. Thanks for looking Neil
- 46 replies
-
- 82
-
-
With my builds for the KUTA GB complete, if not photographed, and with my Dornier 17z build, an hang over from the BoB GB, also almost complete, thoughts turn to starting on a virgin kit for this GB. I had originally intended on going with Airfix's 1/72 Lightning F6, however as there are already a couple of Lightnings being built, I thought I would follow a slightly less well trodden path and do the Whitley sitting in my stash. Having just built a couple of Blenheims in dark earth and dark green, I fancied something a little different for the Whitley, and always having a soft spot for Coastal Command camo schemes have decided to do this build as a MkV from 51 Squadron in 1942. So here is the obligatory set of pics of the box and contents.... ....all the clear parts look exactly that! And here's the kit decals alongside the pack I'm going to be using, as well as the very necessary Eduard masking set. I also picked up the Warpaint monograph on the Whitley, as it's a type I little about. All the parts have all been washed ready for construction to commence once the Dornier is complete. Karl
- 76 replies
-
- 9
-
-
- Whitley
- Coastal command
- (and 1 more)
-
There I was happily sticking plastic together and thinking this is one of the best Airfix kits I have built yet (all those clever constructional wheezes that didn't quite come off on the Blenheims work brilliantly on the Whitley) and then... after i have assembled the engine nacelles (Stages 33 and 34) and waved a bit of wet and dry at the join lines, I discover that Airfix will have you insert the radiators through the radiator intakes after the nacelles are assembled (Stages 35 and 36). I am not saying this is impossible but it will certainly not be a picnic, trying to twiddle carefully painted parts through narrow gaps with tweezers, turning them through 90 degrees and then securing them with glue. There is a bulkhead at the rear of the engine bay so you cannot poke them in from behind. I have not heard this issue raised before, for which I see three explanations: a. no else has actually tried building an Airfix Whitley yet, no doubt not having progressed beyond plastic fondling before being seduced by the next temptations in the release schedule. b. BMers are all real men/women who would not be seen dead reading instructions. They therefore grasped instantly that the radiators are obviously best cemented in place before the nacelle halves are joined. c. it really isn't as difficult (impossible?) as I make out. Please tell me it is c. Even if it isn't, you may well wish to consider cementing your Whitley radiators in place before joining the nacelle halves.
-
 Hi, everybody! This is my next model.
 -
Hi! Here's my Whitley. It's painted using Tamiya Nato Black, and various other dark greys/black for shading. A lovely kit I recommend Best regards Rune Haugen
- 33 replies
-
- 50
-
-
Firstly apologies to anyone who came here hoping to see the new Airfix Whitley, this is a totally different kettle of fish! Not for me the accurate and finely detailed Airfix version but the horrible, how much flash can you get on a sprue, Frogspawn version that I bought on ebay about a week before the Airfix announcement. So curses on Airfix and their stash spoiling ways I built it anyway and all things considered it doesn't look too bad. There have been a few other Frog Whitley builds which taught me a lot and some of the tricks and tips have been used along with the Warpaint book. So a few things tackled include; -the lozenge windows are not cut out in the kit, not a fun task. -all transparent bits are Falcon apart from the front triangular window which I crushed so had to use the kit version. The front turret has also been crash moulded so it can be separated from the housing. -turret interiors have been scratch built -cockpit interior is photo etch -side aerials are stretched sprue -decals are Print Scene I could go on but to be honest I'm glad to draw a line under this one and move onto the next. It has been hard work and I nearly consigned it to the bin a number of times but it's finished and whilst not my proudest moment looks oK. All I need now is for Airfix to ruin my planned Encore Beaufort
- 21 replies
-
- 37
-
-
- Whitley
- Armstrong Whitworth
- (and 2 more)
-
 All, Just noticed that the Airfix website is now displaying the paint guides for the following new tools - (some with new boxart as well) AW Whitley - http://www.airfix.com/uk-en/shop/new-for-2015/armstrong-whitworth-whitley-mk-v.html Beaufighter - http://www.airfix.com/uk-en/shop/new-for-2015/bristol-beaufighter-mk-x.html Heinkel He111 - http://www.airfix.com/uk-en/shop/new-for-2015/heinkel-he-iii-p2.html F4F Wildcat - http://www.airfix.com/uk-en/shop/new-for-2015/grumman-wildcat-f4f-4.html Battle of Britain Set - http://www.airfix.com/uk-en/shop/new-for-2015/battle-of-britain-75th-anniversary-gift-set.html This should start off a few new discussions one would think!! Cheers.. Dave.
 -
 Hi All! May I present.... Armstrong Whitworth Whitley P4955 (ZA-G) of 10 Sqn RAF. This represents the aircraft flown by my Grandfather's best friend during the early stages of WW2. An air gunner, his aircraft was damaged during a raid on Kiel in June 1940 and force landed in Holland on the way home. He was captured and spent the rest of the war in a POW camp. The kit is a very old Frog kit which, in spite of some poor injection moulding, went together quite well (although the engines required a LOT of filler to join them to the wings. Hey ho, c'est la vie). Paints were my usual mix of Xtracolor and Humbrol. Decals were Xtradecal. Thanks for looking! ~M~
 -
Not sure where the other thread with the discussion on the bomb aimers window glazing has gone, the link I had no longer works? Having just caught up on my e-mail, I had one from Airfix in reply to a message sent about the thread and possible discrepancy in the window framing. They are interested in viewing and reviewing any data and information anyone has about this, so if interested parties could send the info and pictures, plans, sources etc to the following address Airfix will make sure the development team have a look at it; [email protected] Best Rich.
-
If so, what's it like? I've seen the sprue shots, but how does it build and is it considered "accurate"? regards, Martin
-
T4284 joined 58 Sqn in November 1940 but its front line operational time was quite short. It suffered a landing accident on its return from a mission on the 23rd December of that year in poor visibility when it undershot on approach to Linton-On Ouse. Following repairs, it was moved to 10 OTU based at Abingdon and given the codes ZG-E as it is represented here. From there, it moved to 19 OTU based at Kinloss where it seen it's flying time out before becoming a ground instructional airframe. The only picture I've managed to find of it is this one (courtesy of www.luchtoorlog.be): I decided to build the Frog kit as oppose to the Fly one as neither have particularly good clear parts. As my skills making new transparancies is quite limited, the Falcon set for the Frog kit swung it for me. I've tried to make most of the corrections known, although I didn't touch the wing root trailing edges. Big thanks to John Aero for the replacement props and General Melchie (Andy) for the Revell Lancaster rear turret which was fettled to look like an FN4 found on the Whitley. Really enjoyed the build and whilst not perfect, I'm happy with what I've achieved. If you've not seen the build, you can see it HERE if you have the patience ! The decals are part of the Xtradecal set which whilst they went on well, the colours are somewhat suspect. The MSG codes were actually light grey so they had to be touched up. The white in the fuselage roundel should probably be darker too, I might tackle this with a black pastel brushing. Enough waffling, here's the pics ! Thanks for looking. Neil
- 59 replies
-
- 26
-
-
After a period of doing ...well not much in terms of modelling, I've been motivated by all the Dambuster media and a day spent under Hendons Lanc with the Bomber Command SIG guys to start on Frogs ancient offering - the Whitley. Whilst the Fly kit is out, the lack of decent transparancies plus a sadistic streak led me this way ! As I get into it, I'm beginning to realise that it's gonna take a while because everything needs re-doing on it. I built one many years ago which still resides on the shelf, but it isn't good enough to sit with her Bomber Command sisters on the SIG displays. Whilst I've got some decals in various after market sets, I haven't chosen a scheme yet, so open to some ideas and inspiration from Britmodeller Here's the plan: The transparencies will be replaced with Falcon ones Rear end widened as per BM discussions. If I remember this is also mentioned in the Falcon instructions because I did it in the old one too. Smudge2's resin engine replacements - may just use the front section, to be decided Airwaves etch plus some scratch building Complete rescribe and some method of improving the fabric effect on the wings (got an idea for this) Scratch build gear bays to replace the horrid Frog set up. Some head scratching here, but already started so no going back ! Cut out side windows and door Possibly open bomb bays up. As usual, I'll make loads of mistakes and correct them as people notice them and point them out, but hopefully it will turn into something quite pleasing after a Britmodeller team effort! Here's the start. I've already done some scratch building in the gear bays. Bit of artistic license here, but little will be seen. The wings were quite warped, but were bullied straight. Next step to scribe panel lines in and build the fabric effect up. Cheers, Neil