Search the Community
Showing results for tags 'vacform'.
-
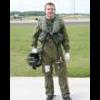
Morning all! It's only taken approximately three years to get to this stage, but my Dynavector Wyvern is finally finished. This was my first venture into the world of Vacform kits, and Dynavector did not disappoint. I chose this as by all accounts it is one of the best kits to use as an introduction to vac kits. The fit of the parts is absolutely superb, and once the necessary surface prep was done in order to get parts to match up, this went together with far less hassle than a lot of the injection moulded kits I've built. My build is by no means perfect, in terms of improvements I could've removed the aircraft lights and replaced them with appropriately coloured clear plastic. I deliberately chose not to overly detail the undercarriage bays as this build was more about testing my ability to build a vacform not my ability to superdetail. I've also missed off the windscreen wiper as my attempt to scratchbuild one looked a bit too 'agricultural' for my liking, so some room for improvement there certainly. Lastly the decals from Berna were a bit of a nightmare, many of them are grossly oversized and they refused to conform to the model without masses of Mr Hobby Setter and Softer. In terms of lessons learned from the build, first and foremost is that Vacform kits are not hard! Picking a good brand such as Dynavector or Aeroclub helps no end, but they are no more difficult than many injection kits (stand fast Tamiya shake and bake kits...) so really ought to hold no fear for anyone! After all if I can manage it, I'm certain anyone can! As always, constructive criticism is more than welcome, without it I'll never improve. So without too much further ado... Kit: Dynavector 1/48 Westland Wyvern Decals: Berna Decals - Wyverns Extras: Compass Rose Resin - Cockpit Tub + Airscale Instrument Decals, CMK Wyvern wheels & Pavla Martin Baker Mk.2 Seat Paints: Xtracolor EDSG & Sky, Humbrol Roundel Red and various shades of Alclad (undercarriage and undercarriage bays) To all those that looked in on the build (as glacial as it was in terms of progress) thank you for all the words of encouragement! Now it's just a case of deciding what to tackle next... Scimitar? Swift? Thanks for looking in folks, Regards, Nik
- 29 replies
-
- 34
-

-
- Vacform
- Dynavector
- (and 5 more)
-
 Evening all! Inspired by the awesome work on here by Tom Probert on his magnificent Shackleton and then the Superfortress and Rich's B-17 I thought that I ought to take the plunge and have a go at the dark art that is a vacform kit. Armed with a bit of knowledge gleaned from t'interweb I decided to start on something fairly straight forward and having heard Dynavector are up there among the Rolls Royce of vacforms and the Wyvern is one of the easier of their kits to build, when one came up cheap on eBay it was a golden opportunity. By the way, apologies for the photos, they were taken on my iPad, so may not be the greatest. A rather pleasant little surprise came in the form of a resin cockpit tub, which looks to me like it may be part of the Compass Rose resin set for this kit (I could be completely wrong of course, but I've not been able to find any other details of resin sets for this kit). Sadly it was just the tub itself and not the full set, but beggars can't be choosers I suppose. No shots of the cutting process, but following John Aero's vacform guide which is on the site somewhere, the parts were drawn around with a felt pen, scored with a new scalpel and snapped from the backing plastic. Definitely one of the scariest parts of vacform building, but not too bad once you've practised on a few corners of scrap backing sheet. A little bit of Tamiya NATO Black for the cockpit and some drybrushing really brought the detail in the resin tub out quite nicely. Because I only had the tub itself from the resin set, the IP is the Dynavector metal part with some Airscale instrument decals from the RAF WWII and Early Allied Jets sheets, just to give it a little more interest. The metal seat supplied with the kit is pretty crude... Since my scratchbuilding skills are nowhere near on a par with Tom or Rich I took the easy option and grabbed an ejector seat from Pavla to replace the kit part. Once all the appropriate prep work for the parts had been done (LOTS of sanding!) construction of the main fuselage and wings went together really quite quickly after a fair bit of dry-fitting to make sure I'd sanded to the correct line and thinned the trailing edges of the wings enough (which still look a little clunky, but it's my first attempt at a vacform kit so don't be too harsh on me! :-) ) The plastic itself is quite soft, so it responds well to Plastic Weld, which has really helped in avoiding seam lines between the fuselage halves and other parts. The detail in the undercarriage bays is a little soft so I added a couple of strips of evergreen to sharpen it up a little bit. Thankfully the inner halves of the u/c doors remain shut, so I didn't have to do too much, just a little bit of wire to add some visual interest and the two ribs. I decided not to go too nuts with adding wires and detail to the u/c bays, as this was mainly to try out the techniques involved in constructing the kit itself and not an exercise in super detailing. Here it is, taped together just to make sure everything fits. The join underneath the fuselage between the wings and the fuselage itself required a bit of fettling, I took too much plastic off of the fuselage halves so had to add some off-cuts into the gap I'd created and smother it in glue in an attempt to get it even. I'm currently working on the tailplane (both have been cut-out and glued together and push fitted onto the spar supplied with the kit to get the angle right. They just need some shaping where they meet the fuselage and then attached and filled and then I think the back of this will have been broken. Well there it is, nowhere near up to the standards seen elsewhere here, but I'm quite pleased with it so far, and hopefully posting a build on here will work as a bit of motivation to actually keep making progress on it. Any tips or constructive criticism would be greatly appreciated though guys, these are unknown waters for me and while I'm enjoying it very much, I'm eager to learn from those of you who know better! Cheers! Nik
- 40 replies
-
- 1
-
-
- Dynavector
- Vacform
- (and 2 more)
-
 Hi guys, here's my latest creation A bit more challenging than the Dynavector's Scimitar, but i've enjoyed every moment building this little beauty..nevertheless i hope this is the last vacform of my life BR from Prague Andrew
- 45 replies
-
- 32
-
-
- Supermarine
- Swift
- (and 2 more)
-
Hi everyone! Just had one of those rare (for me) modelling moments where everything goes to plan with no mistakes. I'm still learning the ropes when it comes to more advanced modelling such as making vacform kits. Anyway, I have just completed my first no mistakes complete removal of a vacform model from its backing sheet. Small and insignificant as modelling milestones go, but a happy little win for me all the same, so I hope you don't mind me sharing this with you fine people! Cheers, and happy modelling! Viv
- 1 reply
-
- 2
-
-
- Vacform
- Hawker Hunter
- (and 1 more)
-
I find it difficult to build only one model at a time so continuing the trend of building a vacform alongside a resin kit, I'm building this one; It's the Hallam-vac Auster AOP9 produced in the late 80's by the sorely missed Ron Firth. Not many parts to this and I'll be finishing it as XP277 of the Royal Aircraft Establishment Radio Flight using my own decals. The kit decals look ok despite the backing paper having yellowed and the canopies look good - see my Prentice build for a recent unpleasant experience in that area! Steve
- 22 replies
-
- 4
-
-
- Hallam vac
- 1/72
- (and 1 more)
-
Built as part of the Non-injected Moulded Group Build but I thought it would reach a wider audience posted here as well. Just one photo here as the rest are in the Group Build Gallery The work in progress can be found here but please have a look at the other builds as well as there is a lot of good work going on and plenty of new skills being learnt/shared. Steve
-
Cutting out complete, most rubbing down complete, new bottle of liquid poly, researching pictures like mad (and I must be!). Let battle commence on Saturday
- 24 replies
-
- 6
-
-
- vacform
- Hallam Vac
- (and 1 more)
-
Two were built and the first one flew in December 1948. Rather similar to the De Havilland Swallow they were designed to investigate transonic flight. Both survived, the first is at the Air Force Academy in Colorado Springs and the second is in storage at the USAF Museum. Not a bad little kit. I resisted the urge to add any extras. It really should have had boundary layer splitters in the intake and perhaps more could have been done with the wheel wells and gear doors. Overall it seems about the right size and shape. I'm not too convinced about the canopy size and shape and the nose profile but it looks OK. Stars and bars came from a search through the stash to find some I would not need. USAF and 6676 were home-made. Colour? An interesting question. When with NACA it was white but I wanted to represent the first prototype at first flight stage. Airmodel reckoned it was orange with black stripes but I could find nothing to justify this. Someone on ARC reckoned it was light gray. Looking at pictures gave me the impression that there was a difference in colour between the white of the insignia and the colour of the fuselage so I went with the light gray and used Xtracolor ADC grey. Maybe I should have used a lighter grey for the paint job but it will do until someone comes up with a definitive answer. Build details here - non-injected group build http://www.britmodeller.com/forums/index.php?/topic/234985829-northrop-x-4-airmodel-172/ It was quite a tiny thing - seen here with a Meteor 4 for comparison As usual any comments or extra information welcome John
- 8 replies
-
- 10
-
-
- X-4
- early jets
- (and 2 more)
-
This should be my third, and final, entry for the group build. Being a glutton for punishment I have decided to attempt a vacform kit and will attempt to build the Fairey Gannet AEW Mk.3 by Welsh Models. Mike
-
Had this laying around for a number of years now, been wanting to make it for a while too but it is really intimidating. I haven't done many vacforms and never one this chunky, but I am now willing to do or die. So the kit is a Historic Wings 1:72 vacform H S Nimrod MR1/MR2 (P) The Plastic on this quite thick and the detail in places is smudged . . . so a bit of work will be required to correct these areas. Fortunately some of the really bad areas I don't need to worry about as the kit comes with some handy white metal replacements. The only other problem is the canopy it is blurry and the surface area is filled with small pock marks. Don't know yet what I will do about that, maybe there is an aftermarket canopy I could purchase, failing that I could cast my own . . will see.
-
As promised in this thread here is a rapid review of the Airmodel vacuformed kit. The contents comes in a sealed bag, as usual with Airmodel vacs: instructions, two sheets of 1mm thick vacuformed plastic some epoxi resin detail parts. No decals are included. I must add that whenever I received kits acquired in Airmodel site they arrived well packed in card boxes protected inside by foam or newspaper. The instructions consists on a folded A3 sheet with a resumed history of the plane (in German and English), some black and white profiles and an exploded view of the parts. The fuselage has molded the Lorraine Dietrich engine but extra parts are provided for an Hispano-Suiza 12H (or 12L?). I've got two kits and one has the main parts already sanded (well, almost. I tend to do the final touches on the wings when I begin the construction). You may see that the cylinder covers are crushed, but that is my fault as they were good when I acquired the kit. Nothing that a little CA or milliput from the inside and a some filler in the outside doesn't cure. The detail is good, with a realistic representation of the canvas over the structure. The parts - fuselage and wing halfs - fits very well, although the wings requires very cautious sanding on the trailing edges, as usual with vacforms. The resin parts are very well molded, although they could have some more detail, mainly the wheels that lack the very characteristic spokes of the Br. XIX. Also the radiator must be detailed with a mesh, as the faces are plain. I didn't investigated the accuracy yet; I only measured span - 204 mm against the real 205 - and lengtht (fuselage + spinner) - 131 mm vs 131.1. So at least dimensionally it is good enough for me. In conclusion, and in my opinion, the kit is well worth the 12.50 euro it costs. It needs some preparation work as all the vacs do, and you must scratch build some parts, mainly in the cockpit, but the required work is within the reach for most modelers and result will be rewarding. Although the Br. XIX was used by many countries during the thirties, only a few decal sheets are available - Hannants lists two sheets by Blue Rider, one for Bolivian aircraft during the Gran Chaco War, and another for a Manchukuo machine. Probably others are available, and if you know of any one please please refer it here. The main reference I know is an extensive article in Air Enthusiast Quarterly number seven. Again, please share here some other references you find important. Carlos links: Airmodel site Bolivian decals Manchukuo decals
- 6 replies
-
- 2
-
-
- Airmodel
- Breguet XIX
- (and 2 more)
-
 Yes I know it’s a bit early to start planning but....... This GB is non-lethal and won’t make you see pink dancing elephants ......well maybe! This GB is for all those people who like to build models that are not primarily injected moulded! There were a lot of disappointed people from the resin and VacForm groups that were very disappointed either or both of these GB’s didn’t get up. This time it’s going to be different!! This build will be open to ALL forms of alternate modelling; resin, VacForm, Wood, even paper if you want. Let’s just see what’s out there and show it to the rest of the world. Actually any form of material can and will be allowed except injection moulding (minor parts will be allowed). Let’s all get together and show the rest of the modelling world (probably +90%) that there is an alternative to the standard, and yes amazing models can be produced from these other mediums. So start digging out that really weird model you’ve got hiding in the attic, any subject matter you like and start planning for a truly amazing and different GB. I don't know what the plans are for deciding the 2015 GB's but such a big as this could be we may as well start the wheels in motion. ok this is the lastest upto date list....welcome to everyone so far, we've got the 30 minimum....now if we can just get the votes in the end!! 1, trickyrich - host 2, Jörgen Stendahl 3, tomprobet - co-host Vacform 4, jb65rams 5, Pin - co-host Resin 6, Mish 7, Envo Matrix 8, Sleeper Service 9, Andy C 10, TrojanThunder 11, Jessica 12, Black Knight 13, Procopius 14, Shar2 15, Kev67 16, Will Vale 17, Sgt. Squarehead 18, Arniec 19, chockhead 20, CliffB 21, English Electric 22, Mottlemaster 23, Moggy 24, Radleigh 25, hgbn 26, AndrewE 27, Graham77 28, Ray S 29, Jockney 30, mackem01 31. kwaterous 32, stevehed 33, johnd 34, Caerbannog 35, Giorgio N 36, Jinxman 37, Lawnguylander 38, Jherek 39, ADRoberts 40, Tomjw 41, badger 42, atvd1020 43, whitestar12chris 44, Murdo 45, Ali62 46, Ray S 47, Troy Smith 48,
 -
Hi guys, Another vacform on the forum... this time in the shape of a IL-76 in 1/72. I'm not to sure on what it's going to look like when done, the fuselage looks 'OK' but the tail plane is going to need some work as to me it don't look right. I'm not one for rivet counting but I would like it to resemble a IL-76/78 at least. I'm actually building this as a IL-82 / IL-76VKP (See here for those that don't know!) I've cut out and sanded all the fuselage, made most of the bulkheads so the fuselage isn't far off going together. Once the fuselage is together I plan on cutting the front off to do all the interior of the cockpit etc! Here's the kit for the time being. (photos taken on a set of scales that are 4ft square to give a rough size) Sanger - IL-78 'Midas' - 1/72nd scale vacform kit. by Rainbow 1984, on Flickr Sanger - IL-78 'Midas' - 1/72nd scale vacform kit. by Rainbow 1984, on Flickr Sanger - IL-78 'Midas' - 1/72nd scale vacform kit. by Rainbow 1984, on Flickr Update soon
-
Completed this Sanger Bristol Bombay a few Months ag and got around to some photos this weekend. It's my first vacform and last for a while until my stress levels come down. Not sure of the percentage of filler compared to plastic but it's quite high! The model represents a Bombay in use in 1942 as an Air Ambulance in North Africa and Sicily, based on photographic evidence and research, I am grateful to all those on the Key Publishing Historic Aircraft Forum that contributed to my plea for information. Like all vacforms the kit is basic so most of the details are sratchbuilt additions, as is the interior and all the landing gear, struts etc. All comments welcome.
- 30 replies
-
- 27
-
-
 Finished this one yesterday, the rarely modelled HP Herald. It is the Welsh Models Vacform kit with resin engines and white metal undercarriage. I used my usual method of a keel in the fuselage halves rather than transverse bulkheads, it is so much easier and stronger too. Ther are a few things to watch for if you are building this kit. 1) The resin engines attach to a 'plinth' moulded on the underside of each wing. I attached mine nice and precisely, but something didn't look right when I dry fitted it on the fuselage, the starboard engine was off the centreline with the front being further from the fuselage than it should. Finally I traced it to the 'plinth' on the underside of the starboard wing. On the vacform sheet measure the front of the plinth to the wing root. Then the rear of it. The rear is just over a mil closer the root, kicking the engine out of line. No problem now that you know about it, you can correct it when gluing it on. I tried removing my resin engine to correct it, but the vac wing started to split, so I have to live with it. 2) The Upper wing has constant dihedral, resulting in a 'V' shape in the above fuselage section. This is not right, it should be a flat airfoil section. Simple to fix with milliput and sanding. 3) The undercarraige was too long. Whan I fitted mine it looked awfully 'stilty' standing way too high. I trimmed the legs down until I was happy with the sit, taking probably 3 mil off each main leg. 4) The white metal props are broad blade, square tipped, I filed mine down to thinner round tipped ones used on Heralds. The decals come in the kit and are laser printed by Twosix decals, and go on very nicely. My only query is with the painting instructions which show pale grey tailplanes. The pictures I can find all show black or dark blue. I went for the dark blue to match the fin & rudder. The starboard (left hand in this picture) engine is a touch out of line, as explained above. You can correct yours if you build one! And finally my usual 'two ship' picture, this one with is more succesful rival, the Fokker F-27 which outsold it by more than 10 to 1. Thanks for looking, John
 -
For the first GB of the New Year, I shall be doing this (but converted into a wing-less, Paraguayan 'Penguin' taxi trainer). Cheers Cliff
-
Hi All I have been going through the stash looking for inspiration for this GB, and like most of us fancied doing something a little different, which is after all why many of us are prompted to join these GB's in the first place. Having rediscovered the Henley still in the jiffy envelope I bought it in, it ticked all the boxes. As you can see the parts have been roughly removed from the backing sheet, so lots of prep to be done, sanding to the wee small hours etc. This is my first Vacform kit, despite having quite a few I have never previously been brave enough to build one. So all help and support through this build will be gratefully received. http://i783.photobucket.com/albums/yy113/Jockney007/image_zps7ac71007.jpg http://i783.photobucket.com/albums/yy113/Jockney007/image_zpsc4a4e54b.jpg http://i783.photobucket.com/albums/yy113/Jockney007/image_zps4579ae2d.jpg http://i783.photobucket.com/albums/yy113/Jockney007/image_zps4579ae2d.jpg And with any luck it should come out looking similar to this http://i783.photobucket.com/albums/yy113/Jockney007/image_zpsa3aa84b1.jpg
-
Hey everyone, I'm jumping on the vacform wagon I bought this kit off Tigger/John Wilkes at SMW and have made a start. Seeing as all my modelling stuff is still tucked away from moving I'm just going to stay on this as much as possible. It's a great size and there is loads to do, so I shouldn't get bored! This is only my second vac kit, my first is still a WIP but I was dying to get another after seeing how much fun they are! Here's some photos.. 1/32nd scale Lockheed Hudson by Rainbow 1984, on Flickr 1/32nd scale Lockheed Hudson by Rainbow 1984, on Flickr 1/32nd scale Lockheed Hudson by Rainbow 1984, on Flickr 1/32nd scale Lockheed Hudson by Rainbow 1984, on Flickr and here she is, fuselage cut out and sanded, wings just cut out and taped together so I can see the size. Roughly 2ft wide! (Since the photo was taken, nearly all bulkheads made and the cockpit area cut out. Photos soon!) 'Tigger Models' 1/32nd vacform Lockheed Hudson by Rainbow 1984, on Flickr
-
The Dornier Do 26 was a result from a 1937 order from Deutsche Lufthansa for three long range flying boats, capable of operating non-stop in the Lisbon-New York route. The first prototype, D-AGNT Seeadler (Sea Eagle), made its first flight on 21 May, 1938, and the second one, D-AWDS Seefalke (Sea Falcon) was completed in the beginning of 1939. These were the only boats completed before the war, so the third prototype D-ASRA Seemöwe (Seagull) went to Luftwaffe together with 3 more aircraft. Both Seeadler and Seefalke never went into service in the North Atlantic route as planned, instead they made 18 South Atlantic crossings transporting mail before the war put an end to the service. You may look for more on the Do 26 in John Stroud's "European Transport Aircraft since 1910", 1966 Putnam, or in the article from the Wings Of Peace series by the same John Stroud published in Aeroplane Monthly, June 1988. As far as I know there are two vacform kits of the Do 26 1n 1/72 - Airmodel (OOP) and Combat Models (listed in their page). I suspect that they are the same, but I'm not sure. There is also the injected kit by Mach 2, and Amodel promises a new kit for later this year. I had the Airmodel kit on my stash for many years and recently I began cutting and sanding the parts, apart from a timid start. Here are the parts, together with the beautiful plans (from Flugsport magazine) printed in the back of the instructions: On thing I always do with vacforms - and also with some short run injected kits, with no locating pins - is to add some tabs, as it makes so much easier the build: It is also important to glue stretched sprue where you must have a sharp edge. After adding some putty, a gentle sanding with a sanding block gives you the knife edge difficult to obtain by the molding process. This is the basic cockpit interior. I intend to detail it much more, as I will open the roof and the front hatch. I'm glad it fits well! The center section parts together with a spar are also glued. And that's all for now. I hope to show some progress later this week. Carlos
-
 I'd like to have go at constructing this 1:144 scale vacform Blackburn Buccaneer S.2 I haven't decided on the markings for it yet but it could possibly be an aircraft from HMS Eagle or HMS Ark Royal 1970's era. cheers Mike
 -
Twenty hours or so after I filled the base of my vacformed Dalek with casting resin I found a small area where the plastic had softened to something a bit like stiff chewing gum: It more or less elastically recovers: I don't know the resin chemistry but it is one of those clear embedding types, I got it from Hobby Craft and filled it with some powdered filler and black weathering powder. It only appears to have affected a small area about 1 by 2cm. Has anyone seen anything like this? Will the plastic reharden or is there anything I can proactively do about it like putting it in a low oven, exposing to UV light, nuclear radiation, etc.?
-
The Avro 748 was one of those aircraft designed in the 1950's as a DC-3 replacement. The first one flew in June 1960 and it went on to great success, finally selling 380 units with a further 89 built in India as the HAL 748. Nothing like the DC-3's production run, but very respesctable by post war standards. The first 18 were series 1 aircraft, all subsequent ones were series 2's which had a higher take off weight. By the time of the series 2 Avro had been absobed into the Hawker Siddely group so it became known as the HS 748. Unofficially it became know as a 'Budgie' because it's such a nice looking little aeroplane! The kit is the Welsh Models Vacform in 1:144 scale which comes with a set of laser printed decals for Dan Air produced by Two Six. It wasn't the easiest of builds as the wing comes in 6 parts with seperate centre section and outer panels, all in upper and lower halves. Cutting and sanding it all out and getting the dihedral lined up took quite some care and checking, so this is probably not the best one for a beginner to tackle. I added scratchbuilt wheel bays, and cut out the cockpit glazing, using Microscale Krystal Kleer to glaze the panels once it was all painted. I made my own props from round section sprue (spinners) and plasticard (blades). The decals went on beautifully. Being laser printed they were on a solid film and needed cutting out individually. I put the fin ones on first followed by the fuselage cheat lines. I thought that the port forward door was too close to the cockpit, so cut it off the cheatline and removed about 3mm of cheatline from between where the door was and the first window. I then put the door on, and placed the 3mm section in front of the door, followed by the bit that curves down to the nose. Its not a very big model( the side views are almost actual size), but makes a nice addition to my collection of twin turboprop airliners. Later the 748 was developed into the ATP, which became known as the 'Super Budgie'. Welsh Models also do one of these, and they make a nice pairing; Thanks for looking, John
-
This is the 1/72 Rareplane vacform OOP kit of the Gates Learjet C21-A The model is painted using Tamiya gloss white, black and silver and finished with Johnsons Klear. Although these aircraft were maintained to a high standard and very clean I used some artistic license and added minimal panel wash to the top and bottom surface of the wings and on the engine just to break up the white of the aircraft. Draw decals were used, although I found these were to big such as the stars and bars and the USAF insignia so instead raided my spares and found something of suitable size. All of the interior is scratch built including the undercarriage and entrance steps Crystal clear was used for the windows and navigation lights This particular aircraft is based at Scott Air Force Base USA Anyway I hope you like it Work in progress link http://www.britmodeller.com/forums/index.php?/topic/234938341-172-rareplanes-vacform-gates-learjet-c21-a-finished/
- 30 replies
-
- 7
-
-
- rareplane
- gates learjet c21-a
- (and 4 more)
-
 Having a small rest from building the Vickers Vanguard, I decided I needed something rather quicker to build so whipped this out of my stash which I have had for a few years which I bought on Ebay, the only problem is it did not come with a clear cockpit, so may have to resort in making a resin mould and casting a clear canopy, anyway I am going to build this kit with full interior, cabin door open, wing and tail flaps cut out etc, I am going to use TwoSix decals for this as well.
 -
This is a forum where you can share your tips tricks and hints for building vacform models, please feel free to share your ideas.