Search the Community
Showing results for tags 'typhoon'.
-
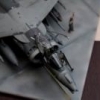
 Last summer was the first time the "Tag der Bundeswehr" (German Army Day) was celebrated. The Luftwaffe invited the public to Manching AFB, near the Eurofighter Manufacturing Line from Cassidian. I took the opportunity and made a few pictures .. More pictures can be found here: http://petesmancave.blogspot.de/ Cheers Pete
- 5 replies
-
- 3
-

-
- Eurofighter
- Phantom
- (and 5 more)
-
Hi! I'm going to order the single seater 1/32 Eurofighter Typhoon but it's going to be displayed In Flight. Any 1/32 seated pilot ideas? I can't find one anywhere to suit this aircraft. Thanks!
-
This kit by Italeri is sublime. After seeing many great builds of the Airfix 1;24th scale I wanted to add a 48th version to my collection. The detail is pretty good, but I wanted to add that littler bit more. Eduard provided a superb PE set for the main grille, cockpit and rockets which in my opinion puts this kit as one of the best on the market. I used Tamiya primer with a dark pre-shade of the panel lines. I hen finished the scheme using Vallejo air, using a post shading technique and opted to paint the D-Day stripes rather than using the decals provided. The kit was then given a gloss coat before adding weathering and a panel wash. The aircraft itself is from RAF Thorney Island, which is one of my local WWII airfields, so it has some meaning to my collection.
- 15 replies
-
- 20
-
-
So chaps! I plan to finish these ones off to clear the bench and my head before starting on some other projects. First up is a mkii hurricane, this is the hasegawa 1/48 mkii. A while back I did this http://www.britmodeller.com/forums/index.php?/topic/234979665-148-spitfire-vbmalta/ This was started to be it's mate up on the boys ceiling but only got as far as this. I was going to do a SEAC hurricane but as is pal was a malta bird I thought it NEEDS to be a malta hurricane. ... can of worms opened I spoke to a chap who knows a bit about the place and he was very helpful, Mr Tony O'toole, thanks again for everything you gave me. In the end I decided to go with the classic There are lots of pictures of this crash landed around and Tony gave me a number of pointers on colours that it could be, but for artistic reasons I am going with the above. This will be nice and weathered just how I like them! Next is a tiffie which was started a bit back and did a wip for here http://www.britmodeller.com/forums/index.php?/topic/234983281-172-tiff/ This is where it was left So I stopped this one for the BofB GB (which I didn't finish, so close but so far) I also topped it as the paint, specifically tamiya's ocean grey. I think it must have been the thinner that I used? But anyhow the finish really needs some work. It will be finished out of the box as ZY-Y. Last one is a funny one, started as a conversion of an airfix hampden into the torp carrying version, then my nephew was born... another one! I have 28 nieces and nephews. For the last few chaps (I have offered for the girls but supposedly it's not the done thing, even the pink spitfire's troy let me know about! ) this one then turned into a plane for his room with his name on. It's at this point No pay load or weaponry on this as supposedly it's not a good look for a kids bed room.... whatever Nearly finished with this one. I hope I still have all the bits.... Hmmmm should have checked that first.... Anyway that's where these are at and what I need to finish Rob
- 28 replies
-
- 2
-
-
- 1/72
- Hurricane mkii
- (and 3 more)
-
 Here's my build: A 2-seat FGR.5 tiff for op shader. I got extremely early on, all I did was start cutting the hole for the 2nd seat and its now been sitting alone, unloved, unwanted for nigh on 3 months. I'm not that happy with the kit to be honest, you'd think Airfix make some pretty high quality kits, and they do. But not this time. The starter set arrived with the pilot missing and some horribly moulded exhausts and that's just for starters. It's so full of imperfections. On the other hand I've nicked its canards for my TSR2 build so I'll be scrathbuilding some.... (the joy ) Still it could be worse... Here's a quick résumé of the back story, the complete version will come soon: After the Paris attacks of the 13th November, the British Parliament was quick in upping its contribution to the fight against ISIS with op Shader. To alleviate the Tornado's flying ops day in, day out some FGR.4 Typhoons were sent to RAF Akrotiri to join in. But they weren't as effective as previously thought. One bright spark considered using the T1 variant as a dedicated strike variant. This was tested and yielded better than expected results but it lacked the flexibility of that the Tornado possesses. In 2017 a solution was found. Remove the airbrake behind the cockpit and install a rudimentary WSO position. Admittedly it was very cramped, claustrophobic and referred to by WSO's as the 'coal hole'. The 2nd cockpit continued to be refined and in 2018 the dedicated 2 seat strike version of the Typhoon was born: the FGR.5. While the principle was the same, the aircraft was built from the ground up as a 2 seater. The cockpit was enlarged and a bigger radar was installed. It immediately started to make a difference in the field. To the point that ISIS admitted that they were 'genuinely frightened upon hearing the distinct sound of the FGR.5's EJ230 engine'. I will be building a representation of a FGR.5. Photo updates to come! chomp chomp -raptor
 -
There are some great photos of this exercice over on the USAF website: http://1.usa.gov/1XYNPnu
-
The Telegraph are reporting that RAF Typhoons and Tornados are to pair up in an attempt to avoid clashes with Russia over Syria. http://bit.ly/1R2GkaK
-
Eurofighter TYPHOON (Twin seater) Revell 1:144 The Eurofighter EF2000 Typhoon started out as the EAP programme in the 1970s engineered entirely by BAe, but was later joined by a number of international partners due to an allegedly common requirement, with the partnership changing over time to end up with Britain, Germany, Spain and Italy remaining, while France went their own way with the Aerodynamics data to create the Rafale, which has a similar general arrangement. Delays and cost overruns seem to be a common factor in modern military procurement, and the Typhoon suffered many, resulting in the Germans taking delivery of the first airframe in 2003, Italy in 2005 and the UK in 2007. Operational airframes have since taken part in operations in Libya and under Italy's control in Albania. After the British Typhoons were initially ordered without guns, then with guns but without ammo, which was again overturned in due course, they were grounded in 2011 due to a lack of spares, which required the RAF to cannibalise grounded airframes to keep flying. The two-seat variant is used for training and conversion, although it is capable of going to war if needs required it, having all the systems in place to make it viable. The Tiffie is a great airshow crowd pleaser due to its agility at all speeds, and the impressive tearing roar of its twin EF2000 jet engines that propel it forwards with an impressive 20,000lbf of power per engine with reheat engaged. The Kit Revell have already given us Two Seat Eurofighter Typhoon in 1/32, 1/48, and 1/72; now its time for this excellent kit to be available to the 1/144 scale modeller. The kit arrives in a standard open end Revell Box (same size as their 1/72 Spitfire sized kits), inside you get 5 sprues of grey plastic and one small clear sprue. The parts are well formed with great detail for this scale. There is no flash on the parts that I can see. Construction starts with the cockpit, and as this is the two seater you get two. As the kit is obviously set up for both a single & double seater you do have to make both cockpit tubs. They are not difficult though. There is an instrument panel, control column and ejection seat to add to each. The seat can not be described as the best, and only bears a passing resemblance to an MB.16 even in this scale. All detail on the instrument panels and side consoles are provided as decals. Once the cockpit tubs are assembled, they are glued into the fuselage, and then the fuselage halves can then be joined up to complete the top section of the main fuselage. The next step is to install into the now completed top fuselage, the large plate section which forms the roof of the engine intakes. The lower section of the intakes can then be placed inside the lower fuselage section. This can then be joined to the top section to complete the main fuselage. The engine exhausts can then be attached to the completed main fuselage, as can the main wings which are single parts in this scale. The radar dome and pirate sensor (If building the RAF version) are then added, along with the console which separates the two cockpits. The aircraft spine is then added next, along with the front canards. The next steps involve flipping the model upside down and concentrating on the underside. The main gear, front gear and gear doors are all added at this stage. They appear quite fine in the sprue and care will need to be taken. Even though no stand is included the gear doors can be placed in the closed positions with the removal of a couple of mounting tabs. The last section involves the addition of the underwing pylons and flap actuators. Revel have done a good job here in providing the modeller with an array of weapons to fit, even if they have the names wrong (AIM-7L Sidewinder anyone?). You are provided with 2 x Fuel tanks, 4 x AMRAAM, 2 x AIM-9L Sidewinders, 2 x IRIS-T, 2 x Tarus Pods and 2 x Stormshadows. Once you have fitted your Eurofighter out the last thing to do is add the canopy and your model is complete. Canopy The canopy is clear and molded with no flaws. It can be posed open or closed as needed. Decals The decals are printed in Italy for Revell and its no surprise in this scale that the sheet is small. It is however packed with markings & stencils for both the airframe and the multitude of weapons supplied in the kit. It is good the weapons markings are there as a lot of manufactures miss these out. Decals are supplied for two aircraft. Typhoon T.3 of No.3 Sqn Royal Air Force, RAF Coningsby 2013. Eurofighter Jagdbombergeschwader 31, Luftwaffe, Norvenich, 2009 Colour call outs are given in Revell colours colourmixes. Its worth noting that the German aircraft have the radome and dielectric panels in the same colour as the RAF & Italian machines (British Colours) as these were moulded in that colour. Not as per the Revel instructions. Conclusion This should make upto a good looking model of the Eurofighter Typhoon. Its good to see a small scale kit packed with detail and weapons. Overall highly recommended. Revell model kits are available from all good toy and model retailers. For further information visit
- 5 replies
-
- 1
-
-
- Eurofighter
- Typhoon
- (and 2 more)
-
 Hello, I'm happy to share my completed Airfix 1/24 Typhoon, as a late war Canadian 'Bombphoon'. Quite a long and involved build, and I hope I've done the kit justice. The WIP is here if you want to see all the amazing detail that got covered up! I added Eduard belts, and a whip aerial from plastic wire, everything else is Airfix, including the decals (and the very slightly cracked canopy...), which took some work to settle as they were a bit crispy. Paint is a mix - Humbrol spray can Medium Sea Grey, Xtracrylix top colours and various Revell aquas elsewhere. Lots of disrupting shades, and then pastels. Thanks to all who dropped by to watch the build and offer advice and encouragement. The kit is well worth getting, it doesn't fall together, but it is a very rewarding build, and I love the surface texture Airfix added throughout. Welcome all your constructive comments! Something a little smaller next time - it might even have tracks... Take care, Matt
- 38 replies
-
- 28
-
-
Hello, Having stepped into the 1/24 world with the old but good Airfix Hurricane (will get the RFI up shortly, sorry, pause for life and work for a few weeks...) I've started proper work on the Tiffie that I've had in the stash for a while. I've studied/hugged the sprues, read the instructions many times, the Airfix Mag supplement by Chris Thomas from a while back, a Warpaint...Time to get started! This will be a Bombphoon, probably a 440 Sqn RCAF one, maybe the Pulveriser option in the box, we'll see. It will definitely be a 4-blade, Tempest tailplane bomber, with most of the panels closed up, except one cannon bay. Why? I like the lines and presence of the Typhoon, and while I've seen many great detailed builds of the engine etc, it's just what I prefer. Anyway, lots of useful stuff for the spares box too. So...I guess you've seen enough sprue shots etc of this kit, so straight into some pics: Starting the framework: Great fun painting and scratching up the seat in this big scale: Not done figure painting for years, this is just for 'armless fun... Completed cockpit, just Eduard seatbelts added: Cannon bay underway: All brush-painted so far, and while the Eduard belts are a major improvement over the kit items, they're a pain to use as the pre-painted coating flakes when bent at acute angles - a problem on belts! Second time this has happened, will look at fabric ones in future. So far, so good. Very clever engineering, it doesn't all fall together as per Tamiya, but I love it, it takes a bit of planning and proper modelling. Take care, Matt
- 56 replies
-
- 12
-
-
Eurofighter Typhoon Single Seater 1:72 Hasegawa With the need for a new combat fighter in the UK going back as far as 1971, failed collaborations between the UK, West Germany and France resulted in a new proposal by the British, German, Italian and Spanish for a new aircraft (EAP) in the mid 80's. France withdrawn due to their insistence on a design that was capable of operating from carriers; the ultimate solution being met by their Rafale programme. Eventually, agreement was made between the UK, Germany, Italy and Spain to share the development and manufacture for what would become the Eurofighter. Whist the project was plagued by political and financial problems; it's now in service with 6 nations with other possibilities under evaluation. Key features of the Typhoon are a Multi-role canard delta wing layout with an intake design under the fuselage much the same and the F-16. A glass cockpit using three main monitors in combination with HOTAS, voice recognition and HUD allow a reduced workload for the pilot, the voice recognition system only being used for non-critical functions. A key safety feature is the Low Speed Recovery System that is designed to prevent loss of control at low speed, high AoA situations as well as an auto recovery on the press of a button in the event of pilot disorientation. The aircraft is capable of super cruise (i.e. Supersonic flight without afterburner). In tests (both planned and unplanned), the Typhoon has demonstrated simulated kills against competition such as the F-22 and F-16. Whilst initial air-ground capability was somewhat limited, existing and planned upgrades will evolve this capability considerably. Air-ship ability is also needed by 2017, this all round ability adding to the aircrafts export potential. Whist not designed as a 'Stealth Aircraft', the radar signature is only about 25% of the tornado's emissions. The Kit Revell have already established themselves in the market with their rendition of the modern day Tiffie, but that hasn't stopped Hasegawa wanted their piece of the pie. Comparisons between Revell and Hasegawa kits often produce emotion where the retail price is concerned, indeed, current price for this kit is around £40, much higher than the Revell kit. Whilst the Revell kit is undoubtedly greater value for money, for some, this isn't the ultimate criteria for making a purchase. So what are the first impressions ? Well, you get a huge amount of parts for such a small aircraft. 195 to be precise with no less than 9 light grey sprues and two clear sprues, one containing a rather impressive stand. Detail is typical Hasegawa with very refined surface detailing. A criticism often made of Hasegawa kits is the lack of weapon options, however, they appear to have to have taken this on board here as I'll come to later. General assembly is similar to the Revell kit, the main difference being a separate tail. As with most kits, construction starts with the cockpit. The tub has some adequately moulded detail although the switch panels can be replaced with decals. The forward panel fits to the nicely detailed front combing section and again, can either be painted or decaled. The pilots seat is made in three parts and somewhat simplistic without any seatbelts. A resin replacement would be a good solution here or at least some additional seatbelts of some kind. With the cockpit assembled, it's then sandwiched between the two fuselage halves. Exterior detailing on the fuselage is quite stunning, more refined than the Revell kit which is a big plus on 1/72 scale. I can't see any evidence of sink marks on these parts. The tail goes on next, and again, I'm impressed with details here such as the small exhaust ports on the base of the tail, very sharply produced. Close up of fuselage halves & cockpit The relatively complex assembly of the lower fuselage and engines follows on. Exhausts are little basic but adequate. The airbrake inner surface is fitted followed by the front wheel well and an intake blanking plate. The plate blanks off the intake about 35mm from the inlet opening. The intake splitter arrangement is fitted to the fuselage and lower wing section. Before fitting the top halves of the wings, you will need to decide whether to open up the holes for the pylons. You will also need to decide whether you'll be fitting the centre tank or not as this will require either a blank or slotted part to be fitted. Again, surface detail on the wings is very nice with refined panel detail and recesses such as the chaff dispensers. With a suitable wash, this will come alive. The wing assembly now fits to the fuselage. Close up of lower wing sprue Close up of upper wings and tail With the basic airframe now together, focus turns to the smaller parts like the landing gear and quite an array of protruding parts such as FLIR pod. Hasegawa have managed to produce some very fine parts indeed, where necessary, the plastic is very thin retaining as much scale thickness as is possible with injection moulded plastic. The undercarriage looks solid with good detailing such as the brake callipers on the main wheels. The only complaint observed are two ejector pin marks on the nose wheel tyre which will need some delicate filling. You do have the choice of either having the undercarriage dropped or an ‘in-flight' option. Included in the kit is a pilot figure which can be added if you prefer to have figures in your builds. With a separate head and arms you have some scope for manipulating the pose too ! Close up of main wheels and pilot Now for the armament selection. There are 5 layouts given in the instructions: Close air Support Suppression of Enemy air Defence Multi/Swing Role - RAF Multi/Swing Role - Luftwaffe Air Superiority The following weapons/tanks are included in the kit: 1500 litre drop tanks x3 Storm Shadow Air Launched Cruise Missiles x2 3. Taurus KEPD350 Air Launched Cruise Missiles x2 AIM-120 AMRAAM x4 (carefully note instructions for fin removal) Meteor BVRAAM x4 (carefully note instructions for fin removal) Brimstone guided missiles x6 (3 per multi-pylon) IRIS-T AAM x4 ASRAAM x4 ALARM x4 The weapons are finely moulded with very thin fins and decals are supplied for where necessary on them. I suggest taking some time to dwell on the options, which obviously be somewhat determined by your chosen nationality, but no matter what you choose, you'll be accumulating some great spares. An example of the effort put in here is that the Taurus cruise missiles each have 11 parts to them.Brimstone & Storm Shadows IRIS-T, AMRAAM, Meteor, ALARM, ASRAAM Close up of AMRAAM, Meteor, IRIS-T Close up of 1500 litre drop tanks The instructions show the canopy to be installed in the closed position, however as the rear canopy combing is a separate part as is the canopy, it shouldn't be too difficult to fit it in an open position. The clear parts are free from distortion and apart from the windscreen and canopy also contain the array of lighters and HUD carried by the aircraft. There is a slight seam along the centre of the canopy which you may want to sand out, however it's very subtle so if you're not confident at doing this, you could leave it as is. Included in this boxing, but possibly not in future releases is a clear stand. The stand comes with a separate instruction sheet bringing me to this conclusion. You can either fit the stand into the slot that is used by the centre pylon or a second option is a cradle attachment that allows the centre pylon to be fitted. Markings A very fine decal sheet is included. It's a very busy sheet as not only are there many stencils for the aircraft itself, but several for the various weapons included too. Register and sharpness are superb with some quite intricate detail in the stencils and squadron markings. Options provided are: RAF -3 Sqn RAF - 17 Sqn Luftwaffe - JG74 as seen in the Red Flag exercise in 2012 Conclusion This is a great kit overall. There are a few criticisms I can make such as the detail in the seat and perhaps cockpit switch panels. Also some prominent ejector marks in the nose wheel tyre, however in my opinion, the finish is more refined than the Revell kit, particularly where surface detail is concerned. The weapon options are superb and a definite improvement for Hasegawa. The shape and general outline of the kit looks to be very good from what I can tell in doing the in-box review. Whether all this is enough to help you part with alot more money over the competition is personal choice. See Spence's excellent build of the kit HERE. Review sample courtesy of UK distributors for
- 6 replies
-
- 1
-
-
- eurofighter
- typhoon
- (and 1 more)
-
Last year I built a set of RAF F-16's, and Paul J suggested that a USAF Typhoon might be a good companion project. I agreed and here it is. In the mid-2010's with the USAF's F-15C fleet aging, and the F-22 only purchased in small numbers, an airframe shortage loomed in the air superiority and air defense roles. It was decided to consolidate the remaining 'Golden Eagles' into the two forward deployed Fighter Wings at Lakenheath and Okinawa. That would leave the six continental air defense wings without aircraft. The Eurofighter consortium offered an appealing solution: partner nations (mainly Britain and Germany) could deliver used Tranche 1 jets immediately (thus providing funds for their own Tranche 3 purchases) with an option to purchase new build Tranche 3 jets in a second batch. The the ORANG's 142nd FW was the first to become operational with the 'second hand' Typhoons, designated F-25A's. Later, Tranche 3+ Typhoons with the CAPTOR-E radar and aerodynamic enhancements would be delivered as the F-25C. I'm planning on using the 1/72 Revell kit. Like many, I'm currently working on builds for the Battle of Britain GB, and this guy will have to remain on the back burner for a bit.
- 19 replies
-
- 15
-
-
Hi everyone and as promised here are some pics from this finished build. I've included a link to the WIP thread if you hadn't seen it before and to recap, this all started with me asking fellow modeller and all-round good bloke Chief Wiggum if he considered building his Trumpeter TU-95 Bear as an in-flight intercept diorama. After almost 10 months and a lot of modelling heartache later (99% for Chief), here it is. We were absolutely thrilled and stunned to win Silver in the Diorama class at the IPMS Ireland Nationals with it as well as the 'People's Choice' Award as voted for by the public at the show... Honestly, we were deligthed! (I'm the one not smiling) While neither of us can make Telford this year, we're hoping to get the diorama there somehow for the IPMS Ireland Club table.....gonna need a big roof box Thanks for looking and any questions, will try to answer them! Cheers, Dermot and Barry (aka Chief Wiggum)
- 30 replies
-
- 44
-
-
Hi I was able to go up to Biggin Hill last weekend to watch the two Typhoons depart. The 29 sq red tail and the camouflage scheme were there, I think they'd been displaying at Folkestone on the Saturday. A few photos are below:
-
 Hi all and have finished my build for the inflight diorama that Chief Wiggum and myself are concocting of a Typhoon intercepting a Russian Tu-95. Revell's Typhoon in 1/72 with a full QRA loadout. The extra missiles are courtesy of JasonB (thanks) and the pylons from the spares box....(please don't look too closely) Not my best build I'll admit and if there are any gaffes in there apparent to the Typhoon experts, please let me know! will spot some gaffes and happy to have her finished. Will post some pictures of the final diorama once that's done too! All the best, Dermot
 -
 Hi Everyone, Here are some of my photos from the Eastbourne airshow, I've tried to pick my favourites out of the almost 1,000 photos I took, but still this is going to be very photo heavy. If you want to view the full 135 photos, they are in an album on my facebook, linked here : https://www.facebook.com/media/set/?set=a.488656594634727.1073741851.100004711722357&type=1&l=0724244a56 Anyway lets kick off the photos, I hope you like them. I'm trying to persuade my missus to let me go to either Bournemouth or Shoreham airshow (preferably Bournemouth) this weekend. Chinook Jet Provost Breitling Wingwalkers Typhoon Spitfire MiG-15 Grob Tutor Bulldog Sea King Eastbourne's Tamar class Lifeboat (At High Speed) Hawk T.2 Blenheim Norwegian Vampires P-51 Mustang "Ferocious Frankie" Vulcan XH558 Dakota Patrouille Reva The Blades Red Arrows Anyway, thats all of the photos I'm going to post. You can view the rest on the facebook link at the top. These photos were all taken with a Canon EOS 20D DSLR body with a 100 - 400 mm canon lens stuck on the front of it. Boy was that heavy without a tripod, but made life easier when tracking the planes. They have all been edited to improve colour balance etc. Please let me know what you think. All the best, Rick
 -
Operation Trebuchet Revell 1/72 RAF Typhoon 1990 saw the Middle East at the brink of war. Saddam Hussain had invaded Kuwait and declared it Iraq's 19th province. After a tense three months, a US led diplomatic envoy managed to talk Hussain back from the brink of all-out war. A long and bloody Gulf War was averted through diplomatic, rather than military action. But it was not without its price. Iraq faced heavy economic sanctions. The Iraqi government counteracted this by promoting policies which encouraged a more isolated and insular state. Sixteen years later and the trade restrictions on Iraq had placed a huge strain on the country both socially and economically. Furthermore, over the years Saddam had succeeded in enriching Uranium in secret mountain laboratories for the purposes of creating a short-range nuclear missile, although at the time it was not established whether he had successfully weaponised it. Hussain, backed into a corner by his people and the international community began lashing out to his nearest neighbours. The long years of isolation had made Iraq strong and fiercely independent. First, Saddam succeeded in re-taking Kuwait and began threatening Israel with his new nuclear arsenal. The world was held to ransom, a belligerant and jumpy dictator had his finger on a hair trigger. In a secret emergency meeting, NATO and the United Nations voted unreservedly for military action against Iraq before a potential nuclear attack was launched. In March 2006 B2 bombers based at USAF bases in the UK took off to instigate a first strike on Saddam's nuclear facilities. Luckily, they were successful destroying 78% of their targets buried deep in the mountains and paved the way for the ground invasion. As it transpires, Iraq had developed a ballistic missile capable of hitting targets as far away as Austria. Although the missile was unable to carry a nuclear warhead, liberating forces discovered a plan to use the missile to launch a dirty-bomb attack on an unnamed city. Following the initial invasion, the Iraqi Republican Guard faced heavy losses, causing them to disperse an retreat to towns and cities across Iraq. Baghdad and other large cities became fortresses, under siege from coalition troops. Over the first two months it appeared that little ground was being made and the number of civilian lives lost increased by the day. The RAF, who now have squadrons based in Saudi Arabia and recently liberated Kuwait, instigated "Operation Trebuchet". The objective: to start a 72hour barrage of continuous unrelenting air strikes on military targets across Iraq with the view to levelling the remaining military resistance and end the multiple sieges across the country. It was the perfect opportunity to test the mettle of the relatively new Typhoon in a ground attack role. The kit, a 1/72 Revell Eurofighter Typhoon will depict one of the machines involved in this fictional operation being re-armed and readied for the next sortie. I'll be using some aftermarket, so far I've identified the Eduard PE set but this might grow as the kit gets built. I'm hoping to have a play around with the camouflage and insignia as I am a big fan of some of the nose art of aircraft used in the "real" Gulf War. The desert pink will feature, but I may also play around with this to offer a unique what-if twist. For those of you who have seen my previous builds, I'll be using my traditional 6x6 bathroom tile as a base with some sort of diorama involved, possibly even another in-flight... We'll see. It begins....
-
So chaps! After being encouraged by cookie to do a wip on my typhoon (he is a very encouraging chap which is appreciated as i don't always encourage myself.... actually I started my spitfire wip as MG encouraged me.... maybe I need to grow a pair) I was not going to start it until I had finished my Malta spitfire.... but then I ripped a transfer off and got a bit annoyed by it all and decided I would start the early.....so. This I what I will be building Nice kit with great detail... below is the option I am going for I build the old tool tiff from airfix when I was younger and always remembered enjoying it. As far as an aircraft I gave always had a soft spot for this brute... but it's always been overshadowed in my love of the sea fury and tempest as a beefcake ground attack, still it's another one of hawkers great stable gun platforms like my beloved hurricane (she's at the top of the tree IMHO) So here's what I did, not much just a bit of interior painting really.... but hey! It's a start. So I didn't follow airfix's paint guide as a lot of people have questioned it (?) So I have taken from other builds I have watched, hopefully this will make it correct. I will see if I can get the aluminium details done and close the ac up by the end of the week, but please don't hold your breath... its against my health and safety policy. Any help and advice is always welcome so feel free, even though this is not my favourite ac I still love it and want to do it proud and there are a lot of people out there that know a great deal more than me. Cheers all Rob P.s. rockets on and a gun bay open is the plan! I am saving the big boobs. ... sorry don't know where that came from .... I meant bombs for another project
-
 This project was made as part of the D-Day Group Build. This is my first ever diorama and it's made up with a lot of other firsts. First Typhoon, Panther and Tiger kits, first tank(s) for many, many years, first plane kit in flight, first use of a Prop Blur, first use of aftermarket decals (for the Typhoon) and first 1/72 figures. Nearly everyone who contributed to the WIP thread helped with ideas for the building of various elements of the project so a big thank you to them all - it wouldn't have been possible without the help of the BM team. Also it was seeing Kallisti's Typhoon base that got me thinking about doing a diorama - so thank you to Kallisti for the idea. Typhoon: Airfix 1/72 Mk.IB Typhoon (new tool version) - MN526/TP-V - No.198 Sqn., 123 Wing, 84 Group, 2 TAF B10/Plumetot, France - July 1944. Panther: Dragon 1/72 Ausf G with Zimmerit, no. 135 of 12 SS Pz, Tiger I: Dragon 1/72 Ausf E with Zimmerit, no. 131 of sSSPzAbt 101 German and British troops from Ceasar Miniatures Baseboard: Softwood, Sundela, MDF, filler and various leftover scenic materials from model railway projects made a long time ago. The WIP can be found here The RFI for the Typhoon can be found here The RFI for the two tanks can be found here Time: early evening, July 1944 - Location: somewhere northwest of Normandy This last photo shows the actual diorama and the background I used to give it depth. The background is actually the display shelf I made for my Spitfire builds but it seemed to work well as a backdrop - I thought it would look better than just a plain wall. Although this project is finished as far as the D-Day Group Build is concerned I've still got some ideas for developing this diorama further but I'm going to make a couple of Spitfires first! Thank you for looking. Comments and suggestions welcome. Kind regards, Stix
- 47 replies
-
- 27
-
-
- D-Day Group Build
- Diorama
- (and 3 more)
-
Hi everyone, a few of my photos from Cosford are below. It was a bit dark at times, but had a great day seeing some really enjoyable displays. Steve
-
Getting rather wet! Kicked off my airshow season in damp style at Abingdon, where massive downpours throughout the afternoon obliterated the flying programme, with the sun making only a fleeting appearance. Despite the general disappointment, we were treated to the RAF's new Spitfire and Typhoon synchro display, which is one of the finest examples of aerial ballet I've seen, pure poetry. Conditions were pretty rubbish throughout the display, making it hard going from a photogrpahy point of view, but I thought I'd share a handful of quick and dirty edits. Abingdon_2015_100 by Shaun Schofield, on Flickr Abingdon_2015_101 by Shaun Schofield, on Flickr Abingdon_2015_102 by Shaun Schofield, on Flickr A more complete set of images from the show may or may not follow in due course... Hope they're of interest! Shaun
-
 Hi everyone! Here is my Eurofighter Typhoon (Revell 1/72 kit), built completely OOB. Overall it's a nice kit, though clearly not as good in terms of quality as other kits from Hasegawa or Academy. I hope you like it! Best, Ricardo Bonus: bottom detail
- 14 replies
-
- 18
-
-
- eurofighter
- typhoon
- (and 3 more)
-
 First off, does anyone want another WIP of an Airfix 1/24 Typhoon? If not, then I will just post pictures of major developments and leave it at that. If so, then I will be a bit more detailed in pictures, build process, irritations, excitations, exhortations, exclamations and exasperations. This will be a slow and steady build I must warn you. Why am I starting this now, with more than a few other projects on the bench? I was tricked; I was bamboozled; I was seduced. I had promised myself that I had to complete at least 3 projects before I started this one. And, I was doing so well this weekend. I received this monster of a kit from Airfix on Thursday the 24th. All I did was open the box up, be amazed at the pretty sprues staring at me, mad a cursory examination of the decal sheet and the instruction book and put it in a corner in my office to be drooled over at length and at my leisure. Then the trickery began. I started reading posts from everyone who was getting their kits in and a trend started to develop, my friends, and not a good one. Most people were indicating their main canopy arrived with a small hairline crack next to the sprue attachment. Not good. I had put off looking at this detail all weekend long as I was trying to get some other projects completed. (Great progress on the IdolM@ster F-22, okay on the Neptune, painfully slow on the Cam-23). So, at 11:30 p.m. Sunday night, I opened up the Typhoon box to check my canopy. Lo and behold, I am one of the unlucky, but very common recipients of a cracked canopy. Now, it is just a small crack, but it is there. I guess I will join the many in sending a replacement request to Airfix and get on the list. Now to Airfix's defense, I thought the packaging of the canopy was quite good. There are two clear sprues. They are packaged separately. Each is first wrapped in a paper towel type material, and then placed in a sealed foam package, which is then sealed in a plastic bag. Seems like this would be adequate to protect it, but I guess not. Now the seducement. Since I had the box open, I started looking at the different sprues and thinking they just looked great. Next thing I now, the sprue cutters are out, the glue is being applied and pieces are being put together. So it is now 1:00 a.m. and I am on step four and stopping to post this. So kind gentlemen and gentlewomen, does there need to be another Typhoon WIP?
 -
 I'd like to ask your opinion about how acurate is the shape of the new 1/350 HobbyBoss Typhoon Class submarine. Here is the only official (?!) drawing of the biggest submarine that mankind has built so far: http://www.heiszwolf.com/subs/plans/Plans_Typhoon.gif 1. If there are any other sources, I'd like to hear about them. As with my everlasting projects, one was(is) to scratch build a typhoon class in 1/144 gigantic scale. So to have a base to build upon, I've drawed over that plan an AutoCAD file. I should say that even in that same drawing, there are some inconsistencies. The sections and x and y plan drawings were not perfectly matching. Anyway, in such cases, I decided a middle way to match as much as possible to the plan drawings. 2. I'd like to ask what is the length of the sub? I made it to be as 175 m as indicated in Wikipedia. In military-today.com it is said 170-172 m. The HobbyBoss kit lengths 489 mm. a simple calculation results in 171,50 m Even if 175 m is wrong with my drawing, the conning tower is way too big towards fore. So here are some picture I've made comparing the drawing which was plotted in 1/350 scale and the Hobby Boss kit. i. The overall length is not matching ii. The conning tower is too big, too lenghtened towards fore side resulting in moving the missile craddles much forward iii. The flat area around the conning tower is too big too What do you think? It's official, I began to count rivets
 -
 Hawker Typhoon Mk.IB Replacement Masks for Airfix Kit Decals 1:24 Maketar These masks are direct replacements for the markings provided by Airfix in the kit. In addition you get a set of canopy masks and a set of wheel masks. The masks come on four main sheets for the markings and a separate sheet for the canopy and wheel masks. They are available in either vinyl or yellow Kabuki tape. The advantage with the tape ones is that they are lower tack and much easier to reposition if you get things wrong. There are no instructions but then they are not really needed. Recommended for those who don't like decals or if you want the true painted on look for your large scale Typhoon. Review sample courtesy of