Search the Community
Showing results for tags 'trumpeter'.
-
Hey, I'd like to share with you my most recent addition to the shelves: Trumpeter's 1/350 scale USS Independence LCS-2. Apart from the way too soft photo-etch the kit is really good and I enjoyed it. I Hope you like my little ship! Cheers, Tom
-
I've only finished one (1) this year but it's a big one - An E100 Heavy Tank painted in a camouflage inspired by the "World of Tanks" game - (so it's sort of a WOT-if ): Paint used: Model Master Schokoladenbraun, Panzer Olivegrün, Panzer Dunkelgelb. Coated with Future, Filtered with oilpaints. I hope you like it - it's my only one! Cheers Hans J
-
 Hi All, Bit of a back story to this one. A couple of years ago we were looking through a big tin box full of old photos that belonged to my mum's side of the family - Amongst the many pictures of family was a newspaper cutting from the mid/late 1930's showing four RN sailors on a gangplank disembarking from (If memory serves me right from what was said) HMS Arethusa. "What's with the cutting?" I enquired, "Well," said Mum, "One of those sailors would have been my Uncle Frank. He was the brother of your great uncle Fred." Uncle Fred had married my Nan's sister and we occasionally went over to visit Auntie Aggie and Uncle Fred (as we knew them, none of this great uncle/aunt thing for us back then), who lived in a little village in Northamptonshire when we were kids. "So," Said I "What happened to Uncle Frank then?" Dad pipes up "He was on the Barham" Ah. A bit of a conversation then ensued where Dad said he'd done a bit of research when he was in the navy himself (1959-1967/8). It turned out Frank had been a signalman and that he was one of the 862 lost when the Barham was torpedoed, rolled over and exploded. Dad had spent a couple of hours trying to find Franks name on the memorial at Southsea back in the day. I'm sure you've all seen the newsreel - I used to wince every time I saw it anyway but it takes on an added poignancy for me now. There is now a fair bit of information available on the internet about the Barham such as the HMS Barham Association Website, crew lists, the aformentioned film, details of the cover up/news embargo carried out by HM Government at the time combined with the story of the last prosecution carried out under the Witchcraft Act when a Spirit Medium announced that the Barham had been sunk before the government had announced it. The last item is quite an interesting tale in itself and can be found at http://www.webatomics.com/jason/barhamconspiracy.html There is also a list of all the names on the Southsea Naval Memorial and whereabouts they are located within the memorial, which meant it was only a matter of minutes to find Frank's name when I went to Southsea the other month. As for the kit, it's in 1/700 scale and made by Trumpeter and claimed to be the ship in its 1941 fit - If it isn't could somebody let me know? I picked it up earlier this year and started building it at work during my lunchtimes but hadn't really progressed very far before I paused, realising it'd be a good subject for this GB. Here is where it is at currently - Just under the 25% rule. I've also ordered a set of etch from Starling Models and might even get some replacement 15" barrels as the kit ones aren't very good. More to follow in the next few days hopefully. IanJ
- 30 replies
-
- 12
-

-
 Due February at HobbyLink Japan: https://hlj.com/product/TRP05627 The real ship was never completed so I don't know how we judge this one for accuracy. Price is equivalent to US$125, which seems reasonable enough.
-
- 1
-
-
- graf zeppelin
- trumpeter
- (and 1 more)
-
 A kit pulled from the "shelf of doom" circa 2005! The kit had been in storage (along with others) from many,many years. It was rescued along with my other belongings two years ago. I decided to build a few 1:144 scale kits recently and this was one of them. Trumpeter 1:144 scale F-86F Sabre in Pakistan Air Force markings circa the 1965 Indo-Pakistan War. The model was painted with Tamiya and Testors Acrylic paints. Decals are courtesy of I-94 Enterprises. The base is an oval piece of wood with a tarmac printed out and glued on.
 -
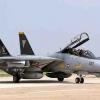
Hey Guys Just got the Trumpeter Su-27UB 1/72. The kit looks great and instructions are ok. But when i checked the paint and marking guide things got confusing. I mean... The Intermediate Blue (H72) looks gray and the Pearl Grey (H74) looks too blue. Pearl Grey doesn't even exist on Mr. Hobby color range. Looking some walkarounds i realise that intermediate blue isn't the base color of the plane as the trumpeter instructions http://www.trumpeter-china.com/Uploads/201509/560b2eb547e36.jpg I need some help. Where i can get any real and good color scheme for this Su-27UB Flanker C? Thanks
-
Hi there guys, I was looking around at picking up my first field gun model kit since coming back into the hobby as an adult. This is my 5th or so kit, all others have been Tamiya/Meng so I wasnt sure what to expect from trumpeter given their reputation for sometimes overly complex kits. I was very surprised and absolutely loved the kit. There arent any reviews out there I spotted so I put some details below pictures. Here the kit is painted up, I havent decided on whether to give it an oil wash or add some weathering. There are no decals. You can see an issue I had with the front wheels (details at the end). it. There are an absolute tonne of wonderfully detailed pieces around the gun behind the shields; As you can see the wheels at the back are on much better than those at the front. Some details about the kit; It sits at around 270 parts, in the box you get 5 plastic sprues: 2x A, B,C,D; 1 small sprue of photo-etch also labelled A; 4 rubber wheels and a separate piece which is unlabeled but the instructions call it D82. The sprues come wrapped in a little piece of sponge inside their plastic bags, which is quite nice since there are quite a few thin long pieces which are very easy to break when handling the sprue if not careful. The instructions are quite spartan but clear enough. In steps 1-5 you build the gun itself, 6 to 20 contains the majority of the pieces and involves building the platform for the gun then in 21-27 you build the carriage. There are 2 options shown through the instructions, one for travel mode (which is how I built the kit) and one for combat mode, with the struts down and gun elevated. There is only 1 paint scheme shown, the typical russian green all over with rubber black wheels. The paint guide seems a little off to me, they recommend tamiya XF20, but also call for light green, I used vallejo 71.017 russian green 4BO which I think looks pretty nice. The downsides for me are; there are alot of very small, very easy to break pieces and absolutely no spares provided, the gun, as well as multiple other cylindrical pieces, come in 2 parts which leaves quite a few annoying seams to be filing down and finally the construction of the wheels has a part in it which I think shouldn't be there. When you build the wheel up, the instructions have you pop a little piece inside the axle mounting (A25). If you put it in (like I did at the front) the wheels simply dont go over no matter what you do, if you leave it out (like at the back) they fit perfectly. Also nearly all of the PE parts have to be bent, most of them freehand, which is a pet hatred of mine. So all in all, I had a great time with this kit, its complicated but not ridiculous, there are lots of small pieces to be handling but they all go in place very easily and it doesnt get repetitive (unlike say, making 80 links worth of tracks out of 4 pieces, thanks Meng) and comes together really nicely. I do think that for the price, given the lack of paint options and no decals, the kit does need something a little extra. Either a metal barrel or crew or even just some ammo+ammo storage would really bring the kit together to me.
-
Hi folk,s my entry will be Trumpeters 1/350 HMS Zulu,she was launched in 1937 and after war service which included the Norway campaign and convoy duties was lost off Tobruk in September 1942 to Italian bombers while being towed to Alexandria after an earlier attack.Trumpeters kit appears to be well liked by the Maritime modelling community with the purist's quite rightly pointing out certain issues regarding armament fit etc which I can live with,I,ve ordered via my LMS so about a week till I can show the box content's so heres the box art.The length of the GB is perfect for a nice "chilled" build(so I can squeeze in that Hurricane).
-
 Source: http://www.eduard.com/store/out/media/InfoEduard/archive/2016/info-eduard-2016-06EN.pdf V.P.
 -
Built almost box stock, tyres by Icon Miniatures, and decals from Best Balsa Kits. This took a lot of willpower to finish, rather than hiding it in the bottom of the cupboard.
-
 Hi all. This is the 1/48th Trumpeter FGA.6 Seahawk. I started this about a year ago and I’ve just finished it today (16/10/16). It’s been around a while so and information about the kit is readily available online so I won’t cover that here but I will cover some of the issues that I had when building it. Firstly, it’s built with kit decals. From the boxy get WV824/122-C. An FGA Mk.6 apparently from HMS Bulwark in 1959, that’s what Trumpeter tells me so I’ll go with that. Main paints are Gunze Acrylic, Mr Color Lacquer and Tamiya Acrylic all thinned with various amount of Mr Color Levelling Thinner so it goes through the H&S gun. The seat has been replaced with a Pavla item though I don’t think it’s correct for the variant. So sad too bad right? The kit decals performed quite well with the Microset/sol products. The white is transparent so you can see the demarkation line between the grey and white on the rear fuselage, be sure to squint your eyes. Building the model was pretty straight forward with the two most noticeable problems being cleaning the seams of the intake guide vanes and cleaning up the horizontal seam that separates the upper and lower fuselage halves. Two or three applications of sprue glue helped eliminate the seam along here with some judicial sanding and polishing of the plastic for final finishing. Nose weight was installed behind the rear wall of the cockpit as I was suspicious of tail sitting with the wings folded. I installed a number two sinker with some two part epoxy to secure it in place to ensure this wouldn’t happen. I still had suspicions when I test fitted the wings and gear so I had to hack the noses of the wing tanks to install a number 0 and number 1 sinker in each of those. This put weight forward of the main wheels which ensured it sat on its nose wheel. The main tanks needed some work after having their noses cut off. Iy was once again out with the sprue glue to tidy up my handy work. Another fiddly area to tidy up and look respectable is the forward rear join that runs straight through the middle of the exhaust panel. More sprue glue fixed this panel up. The corollary to this panel line is that time needs too be taken when aligning the fore and aft fuselage sections. The Mk 1 eyeball helped here and I’m pretty happy that all is square. The other subassemblies are certainly not Tamiya like in detail but they suffice for this model. The undercarriage and associated doors are suitable for the kit as long as you don’t pick it up and the flap wells are there but…meh. Of course the most noticeable feature is the folded wings of the model. I replaced the kit attachment points with something a bit more substantial from card stock and some superglue. The kit would have you mount the wings perpendicular to the horizon line but reference pics suggest that they are almost touching. Due to the precarious fold I opted for a middle ground and angled them in but not to far so that the glue wouldn’t be to stressed. The benefit is that it saves display space in the cabinet and is something different to look at. There’s a bunch of other stuff I could go on about but this is enough…tl;dr right? Pardon the moody pictures too. The black cardboard was at hand so that’s what I used. Feedback and suggestions are more than welcome but I certainly won’t be building another one of these soon! Thanks, Michael
- 22 replies
-
- 42
-
-
Anyone seen any more previews of Trumpeter's 1/16 Jagdtiger? I think it's due out soon?
-
To be fair, the absolute last thing I needed was another ship project on the go, but I got talked in to it through a Facebook group I co-admin which initiated a group build themed on the Battle of the Atlantic. Being an admin, I thought it bad form not to join in, but realised that finishing a ship would be good for me so decided a fresh start with lowered aspirational standards might actually help. I therefore took a bit of a detour on the way home from Duxford in July and dropped in at Hannants in Lowestoft. In retrospect, there are postal companies available which would have saved an enourmous amount of time droning down mile after mile of the dullest roads in Britain, but never mind. It's the Trumpeter 1942 boxing. The mouldings are quite nice on the face of it: I raided the stock room for White Ensign Models PE747 to go with, and also got some brass barrels, masts and yardarms from Master to go with. The Group Build kicked off on 1st August. Being Trumpeter, it doesn't take too long to find an issue. The upper and lower hull halves are different lengths. Just blending in the prow or stern didn't seem clever as the torpedo bulges don't line up either. Anyway, I set about spraying the deck. All paints are my own, perhaps/hopefully obviously. I started removing moulded ladders which will be replaced by photo etched parts later. The moulding on B turret barbette shows poorly aligned tooling. I decided it would be easier to just sacrifice the ventilators to get the barbette cleaned up properly Then I replaced them with Evergreen strip. I intended to display this model in a seabase, but I just don't feel right about using waterline plates, so I decided to address the hull, by sawing it in half. The width of the razor saw blade almost cured the alignment issue, and some wet and dry on a flat, hard surface did the rest. The halves were rejoined and glued to the upper half. The seam was filled and sanded The hull was then sprayed 507C thinned with cellulose thinner for maximum drying speed, then masked with Maskol before painting on Western Approaches White and B5. Tonight's exercise is to remask and hopefully get the MS1 and MS3 colours on. Tonight I have: The hull camouflage was completed: Then the underwater hull was painted in the Royal Navy's anti-fouling red colour and the boot topping painted on. Building up superstructure prior to camouflaging it: I took a break and painted the Walrus cockpit areas (not the glazing!!) black and the rest of the fuselage silver. When the Dark Slate Grey/Extra Dark Sea Grey goes on later, this gives a sort of illusion of not being a solid blob of plastic. I made a start on a sea base. This is my first attempt at this particular technique. And a wee bit more superstructure assembly and I'm calling it a night.
- 48 replies
-
- 13
-
-
- Trumpeter
- White Ensign Models
- (and 1 more)
-
From chinese source it appear Trumpeter is working on a 1/72nd MiG-29SMT (9.19) "Fulcrum-E" kit - ref.01676 Source: http://www.weibo.com/u/2975465393#_loginLayer_1414227446425 V.P.
-
Hello Britmodellers here are pictures from my current build on my bench ( or better one of them) Its Trumpeters H.M.S Hood in 1/350 scale. Its my first attempt to add more details on a 1/350 warship. The kit was started right after i got it in my LHS, as an intended oob build, like my other ships i had at that time. While building her ( that was in 2007 or 08 ) i discovered modelling sites like Modelwarships.com or websites about the real Hood, learning about the wrong main gun turrets and the posted ships had so much more details. After i became unhappy with my idea it quickly stalled. Filling and sanding the seam running around Hood hull didn t helped either. Some month back, i decided to give this one a second go, with some more budged and some more skill, i ordered an photo etched set from Eduard, gun turrets in resin from WEM, just before they went out of business, and a detail set from Trumpeter with beautiful turned brass gun barrels. Adding PE stuff proved difficult and progress was slow, a bit later i gor me a self adhesive wooden deck from Pontos and my Hood project was running well until live stopped this in summer 2015. ( incl. two BM Group Builds ) Now i have some days of until the new year and Hood is back from the mothballs.
- 91 replies
-
- 10
-
-
- H.M.S Hood
- Trumpeter
- (and 5 more)
-
Hi everyone !!! After a very long time i'm back again . This is my latest project . The Trumpeter kit is a very good one with very nice detail and loads of weapons . My previous attempts to paint the model failed but this one is the final . I still have to put the missiles but from what you will see you get the picture . Painting freehand as always . I hope you like it PA160191 by nionios_v, on Flickr PA160192 by nionios_v, on Flickr PA160193 by nionios_v, on Flickr PA160195 by nionios_v, on Flickr PA160196 by nionios_v, on Flickr PA160197 by nionios_v, on Flickr PA160200 by nionios_v, on Flickr PA160201 by nionios_v, on Flickr
-
After the 1/48th Sukhoi Su-9 "Fishpot-B" - ref.02896 - and Su-9U "Maiden" - ref.02897 - (thread here: http://www.britmodeller.com/forums/index.php?/topic/234953191-148-sukhoi-su-9u-fishpot-bmaiden-su-11-fishpot-c-by-trumpeter-su-9-released/?hl=sukhoi), Trumpeter is to release a 1/48th Sukhoi Su-11 "Fishpot-C" - ref. 02898. Source: http://tieba.baidu.com/p/2804557302 The test shot is on display at the Nuremberg Toy Fair 2015 Source: http://www.primeportal.net/models/thomas_voigt9/trumpeter_hobby_boss/index.php?Page=2 V.P.
-
 #27/2016 So, here´s the first finished model for our Yom Kippur collection. Trumpeter kit with Aztec decals, initially wanted to use the Pavla SK-1 seat but it didn´t fit well (was also too short) so my dad used the kit seat, only stole the seatbelts from an Eduard kit. Added the missing IFF antenna on the belly with plastic rods. Camo done with Tamiya XF-55 Deck Tan and XF-58 Olice Green, underside colour was an older selfmix. Couldn´t exactly tell which colour the cockpit had. Decided for the colourful turquoise, mixed 50:50 with Gunze H25 Sky Blue and H46 Emerald Green. The model shows an a/c of the Egypt elite No.26 Squadron which was considered the best dogfighter unit in the EAF. This aircraft made it through the Six Day War and the Yom Kippur War. The Arab airforces still used this older MiG-21 type becuase the Atoll rockets were unreliable and the F-13 30mm gun was more potent than the 23mm gun of the other MiG-21 types.
 -

JGSDF NBC Detection Vehicle 1/35 Trumpeter
Kingtiger posted a topic in Ready for Inspection - Armour
JGSDF NBC Detection Vehicle 1/35 Trumpeter -
 Well it's done - this has been something of a slog as it's not a great kit. It's very nice in some places, and very iffy in others, and has some inaccuracies. However other than the Revell it's the only 1/32nd P-51B. I like some bits and hopefully having built this means that Tamiya will release a B Painted with Gunze throughout, and weathered with Oils. Wip availabe here Peter
 -
Hi Folks! Here's my 1st build in this forum. It's the JGSDF NBC Detection Vehicle from Trumpeter at 1/35 scale. It still needs some file or sandpaper on certain spots later on.
-
Hi folks! The WWII is my favourite theme, so I decided to participate in this GB with the KV-1 from Trumpeter at 1/35 scale. I started with the lower hull and suspensions: It seems to be a quick build, since the fitting, the castings and the instructions are great.
-
Hi chaps This is a 1:48 Trumpeter kit with an addition of Dreammodels PE. It represents a PLAAF high altitude, high speed interceptor which collided in mid air with a USN EP-3 over the South China Sea. It is armed with a pair of PL-8 pythons. The build was a a part of ARC's Far Out, Far East GB. For more photos and info please check http://militaryaviation148.blogspot.si/2016/08/j-8ii-plaaf-81192.html Thanks for looking in
-
Hello! It's been a while again. I've recently finished this great Trumpeter's model - BTR 60 PU with interior. When I saw this model kit, immediatly I had this thought of showing the interior via cut-offs in the upper hull. Finally I've picked this one to do and had a chance to do this project. In the meantime I've decided to put some lights inside powered by a battery placed in engine bay (the kit doesn't provide any details in this section. The kit itself was nicely moulded and detailed. The only problem I had, when it came to join together lower and upper hulls. Dry fitting was ok, but then when everything was finished, big gaps appeared in front.. Managed to fill them and finish the model. When it comes to interior colour, it's not 100% accurate for this exact vehicle. I've done some research and appeared, that there was pretty much everything from white, thru green and even blue. I've painted the instruments in classic russian cold war interior colour greelue (green+blue) Enjoy and don't be scared to comment! On some pictures looks like some wheels are not flat on the ground, that's due to my vinyl background, which is quite stiff and model isn't heavy enough to make it flat.. Thanks for your attention, Will be back soon! Bart.
- 16 replies
-
- 15
-
-
HMS Hood Trumpeter 1:200 HMS Hood (pennant number 51) was the last battlecruiser built for the Royal Navy. Commissioned in 1920, she was named after the 18th-century Admiral Samuel Hood. One of four Admiral-class battlecruisers ordered in mid-1916, Hood had serious design limitations, though her design was drastically revised after the Battle of Jutland and improved while she was under construction. For this reason she was the only ship of her class to be completed. As one of the largest and, ostensibly, the most powerful warships in the world, Hood was the pride of the Royal Navy and, carrying immense prestige, was known as ‘The Mighty Hood’. She was involved in several showing the flag exercises between her commissioning in 1920 and the outbreak of war in 1939, including training exercises in the Mediterranean Sea and a circumnavigation of the globe with the Special Service Squadron in 1923 and 1924. She was attached to the Mediterranean Fleet following the outbreak of the Second Italo-Abyssinian War. When the Spanish Civil War broke out, Hood was officially assigned to the Mediterranean Fleet until she had to return to Britain in 1939 for an overhaul. By this time, advances in naval gunnery had reduced Hood's usefulness. She was scheduled to undergo a major rebuild in 1941 to correct these issues, but the outbreak of World War II in September 1939 forced the ship into service without the upgrades. When war with Germany was declared, Hood was operating in the area around Iceland, and she spent the next several months hunting between Iceland and the Norwegian Sea for German commerce raiders and blockade runners. After a brief overhaul of her propulsion system, she sailed as the flagship of Force H, and participated in the destruction of the French Fleet at Mers-el-Kebir. Relieved as flagship of Force H, Hood was dispatched to Scapa Flow, and operated in the area as a convoy escort and later as a defence against a potential German invasion fleet. In May 1941, she and the battleship Prince of Wales were ordered to intercept the German battleship Bismarck and the heavy cruiser Prinz Eugen, which were en route to the Atlantic where they were to attack convoys. On 24 May 1941, early in the Battle of the Denmark Strait, Hood was struck by several German shells, exploded and sank. Due to her perceived invincibility, the loss had a profound effect on the British people. The Royal Navy conducted two inquiries into the reasons for the ship's quick demise. The first, held very quickly after the ship's loss, concluded that Hood's aft magazine had exploded after one of Bismarck's shells penetrated the ship's armour. A second inquiry was held after complaints that the first board had failed to consider alternative explanations, such as an explosion of the ship's torpedoes. It was more thorough than the first board and concurred with the first board's conclusion. Despite the official explanation, some historians continued to believe that the torpedoes caused the ship's loss, while others proposed an accidental explosion inside one of the ship's gun turrets that reached down into the magazine. Other historians have concentrated on the cause of the magazine explosion. The discovery of the ship's wreck in 2001 confirmed the conclusion of both boards, although the exact reason the magazines detonated will always be a mystery since that area of the ship was entirely destroyed in the explosion. The Model I think I’m right in saying this is one release that maritime modellers have been really looking forward to. Since Trumpeter started their 1:200 scale product line, the Hood was one ship that was always mooted to be included. Well, here she is in her beautiful, enormous glory. Arriving in a huge box with a great painting of the mighty Hood at sea on the front the sheer size of the box gives a hint at what is inside. Once the lid has been prized away the modeller is confronted with three smaller boxes and a flapped area which covers the single piece hull, the mould for which must be amazing to see. The hull is well protected by two cardboard supports and foam pieces at each end to ensure the delicate bow and stern aren’t subject to transportation damage. Inside the other three boxes are four separate deck sections, three for the main deck and one for the shelter deck, twenty sprues, eight separate superstructures/deckhouses and four separate propellers, all in a grey styrene. There are also seven sheets of etched brass, four metal rods, a length of chain, and a smallish decal sheet. As with most Trumpeter kits the moulding of all the parts is superb, with no signs of flash or other imperfections, which is quite amazing considering the size of some of the parts, although there are quite a few moulding pips which will require extra cleaning up and the propeller blades have a slightly annoying tag on their outer edges, as you will see in the accompanying photographs. Unfortunately, also as with a lot of Trumpeter kits there are some really annoying inaccuracies, which is strange, since they did so well with their 1:350 scale kit. Whilst some are easily handled, like the rubbing down of the rather too prominent hull plates, although the hull itself is generally correct, there are also those which are a bit more difficult to rectify, namely the different sized funnels where they should be the same. Hopefully someone will release a fix for this, or it may be time to try some scratch-building. Over it is pretty accurate though, with a few minor problems, which are best noted in the excellent review by the HMS Hood association, HERE Construction begins with the fitting of the six strengthening braces into the hull; topped off with the fore deck, centre deck and quarterdeck. On the underside the propeller shaft exit glands are attached, followed by the metal shafts, A frames, propellers, ensuring you have the correct propellers on each side as they are handed, and the single rudder. Turing the hull the right side up, six parts of the rear superstructure are attached to the rear of the centre deck, along with four cable reels which are a combination of PE and plastic, followed by a selection of vents, hatches and upper deck supports. The large, single piece shelter deck is then fitted atop of the superstructure parts, also covering the join between the foredeck and centre deck. The lower bridge structure is fitted with bottom sections of the mast supports, a pair of three piece paravanes, six boat booms, four Carley floats and some small platforms, before being glued into position. The shelter deck is then fitted out with numerous ventilator mushrooms, inclined ladders, and derricks, whilst a large boat boom is fitted to either side of the hull amidships. The cradles for the ships boats are then added to the shelter deck, followed by yet more ventilators, chimneys and a pair of large ammunition hatches. The sixteen small ready use lockers and seventeen cable reels are then assembled and glued into position, followed by the thirty five large ready use lockers. On the foredeck, the anchor chain windlasses, four smaller windlasses, and main breakwater are attached, along with the breakwaters either side of B turret. Then more mushroom vents, windlass, lockers and chain pipes are fitted, followed by the large vents around both B turret barbette and the armoured control tower base, which also has three winches fitted to the deck around it. The four piece anchors are then assembled and fitted to the hawse pipes, followed by two lengths of chain and two deckhouses attached to the rear of the main breakwater. The quarterdeck is similarly fitted out with mushroom vents, although not quite so many, winches, large vents around X turret barbette and the prominent inclined ladders either side of the rear superstructure, as well as the square scuttles sited nearby. Back on the foredeck there are several derricks fitted, along with the Jackstaff, cleats, and bollards. Similar fittings are attached to the quarter deck, along with the Ensign staff, as you can see the instructions bounce around a little. The build then moves onto the superstructure, with the assembly of the sundry parts fitted to the rear funnel base, as well as Carley floats, winches and two of the smaller ships boats, a smaller tower structure is attached, and fitted with two, two piece wireless arms. The after tower structure at the end of the shelter deck is a single piece item and is fitted with a number of platforms and their associated supports, the after main armament director, made up from nine parts, two large intakes, two six piece searchlights and one of three, eleven piece AA directors, one large and two small Carley floats. The two structures are then glued to their respective positions. The shelter deck is then fitted with more hatches, intakes and five deckhouses. The four searchlight platforms, two either side of the aft tower and two alongside the aft funnel are fitted along with their searchlights, whilst the aft PomPom platform and two quad machine gun platforms along with their seven piece mounts are glued into position. The base of the bridge tower is attached to the tops of three deckhouses, behind which the four flag lockers are fitted on either side of the forward shelter deck there are two observers binoculars, and aldis lamp, a large signal lamps, a semaphore pole and a quad machine gun mount. Two large and two small directors/rangefinders are also fitted near the signal lamps. The armoured tower and deck structure are then glued into position, followed by the tower roof and the large six piece director/rangefinder. Onto the deck, three deckhouses are fitted, along with four inclined ladders and a vertical ladder. The bridge itself is a single piece part, and is fitted out with sixteen observers binoculars, two AA directors, two searchlights, three further decks the lower mast supports, foremast, the complex PE foremast starfish structure, top mast, lower yardarm, inclined ladders, vertical ladders, and main armament director. The funnels are next on the assembly line, and whilst the rear funnel is the wrong size, most modellers will probably overlook this and build the kit straight out of the box. Each funnel is in two halves, which are then glued to the base, and fitted out with PE hand/foot rails, internal platform, spacers funnel cap and grilles, followed by the numerous uptakes fitted to the outside of each funnel. The main mast is next up and whilst the mast itself is a relatively simple build, the various fittings for the boat crane are PE parts, as is the complex starfish platform. The upper mast is attached to the platform and topped off with the Type 281 radar array. The crane is a single piece jib, PE hook assembly and PE cable assembly. Once complete the funnels, foremast and mainmast assemblies are glued to their respective positions, as are two smaller boat cranes fitted one each side of the rear funnel. There are thirteen large ships boats provided in the kit, a mixture of cutters and motor boats and each is made up from multiple parts, including propellers, propeller shafts, rudders, etc, but strangely the rowing boats are not provided with any oars. They may have been stored elsewhere when cruising, but it would have been nice to have some for interest. The completed boats are then attached to their respective cradles. Finally we come to the armament. There are four, six piece UP mountings, with the option of using PE or plastic parts to build them, six, seven piece four inch secondary turrets, and three, eighteen piece octuple 2pdr PomPoms. The main turrets are very nicely moulded, although perhaps a little deep. Each turret is made up from the turret, turret base, trunnion mounts, and two slide moulded gun barrels. Each turret is then fitted with a four piece rangefinder mounted to the rear, but only B turret is then fitted with a UP mounting platform that sits astride the rangefinder and X turret is fitted with two platforms that are attached to the starboard side of the turret roof. The completed armament is then fitted to the model. To complete the model, a full ships worth of railings is provided in PE, as well as four accommodation ladders, four Jacobs ladders and a pair of lifering quick release racks. Oh and of course the rigging and painting to the modellers taste. Decals For the size of the model, the decal sheet is actually quite small and contains only the ships two nameplates for the rear quarters and a selection of Union Jacks and White Ensigns in different sizes and in straight or wavy form along with two Vice Admiral’s pennants. They are nicely produced and appear to have a nice thin carrier film and to be in register. Conclusion It’s been a little while since this kit has been released, and its popularity has meant that we have only now been able to get hold of it. Overall impressions are very good, with the hull and most of the structure being pretty accurate overall. It’s just a shame that Trumpeter, once again, have snatched defeat from what would have been a great victory with the difference in funnel sizes even without the smaller discrepancies. It’s still a wonderful kit and with a super detail set from the likes of Pontos, who look like they are including a new resin funnel, and Mk1 Designs you can relatively easily produce an amazing, museum standard model. Review sample courtesy of UK Distributors for
- 3 replies
-
- 8
-
-
- Pocketbond
- HMS
- (and 2 more)