Search the Community
Showing results for tags 'tamiya'.
-
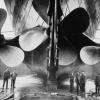
Background: The Yahagi was the second of four Agano class light cruisers build for the Imperial Japanese Navy. She was laid down during November 1941 by Sabeso Naval Arsenal, and launched in the October of 1942. The main armament was six 6-inch carried in three twin turrets and the top speed was 35 knots; two float planes were carried. Yahagi was present at the battles of the Philippine Sea, Leyte Gulf, and Battle off Samar. In 1945 Yahagi was attacked by waves of Allied aircraft and sunk with the loss of 445 crewmen. The kit: The model is from Tamiya's 1/700 waterline series and was completed using a mixture of spare photoetch (mostly from various White Ensign Models sets), plus some minor scratch-built details. The hull was painted with Tamiya XF-53 Neutral Grey, and the deck with XF-64 Red Brown. The rigging was accomplished using Uschi rigging thread (.003mm). A log of the build can be found in the Work in Progress section: http://www.britmodeller.com/forums/index.php?/topic/234975349-1700-light-cruiser-yahagi/ I had a good time building this model and look forward to doing more IJN subjects in the future; another Agano class ship but in 1/350 is on my wish-list. Thanks for looking, and any comments or questions are most welcome. Regards, Ross.
- 16 replies
-
- 12
-

-
 OK, I'm calling this one done. Back in February I posted pics of my Tamiya Spitfire Mk.Vb (link), and now I've finished off it's Airfix sibling. Whereas the Tamiya kit was basically OOB with a few minor shape corrections, this one has a few additions to it (but no shape corrections): - Master brass cannon barrels - Wing trailing edges thinned and surface detail added to ailerons - Sutton harness from Tamiya tape - Added missing fasteners on the engine cowls - Added wing root fillet fastener detail - Prop, spinner and main wheels from the old Hasegawa Mk.Vb - Tail wheel from the Hasegawa Mk.IXc - Kit exhausts drilled out and detailed with weld seams - Main markings/insignia painted with home-made masks - Barracudacals airframe stencils - Added the sliding hood knockout panel cut from an old "Fast Frames" sheet Questions and constructive criticism are always welcome! The markings I chose are for a 402 Sqdn (RCAF) aircraft flown by Flight Lieutenant Henry Percy Duval of Saint-Jean-sur-Richelieu, Quebec. F/Lt. Percy was shot down near Dunkirk in late May 1940 during the Battle of France and managed to return to fight in the Battle of Britain. Later, on 27 April 1942, he was flying AA834 on a "Rodeo" to Lille and collided with another Spitfire over Le Touquet and was KIA. F/Lt. Percy was not famous, nor was he an ace, but to me he is representative of the thousands of airmen who gave their lives. Cheers, Tony
- 23 replies
-
- 26
-
-
 Hi all, Normally I build in 1/144 scale so doing something in 48 scale is like normal people doing something in 1/16th!!!! This one is OOB with the exception of an OWL SN2 resin radar aerial set for the Ju88. - It's a 'what if' - if they had of gone into service they would have troubled even the mighty mossie..... Thanks for looking .... she is just about done. Happy Modelling all, Ian
 -
Hi everyone, this is my first ever WIP thread; I thought it would be interesting to share my progress on a build; the kit is Tamiya's 1/700 IJN Yahagi. I won't be buying any upgrades for this build, so any extra detail will have to be scavenged from my spare bits or otherwise scratch built. Any comments, observations or advice are most welcome. The first step is to begin work on the sub-assemblies and clean up easily identifiable parts in preparation for priming; the fiddly stuff I will prime on the sprue and remove unwanted lines after cutting. Apologies if the picture quality isn't great, as my camera isn't of the highest standard and light levels aren't ideal at the moment. From what I can determine the kit seems to be an older release, and like many Tamiya ships in this scale there is a lack of vertical detail on the superstructure; the lower half of the bridge tower has none at all. It would be a shame to leave it like that since the rest of the kit is of a more than acceptable standard. Using pictures of the 1/350 version of Yahagi as reference I drilled some portholes and added some doors and ladders; some moulded on detail was removed and will be replaced by railings later in the build. The turrets will get the same treatment. I have a concern about the PE parts - the doors resemble slightly chunkier versions of the ladders and it's harder to tell them apart; I will address this in the painting. Two possible options are: 1- apply a recess wash to the outline of the door and to the entire ladder or, 2- apply a recess-wash to the entire door and leave the ladder the same as the hull and treat it as soft detail. I am leaning towards the latter. Regards, Ross.
-
 Chance Vought F4U-1A Corsair detail Sets Eduard 1:32 The Tamiya 1:32 Corsair F4U-1A is a fantastic model straight out of the box as are all of this series of 1:32 kits, but there are always more ways to gild the lily. This is Eduard come in with their range of update sets for it, six in fact if you include the zoom and mask sets, and there’ll probably be joined by others in the near future. Each set is held in the usual poly sleeve packaging with a card insert to prevent damage, and the instructions still leave a lot to be desired. Typically some of the kit details need to be removed before the brass parts can be added. Interior Set (32828) Contained on two sheets of relief etched brass, the larger one is unpainted whereas the smaller one is not only pre-painted but self adhesive as well. The unpainted sheet contains items such as the rudder pedal heel and toe plates, rudder cable attachments, side console inside faces, document pockets and additional fittings not included in the kit. On the engine bulkhead there is a pair of new cable runs and pipes, whilst the foot rests/”floor” troughs are fitted with more detailed bulkhead fittings complete with lightening holes. There are a large number of instrument boxes fitted around the cockpit, on the side consoles; coaming and side walls onto which the pre-painted faces are attached. The instrument panels are also pre-painted complete with the instrument faces on the backplate. A little dab of aqua clear will give them the appearance of glass fronts. The fire extinguisher and oxygen bottles receive new straps and supports and the canopy is fitted with new frames fore and aft and latching handle. Interior Zoom Set (33144) This zoom set contains only the above pre-painted sheet and allows the modeller to build a well detailed cockpit without the hassle of getting bogged down with detail that might otherwise be deemed superfluous. Engine Set (32365) To really enhance the details on the kits engine this set provides a wealth of additional and finer parts for the job. Quite a few areas need to be cut away before the etched parts can be added, particularly around the cowling mounting bulkhead between the cylinder banks. Holes need to be drilled into the cylinder banks ready to accept the new wiring harness which is pretty complex and care will be needed as whilst the instruction diagram is better than usual, it could have been clearer. The exhaust manifold receives new flanges and jubilee style clips. Another complex area of the build is the fitting of the individual cowl flaps and cowl flap ring. Each cowl flap is fitted with a three piece etched actuator which will need a very steady hand to assemble and fit. The front cowl mounting ring is also provided as are the interior rib detail for each of the opening cowling panels. Exterior (32366) This single sheet set contains some very nice additional detail for the exterior and open areas of the kit. There are quite a few parts dedicated to the interior of the tailwheel bay, especially on the mounting bulkhead which has new mounting fixtures and fittings for the tail oleo, whilst the foreward bulkhead is fitted with new fittings which include the rudder cable arm and mounting bracket. The tailwheel bay doors are fitted with new hinges panels and attachment links. The main wheel bays also get a dose of additional detail with the fitting of new panels around the bay walls and roof along with additional cabling and pipe work. If you’re building the model with wings folded then you have the option of adding new end plates to the flaps and ailerons along with replacement brackets and web pieces. The wing fold areas have a host of new hoses and pipework fitted which will really make the areas look not only more accurate but busy. Placards (32829) This small single sheet set contains much of what is already on the interior sets pre-painted sheet and naturally the zoom set, which is rather annoying to be honest. There are a few parts different that the modeller could use in the cockpit, but not nearly enough to make this set worth being separate to the interior sets. Masks (JX176) To complement the sets mentioned above, Eduard have also released a set of paint masks for the F4U-1A, which helps masking the clear areas a whole lot easier. Conclusion As with most of Eduards releases there are questions as to why some sets are so comprehensive yet still missing vital parts that are held back to make up other smaller sets. The placard set should be contained in the interior pack as should a set of seatbelts which will probably be released later. The quality of these sets is superb, and will certainly help to the making of a super detailed model. Highly recommended. Review sample courtesy of
 -
Well, 2014 was a bit of a bust for me modelling-wise, as I didn't actually finish a single thing. Fortunately 2015 is shaping up to be a bit more productive (actually infinitely more, if you're a stickler for math.) Hot off the bench is the good old Tamiya Spitfire Mk.Vb, pretty much OOB. The only things I did to it were: - Refined the wing trailing edge a bit to fix the well known shape issue - Refined the shape of the nose a bit to make the rocker covers a bit less "broad shouldered" looking - Drilled out the canon barrels - Drilled out the exhausts And that's it. I didn't even add a seat harness, although I still have the option since the canopy hood is only tacked on. Paints are Gunze Mr Colour for the Dark Earth, Tamiya 75% XF81 Dark Green plus 25% XF49 Khaki for the Dark Green and 75% Tamiya XF21 Sky plus about 25% X2 White for the Sky. The roundels and fuselage codes were masked and painted, while the rest of the decals came from the new Airfix Mk.Vb kit (which will be next off the bench, as it happens.) The markings themselves are neither fish nor fowl, BM597 having never actually been painted in this camouflage scheme during her service career, although she did wear the codes JHoC while flying with 317 Sqdn. As a restored warbird, BM597 does indeed wear these colours, but there are several airframe details that are post-war modifications that the Tamiya kit does not include (obviously). So I've painted the model up in the restored colours, but weathered it as if it were in service, just because I felt like it. Questions and constructive criticism are always welcome! Cheers, Tony
- 47 replies
-
- 26
-
-
IJN Battleship Musashi Detail Sets 1:350 Eduard Tamiya first released the 1:350 IJN battleship Musashi in 1979 and apart from adding new parts in 1981it hadn’t really been updated until 2013. To update and detail this latest release Eduard have now produced three sets of photo etched parts. The three sets are for the ship, deck plates and railings. Part 1- (53-133). This comprehensive two sheet set is jam packed full of parts for use throughout the ship. It includes everything from the hyper complicated and realistic aircraft handling crane to vent grilles and liferings. The aircraft handling crane is completely replaced with brass and although there is minimal folding required, there are a great many parts that go to make up one of the most realistic cranes I’ve come across. Every boom, jib, cradle and cable wheels are included, as well as all the webs, supports and brackets. All the modeller has to add are a couple of 0.3mm plastic rods to finish it off. The rest of the sheets contain numerous intake grilles, vent grilles, inclined and vertical ladders, cable reels, some of which require the modeller to provide some 1.5mm plastic rod for the drums whilst the large ones the drum is made up of brass etch that is rolled to shape. There are also hand wheels for the winch brakes, a new face plates for the breakwater and deckhouses, deck hatches and a new accommodation ladder for the foredeck. The light AA gun tub splinter shields are replaced as are the two Type 21 radars atop the main rangefinder as well as the Type 13 radars on the foremast, which also gets a full complement of ladders. The 155mm turrets are provided with new access doors, ladders, and a small crane, with the fore and aft mountings also being fitted with aerial towers. The main 460mm turrets are fitted out with replacement platforms, doors, ladders, rangefinder hatches, and the practice gun platforms and railings which weren’t always fitted, so check your references. The various gun directors have new port covers fitted, as do the 127mm turrets. There are loads of new platforms, railings and inclined ladders fitted to the main superstructure tower and a large platform fitted to the front of the funnel casing. On the quaterdeck there are several replacement platforms, new boat bay doors and the large perforated gratings in front of the catapult mounts. Talking of catapults, both units are completely replaced, with separate cable wheels, platforms and mounting plate. To complement the new catapults there are full set of transport and launch cradles for both the single and twin float aircraft, each of which also receives a new propeller. Part 2 – (53-134). Whilst the set above does include a lot of the subsidiary railings for the platforms this set completes the ship with a full range of railings for the main deck, and superstructure. What is nice with this set is that Eduard have taken the trouble to actually shape the foredeck railings so they fit the sheer of the hull, making life a lot easier. There are also a selection of smaller railings and handrails for areas such as the main rangefinders, 127mm mounts, and quarterdeck. Part 3 – (53-135). This is a very simple set which provides a set of new deck plates for areas such as the AA mountings, gun tubs, boat bay recesses, AA platforms, main superstructure decks, quarterdeck grille surrounds and aircraft handling turntables. The main plate will make painting the decks much easier as they can be painted separately then fitted after the superstructure has been painted. Conclusion Eduard seem to be really getting to grips with their maritime update sets and these three are just superb. These look like they will bring a big improvement to the kit, giving some much need finesse to the finished model. Very highly recommended. Review sample courtesy of
-
Well, it would appear that a Tamiya F14 in 1:32 dropped on to my door mat yesterday... I wonder how that happened I really want to make this kit the best one I've built, and as a mediocre modeller (and maybe I'm giving myself a little too much credit there) I wanted to ask you good people for some help and advice to help me along. Do any of you have any recommendations for decals, photo-etch parts, resin extra's? I've seen a few on Hannants that take my eye but thought I'd see what you guys came up with before I bought anything? Are there any metal undercarriage sets out there as I'm not sure I trust the plastic parts to hold the kit up? Do any of you know of any 'work in progress' threads (I've looked but can't find any)? And basically anything else I should be aware of that will help me make a really good go of this kit... Thanks guys and girls, look forward to reading your replies. James
-
Horst Carganico's aircraft as interpreted by Kagero's Topcolours. Completed this a couple of months ago. OOB - Thanks for looking, Happy modelling all. Ian
- 11 replies
-
- 18
-
-
Hello! Since the SWMBO is stalling all my attempts to get something done on the 1/24 Typhoon, i decided to post an older model here in RFI, just to show that i'm still alive. So, here we have the prototype for the B zerstörer series, M14 or RP+UQ Model from Tamiya, some etch in the cockpit from Eduard, Quickboost exhausts and CMK Wheels. Enjoy! Painted with Gunze acrylics, and some slight weathering here and there. Thanks for watching! //Christer
-
 There doesn't seem to be much online for this one. Any thoughts? Cheers, Andrew
 -
I actually finished a model and it only took me two months... I present my first motorcycle model, hopefully not the last. I hope you like it. There are no doubt many things that could have been better, but overall I'm pretty happy with how it turned out. One of the flame motif decals is missing (thanks to a masking incident) but a replacement sheet is one the way. It's built out-of-the-box and finished in Tamiya Spray, Tamiya Acrylics and Alclad metallics. I used Alclad Aqua Gloss to seal the decals, but to be honest I didn't really get on with it and the finish is not as glossy as it might have been. Kawasaki Ninja ZX-14 Special Colour Edition by Caution Wake Turbulence, on Flickr Kawasaki Ninja ZX-14 Special Colour Edition by Caution Wake Turbulence, on Flickr Kawasaki Ninja ZX-14 Special Colour Edition by Caution Wake Turbulence, on Flickr Kawasaki Ninja ZX-14 Special Colour Edition by Caution Wake Turbulence, on Flickr Kawasaki Ninja ZX-14 Special Colour Edition by Caution Wake Turbulence, on Flickr Thanks for looking! I'll add a few close-ups later. The build thread is here. Cheers, Andrew
-
My first foray into the world of bike kits.... I am completely ignorant about bikes in the real world - my bike only goes as fast as I can pedal it! So, here's the kit: Tamiya Kawasaki Ninja ZX-14 Box by Caution Wake Turbulence, on Flickr I've decided to go for the white scheme above. So far, I've assembled and primed the engine block and assembled parts of the frame and the exhaust. Overall, it seems to be a well moulded and well engineered kit, although the plastic does seem a little hard and brittle and needs a little extra care when cleaning up. I've stripped all the chrome off the exhaust sprue, as I want to have a go with the Alclad high shine chrome finish, which I haven't used before. I'll be using a mixture of Tamiya acrylics/sprays, Alclads and possibly some of the Mr Hobby metallic finishes. More photos to follow. Cheers, Andrew
-
Good morning, as my Kawasaki ZX-14 build is nearing completion, I am planning to start on this one next. I haven't made up my mind which colour to go with yet, but i think I might have a go with some Zero paints, especially as they do colour-matched paints for this car. I know a couple of companies make PE sets for this kit, so I may have a look at those too. Any advice you may have on using Zero paints, and building car kits in general, gratefully received! Stayed tuned, I'll put some pictures up later. Cheers, Andrew
-
Hello, With the arrival of the airbrush and compressor yesterday I've decided to take the plunge and build two kits at the same time. the two kits I'm building are the 1/100 Academy F-14 and the reboxed Italeri/Tamiya Jaguar GR-1, here is the usual box shots for the moment. Box Shot of both kits: Academy 1/100 F-14 Tomcat: Stand for the Tomcat: Sprue A: Sprue B: Tamiya/Italeri Jaguar GR-1: Sprue A: Sprue B: The Tomcat is going to be finished in White, and at the moment I'm unsure about the Jaguar, its either going to be in the Gulf War Colours or the Grey/Green scheme which it can also be built in! Thanks for Looking.
-
Kit: Tamiya 35190 Paint & Weathering: (Mostly) Tamiya Acrylic. MIG pastels, oil washes & filters. Decals: Kit. Extras: RB aluminium barrel, numerous extras from Tamiya, Italeri & Academy accessory sets. References: New Vanguard #3 ‘Sherman Medium Tank’ – S J. Zaloga. US Armour Camouflage & Markings WWII – Jim Mesko. D-Day to Berlin, Armour Camouflage & Markings of the US, British & German Armies, June 1944 to May 1945 – Terence Wise. Building & Detailing Realistic Sherman Tanks – James K. Wechsler. M4 Sherman (Early - Remanufactured) ‘H’ Company, 66th Armd. Regt. 2nd Armd. Division France, August 1944 - Really enjoyable, and for me lightning-fast, project. Thanks for taking the time to look and/or comment. As ever happy to take any and all questions, criticism and comments. AFN Ian
-
These were built about 4 years ago and the Calsonic was my first ever car build. All are Tamiya 1:24.
-
Next in the queue are these two, partly because having bought the first five volumes of the Luftwaffe Crash Archive I want to make a start on utilising the fabulous research therein. Tamiya Emil by jongwinnett, on Flickr Airfix Emil by jongwinnett, on Flickr So far actual modeling progress has been limited to a waft of Halfords finest primer. Coming next... by jongwinnett, on Flickr Ideally I would like, to do one as Boehm's E-3 which was the first Bf109 to come down in the UK. However, whilst I have most of the necessary decals, the White 4 edged red eludes me. I think Boehm's plane featured in one of the Cutting Edge decal sheets in 1/48, but I haven't found a source in 1/72. Suggestions welcome! I haven't decided on how to finish the other. I do have decals for Priller's E-3, but I would prefer to model another that came down in the Uk. I know nothing about German planes, having never built one before, but am I right in thinking that the E-3s were largely upgraded to E-4 standards, or is that nonsense? I haven't found another suitable prototype yet. But the research is half the fun.
-
 Big weekend, managed to complete two models. Her is a completed one from the shelf of doom. I am not sure why I put this aside, but it has been sitting there for the best part of 2 years. I suspect it may have been I had lost heart after having some issues with the decals and also because I didn't want to deal with the undercarriage, which I had found fiddly the last time I made this kit (as a B Mk IV), and made a hash of that time. I was reminded of it when rummaging in my paint supplies and finding the pot of own-mix PRU blue (and no, I cannot remember the recipe, other than it contains Tamiya acrylics). Finished as a PRIV of 540 Squadron, RAF Benson. Final coat of Italeri Acryl flat varnish. Only just had enough of the own-brew PRU, down to the very last dregs. I used Clearfix for the camera windows, found it a bit hard to handle. All in all though very happy with how it turned out. Build thread here. Thanks for looking.
- 11 replies
-
- 13
-
-
- DH Mosquito
- Tamiya
- (and 1 more)
-
- 19 replies
-
- 12
-
-
After my last model, I thought I should return to the shelf of doom to see if I could finish this one. I am not sure why I put this aside, but it has been sitting there for the best part of 2 years. I suspect it may have been I had lost heart after having some issues with the decals and also because I didn't want to deal with the under carriage, which I had found fiddly the last time I made this kit (as a B Mk IV), and made a hash of that time. I was reminded of it when rummaging in my paint supplies and finding the pot of own-mix PRU blue (and no, I cannot remember the recipe, other than it contains Tamiya acrylics). So here is what I had to start with: And some close ups: Those radiators need redoing - what was I thinking? First task - dealing with the undercarriage and wheels. Painted and lightly weathered the wheels. Ok, it was fiddly but I persisted and ultimately once complete was actually a pretty sturdy item. Cut back the aluminium finish by a wash of acrylic raw umber in floor polish. Finished off the props,which were 90 % done. Test fit to see how it all looks.
-
So here is my second finished kit after 25 years out, Tamiya's 1/48th P-51B dressed as Don Gentile's "Shangri-La"; there are PE seatbelts in there plus replacement exhausts again, and another Eagle Cal set for the markings as the Tammy ones disintegrated into a zillion pieces - probably just as well as their red was too dark and the chequerboard was inverted - red squares where there should be white, and vice versa. There are a couple of other issues if you are building this kit: the propeller should be the paddle-bladed type, not the cuffed as supplied (and used, I wasn't too bothered!), and the drop-tanks are also wrong, all pictures of Shangri-La show her with the tear-drop type. Pictures also show the main undercarriage doors firmly closed on the ground, so I followed suit here. Curiously she appears to have worn both exhaust styles at various times. A few more techniques learnt along the way, including using a pencil for panel lines, and Tamiya weathering powders.
- 17 replies
-
- 19
-
-
Evening all, As promised in my WIP thread, here's the finished 109. A few niggles that I can't ignore, but a generally an enjoyable build. I'll be displaying her at Yeovilton along with the Spitfire. Thanks for looking, comments welcomed Shaun
- 18 replies
-
- 30
-
-
 Hi everyone, This is my Panzer II. Just about getting the hang of the new weathering technique that I've copied off of something I saw in a magazine, this basically involves me spraying a very thin coat of a brown or dark colour over the running gear just to simulate the grime that built up down there and to tone the model down. Tamiya's kit is nice, being tooled in 2008 it is naturally one of the better Tamiya kits and it was a bit of a break from the 70's and 80's kits that I have been building and updating. The only problems with the kit that I faced were the lifting hooks on the turret went missing so I placed a bit of foil painted in Tamiya dark green over the top of the big locating holes to mimic a draped piece of folded tarpaulin. Also the link and length track (in which it was my first experience in using it) was a bit of a tricky job on the first side and I was left with a small gap that had to be fitted with a slightly modified track link to make it look normal, the second side however was slightly easier. The tank itself was painted in Tamiya acrylics whilst the detail painting was done in Humbrol enamel and Vallejo acrylics which gave the wood colour. Decaling was a bit tricky as a lot of the decals were on the turret and were over vision panels or fairings so Mr Softener was used to give them a bit of help whilst settling (that and lots of Klear!) Weathering mainly consisted of the said running gear treatment and various washes and filters. A dot filter was applied to the turret and some of the more slanted parts of the hull but not all of the tank could be filtered as there's so much equipment on the thing. Thanks for looking! Again, thanks for looking. It may not be one of my best builds but, hopefully the Mk. IV 'Tadpole' from Takom will be better!
 -
Whilst making the finishing touches to my Hellcat, I couldn't resist making a start on the next of my Battle of Britain builds, selecting the Tamiya E-3 boxing as the first of two 109s I have planned for my project. The build has progressed quickly as you'd expect of a Tamiya kit, with the interior complete. I've added some pre-painted belts from Eduard as finishing touch, but otherwise it's OOB. Expect progress to be pretty swift! Cheers, Shaun