Search the Community
Showing results for tags 'scratch'.
-
My friends I want to give you a way to make a scratch submarine with balsa First we choose the plan. I use the blueprints plans and I prefer there are three views of sub f.e Then I analyzed how make it. I seperate to the main submarine corp and the turret. I save the plan as foto and go to open with painture I zoom the foto in dimensions I want. ( Because I use leaves of balsa 1000mmX100mmX10mm the dimensions must be less from the Balsa) To make a sub 70 cm we want 8-9 pieces of balsa I fix them with cyanoacrylic glue and not with wood(water)glues because the woodglue will warp the balsa. Be carefull because the cyanoacrylic glue when comes in contact with balsa makes temperature and gas. You must me very hurry to fix the pieces I have a piece of balsa 1mX 80mm (if I use 8 pieces)X 100mm. That for the main corp. I calculate the turret and make the same with smallest pieces of balsa. Then I take a piece of paper and design the plan (all the lines) of corp from the zoomed foto. The same for turret, Cut the paper plan of sub and design it on balsa Then design the plan from upper side of sub (deck) Cut the paper Do the same design on balsa piece upper side. Be careful the lines to be on correct position in 3 dimensions We leave always a small piece of balsa and cut the balsa to the small around black lines.If do nt do that the sub with the sand paper work will have smallest dimensions . then with a sand paper on sand paper driver begin to scratch the balsa until lines We must have in our mind the geometry , symmetry and stereometry. The same do for the turret Be careful The external lines of plan are the real dimensions on 2 dimensions. The 3d dimensions give us the interior lines. In that level we use and the front and back plan to see the angles and curves. In that level the balsa "speak " to us. We see the scheme to construct and always must make small steps because the wrong difficult repairing. When we make the corp ....... we paint with wood varnish , dry well and with a sand paper smooth it. That for three time. The sand paper must be light Then paint with acrylic varnish ( I have nt foto of type 214 with acrylic varnish) We paint the acrylic colur 2 hands or more We fix the turret on corp. (the turret paint with the same way) For antenas etc I use plastic sprue, tooth peaks, and wires. For propeller make it from a piece of metal in scale For other accesories of sub I use interior pieces of mobile. You will discover a modelling microcosmos in an old mobile. (Barrels for machine guns are good and the lighters gas tubes) I am happy to answer your questions
-
Hello everyone. I'm still new here..., so here I'm trying my second message. These are my works in progress. For now, all suspended in different stages of construction, for some error that requires a major correction, for boredom, or because the stage that begins requires special attention, especially the development of engines... Anyway, now I am dedicated to some works that occupy me all the time, so necessarily there they will be waiting for the best moment to be finished. Artigau 'Coronel Pringles' ... it was an airplane of Argentine manufacture that flew between 1917 and 1920. It is the work that is first in the waiting list. I have to make the Gnome Omega 50hp, make the simil fabric of the wings and fuselage, and everything else. London & Provincial ... they are the models 'Brevet biplane' (Gnome Omega 50hp), and 'Fuselage biplane' (Anzani 100hp.). It is necessary to refine the details of the fabric of the fuselage and the wings, besides carving the corresponding ailerons. The cylinders of the engines are already made, only the blocks are missing, and everything else... LFG V.130 Strela ... the huge wings of this plane are stored in another box. The Benz Bz-IV engine and all its parts are already made, I just have to assemble it. Work details on the fuselage. Assemble the wings and tail, and continue with the construction of the rest of the parts... FEIRO Daru ... an interesting Hungarian passenger plane from the early 20s. This project I suspended almost at the beginning, since the development of the nose for the Hispano-Suiza was wrong. It will require a lot of attention and better interpretation of the images.
-
Hello... I greet the community from Argentina. I see that I joined Britmodeller in 2015, but I never wrote anything... I can assure you that I'm not a ghost! ^ ^ I am a lover of everything that has wings produced between 1919 and 1939... I am also very tempted by the WWI planes, and the beautiful curves of any time (of some planes too). Although the interwar world is usually silvery with some well-documented colors, being a ghost can sometimes be very convenient at the moment of interpreting lost livery in b/w. I embrace this hobby from the scratch, drawings, and some projects that revolve around them. My English is very bad, so I apologize in advance. If the subject be up to my knowledge, and I have time, it will be a pleasure to participate in Britmodeller. Saludos Matías
-
A recent scratch build project that i have completed, Focke-Wulf 190 T-1. This is a fictional design of a Fw-190 D-9 fitted with a turboprop engine and tricycle landing gear. For the paint scheme i used a Tricolour scheme from a Fw-190 A-8 With the colours of Yellow 15 from a Fw-190 D-9, the scheme was weathered using a graphite pencil and various washes. I was happy with the overall build of the model but was not as pleased with the paint schemes finish as i had to brush paint rather than using a airbrush due to my airbrush being out of commission. Thanks to anyone who took the time to look over my build, look forward to hearing any feedback.
-
 Hi, Yesterday evening I finished her. This is Potez 29 - small airliner, transport, ambulane and liason development of Potez XXV. In real thing it has common with XXV whole lower wings and upper ones except the center part, which was incorpoated with fuselage and wider, as fuselage also was. I di it similar - I used wings of Broplan Potez XXV (vacu) and buid our of scratch everything else includeing central part of top wing. The build was reported in thread The painting scheme was on side profile - but since the wings has no dihedral on side profiles you cannot see any detail. So it my reconstruction how it might be based on some photos. I explained my decisissions and motivations in WIP threat . Comments welcome Regards Jerzy-Wojtek
- 17 replies
-
- 21
-

-
 Its been a long time in the making but its finished. Its a long way of a clean build and the decals are very annoying but other than that is was great fun to build and i learnt lot about scratch and kit bashing. The bits and bobs used to build up the TEER HG Exia HG Kashatria MG Sinanju HG IBO weapons kit A screwdriver handle, hose connector, sample pot, hair clipper grader, some sort of electrical connector picked up from DIY shop, a plastic tube and a few bit of pla-plate and tube, the odd bit of copper wire and a few paper clips. This is my imagined ship from the Gundam universe that they call a mobile armor, this one is a massive over powered gun designed for bowing up space stations, small moons or asteroids Spec: Length 87.5m Height 27.5M Wide 45.0 (with arms) Weight 415t Speed Mach 35. Hyper Mega Cannon 5 Funnels High Energy Beam Cannon 2 High Energy beam sabres Battle Claw I-Field Barrier
 -
 Hi all Haven't posted much in the way of build photos as this one just didn't seem to appeal to many. It may still be that way but it is what it is and I enjoy doing them. So, this is a hand carved Ferrari (the eighth I've done of this model), but this time I wanted to hack it from nice woods ... mahogany and padauk ... with some light coloured veneer, then give everything a highly polished lacquer finish. Decided to do a matching pattern on the base just for fun. Not highly detailed as I like my wooden models mostly to emphasize and concentrate on the beautiful shapes of these early cars. OK, I'll let the pictures speak for themselves. Enjoy (I hope) Frank Other Scratch builds ... Lancia D50 Sport Fishing Boat Half Hull Boats Flying Scotsman A3 Lola T70 Mk 1 Dragon Sailboat
- 21 replies
-
- 22
-
-
Hi It is like that that Potez XXV and Breguet 19 are in a way coupled machines. From begining they were competiting and still if you think on one of them you immediately have to think on the second one. Since I am just about to finish construction of TWO Breguets out of a SINGLE Hit-kit kit I started to construct Potez XXV family. In my stash I have three of them: 1. Hit Kit Potez 25 TOE 2. Hit Kit Potez 25 Jupiter 3. Broplan Potez 25 A2 (Lorrain engine) However, I think that doing three Potez XXV could be a bit too much. Therfore I decided to to do: 1. Vichy from Indochina - P. XXV TOE (almost OOB if this term can be used in case of Hit-kit kit) 2. Spanish Republican P. XXV Jupiter - ex-Estonian (as above, however this paointing scheme is not included in box) 3. Scratch conversion to Potez 29 made with use of wings and some more parts from Broplan 25 A2. Here the painting scheme is from Marocco, 1943, but I have two others schemes in some French journal or booklet. Not decided yet which exactly I will do. There is a resin kit of this machine by Lift Here, but why not play with scratch a bit? The fuselage is winder and therfore the wingspand rised from 14.15m to 14.60m (in other sources 14.50 m) Therefore I have to cut the wing. The whole central part will be re-worked anyway... So As you see I started like playing 3NT in bridge. From the most difficult colour... Cheers J-W
-
Hi, About 10 Feb I started build of three Polikarpov R machines: two R-5 and one R-Z. There is a WIP thread on this. First R-5 (transport version in winter camo) I presented here already a couple of weeks ago. Now time for second one: the R-Z Natacha in Spanish Republican colours from fall of 1938. The presented here LN-045 was shot down along with five other R-Z on 23 Dec. 1938... She wear a Nungasser-like emblem on sides. Decals were home made (ughh....). Generally the R-Z is not just a variant of R-5. After constructing this model I consider it much different, similar or even more then the difference between Typhoon and Tempest, for instance. The original SH kit was seriously reshaped to match Michail Maslov's drawing o R-Z from his monography about R-5/R-Z family. Even despite small errors which I noticed in those drawing while compare them to photos (details in WIP). The most serious surgery was cuting out 5 mm from whole chord of lower wing (!). The whole tail was reshaped as well: fin and rudder are enlarged whereas tailplane was made smaller and different in shape. Wheels are a bit bigger and nose was also a bit modified. More details in WIP thread mentioned above. She looks like that: This is my number 32nd of SCW And here you can compare chord (especially of lower wings) of R-5 and R-Z On photo above, besides this old lady there is Soviet the R-5 limousine (transport variant). She was already on RFI some weeks ago, it is scratch conversion from Apex/Encore kit. The third one will be R-5 bomber (MPM vacu), likely in camo from Russian invasion of Eastern Poland in September 1939. Not very much left to finish it... Comments welcome Regards Jerzy-Wojtek
- 23 replies
-
- 20
-
-
- Polikarpov R-Z
- scratch
- (and 1 more)
-
Hi all, a "little" project for my Eighth Airforce stuff, all from scratch Cheers Macki
-
Hi A small break in series of "old and odd Germans" which I am doing this year. Back to Hawker biplans. Actually, I started them in 2015, as a kind of glossa to build of five members of Hawker Hart family and a repair of mine 40 years old Spanish Fury. They are: Hawker Nimrod and Hawker Persian Fury II (Bristol Mercury engine). Let me start form the backgroud. I had one A-model Fury in stash and Ii was difficult which one of them should I do. So I bought the second one! The true is that I was thinking on doing both of them since time when I saw for the first time Persian radial fury in Profile Publication when I was a young teenager visiting together with my brother library of Krakow's Museum of Aviation about 1974. The Danish Nimrod "seduced" me shortly afterwards - we got from our Grandfather (who was living in London) a British book "Encyclopedia of Air Warfare - exactly that one: ( https://www.amazon.co.uk/Encyclopedia-Air-Warfare-Christopher-Chant/dp/B000I9NK1O) . Inside there is a colour profile (among hundreds of others) of Danish Nimrod. Those days the conversion from Matchbox was the only option but the problem was, that I was not able to do new wings... So I was waiting about next 40 years to do it now finally . As I told now as a base I took Hawker fury by A-model. The Bristol engine and cowling I took from old Letov S-328 (old KP kit) but I have to modify it a bit. Since I bought the new Special Hobby Letov (excellent kit indeed!), the old one from stash went to box with spare parts. The propeller is from AZ Hart (a spare one) as the exhaust pipes (but shortered). The oil cooler is a resin copy of A-model Hart one. The nose was a bit tempered and small other modifications were applied followings photos from Net and from a Spanish monography of Fury. Decals - the crown and the Lion and Perisn numberings are hand work with brush on decals. The national insignia are from set for F84F by Hi-Decal. What is really peculiar - the national insignia for Nimrod are also taken from the same set! - That is really funny that such decals containing Persian and Danish roundels together exists The Persian Fury is in presumable look from defense against British and Soviet invasion of Persia in 1941. Here it is: And mine "Iranian Set" - Fury and radial Audax (posted on RFI in last year already): More difficult was Nimrod. About construction I will tell below, let me show first a photo of both conversions nose to nose: And more photos of Nimrod: The painting scheme (on ski!) are from winter 1939/40 - not exactly from German invasion on 9th April 1940. But on that day nothis special happend to Nimrods - they were not flying at all... In all work I was following arictle in Small Airforces Observer (SAFO) from 1990. I discussed the problem of small/large tail (I decided to left small one) on a thread in Interwar section recently - many thaks to John Aero and Mike (KRK4m) for explanations and comments which they made there. Here is a page from SAFO and model: Going back to wings. A year ago I did DH 84 and DH 90 by scratch work - so I realized that I've got a know how of doing fabric covered wings. OK - more or less . So I start to do them. Below are some photos from progress. The lower wings I made from outer parts of upper wings of Fury (enlarged by about a single rib distance cut from lower wing). I sanded it to remove all ribs structere ans then started to draw new positions of ribs. The upper wing is in central part left from Fury and in outer parts it is made out of RWD-6 Polish model (of course following the drawings). Below are raw wings from top and bottom: So - I added ribs, covered gently everything with Tamiya filler, first sanding, then correct & sanding, correct & sanding etc... After first attempt - the slope a bit too big (this is a difference between the SAFO drawing and the second drawings which I had). So I have to break it and change a bit slope... And a fuselage That is all - comments welcome Regards Jerzy-Wojtek
- 15 replies
-
- 17
-
-
- scratch
- Hawker Persian Fury
- (and 1 more)
-
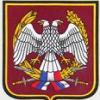
Hello. I am planning to build a vihor tank. Since there are no kits for this tank on the market I ll have to modify the T-72M 1/72 Revell kit or some other. The vihor tank was partially based on soviet T-72. The frame is the same, the number of wheels, the gun and some other smaller parts such as headlights and machine gun on the top of the turret. Other parts are different such as the turret, side rubber skirts, mud fenders, upper plate on the hull and other things. The biggest challenge will be the turret modification and I don't know how to pull that out. I have no experience in scratchbuilding so I ll need a lots of advises. One of my plans was to buy a resin modification set for the M-95 degman tank which is based on vihor but I ll have to cut a lot and still wont have that I need. I ll post you the pictures of vihor and then you'll be able to tell me what to do in order to convert the T-72 tank into this one> THANK YOU IN ADVANCE
-
 Hello, here is another project that started with the pictures found in the internet. Even the tires had to be built from the zero. The scale is 1:25 The project is half made in resin, although my models are mainly built in tinplate In this picture the tires are from the old project that I made years ago. In this picture the tires are from the new project that I made this month.
 -
Bonjour tous le monde, Ceci est un nouveau scratch diorama 1/35 en cours, nous sommes au fond d'un estuaire de la Bretagne, Il y aura un quai liittle en bois et une cabane de pêcheur, un petit bateau en bois et un ou deux pêcheurs (je ne sais pas exactement en ce moment ...) Il est juste le début des travaux, l'altération de la cale et de la hutte est en cours ...... .....To be continued
-
 Hello , This is an old diorama ( i built it 25 years ago ) it doesn't exist anymore because of an "accident" in a moving house. ...only 2 pictures to remember it A typical 60's little wooden boat ( with a little inboard engine ) leave a small harbour in Côtes D'armor
- 9 replies
-
- 8
-
-
- Typical
- Wooden boat
- (and 4 more)
-
Hi, Promised few days ago and just finished - second one radial Audax, this time with 9-cylinder Bristol, next of my "Hawker Hart Family mass production" - the Hawker Persian Audax. Model was scratch converted and detailed from AZ Hart B4 kit. Markings are following the Profile Publication scheme with small differences based on speculations or photos In Interwar section I tried to discuss confusion I have with details http://www.britmodeller.com/forums/index.php?/topic/234986512-persian-audax-1941-confusion/ - many thanks for most of all John Aero for his comments, which encourages me with finish. This machine is in markings of 4th regiment based in Abadan. However - the numberals on cowlings and upper wing are Perisan "2" - why not "4"?. The individual number is 253 (read from right to left). She is suppoused to take part in few days war against British-Soviet invasion of Iran in 1941. Since it was short war and before it machine was exploited in peacefull time and was repainted shortly before the war - I made very delicate weathering despite desert condisions there. Here she is: Comments welcome and thanks for watching Regards Jerzy-Wojtek
- 19 replies
-
- 21
-
-
- Iran
- Hawker Audax
- (and 1 more)
-
Hi, Something what I just finished, not the archive one. Northrop Gamma 2E, China markings from second Sino-Japan War, Hankow 1937 (till perhaps 39?) I started this about two years ago and was standing unfinished for a long time. I will try to explain a bit why it was going so slowly - but first I would like to present the photos: Here I realized, that some mud or dust must be added on w wheels, so I added: The model is scratch conversion of Williams Bros Northrop Gamma 2a/2b kit Here is a couple with another Gamma from my shelves - the Spanish one 2D. And here those two with Northrop Delta - which I also converted from the same kit: They used the same wings, undercaridge, horizontal tail, in case of Gamma 2D and 2E they basicly have the same fuselage, but 2E has shorter engine bad... Gamma 2D and Delta were alredy posted separately before. Well, I have to confess something. All those three models are made from a single Gamma 2A/B kit from Williams Bros.... I breed them - I copied some needed parts in resin... Here one can see that it was resin indeed: I engraved the lines and added details which differ them.. The canopy is made of 15 separate sheets glued together : This was a kind of pure "academic" work (opposite to work on Delta, which is really hard to get AFAIK ) since the Gamma 2E exists as nice resin kit by RS. Nevertheless - It took me some time. Finally I would like to present my small set (as yet) of China airplanes from first part of second Sino-Japan (before 1941). All of them I posted already separately (Dewoitine, Vultee V11, I-153) Thank you for watching, comments welcomed and regards Jezry-Wojtek
- 16 replies
-
- 17
-
-
- Northrop Gamma
- scratch
- (and 1 more)
-
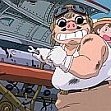
Hi guys! Let me show you one o my older plane. It was a really quick building out of the box, with some scratchbuilding just for fun! Hope you like it, thanks for watching! Matyi from Hungary
- 13 replies
-
- 22
-
-
 Hello everyone: group photos of my recently finished Egyptian MiG-17F and MiG-17PF Frescos: the MiG-17PF in natural metal is from around the 1967 war with Israel. Hobbyboss plastic (very good, hardly any problems) still in UARAF (United Arab Republic Air Force) markings, decals are sourced from various sources, the 31st squadron "bat crow" unit insignia was printed at home with the artwork provided by Tom Cooper, thanks!!, see in progress build KK-2 ejection seat is from Aires (a bit small!), 23mm cannons and pitots are from Master and very recommendable! the MiG-17F is from the closing stages of the war of attrition/ beginning of the Yom Kippur war, in cmouflage colors, but an example apinted before the Nile valley camo scheme was introduces fleetwide. the flag shows the Hawk of Quraish which was used from late 1972 up until the 80ies when it was slowly replaced by the current Eagle of Saladin. Decas are Hi-Decals, which at the moment seem to be the only ones who provide the correct flag for this time frame. the decals were reshaped though. Arab numbers come from the Iraqi airfoces decals sheet from Lindenhill decals. cannons and pitots are from Master, the KK-2 ejection seat is from Neomega resin (very recommendable!) the MiG-17F is armed with one 37mm and 2 23mm cannons in the nose, as well as 8 Sakr rockets and 2 250kg bombs on fuselage pylons only to be found on Egyptian MiG-17s! in progress and lots of additional information from Tom Cooper, many many thanks!!!!, without your help this build would not be half as accurate!!!!!, and all the others that contributed can be found here: http://www.britmodeller.com/forums/index.php?/topic/234974798-mig-17f-and-pf-fresco-june-1967-and-war-of-attrition-1967-1973-double-build-148/ so here some impressions: now fully armed: more photos of the individual planes will follow soon if you want thanks for looking, reading and your comments! regards, Werner
- 13 replies
-
- 17
-
-
Hi Some months ago I posted photos of my scratch build of Caproni Ca 309 Ghilbi http://www.britmodeller.com/forums/index.php?/topic/234971248-caproni-309-ghibli-scratch-172/ Continuing - next from Caproni shelf - the Ca 310 Libeccio in Norwegian markings. Norway had only four Ca 310 received, although initially they wanted 24 of them. In net it is now easy to find some photos: http://www.airwar.ru/image/idop/bww2/ca310/ca310-15.jpg http://en.wikipedia.org/wiki/Caproni_Ca.310#/media/File:Caproni310.jpg It was much worse years ago when I was making this model... I made this model as scratch conversion of Italeri Ca 311 about 10 years ago. Whole fuselage is a scratch construction. In fact - it is even worse. The whole model is made from resin, all parts which are the same with Ca 311 like wings, engines, propellers, tail are resin copies of Italeri Ca 311, not the original styrene parts. I had just one Ca 311 and wanted to do have two models...Or rather three - since some copies were used also to construct Ca 309. Obviously it would be much simplier to convert them from normal plastic kit. But those days Ca 311 was not available at all. And this way there was more fun, do you agree? -I hope "yes"! I made it on wheels - It is likely that during German invasion in April 1940 she should wear skis, not wheels. But I did not have drawings for skis. So I made wheels. Nowadays there is a nice model from MPM with skis already in...However - I found recently in net a photo of captured Ca 310 in Stavanger - and she is on wheels. Anyway - mine is on wheels http://xoomer.virgilio.it/f5avipatches/ca%20310%20page.html So, mine Ca 310 looks like this: Thank you for watching - comments welcome Regards Jerzy-Wojtek
- 5 replies
-
- 9
-
-
- Caproni Ca 310
- Norway 1940
- (and 1 more)
-
Hi, Of on my (edit - I raplaced "younger" to "more recent", not to confuse) work - just ten years (edit_ means- ten year ago). In times when no Do 215 wa as kit on market I made a scrach work to produce Do 215 B5 night fighter out of Monogram Do 17 Z. New nose including light and radar, whole engines - but also I corrected too large wing chord of Monogram kit. Result is not as nice as surely one can produce now from ICM kit (I heard on BM that also with some effort needed to corret flaws), Anyway - I hope you will enjoy. I was trying to remove silvering of original stencil decals but gave up... sorry for this. Markings are of II/NJG 2 (R4+DC) based in Leeuwarden, Netherlands in summer 1942, came basicly from drawer. Comments welcome Jerzy-Wojtek
-
Hi, Next archive Japan airplane. Namely - two of them. Both made from the same kits. Yes!. The kit was Hasegawa Ki-61Hien (Allies code "Tony"). I made her OOB as Kai 1c version and from another one I made scratch conversion to Ki-100 II Goshikisen (the radial version with step-back canopy and different front part of canopy as well). I made them about 20 years ago, in those times the only one Ki-100 kit in 1/72 came from old Aoshima. There was no Hasegawa kit for it yet. Markings: Ki 61 Kai 1c is from 244 Sentai (Headquaters), Tokyo, Nov. 1944, Ki-100 is from unknown to me unit, from winter 44-45. Comments welcome, regards Jerzy-Wojtek Ki-61 Ki-100 II (scratch conversion from Ki 61) Thank you for watching
- 2 replies
-
- 8
-
-
- Kawasaki Ki 61
- Kawasaki Ki 100
- (and 1 more)
-
Hi, Back to secondliners. De Havilland DH 90 Dragonfly. One of "missed" (not produced) injection kit in 1/72. For me it bacame so much "missed" that I decided to do her out of scratch. There are some resin but very expencieve. Old vacu is not available, I think. I reported the construction work, together with DH 84 (far from finish as yet) on WIP: http://www.britmodeller.com/forums/index.php?/topic/234971246-de-havilland-dh-84-dragon-and-dh-90-dragonfly-scratch-conv-172/ (EDIT 26 JUl 2017 - it will be re-available soon I hope) So, this is my the newest production - today, when I was making photos the matt coat was not still very dry I am sorry that I havn't done it in British markings - I was searching for interesting camo for RAF, RAAF or SAAF (preferable - I had hopes for DE/MS/Azure) and I did not found any interesting one. I found some but typical. Thus I was considering Spanish (both sides of Civil War) or Danish (silver, what can be inconvenient for scratch build model) when I found in Net photos of a Dutch one - impossed to Royal Netherland Air Forces, 1940. This particular machine was destroyed during German invasion in 1940 (photos I posted in WIP). Here she is: And two last photos with help of flesh: Thank you for watching I wish all the best for everybody on the BM in New Year 2015! Cheers Jerzy-Wojtek
- 11 replies
-
- 13
-
-
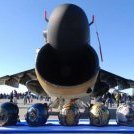
 A very very long time ago I started on a B737-200 I wanted to set myself a challenge so I decided on a project to build a B737-200 Combi fitted with a gravel kit etc. and with all the doors open being loaded up in the snow of the Canadian north....... Over a few weeks I collected together a kit, some AM stuff etc. as a starting point: The Airfix engines are known to be a poor representation of the -200 engines (narrow pylons being the first issue!) hence the braz resin engines. All was well until I looked at the Braz engines in the above shot.... which had degraded silicon bits from the mold down their tail-pipes... not good! but Hannants were their excellent selves and we quickly determined that all 2 of their remaining stock had the same issue so they went back for a refund. A bit more online retail therapy and I had some Nazca decals and the authentic airliners resin engines (lovelly things): I know the extratech PE is for a different model of B737 but I was using it for the common parts.... A few weeks later after some scratch interior building, cutting a cargo door opening and I was thinking about the cargo door itself: But in the end the windows just didn't look right and the internal detail on the whole aircraft was poor, the windows are in the wrong place on the model, the doors are wrong and the nose shape and cockpit windows are also way off..... Skip forward 3 years and I started using 3D printing at work to build replicas of skulls (useful for teaching anatomy). I've been modelling aircraft in 3D programmes for years (used to sell them for flight simulators) and remembered I had a 727 model somewhere.... the fuselage isn't that different so it might be easy to adapt it to make a 737-200. Skip forward another year of messing around in Blender, 3DStudioMax, ZBrush, Polyworks, Rhino and all manner of other 3D programmes I work with and I had a set of STL models that I was happy with. So this Christmas I borrowed our newest 3D printer from work and this is what we get: These are my external shape masters.... but there was a problem. It was cold the day I went out and left these to print (18hour print time at 40micron layer size) and I wasn't thorough enough with the glue (pritstick) on the glass build plate so I ended up with the left side's nose lifting off the build plate and warping (bugger!): Now printing a new left side wasn't an issue but it takes a lot of plastic and 9 and a bit hours! so a quick edit in blender and I printed off just the nose section from just forward of the left door: Might have been a bit OTT with the glue this time as it took 3 hours soaking in warm soapy water to get the damn print off the glass! Next up: how to perform rhinoplasty (nosejob) on a 737.... Marked up and chopped off the dodgy nose: Lined up and glued the new nose on using the right hand side as a guide: A bit of Perfect Plastic Putty (wonderful stuff!): Have just sanded off the excess filler and it all looks spot on. Next up printing the internal details masters, molding them all in silicon and then casting the rough resin detail masters from these molds. I'll then add all the small details, panel lines etc. on those resin casts as the 3D printer plastic is very hard and therefore difficult to sand etc. More later. FB
- 17 replies
-
- 5
-
-
- 3D Printing
- Scratch
- (and 3 more)
-
I have been making threatening noises about this build for some time now - and now it's time for me to make a start. I have been gathering materials and resources over the last few months - still a few critical items to lay my hands on but I think I have enough to make a start. A bit of history: A few years back I was lucky enough to be given the job of redesigning an original Pullman carriage. The owner wanted it to run on the tracks again and after a spate of rail crashes in the UK, rail regulations were tightened considerably. This carriage was originally a wooden bodied carriage so there was no way the authorities were going to let that back on the tracks without some serious modifications. My job was to survey the carriage and come up with a design (in steel) that would allow it back on the tracks. I was lucky in that many original features were still contained in that wooden shell, which we were able to reuse. In short, we brought the carriage up to Edinburgh, removed (or rather, smashed) the wooden structure until we were left with just the chassis. The carriage was then rebuilt (in steel) as close to the original design as we could, while being very sympathetic to the original styling. Since then I have always wanted to build a scale model of the carriage - I still have all the drawings I made during that two year stint, and my model is going to be based on those, at 1/32 scale. I have some idea of how I am going to tackle some of the build, but mainly no idea about most of it. I just know that I am going to have to scratch just about everything. Here's a few shots of the drawings I am working with. First up, the chassis and sideframe structure.... (just an overview) The vestibule ends - which gave us a lot of trouble to design, as structurally, they take the brunt of any collision forces. Incidentally, my name, along with others on the project team, has been stamped on the shear plate in the vestibule ceiling. Lastly, here's what the carriage should end up looking like. This particular carriage was important as it was the last of it's type ever constructed, way back in 1951. Unusually, it has square windows at the kitchen and toilet areas - these were usually oval on Pullmans. I believe this is running today and can be booked for private charters - a bit more expensive than your standard BR ticket though. As always with my builds, this is not going to be a quick one - I reckon on about two years or more to build this one, but I have to make a start somewhere! So, to begin, the chassis plans printed out to 1/32 scale Some bits and bobs ready to begin. As you can see, this is going to end up around 600mm or so in length The first cuts begin.... oops did I mention that I am building the chassis in brass ? I should also mention that I am going to try and stay as true as possible to the original chassis structure/design. What on earth am I doing here??? Too late - I've started..... now I just need to learn how to solder lumps of brass together btw I placed this thread in the vehicles section as it seems to get a lot more traffic than the trains forum. Mods feel free to move it if I have broken any laws