Search the Community
Showing results for tags 'royal navy'.
-
Hi, built for the GB on this site. Enjoyable build (though frustrating that the tail rotor blades had to be cut and repositioned the correct way!) Used some Eduard Etched brass (other bits too small for me!) Painted with Xtracolour RAF Blue Grey enamel and Gunze Mr Hobby RLM04 Yellow acrylic, with tamiya X-22 for the gloss. Thanks for looking Untitled by bryn robinson, on Flickr Untitled by bryn robinson, on Flickr Untitled by bryn robinson, on Flickr Untitled by bryn robinson, on Flickr Untitled by bryn robinson, on Flickr Untitled by bryn robinson, on Flickr
- 16 replies
-
- 23
-

-
Greetings everyone I thought it about time that I post some of the latest of my ship builds. The trouble is I rarely know when to stop on a ship build, so although they are classed as RFI there is still a bit of tinkering to go. If I waited until I completed them then I would never get them up here! So first up is HMS Bligh, which was a Capatain Class Frigate, on Lend/Lease from the US, originally a Buckley class Destroyer. She is the USS England release from Trumpeter in 1:350. I also used the GMM models etch fret which is excellent and also has conversion parts and notes to convert to a Captain class. I did also buy the WEM boat set for the Captain Class but I have only fitted the life dinghies so far (see second sentance!). Paint is from WEM (when they existed) and the rigging is very fine black thread which was a total . It worked out fine apart from the flag stay(?) which need a bit of tension as it seems a bit flappy! I started this build probably about 8 years ago and it spent many years on the shelf until I felt up to the rigging. The base was once a nice shiney brass but has tarnished over time, maybe need to get the brasso out! Any way here she is! Apologies for the poor photos, I did try to use flash but it kept causing shadows behind, it is only a point and shoot after all! Thanks for looking Bob Edit: Just noticed the missing anchors
- 7 replies
-
- 12
-
-
- Trumpeter
- royal navy
- (and 2 more)
-
Royal Navy Rothesay Class Frigate. pics of HMS Plymouth F126. First pic is crown copyright and only used to show the overall outline of the vessel. The rest of the pictures are thanks to the team at Scale Warship.com, and taken while she was on display at Birkenhead Docks.
- 2 replies
-
- 1
-
-
- Royal Navy
- Rothesay Class
- (and 1 more)
-
Hi, I am currently building the Italeri 1/72 kit, and will probably do the yellow over blue grey scheme. I believe the blue grey is RAF blue grey and can only find an Xtracolour paint. As I prefer to use acrylics (I have use of the spare room but try not to be too stinky!), anyone know of an acrylic alternative? Thanks
-
The following images have been taken at various locations around Cornwall since Jan 2016. Unfortunately the few remaining 771 Squadron Sea Kings have been rather elusive. Locations here include Bodmin Moor, Davidstow airfield, Godrevy etc:
- 10 replies
-
- 15
-
-
A friend who lives in Plymouth took the photo's below of HMS Ambush whilst entering and leaving Plymouth Dockyard last week. I am hoping he will send more as there are some nice detail views for anyone modelling the kit of this boat. Mike HMS Ambush approaching Devonport Dockyard, Plymouth on 16/01/2016 - All photo's courtesy of Jeff Stevenson. HMS Ambush leaving Devonport on 22/01/2016
-
Royal Navy WW2 Colours Lifecolor I’ve been trying these paints out now for the last couple of months so thought it was about time I wrote up the review. I won’t reiterate what Mike has already said about Lifecolor paints HERE. These two sets have been out for quite a while now, but they have only just arrived at BM’s London offices. Fortunately though, I have already used some of the colours on my builds and they do work very nicely. My normal media is enamel but every now and then I like to get the acrylics out, particularly on cold days when I can’t have the patio door open. The first set covers mostly the greys used by the RN, and include:- UA631 – Dark Admiralty Grey 507A UA632 – Medium Admiralty Grey 507B UA633 – Light Admiralty Grey 507C UA634 – Light Grey B20 UA635 – Medium Green-Grey MS3 UA636 – Dark Blue-Grey B5 The second set covers the rather more garish and unusual colours, but also some of the most commonly used:- UA637 – Hull red UA638 – Western Approaches Blue UA639 – Western Approaches Green UA640 – White UA641 – Semtex Green UA642 – Corticene Whilst most of the colours have looked to be just about spot on when used, I found the Hull red a little too brown and dark, there should be a hint redder in my view. Detail painting using a brush proved to be a delight. The paint going on well and drying to the same tone as the sprayed paint, which I’ve found is not always the case when using enamels. For those times when you've left your airbrush uncleaned, or even the brushes you've used, then this new product will be just the job for you. It's designed to be used in conjunction with tap water, much like the paints, and all you have to do is give the brushes a rinse in water, before using the cleaner until the hairs are devoid of paint, when you give them another rinse in water and dry. For airbrushes, you will need to disassemble the airbrush and place in a carton to soak fro between fifteen and twenty minutes.Once cleaned, reassemble the airbrush and spray water through it. It might be an idea to use this cleaner in an ultrasonic bath, should you have one. Conclusion These are great paints, easy to use and with good colour density. The pigments are quite fine and definitely need to be thinned before using in the airbrush, although I found they didn’t clog as much as some. The cleaner is another handy item to have in you paint collection, especially as we don't always clean our airbrushes or brushes as well as we should. The cleaner is just the job for those times when we haven't cleaned our airbrushes or paint brushes as well as we should. Very highly recommended. Review sample courtesy of:
-
Finished I do like the kit it builds up quite well view from 5ft Rodders No I dont like the sand filter decals either
- 28 replies
-
- 21
-
-
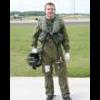
Hi everyone and while I'm a regular contributor to BM, this is my first post on this thread - a Royal Navy Tornado of 892 Naval Air Squadron, HMS Ark Royal, 1980 built for the GB here on Britmodeller. You can read the short build (and even shorter backstory) Here but in summary.... Kits: 1/72 Airfix Tornado (fuselage/undercarriage) & 1/72 Revell F-18A Hornet (wings, tails and stabilators) Decals: Matchbox F-4 Phantom donated by Tim Moff (cheers Tim!) and stencils from the Airfix kit. Paints: Revell Acrylics brush painted, White from a rattlecan, Klear, Flory Models Wash. Extras: Stores from spares box and/or the source kits She won't win any good looks competitions and now that I look at it again, I think she looks a bit too 'Soviet' to be serving with the Royal Navy But had fun with it and has got me thinking of future WHIF ideas.... Thanks for looking! Dermot
- 9 replies
-
- 15
-
-
- Royal Navy
- Tornado
- (and 3 more)
-

1/72 Airfix BAE Hawk T.1A Royal Navy
Darren Rhodes posted a topic in Ready for Inspection - Aircraft
Greetings folks, Last of what I can term my shelf of doom builds. Sadly this one is somewhat worse for wear for its time on the shelf of doom, owing to the fact that is departed said shelf on at least one occasion, doing damage to many of the sticky out bits. That being because this has stood on the shelf of doom awaiting merely a canopy for several years. A canopy I say, however, at the fifth attempt, you read that right on the fifth canopy I considered it passable to consider complete. I won't say any more about my masking skills. And not looking forward to my explaining my request for three canopies to Airfix (received one replacement so far). What with Fritag's stunning Hawk build I honestly wasn't going to post this, but I think I've fixed one thing that Fritag will miss, Royal Navy markings! That and I'm feeling sympathetic to the Navy folks on here who I have observed seemed to get picked on somewhat. Airfix kit, I think Model Alliance decals, Pavla resin seats and a Master pitot probe, other out of the box. Painted with Xtracolour enamel black, only way I can get a glossy finish. On with the photos. Darren- 29 replies
-
- 46
-
-
Royal Navy Crew Eduard 1:200 With Trumpeter having started producing Royal navy ships in 1:200 scale, it’s natural that they will need some crew to man them, and once again Eduard have come to the rescue with this set of crew dressed in standard Atlantic No 3’s dress. The single sheet of what looks like tinned etched brass on which several rows of figures are attached. Each crewmember is pre-painted and self adhesive, making it a lot easier to produce each crewman just by the act of folding the two halves together. As with the 1:350 scale crew sets, these do still look rather flat, perhaps more so given the increase in scale, but at least they have some depth to them. There are several pose included, such as crouching, leaning on the railings, standing at ease, standing with hands on hips, (probably a Chief Petty Officer), and in a climbing stance for use on vertical ladders. There are other poses, one with what look like binoculars, and a couple that look like they’re manning a gun. There are sixty four crewmen in total, so with only a couple of sets you could really make your model look more alive. Conclusion As with the other sets I still have reservations with the thickness of the individual crew, but if you can overlook that, or you have some really fit/skinny crew on your ship then this really shouldn’t be a problem. The ease of use is superb, especially after you’ve spent months creating your masterpiece these will add the finishing touch. Highly recommended. Review sample courtesy of
-
 Hi, Been a while since I last built a model but due to inclement weather, shorter days and the start of yet another reality TV show airing, I decided to "get me out of here" and find a wee project to keep me amused. Decided to build a fixed wing aircraft this time but stayed with the Fleet Air Arm theme and purchased the Sword 1:72 Fairey Gannet AEW.3 from flea bay. Apart from a wee 1970's pilot, this will be built OOB. Hopefully, I will be able to do it justice and if possible, change the airframe number to represent the old gate guard that sat at HMS Gannet for many a year. I do believe that she is now safely on display at the Dumfries & Galloway Aviation Museum - http://www.dumfriesaviationmuseum.com/fairey-gannet/ The following is a photo of her, quite a few years ago, resplendent in the Ayrshire sunshine The kit seems okay with plenty of recessed panel lines and raised detail. The instructions are very good and it would appear at first glance to be a straightforward build. I did notice that there is no numbers on each sprue part but this isn't really a problem as the diagrams are clear and there are not really that very many parts. Included in the kit is some photo etch for seat belts and panel instrumentation, although this cannot really be seen when the fuselage halves are joined together. I built up the cockpit, converted a modern "PJ production" SAR pilot into a 1970's pilot and popped him into place. There was not point in doing anything else with the interior as it is not on show. Having build an ASW version of this model some years ago, it is definitely a tail sitter, so I used some self adhesive car wheel balancing weights and stuck 20 grammes into the nose/cockpit section before gluing it together. I also used some pink tac to create the right amount of clearance and extra support for the nose wheel bay and cockpit tub. Most of the two fuselage halves went together fine but there is no real depth to the locating spigots on each half and there was a bit of sanding/fettling required to get the front section to mate together especially around the cockpit. More work required on this when cured. The wee pilot seems happy enough for now though .. The biggest problem is that the AEW dome on the underside has a huge gap which has required a liberal amount of filler to close. This will mean even more sanding and re scribing one it has fully hardened. Not much else to add at the moment, except that should be a fairly fast build, ie weeks instead of months. I purchased a rivet wheel a few weeks back but will wait and see if I will use it on this. Glad to be back building again, all the best B
- 53 replies
-
- 5
-
-
- Royal Navy
- Gannet
- (and 2 more)
-
Morning all! It's only taken approximately three years to get to this stage, but my Dynavector Wyvern is finally finished. This was my first venture into the world of Vacform kits, and Dynavector did not disappoint. I chose this as by all accounts it is one of the best kits to use as an introduction to vac kits. The fit of the parts is absolutely superb, and once the necessary surface prep was done in order to get parts to match up, this went together with far less hassle than a lot of the injection moulded kits I've built. My build is by no means perfect, in terms of improvements I could've removed the aircraft lights and replaced them with appropriately coloured clear plastic. I deliberately chose not to overly detail the undercarriage bays as this build was more about testing my ability to build a vacform not my ability to superdetail. I've also missed off the windscreen wiper as my attempt to scratchbuild one looked a bit too 'agricultural' for my liking, so some room for improvement there certainly. Lastly the decals from Berna were a bit of a nightmare, many of them are grossly oversized and they refused to conform to the model without masses of Mr Hobby Setter and Softer. In terms of lessons learned from the build, first and foremost is that Vacform kits are not hard! Picking a good brand such as Dynavector or Aeroclub helps no end, but they are no more difficult than many injection kits (stand fast Tamiya shake and bake kits...) so really ought to hold no fear for anyone! After all if I can manage it, I'm certain anyone can! As always, constructive criticism is more than welcome, without it I'll never improve. So without too much further ado... Kit: Dynavector 1/48 Westland Wyvern Decals: Berna Decals - Wyverns Extras: Compass Rose Resin - Cockpit Tub + Airscale Instrument Decals, CMK Wyvern wheels & Pavla Martin Baker Mk.2 Seat Paints: Xtracolor EDSG & Sky, Humbrol Roundel Red and various shades of Alclad (undercarriage and undercarriage bays) To all those that looked in on the build (as glacial as it was in terms of progress) thank you for all the words of encouragement! Now it's just a case of deciding what to tackle next... Scimitar? Swift? Thanks for looking in folks, Regards, Nik
- 29 replies
-
- 34
-
-
- Vacform
- Dynavector
- (and 5 more)
-
For my Scarab... 50s/60s, and often later until the military was sold off to the civi contractors, RAF or RN vehicles were generally blue (obviously save for specials and frontline eg RAFG). Best Revell, Humbrol or Tamiya (possibly Vallejo if stocked)? Would love 100% accuracy but won't be mixing %s so will take a 'very close'. ... VMT. D.
-
 Hands up if you watched Only Fools and Horses, looked at the Trottermobile and thought "i want one". Well Mr Scammell thought the same...he was just a little early that's all... The Scammell Scarab is a British 3-wheeled tractor unit produced by the truck manufacturer Scammell between 1948 and 1967. Its name is commonly believed to be derived from the rounded bonnet that resembled the elytra (wing covers) of a Scarab beetle, but the name really comes from a more conventional source, Scammell's idea of the combination of an Arab horse...and the word Scammell. Sca-rab = Scarab...It was extremely popular with British Railways and other companies which made deliveries within built-up areas. The Ministry of Defence also used the Scarab and trailers for predominantly internal transport on large military bases... And it's the last sentence that allows me to contemplate a less than commonly seen Service Garb for an already less than commonly seen kit. :) Roll on the Dapol (ex-Airfix) HO/OO Scammell Scarab...
 -
At long last I have a 'new' desk which although smaller and lacking drawers/cupboards will at least allow a restart after a too-long break. And what dropped through my letterbox this morning but another early suprise...(although mine is rather more crumpled in appearance) The (not so) mighty Mechanical Horse aka Scammell Scarab which using the kit options would build up to this: I see there is a walkaround (yay!) but only one build thread (aww) so it will fit in nicely as being different to the normal 99.9% of kits seen. Now I just need to get bits and pieces sorted in to place before deciding on RAF, RN or civilian scheme (and another excuse to get to Antics searching the paint stands...whilst ignoring the 'wall of plastic' of course:)) One question/request... Google (and Bing) bring up a few pix of models or museum vehicles in military dress but nothing of real vehicles in action. Whilst I'm still umming and erring on my Dinah build I thought it might look good sat next a 50s or 60s Hunter or Gannet or...
-
Hi everyone, Looking at the kits to hand, I was thinking of just a straightforward build of this little fella...How neat is that wee sprue! But then I thought, nah..why not go all in with something involving a bit more head-wrecking plastic cutting. Having recently finished a Tornado, I thought I'd give one another go but this time adding some bits from the kit below... I know there's already another RN Tornado underway here (looks cool) and this probably isn't the most original idea but thought I'd give this one the fixed wings and smaller twin tails from the Hornet. I like the idea of an asymetric loadout too so that might get the nod as well. Bodging (and backstory) starts tomorrow night! Cheers, Dermot
-
Finally finished this model, which I started back in May this year.. Full build thread is here - http://www.britmodeller.com/forums/index.php?/topic/234981204-navy-709-flexops-due-sea-king-has-6-xv711-circa-1996-819-nas/ Before the photos, just want to publicly thanks "Wafu" and " daryle-five-zero " for supplying / swopping various parts in order to build this. I also have to thank whirlybird decals for making the bespoke squadron & aircraft decals. Model is Hasegawa mk 5 with added PE and a totally scratch build rear interior. Enjoy .... Many thanks and happy modelling
- 46 replies
-
- 58
-
-
The Navy trialled three Skeeters, WF112, WF113 and WF114 around 1950/51. The trials didn't go anywhere and the Skeeters were handed/sold back to Saro and subsequently went to the AAC. I picked up this Aeroclub kit at SMW a year or so ago and it is an engaging little thing. The WIP is quite far along as I didn't keep a record and I have only just managed to sort out photobucket. It's mixed media, injected, white metal (including the cockpit which makes it stand on its tricycle undercart) and a vac formed canopy. It's a little stalled mainly as I attacking a couple of Hurricanes for the Battle of Britain GB and my inmate fear of vac formed canopies. But here is the little fellow so far. It is tiny, about 3 inches long. It's built pretty much OOB with a little detailing in the cockpit and some of the drive details. The drive details are from a corner of plastic packing smoothed out with filler while the drive wheel is a circular piece of plastic mounted on wire. The fire extinguisher is a Blenheim anti personnel bomb trimmed, the instrument panel wires are indeed wires and the straps Tamiya Tape, with the cyclic a piece of wire. Aluminium paint is brushed on Revell aluminium thoroughly thinned with Flow Improver.
- 14 replies
-
- 11
-
-
- Saro Skeeter
- Aeroclub
- (and 1 more)
-
 So I have been flicking through this GB since it started looking at the fantastic builds on offer and now I have finally succomed and been suckered into it! I managed to find a pure resin kit in my stash and this is the one I shall present. It is the very fine Pre Dreadnaught HMS Renown from Combrig in 1:700 scale. She is very small and very fine, I just hope I can do her justice! Any hoo here are the pics I also found the remains of a GMM 1:700 British Battleship etch fret. I was glad about this as it has railings ladders and also the admirals walk railings which will make alot of difference. I will mount here on a wooden slab that I have kicking around, and will also attempt my first sea scape. I have been umming and erring about seascapes for years so have now committed myself to it. I saw this pick of her on the web apparently off Halifax, Nova Scotia in 1897. As this is now my hometown I shall do a scene along these lines. She will be in her black scheme at anchor with maybe a couple of 'Liberty Boats' chugging around. During research I managed to uncover alot of pictures of both the black and white schemes. Also I have come accross a couple of builds in her white scheme but nothing of her earlier set up. This could be an web exclusive, the first build up of her in the black scheme! How many of you can claim a unique build like that eh? .............. then again looking at most of the builds in this GB that would be most of you More to come soon! Bob
 -
Hi, Appreciate that there has been a recent group build for the Sea King however I didn't take part as it's taken me 5 months to get to this stage. I'll admit, I've not got that far however my hope is that I will end up with a large model representing this actual aircraft, which coincidentally, was the last aircraft I flew in back on 21st August 1996. Not a particularly interesting flight .. more of an AFCS ( automatic flying control system) check test flight. She passed and was serviceable for future use. The last I heard .. she is sitting down in HMS Sultan, being used as a training aircraft for future WAFU's The link for this is http://www.planepictures.net/netshow.php?id=1036995 Anyway, I started with the excellent ( and only) 1:48 scale kit that I could find and ask Santa for. The har.5 kit from Hasegawa "Ark Royal" ?? edition because this would require the least of all options to convert to the has.6 version. First job was to source a MAD sponson for the stbd side, which I did from fellow member "WAFU" and sent him the regular sponson from my kit. Next came the purchase of some PE, which I have never really used before and was pondering the purchase of PE tools. In the end and after some discussion with other members, I just bought some quality smooth pliers and snips. This was mainly due to the fact that there was no real requirement for bending lots of PE that I'd purchased. And so I began... I decided to leave the front seats as is and I appreciate that the Westland versions do not have the large seat supports shown here. This was to help support and place the PJ production 1:48 Lynx crew which I will add later ... especially the all important aircrewman and then... ..the most frightening job for me was to take a saw to my model and I carefully cut out the main cargo door, which thankfully I can reuse and attach later. This was nerve racking to say the least but after some hints and tips from other members, I purchased the best quality micro saw I could afford ... best investment ever. Dry fitted almost everything that I could, as I wanted to minimise fit issues which would require sanding and as such , loose detail. I haven't tried re scribing and due to the good quality of this kit, hopefully I won't have to. There was a gap above the main cockpit and fuselage and this was addressed later. This picture shows the hole I cut in the cabin floor, in order to fit the sonar and you can just see the first bit of PE fitted, which is the sea anchor storage, fitted behind the P2's seat. Decided not to fit the PE yaw pedals as I actually preferred the plastic kit parts, however I did fit the pedal surrounds and sanded down the instrument console, ready for the attachment of the self adhesive PE parts. PE broom cupboard bent & attached. This is where the hydraulic actuators and other gubbins for the AFCS are housed, behind the P1's seat. The first aid kit, flare pistol and piddle tube ( back up intercom !!?? ) was also attached to this cupboard. Finally , I was ready to start some scratch building for the back of this aircraft as the kit is absolutely bare ... which is a shame. The rear crew seats were made using bits n bobs of plastic, copper wire and cocktail sticks. I cannot take credit for this idea, it was borrowed from the excellent thread below http://www.britmodeller.com/forums/index.php?/topic/234976450-sea-king-crew-seat-detaing-revell-72nd-scale-kit/ The seats I was happy with .. the observers / aircrewmans stations .. eh not so much !.... so I started again .. from scratch. Whilst I was trying to figure out the rear consoles, I decided to fit some soundproofing and cabin flooring. For this I simply used some cut up plastic sheet, cut up jiffy bags and some of the plastic straps that held the polystyrene packaging on my new fridge freezer ... another expense I could have done without. Waste not... want not !! Rear consoles v2 ... made using some of the polystyrene packaging, cut to shape and faced with some plastic card. I also use the jiffy bag to make the cover that surrounded the dipping sonar. This was maily due to the fact , that even with the rear cabin door open, viewing access is minimal through said door and cabin/cockpit windows. As you can see, the dimensions of the consoles are much better second time around. I also took the opportunity to fit soundproofing to the cabin ceiling. .... and after painting and applying the cut up cockpit decals from OOB, I ended up with this. I elected to keep the front personnel door closed, so I simply used some polystyrene block to make the fwd equipment rack and also a representation of the MS10 liferaft.. which you can just see through the cockpit. View from the other side Actually quite liked the self adhesive PE for the cockpit .. but it did require a lit bit of help to stick ie superglue Back to the rear cabin area and shown is my first attempt at rear cargo seats. These have since been removed and v2 fitted. I used the luminous "hamma bead" method to fashion the radar screen. Melt the beads using a warm iron and cut to shape. This worked quite well and when exposed to strong light and viewed in darkened conditions you get the following effect. Excuse the poor quality photo .. but you get the idea This was the dirtied effect I was looking for and so far so good. It was then time to take possession of the following bespoke decals sourced from Roger at www.whirlybirdmodels.com Fantastic and just what I wanted. This guy is a genius and we spent several months conversing by email and phone to get the above just right. These are unique to my model and I am over the moon... but lots to do so they have been safely packed away for now The fit of this kit is the best I've come across yet and I finally joined the two halves and dry fitted the various access panels. The gap above the cockpit and glass were filled with platic card and some detail added using wire. The hull is a snug fit and fits perfectly despite what the picture above suggests. I am not going to glue the boat hull section until I've attached the various antenna and decided what I'm going to fit inside the sonar well. I know it will be the correct dipping sonar but I am thinking of scratch building the full body, which I can remove to display, if so required. So this is where I'm at to date. This has taken me 5 months so far, mainly due to work commitments. I could not commit to the time scales of the group build but the fantastic work of all contributors was borrowed for incorporation into my model. This is going to take me several more months but hopefully the result will be be worth it. By posting on this WIP forum, it should ensure that I don't forget about it and do bits n bobs when I can. Thanks for looking in... best wishes
-
Hello, I was reading earlier that the Fleet Air Arm used Sea King helicopters in the SAR role alongside the Wessex since the 1960s, and that both participated in rescues during the tragic 1979 Fastnet yacht race. I know Wessexes at the time were painted in Dayglo Red/Extra Dark Sea Grey, would the Sea Kings have been the same? Many thanks, Conor
-
Not long to go now before these are retired so it was indeed a pleasure to see 4 x Sea Kings arrive at Newquay on Tuesday afternoon. They had been working on Bodmin Moor and came into Newquay for some fuel before returning to Yeovilton. For the number crunchers they are ZA299/D; ZA296/Q; ZF116/WP and ZF117/X.
- 6 replies
-
- 11
-
-
- Sea King
- Sea King HC4
- (and 3 more)
-
Completed Model Post. Here are some pictures of my model of HMS Phoebe, a Towed Array Leander class frigate as she was in 1989 when I served on board her for my Apprentice sea time. The model is a conversion of the 1:600 Airfix kit with White Ensign Photo Etch detailing and some scratch built enhancements. A detailed build log can be found here: http://www.britmodeller.com/forums/index.php?/topic/234976345-hms-phoebe-f42/ Enjoy.
- 25 replies
-
- 23
-
-
- Leander Class
- Frigate
- (and 4 more)
-
Hi, before I start I have no affiliation with this company what so ever. I just thought that any builders of 1/700 US or RN warships should take a look at this site. http://www.3dmodelparts.com/ship-accessories/?sort=featured&page=2 I received my order of octuple pom pom's today and am totally amazed at the quality of the parts. These are 3D printed in acrylic resin and are very fine, they are much easier than photo-etch and have 3D barrels. They can also be set at any elevation, so are ideal for diorama's. I hope that some one finds a use for these as I think they are amazing. There are several different weapons and a few structure parts available. Mick ps, I have been chatting to the owner and he is asking for suggestions on his new items.