Search the Community
Showing results for tags 'revell'.
-
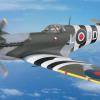
Hi folk's this is number four in the P-47 STGB,my take on Revell,s "M" in the marking,s of Capt. John C Fahringer's aircraft of the 63RD F.S at the end of the war.Revell have shown her in the late scheme with the fin fillet added,red outlines to the codes and the lower wing buzz code added,while being flown by Maj. George E Bostwick on March 25th 1945 she downed an Me 262 and damaged another(I,m two kill markings shy on the finished model).Thanks for looking. And all four take a final bow.
-
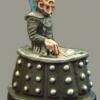
What started out as a distraction from the large Vader figure managed to turn into a minor obsession with colour variance, scale colour theory and highly magnified stills from the DVD’s (still not got them on Blu-ray). While I do want to get both the Bandai 1:144 and the Revell 1:72 I will be laying off of the ‘Falcon for a while (it helps I can’t afford either!) C&C’s are most appreciated but please be gentle :-) Paints used were space-fighters and star-defenders sci-fi colors from mig with vallejo top coat and ultimate weathering wash dark dirt Thank you Davros aka Mechanised Dwarf 342
-
Revell boxing of 1/48 Messerschmitt Bf109 G-10, of 11/JG 27 based at Schleswig-Holstein March 1945 (at least that's what the instuctions say. The instructions are also dated 1998 and I have been reliably informed that although fairly basic the accuracy of shape is second to none. Eduard etch set for cockpit and inside chin scoop, Hasegawa pilot figure from their Luftwaffe Pilot Figures & Equipment set and a basic attempt to add subtle rivets using the Trumpeter Master Tools Rivetter. Freehand airbrushed upper surface camo scheme and first attempt at freehand airbrush mottle. Just missing antenna cable which I will add soon. Will also need to change the Morane antenna mast under the port wing to natural wood as I have just learned here they were wood and just clear varnished. Couldn't get the stand attachment out. It was well and truly wedged in. On the stand Stand removed using Inpaint And the three 1/48 scale builds on one stand. WIP thread here Comments and suggestions welcome. Thanks for looking.
-
Hello folks, Over on Modellers Alliance there's a 'Micro Modelling Month' GB happening, as the subject of my project is just about as British as I am, thought folks here may be interested. Enough talk, here's some photo's. At this point the kit had spent just two hours total on the bench, including fitting the resin recce nose from FAA Models. Just a smear of filler needed on the underside of wing-tip and a little on the nose join. More in a moment, hang-on... Ian.
- 10 replies
-
- 1
-

-
By the end of November 2015 I was getting quite confident. I had already decided on the next build a month earlier as I had been eying up the old Revell 1/48 Bf109 G10 which I had bought some years previously for silly money (£5 if I remember correctly). I had recently picked up some photo etch sets for various intended projects at Scale Model World and also picked up a rivetting tool. I also have the Hasegawa Luftwaffe pilot figures and equipment set so the lack of a pilot was not an issue. Unfortunately I cannot find the pictures I took of the initial stages so we start at the completed cockpit enhanced with an Eduard photoetch set fully enclosed in the fuselage and the wings and tail already on. The various scoops around the nose have been hollowed out as have the exhaust stubs. You will also note that I made the cardinal sin of assuming something without checking references and cut off the square bulge for the enlarged battery behind the pilot and made it flush with an engraved door as in the E model. Did not realise my error until all was buttoned up and painted so it's not going to get corrected. I have come to the realisation that I need a LOT more practice with photoetch but I did manage to get it mostly in without too much anguish. Managed to fettle the gear into the up position (I really prefer them flying ) Cut out the solid navigation lights and created clear ones fron clear sprue cut to a right angle, drilled at the back and the relevant colour of Tamiya clear popped in the hole. Glued to the wing and then sanded and polished to shape. Red didn't turn out so good. Happy with the green though Those hollowed out and painted exhausts I felt he looked better with the 'tache although he now looks more likely to say 'Tally ho chaps!' In his office Canopy on The pencil lines show where I have added the rivet lines using the Master tools rivetter although I couldn't get the rivets to show on the picture Used custom Tamiya mixes for the RLM 76,81 and 82. RLM 76 applied after a nice undercoat of primer and a preshade. Note the prop spindle is now missing. That is the result of a mishap whilst undercoating whereby the spring clamp I was using to hold the plane sprung off sending the freshly primered 109 nosediving to the front dorstep where it proceeded to cartwheel with all the grace of a wounded gymnast hard against the wall. Not a happy bunny. Fixed it by drilling out the centre and glueing in a length of plastic rod of the appropriate diameter when the time came to add the prop Freehanded the camo but did use blutack sausages for the demarcation between upper and lower and Tamiya tape for the nose My first attempt at freehand mottling with an airbrush begins, I had also feathered in the demarcation between the RLM 76 and the top camo colours. 2nd mottle colour on 3rd mottle colour on and the nose is now a very fetching shade of RLM 04 Gelb Gloss coated and decals on. Didn't use the decal for the green fuselage band as it didn't go all round the fuselage at the location it was supposed to be at. All the bits on, some weathering courtesy of the new set of Flory washes I got from Telford, a bit of exhaust staining topped with a coat of Tamiya Matt Clear and we're just about done. Swastika came from a very old Xtradecal set of assorted sizes and I ended up masking around the fuselage decals and painting the fuselage band with my own approximation of the green. And you even get a shot of Phil's fingers too:) Comments and suggestions always welcome.
-
The New Revell Avro Shackleton is Now In Stock Revell 1:72 Avro Shackleton Mk.2 AEW Model construction kit of the Avro Shackleton, one of the most famous long range maritime reconnaissance aircraft. Developed in 1971 the AEW.2 version received a large radome and was used in service by the RAF. Product Information Finely engraved surfaces Detailed cockpit Rear observation station Weapon bay with separate doors Side door optionally open or closed Nose section with MG s Tailplane with separate rudders Nose radome Separate ailerons Separate flaps Detailed engine nacelles Detailed main undercarriage Rotatable propeller Antennas Decal set for 2 RAF versions Product Details Length: 370 mm Wingspan: 506 mm number of parts: 193 Paints Required Acrylics RV36378, RV36302, RV36109, RV36381, RV36371, RV36363, RV36301, RV36190, RV36199, RV36314, RV36330, RV36731, RV36101, RV36148, RV36330 Enamels RV32378, RV32302,RV32109, RV32381, RV32371, RV32363, RV32301, RV32190, RV32199, RV32314, RV32330, RV32731, RV32101, RV32148, RV32330. SRP £36.99 with Free UK Mainland Royal Mail 1st Class Postage Click on the link to order yours http://www.creativemodels.co.uk/revell_172_avro_shackleton_aew2_-p-39547.html Follow all our latest news on our Facebook page https://www.facebook.com/CreativeModelsLtd/
- 1 reply
-
- Shackleton
- Creativemodelsltd
-
(and 1 more)
Tagged with:
-
Hi guys, Like the title says I am thinking of building an F-15D (probably an aggressor) and was wondering if I could use the excellent Revell F-15E as a starting point. If so is it as simple as leaving off the FAST packs and relevant aerials and adding those relevant to an F-15D. Any help with this would be greatly appreciated. Craig.
-
Good Morning everyone! Attached you can find a few (non professional) pictures of my latest model as part of the "old stash clearup" Nice and simple kit released by Revell about 10 years ago. The paint was Revell's enamel protected by a good few layers of Humbrol Clear. I still have to learn and practice with the airbrush as the surface was very "sandpapery" Thanks for watching and any comments welcome. Roland
-
Finally finished third piece of this Revell gift set. I think now i will take a break from airplanes for a few years, and focus on ships, haha. I won't write much about this model because I really debated with myself should I put pictures of it, because it is very bad with a lot of mistakes. I studied some real photos of this plane, but at the end i decided not to follow color scheme and made it by my taste Thank you, and until my next model
-
Hell fellow modellers. I have finally completed my Norwegian Air Shuttle fleet. A project that has lasted me far too long. The first model being the Revell 737-800, LN-NOL, was finished back in November 2012. The -300 was completed back in January 2014. Now, two years later, the Dreamliner is complete. My target back in the days, was to model one of each plane type in the 2012 fleet. The -300 has now been withdrawn from service. The Dreamliner has switched registration, so its now on norwegian registration; LN-LNA, and accordingly, the 737-800 has changed from LN-NOL to EI-FHC. The Norwegian Trio by Robin Matcham, on Flickr Norwegian Long Haul 787-8 EI-LNA by Robin Matcham, on Flickr Norwegian Air Shuttle 737-3Y0 LN-KKR by Robin Matcham, on Flickr Norwegian Air Shuttle 737-8Q8 LN-NOL by Robin Matcham, on Flickr After being three months in the Phillippines with work, I have now returned to Denmark and should be able to complete some more models in the near future. Robin
- 14 replies
-
- 29
-

-

Revell Star Wars T-70 X-Wing 1/51
fernwood79 posted a topic in Ready for Inspection - SF & RealSpace
Here as promised is the companion T-70 kit to the FO SF TIE I did at Christmas. Just to remind you, the challenge here was to see what I could do with just panel wash and dry-brushing, keeping the rest of the original kit paint scheme. I left out the BB-8 astromech because the ship is Snap Wexley's which should have an R5 unit. The kit is pretty good for a snap-fix one and I think it captures the sleek look well. -
Hi Has just picked up the latest Revell 2016 catalogue. Noteworthy by its absence is the complete lack af ANY F1 models. Meaning that the entire backlog of older F1's will disappear in thin air. Needless to say there was no mention of any new ones... Also worryingly the only DTM car was the white BMW - all other were gone - Mercs and Audis... :-( The two new models were the ones already made by Tamiya: The Vaillant and Jægermeister Porsche 934. Hmmm... :shock: Flemming
- 10 replies
-
- Revell
- ; Formula 1
-
(and 1 more)
Tagged with:
-

New Revell & Airfix Avro Shackleton Model Kits
Wonderland Models posted a topic in Wonderland Models
We've got 2 great Avro Shackleton Model Kits from Airfix and Revell for you! the Airfix 1/72 Avro Shackleton MR2 Kit is available now with the with the Revell 1/72 Avro Shackleton AEW2 RAF Kit is available for pre-order now and arrives in store on Monday 29th February! For full details, please see our newsletter.- 2 replies
-
- new releases
- revell
- (and 8 more)
-
This is my first completed build for 2016 - the 1/32nd scale Heinkel He 111 P-1 from Revell. I started this back in the summer of 2015 as a 'pick it up and do a bit as you fancy it' build, and I've been working on it on and off for the last 6 months or so. I have built it more or less out of the box, but I did add some Eduard detailing for the seatbelts and instruments etc, as well as some brass barrels for the guns as the kit's are undersized. It was an absolute joy to build and went together beautifully - very little filler was needed and it proved to be a completely trouble-free project. The only tricky and more time consuming part was the extensive glazing which required careful masking and painting both inside and out. All that glass and no protection 'up front' makes you realise how exposed these chaps were when a fighter sprayed that area - it doesn't bear thinking about the carnage that would ensue in the nose when under attack. Xtracolour enamels were used throughout, with the kit decals also being used which were flawless. The swastika was not included so this was sourced from an Xtradecal sheet, and the whole paint job was finished off with a spray of Humbrol flat varnish. If you're thinking of venturing into larger scale models I'd heartily recommend this kit - it was an absolute joy. Heinkel He 111 P-1 of III.KG 27, Delmenhorst, Germany, Summer 1940. It's also BIG - the He 111 is considerably larger than I had anticipated (span of just over 74ft) and not much smaller than a B-17. Make sure you leave plenty of shelf space! Tom
- 41 replies
-
- 48
-

-
- Revell
- 1/32nd scale
-
(and 1 more)
Tagged with:
-
Hi folk,s I did,nt intend to take part in this one not that I don't love the P47 mind,I was in my LMS and as he still has 40% off Revell I thought why not so decided on two in a nice small scale,Not decided on both scheme's I got a bottle of Vallejo's new metal effect paint to try on the Siskin on the made in Britain GB if all end,s well I may do one in NMF,one will be a French machine.
- 153 replies
-
- 10
-

-
- Revell
- Thunderbolt
-
(and 1 more)
Tagged with:
-
It's been a while since I've built Revell's 1/144 737-800 and I fancied a 'quick build' after the nightmare of Revells 1/48 F-5F This one has been built almost oob, the only change being replacing the kit engine fans with home-made decals on plasticard. The main decals were from Gio (the Nok Air scheme) and Authentic Airliners (fuselage windows). The model was hand painted using Model Color acrylic for the orange, Tamiya X2 acrylic for the white, Humbrol 85 acrylic black, and Xtracolour enamel greys for the wings. I also painted the yellow beak rather than the Gio decal to avoid inevitable decal wrinkling and creasing around the complex nose curves. I've not used Gio decals before - lets face it, they're not easy to get hold of, but a word of warning: check your references carefully before using them as I found a major error in this set. Gio has printed the Nok logo (yellow beak on white disc) with the beak mirrored so that it always faces forwards i.e it would be different on the port and starboard sides. This, however, is not correct as the Nok beak always points to the left and is therefore the same on both sides of the airframe. Luckily the decal sheet has 4 options of Nok aircraft so I had enough correct-facing logos to build this model. I will need to make some replacements though if I want to do any of the other options from this sheet. Another error is that the white Nok telephone number font (forward fuselage below windows) is too small. This is also the first time I've used Authentic Airliners windows, but I understand now why everyone raves about them - they really look nice. Anyway, hope you like
- 12 replies
-
- 23
-

-
Well, it's a new year, so why not a new WIP? I wasn't initially going to do this thread, so I've already made some progress. I started by painting the inside of the fuselage matt black and fitting the clear window parts. Following this the main and nose gear bays and the flightdeck were painted and installed. After joining the fuselage halves, I fitted the belly plate and the wings. The fit has been very good so far - only two small patches of filler have been needed. A350 by Caution Wake Turbulence, on Flickr The windscreen is very slightly under-sized, but after painting the edge with black paint, I able to make a good join using some microscale crystal clear. I cut the mask using the windscreen from a second kit. A350 Nose by Caution Wake Turbulence, on Flickr I've masked the cabin windows with Microscale Micro Mask, applied using a short length of 0.5mm styrene rod mounted in my pin vice, which seemed to work better than a cocktail stick. A350 Windows by Caution Wake Turbulence, on Flickr It's a bit of a pain having to fit the nose gear at the beginning, but it hasn't broken off.....yet! With some thought, you could probably modify it to fit at the end. A350 Nose Gear by Caution Wake Turbulence, on Flickr It took a little bit of fettling to match the curvature of the fuselage and the belly plate, but with a little sanding and some rescribing, I'm quite pleased with the result. A350 Belly by Caution Wake Turbulence, on Flickr I decided to add a little detail to the main gear.... A350 Main Gear by Caution Wake Turbulence, on Flickr I've been experimenting with various shades of Alclad on the engines.... More or less successfully. There are a couple of sink marks on the engine cowling to be filled. A350 Engine by Caution Wake Turbulence, on Flickr I'm reasonably pleased with the engine fans, although the blade spacing is a bit uneven. Trent XWB Fan by Caution Wake Turbulence, on Flickr As ever, Revell's painting instructions seem to have only a loose relationship with reality... I have to say, despite some people's misgivings, the A350 is really growing on me! Thinking about doing a second in Virgin colours if my A330 decals will fit. More as small people permit..... Happy New Year, Andrew
-
Here is my Revell First Order Special Forces TIE Fighter. It's 1/51 and the smaller of the two on offer from Revell with just 15 parts! OOB it looks a bit toy-like. I got it for Christmas and had limited modelling stuff with me, so I decided what I could do with just panel wash and dry brushing over the existing paintwork. In the end it turned out better than I had expected! It's amazing how much difference it makes
-
Hello! This is the first 'proper' build i've done for a few years, I'm rusty but back with vengeance. Far from perfect re: paint job, but it's a notorious kit to build. I've neatened up the cockpit and airbrake since I took these pics too. Can't wait to get my hands on the new tool Airfix kit! Up next: 1/200 Vulcan in anti flash. If anyone can tell me what image extensions i can use here, i'd be grateful. They all reject for me! In the meantime, pics here: http://postimg.cc/gallery/2lgjzw3xg/31c2f0a1/ Chris
-
I finished this kit in December, but I've only just ventured outside to take some pictures. Vallejo Model air used for all the major colours. I really enjoyed putting this one together - thoroughly recommended. WIP is available here. I knocked up the backdrop after the sad demise of the Spad I built last year - Who will be the first to identify the airfield? WP_20160206_12_45_39_Pro by Andy Moore, on Flickr WP_20160206_12_45_26_Pro by Andy Moore, on Flickr WP_20160206_12_45_04_Pro by Andy Moore, on Flickr WP_20160206_12_44_39_Pro by Andy Moore, on Flickr WP_20160206_12_44_29_Pro by Andy Moore, on Flickr WP_20160206_12_43_59_Pro by Andy Moore, on Flickr
-
The 1/72 Avro Shackleton AEW2 RAF Model Kit from Revell is available for pre-order and should be arriving very very soon! Get your preorders in as soon as possible to get your hands on some of our first batch! Don't forget to check out the rest of our Revell New for 2016 range too. Watch out for more great release from Wonderland Models!
-
- new release
- revell
- (and 7 more)
-
Hello Chaps, I'm back to share with you my final build of 2015, that I completed the morning of New Years Eve. This was a gift from a fellow YouTube modeler, who sent it to me because he knew that I was enjoying building Luftwaffe aircraft during the last 8 months, but hadn't yet built a bomber, and that the Heinkel He 111 was a plane that I really wanted to get my hands on. This is a discontinued kit from 1994, but has been re-released under the Revell banner. For a 22 yr old kit, it has some reasonable details, including recessed panel lines on the exterior surfaces and three figures: a officer, pilot and bombardier/front gunner.. I did have a couple of fit issues though: one of the wing root to fuselage joints had a gap of around 1.0mm that I had to fill, and, the profile of the greenhouse canopy was wider than the profile of the fuselage body on both sides. I therefore had to carefully file the clear part down without damaging the window areas. Also, the original decal sheet was yellowed and the moment I put decals into water, they disintegrated. My friend who sent me the kit had suspected this might happen, so he included a more up to date set of decals, although they had markings for two H-6 version Heinkel's that carried two torpedoes and also didn't have the fully enclosed dorsal gun turret, but the open style with the windshield facing forward to protect the gunner from airflow. This newer decal sheet didn't include decals for the V1 rocket, of which there were 24 stencils intended to go onto the rocket on the original sheet. I therefore decided that this was going to be a non-existent, what if, fun build. I mixed some of the fuselage side markings from the decal sheet to spell 1H+AM, which was associated to a Junkers Ju 88 and which I thought appropriate at the time of building, as it was Christmas, and most people like a good Spiral Ham! With this being a large model at 1/48 scale, I thought that the two tone splinter camo was just too much green, and therefore broke the monotony of it up with a white tail band, which would have indicated that it operated in North Africa....again...accuracy isn't playing into this build...it's just for fun at this point in time. I have to say though, it was a good kit besides the outlined issues and I had a lot of fun building it! Enough waffling and onto the photos, I hope you like them Well there she is, I hope you like her as much as I enjoyed building her. Again, just like my Fw 190F-8 build, I haven't had the time to post my build on here, but I do have a introduction to the build video and 4 "Build Update" videos on my YouTube Channel, along with my "Final Reveal" video that are available to watch, should you be interested in all the stages from start until end of this build. Here are the links for the 5 videos associated to this build: Introduction Video Link- https://youtu.be/BRDvVv0aAS8 Build Update #1 Video Link- https://youtu.be/VCvq7-FxUxU Build Update #2 Video Link- https://youtu.be/wolvHNA4rZQ Build Update #3 Video Link- https://youtu.be/WPJQIszbQIs Build Update #4 Video Link- https://youtu.be/gSrM2QytLYc Final Reveal Video Link- https://youtu.be/l2BoXSWtHcE Thanks in advance for taking a look at this posting, for leaving comments and for watching any of the videos, should you do so, much appreciated! Until my next build thread begins, happy modeling, have fun and Happy New Year! Cheers Martin
- 37 replies
-
- 38
-

-
Hi all, Been ages since I posted anything but to try and get back in the swing here's an original vintage 1960's Revell build of Eddie Rickenbacker's SPAD XIII. The build was done as part of a fun "build a beast" competition at my hobby club. Members select obscure/difficult/potentially horrible/fiddly and awful kits that go into a Secret Santa and participants basically have a lucky dip blind draw to choose their "beast" to build over the summer break and present at the first new year meeting early Feb. Out of about 20+ starters I think about 12 kits ended up making it to show......I guess the rest of the builds languished in despair and grief! New things I tried... Rigging a bi-plane for the first time and painting the roundels. Masks for the roundels were done on self adhesive vinyl with my next door neighbours laser cutter which saved me after I destroyed the kit supplied decals! Anyway here's my build......and yes.....It nearly did my head in! Thanks for looking. Cheers
- 12 replies
-
- 18
-

-
Hi All, The Hasegawa 1/48 A-7E Corsair is a wonderful example of the state of the art in the late '80's as far as the mainstream injection Molded manufacturers are concerned- it has a level of detail and features, such as detailed avionics bays, separate flaps and detailed cockpit that set Hasegawa at the top of the tree in those heady days, and as a kit it outstrips it's contemporary's such as the Hasegawa 1/48 F-16 and F-15. It also sports the finest injected molded AIM-9's I have encountered in any kit to date, although more modern toolings may have overtaken this aspect of the kit. This is the Revell of Germany boxing of this venerable classic, and I snapped this edition up around 10 years ago, being familiar with the contents and harbouring a soft spot for the good old "SLUF" (Perhaps I feel a certain kinship with it's sobriquet!) I utilised the Superscale VA-97 Corsair decals, to depict the aircraft as it appeared in April 1980, part of the USS Coral Sea's air wing, and sporting the identification stripes applied to the US Navy aircraft as part of Operation Evening Light, which itself was the Airpower component of Operation Eagle Claw, the mission to rescue the Americans held in Tehran who didn't make it to the Canadian embassy. The sheet is still around in various outlets, and I also understand that Hasegawa released the kit with these markings as a special edition some years ago. Many hours of searching the web for the few photographs of the VA-97 aircraft of the period resulted in the identification of the weapons load as a pair of Rockeye II CBU on the middle pylons, two fuel tanks on the inners and a pair of AIM-9's for self defence. I used the kit's AIM-9D as they are superb, although some grainy black and white shots hint that AIM-9L's may have been utilised at the time, although I am unsure as to the Lima's in service date. I added a pair of the Eduard Brassin Rockeyes and Bob's your Uncle: I am very pleased with some aspects of this build, although there is a lot of room for improvement, but overall an enjoyable build. As always, thanks for looking, Cheers, Troffa (edited to correct Photobucket ineptitude)
- 17 replies
-
- 31
-


