Search the Community
Showing results for tags 'revell'.
-
Hi this is my 4th model the Revell 918 Spyder. I have used some scal carbon fibre and Plamoz wheels which was not from the Kit, Gravity and Zero colors for paint. I like the final result i am happy with it unfortunately it was rushed as i had a due date to finish but there arnt really many imperfections to be seen by the eye. any feed back is appreciated i may build another one of these in the future as a very enjoyable detailed model.
- 9 replies
-
- 8
-

-
- porsche
- porsche 918
-
(and 2 more)
Tagged with:
-
Hi All, Sorry for the very long intro, but this is an oddity that deserves a proper introduction! This is the early 1970s AHM boxing of the very old (1958 I think?) Revell USS Decatur DD-936 - so far I believe this is the only Forrest Sherman class destroyer in injection plastic form. It works out at approximately 1/320 scale, which is close enough to 1/350 to excuse me throwing lots of modern aftermarket goodies at it! It's a nice kit - one piece hull and lots of details. Instruction sheet typical of early 1970s-vintage US kit releases. The kit has some very nice moulded on detail, but look at those injection pin holes!! Here's some more, plastered all over the detail side of the deckhouse - ouch! Gonna be a headache to remove those without taking all that detail off. The decks also have moulded on railings - they will have to go too! The weapons and radars are quite nice but a bit lumpy. Some scratchbuilding and aftermarket will be required! The masts are ok though, I will be happy to use these. These steps would have been a nice touch back in the 60s, but they will be replaced with photoetch items. Decals and flags - the kit gives you the option of 48 or 50-star flags, something today's manufacturers can't get right most of the time... The fit looks very good, considering the age of these moulds. Should come out a winner! Al
-
1:32 Hawk T-1 lighting kit Tirydium Models Following on from his fibre optic lighting sets for sci-fi subjects HERE, Tirydium Models has released this set for the Revell 1:32 BAe Hawk T-1. Packaged in a clear zip lock bag the set comes complete with all you need to light the following: Nose Light (White LED) Wing Tip Warning lights, (White LED’s with 2 x 0.75 fibre guides) Top Strobe Light, (Red LED with 1 x 1.0mm fibre guide) Underside Strobe Light, (Red LED with 1 x 1.0mm fibre guide) There is also a controller chip on a board for the flashing strobe lights. Everything comes pre assembled, so all the modeller has to do is fit the parts into the model as it’s being built. Due to the construction of the kit slots will need to be filed out along the wing for the fibres to fit without being pinched and the wing tip lights will require their lugs cutting off and a small hole drilled into them. The instructions are very clear and easy to read and come with a selection of colour photographs showing where and how the LED’s and fibres are to be installed, along with written instructions explaining what needs to be done. The kit is well made with all LED/Fibre optic joints well taped up, there may be a slight excess of fibre for the lights, but this can easy be cut to size. Conclusion This is a very nice and well made set-up for those who either don’t feel competent or, like me, a little too lazy to fit lighting systems to their models even though they would like to. With this kit, aided by the clear instructions, there is now no excuse. Highly recommended. Review sample courtesy of
- 8 replies
-
- 1
-

-
- Lighting
- Fibre Optic
-
(and 3 more)
Tagged with:
-
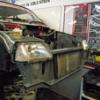
'69 Dodge Coronet SuperBee with a Hemi
MetroRacing posted a topic in Ready For Inspection - Vehicles
Ok so I finally dragged this kit across the finishing line. The story is detailed in my Mopar Madness thread but as that turned into a one man group build I'll recap it here to save time. Whilst looking for Centreline wheels for my Charger I fished out this Revell reissue of the Monogram 1969 SuperBee which I'd previously started. I decided to finally get it finished and made hast with stripping the engine so I could paint it the correct colour. I then found that the base for the air filter was missing. I assumed it was the reason I gave up the first time and set about a resolve. I chose to use the Hemi engine from a spares and repair Plymouth 'Cuda with the air filter from a '71 Plymouth GTX. The engine proved a right pita as its a lot bigger than the 440 6 pack engine and then I found the missing air filter base . In the end I gave up on it yet again when I'd have enough of the engine constantly breaking lose in the engine bay lol. Well a few weeks back whilst I was building my NASCAR kit I got it out and saw that despite all the niggles I was actually on the home straight with it. So I continued work on it in the background to the NASCAR and actually finished it before that. Though because of accessibility problems with my PC, someone put some Volvo doors in the way and how god awful it is trying to post a topic or even a reply with picture is it is from my phone; I've held off till now to post it lol. Anyway here it is. Paint is VW Mars red btw. As always comments etc always welcome. TTFN Ashley -
I picked up this little kit for around 4€ in a toystore. Post ww1 some german types saw service in the belgian airforce. most where stripped of their guns and used as trainers. I wanted a quick build so i build it almost straight from the box, only leaving off the guns and covering the hole with plastic card and filler, i also added a windshield. the lozenge cammo presented a problem as the kit decals only provice a black outline pattern for these and revell will have you paint each individual square by hand... seriously revell? I googled some lozenge patters and printed these to scale, after adding belginan roundles.. these where stuck to the plastic parts using a mixture of microscale kristal kleer and pva and also given a coat with this. For the commet on the fuselage, i first sprayer the area red and than put masking tape over a printed design, carefully cut out and masked it and than oversprayed with an off-white. i imagine the real plane had it's fuselage recovered with new, unpainted fabric resulting in the strange, but striking design. original decals asside, and considdering it's vintage, this is a little gemn of a kit, and given there's more interesting conor schemes for it, i'd certainly be tempted to pick another one up.
-
BAe Harrier Gr Mk. 7/9 1:72 Revell Developed from the prototype Hawker Siddeley P.1127, which flew for the first time over fifty years ago, the vertical take-off Harrier has become one of the most famous post-war jet aircraft of all. Awarded what some would say is the ultimate accolade for a non-US designed aircraft – a purchase order from the United States Government – the first generation Harrier was successful enough to merit the development of a second generation. Despite a slightly troubled development, during which Hawker Siddeley pulled out of the joint Ango-American project in 1975, only to rejoin again (as British Aerospace) in 1981, the resulting aircraft was a quantum leap in terms of capability compared to the original design. The second generation of Harriers, to which the GR7 and GR9 belong, feature a larger wing, more powerful engine and extensive use of lightweight composite materials throughout the airframe. The GR9 boasts a wide range of improvements to avionics and weapon systems compared to the GR7. The aircraft has seen extensive combat service and both the GR7 and GR9 have been employed over Afghanistan as part of Operation Herrick. It’s no secret that Revell’s Harrier GR Mk. 7/9 is actually Hasegawa’s GR Mk. 7/9 in a blue box. Revell must like the Japanese manufacturer’s take on the Harrier as this is at least the second time that they have released it in their own box. They also released the 1:48 version a few years ago too. The kit is comprised of 91 parts, moulded in the familiar glossy grey plastic used by Hasegawa. Despite having been around the block once or twice, the moulds are clearly in excellent condition and there is no trace of flash anywhere. The panel lines which make up the surface detail are very fine and clear. This is one area where the kit has the edge over the newer Airfix version. Whilst the panel lines on the Airfix kit are pretty tidy, these are just that bit more refined. The cockpit is pretty typical of other Hasegawa kits in this scale. The overall shape looks good, but there is no raised detail to represent the instruments or controls on the instrument panel or side consoles. Decals are provided instead. If you want something a little more convincing, then aftermarket resin or photo etched parts will be the way to go. The ejection seat provided is actually for the AV-8B rather than the GR7/9, so it is closer to the American UPC/Stencel seat than the Martin Baker Mk.12. As the seats provided in kits in this scale are usually only rough approximations of the real thing though, it’s not exactly a deal breaker. Other interior detail includes the intake trunking and turbofan blades, both of which are moulded in a single part and so will require careful painting. The auxiliary intake doors are moulded with the upper three in the open (or dropped) position, which is a boon for those of us who model their aircraft with the landing gear down. The front jet exhaust nozzles are moulded in two halves, which will create a troublesome seam to clean up. The rear nozzles are moulded in one piece, but are solid, with no real attempt made to create any impression of depth. I’m not sure which approach is better, but this is one area of the kit where I really would recommend some resin replacements. To be fair to Revell (or Hasegawa), this tends to be a problem area for all small-scale Harriers. The nozzles are designed to rotate too, thanks to rotating joints which fit inside the fuselage. The other major parts of the aircraft, including the nose, wings and horizontal stabilisers are all very nicely recreated. The nose in particular is bob-on. The Leading Edge Root Extensions (LERX) that are characteristic of second generation Harriers are the earlier 65% type, which means that if you don’t plan on using the kit decals, you will need to check to see if the aircraft you plan to build had the 65% or 100% versions fitted. If it’s the 100% versions, then there are a couple of aftermarket options available to you. The undercarriage is all quite nice, although in-flight versions of the wing-mounted stabilisers aren’t provided. The nose gear wheel is moulded in one piece with the leg, which is a pet hate of mine, but I guess it makes the whole set up a bit stronger. Hasegawa blow hot an cold with their ordnance. Some kits have very little whilst others have a veritable surfeit. Unfortunately this kit falls into the former camp. Aside from the option of gun pods or strakes for the under-fuselage position, you are provided with a couple of drop tanks and a pair of AIM-9 Sidewinders. If you want a full load of stores then you’ll need to rob the more generously appointed Airfix kit or the spares box. The canopy is thin and clear, but owing to the horseshoe profile, it has a mould seam running down the centre. This should be fairly easy to remove with a nail buffer or similar tool though. The MDC is moulded in place on the inside of the canopy. A decal is also provided for this feature, but the carrier film is quite large, so I personally would avoid using it. Two options are provided for on the decal sheet: GR.9 ZG858, flown by Wing Commander Simon Jessett of No. IV Squadron, Joint Force Harrier, RAF Cottesmore during the Harrier retirement flypast on 15 December 2010; and GR.7 ZD404 “Lucy” of 1 (F) Squadron, depicted at Kandahar Air Base, Afghanistan, 2007. As usual, the decals are superbly printed but they do look a little matt. I would recommend applying them over a gloss surface and using a decal solution. The decal sheet is amazingly comprehensive and includes decals for the ordnance, undercarriage and even the individual numbers for the Rolls Royce Pegasus compressor blades. Conclusion Most modellers considering a Harrier GR.7 or GR.9 in 1:72 face a straight choice between this kit and the Airfix alternative. The Airfix kit holds quite a few aces in terms of ordnance, cockpit detail and optional extras (closed auxiliary doors, in-flight undercarriage, 100% LERX), but this kit is still well worth a look. Although it is slightly simpler, it has finer surface detail and will build up into a very handsome model. Revell’s boxing is also good value when compared to the later Hasegawa boxings. Recommended. Revell model kits are available from all good toy and model retailers. For further information visit
-
I finished this quite a number of years ago now (in fact not long after it was issued by Airfix) but don't think I ever got around to posting pictures - with a couple of builds going on the WIP forum they inspired me to get the old girl out and take a few shots. This kit gets a really bad press, but with some careful planning and thought it actually goes together fairly well - far better than the reviewers will have you believe The only tip I would give is to join the fuselage in complete lengths first, (i.e. add the nose and tail sections to the centre section of each side before gluing the fuselage halves together) as this will drastically reduce the step and amount of filling between the nose/tail and centre section, as the latter has a slightly smaller diameter. I used Halfords' White Primer with Appliance White over the top, and after decalling I gave it a few coats of Halfrods' Lacquer. Decals were as originally supplied in the box. I'd say if you've got one in the stash get it out and build it - it'll provide hours of fun All the best, Tom
- 26 replies
-
- 47
-

-
This is the final thread for my porsche 962 that raced in the 1988 lemans being beaten by the monstrous jaguar xjr9 lm. This started out as a revell porsche 962 rothmans kit, also I had the god awful tamiya 962 kit which I originally only planned to use for the shell/Dunlop decals but a few more parts of the car were added to enhance the revell body. Modifications made were mainly to the rear end using plasticard to lengthen the rear deck. I also corrected the naca ducts on the roof/engine cover with the help of the tamiya body shell And the rear wing supports where made with plasticard and a file. Other than that everything else was just the revell kit. Paints were tamiya white primer, zero paints lotus yellow, zero paints ferrari pre 04 red, tamiya black, zero paints premixed clear and tamiya semi gloss clear. With a cheap Wilkinsons paint for the floor pan and other bits that will never be seen. Be warned it is pretty photo heavy Here it is. Finally a few pictures with a couple of my other cars that fit with this With the car that beat it in the real race aswell as the build race And the car that made me think modifying a revell porsche into other variations was possible Overall I think this kind of modification to a revell or hasegawa porsche 962 is relatively simple once you know what you want to add and would suggest trying to anyone one here. Thanks for looking Shaun
-
As in the title, I am looking for RAF decals for either the GR.1 or GR.4 for the big Revell Tonka. Does anyone know of a good set or any at all? Rob
-
Good evening, After around 70 odd hours of work, I've finally completed my first built in over a decade. It was certainly a testing model kit, and despite some gross errors, this built has taught me so much about patience, taking time to ensure the intricacies and details are done as best as possible. I hope you enjoy the photos. I would sincerely like to thank TrojanThunder for the overwing decals. The default Revell ones were flimsy to say the least for this rookie. The Qantas 90's Livery was by DrawDecals and the details were off the default Revell decal sheet. Feel free to let me know what you guys think and I look forward to my next built. Yup, it does resemble and Boeing 737! Whew! I went with the default winglets and engines. One of the more testing parts was reprofiling the winglets to reflect the correct chord and height, followed by assembly, and hand painting the winglet, gold stripe and leading edge. TrojanThunder, the decals arrived in time! Thank you so very much! Another challenging part, getting these individual decals in the tailplane. Thank you and kind regards, Charlie
- 22 replies
-
- 14
-

-
Hi all and some pics from this WIP build. I used a Revell 1/52 Snowspeeder and a surplus toy AT-AT leg from Kenner for a Battle of Hoth diorama. Base was homemade and everything brushpainted (and it shows!) Cheers, Dermot
-
Well I've cracked open this bad boy, and I'm off to a flying start (hur hur). I've started the butchery already, as most of the detail is a little dated, so hopefully I'll be able to improve things a little. The beginnings of a new seat. The molded rings in the floor have been drilled out and I'll be adding tie down rings at some point, also removed the ammo cans so i can start putting together new ones. And the rear bulkhead, although pretty good 40 odd years ago, doesn't quite cut it these days. So I used it as a template for a new peice cut from 60 thou sheet. Still need a little trimming and sanding here and there but it fits the interior much better, with no gaps between it and the fuselage. Now to figure out how to add the soundproof matting again, probably time to dig out the milliput.
-
Hi, I recently found a compressor and two airbrushes. The airbrushes are Badger 200NH and Badger 155 Anthem. Currently I only have access to Revell Enamels in the little 14ml cans. So I was wondering whether it's possible to thin them down enough with whitespirit (Seems like I have an infinite supply of it haha), to be able to use them with the airbrushes.
-
Hi there. I would like to share my latest build of the Sea Lynx Mk 90B (RDAF) End of june I was visiting Helicopterwing Karup i Denmark, and had a tour of their facilities. They are keeping the RDAF fleet of Helicopters in shape for their duties. Today the fleet concists of Aerospatiale AS-555 Fennec (12), Agusta Westland EH-101 Merlin (13) SH-60 Seahawk (3) 6 on order. And of course the Westland Sea Lynx Mk 90B (7) used to be 14... So I just wanted to do this build of the danish Lynx before they are being taken out of service. Haynes Lynx manual for some further detailing... Aftermarket parts from Eduard, paint from Mr. Paint and Rivets from HGW as the Revell kit is without any?
-
After my 1/32 Italeri Sopwith Camel, I decided that I really enjoyed working in this scale. With that in mind, I have decided to have a crack at Revell's MkIIa Spit which I bought off a member on here with some alternate decals and some Eduard masks. Here goes and as always, I am only learning and will appreciate all comments and advice, good or bad. :-) Dean
-
Hi again, now with this quite unique aircraft. I liked so much the way it looked at Auckland I knew I had to build one someday. Gio Decals, which were a nightmare, and Model Master enamels. I did my best with the decals but at some stages I must confess I almost quit. Glad I managed to get through the storm though. Thanks! Ignacio
- 19 replies
-
- 22
-

-
This was completed for the Airliner III GB currently underway. Since some of you don't venture over there and are having airliner withdrawals in RFI I thought I would post this here :D. It is the Revell B767-300 kit from the Gulf Traveller boxing. I built it out of the box and used Australian Airlines markings from the Draw decal sheet. A bit of history on Australian Airlines Australian Airlines was a short lived full-service airline based in Australia, servicing Australian and Asian destinations between 2002 and 2006. It was an all-economy, full-service international leisure carrier, and was a wholly owned subsidiary of Qantas, (although run independently of the mainline carrier). The airline ceased operations under its own livery on 30 June 2006. Qantas decided to discontinue the public use of the Australian Airlines brand in favour of having Jetstar Airways as its leisure, now low-cost, carrier. Qantas and Jetstar began operating services to replace Australian Airlines' routes, with Jetstar International introduced in late 2006 to help expand the Qantas Group's international presence.
-
After seeing Steve's B747-8F I grabbed one of my older Revell B747s from the stash and started chopping. Mine will be a -400F and I will fix some issues with the kit. not worrying about wing AOA or nose plan shape. I will fix the nose hump and reshape the cockpit roof though. Some chopping, and gluing, I managed to miscalculate the cuts and need to make some extras, always the case for me. But I think I have the hump sorted now. I have the Flying Colours decal sheet and some Braz PW4000s from a previous failed attempt during Airliner GB II for this build. Since these pictures were taken I have started filling the seam work on the cuts and filled the cabin windows with super glue. I will work on this one as time permits concentrating on the other 2 as they are nearing completion.
- 16 replies
-
- 6
-

-
- conversion
- 1/144
-
(and 2 more)
Tagged with:
-
Hi everyone, So after the Podracer last year, I've been itching to try another Star Wars build. I've had this one in mind for a while but only getting around to it now. Going to combine this little fella... With this donated toy bit.. To make this! (fingers crossed) I can't say that i've ever used toy scraps or modelled snow for a diorama........might be biting off more than I can chew! Cheers, Dermot
- 22 replies
-
- 6
-

-
- revell
- battle of hoth
-
(and 1 more)
Tagged with:
-
Hello, I am currently working on the beautiful 1/72 Halifax III kit from Revell. It's about time to add the engines to the wing, and that's where I came across the exhaust issue. Please have a look at Revell's instruction sheet, in particular the placement of the exhausts. Three of them are pointing to the Right, only one is pointig to the Left: Now I had a look at my references (Squadron/Signal "Halifax In Action") and they are different. The inner exhausts are pointing inwards, while the outer ones go the other direction: Should I follow Revell instructions, or are Squadron/Signal plans more accurate? Another interesting feature missing from the Revell kit is that Y-shaped frame inside the engines. I find it difficult to describe, maybe this photgraph helps to understand: http://www.gettyimages.at/detail/nachrichtenfoto/kent-ford-who-flew-the-mark-iii-halifax-near-the-end-nachrichtenfoto/165323783#restorationenginekent-ford-who-flew-the-mark-iii-halifax-near-the-end-picture-id165323783 A similar piece is included in Italeri's 1/72 Stirling (which also runs on Hercules power) as a photo-etch part. I clipped it out to see if I could use it on the Halifax, but it doesn't fit: Does anyone know what this Y-shaped structure is good for, and if it was installed on all Hercules powered Halifaxes? I am thinking of representing these with stretched sprue, maybe. Thanks for your help, it is greatly appreciated. With kind regards from Vienna. Roman
-
How dull it is to pause, to make an end, To rust unburnish'd, not to shine in use! -- Alfred, Lord Tennyson, "Ulysses" 'They might say, it seems to me, "you are rich; we are poor...You have had the past; let us have the future." Above all, I fear they would say, "you are weak and we are strong."' -- Winston Churchill, 16 November 1934 Mr Edward Heath (MP for Bexley): Can the Secretary of State be certain when confrontation over Indonesia will end or when the certainty of the independence of Malaysia can be assured? Mr Dennis Healey (MP for Leeds East): No, I cannot be certain about everything but, I think that it is possible to take some decisions now and that a Government with any sense of responsibility to the British people must take those decisions which it is possible to take... -- Hansard, 7 March 1966, "Defence" During the 1960s, a curious sort of undeclared war was waged between Indonesia on one hand, and Malaysia, Singapore, and their western guarantor, Great Britain on the other. In early 1960s, the Indonesians had fought a similar war against their former colonial masters, the Dutch in an attempt to gain control of what was then Dutch New Guinea. This had involved paratroops, aeronaval combat (a Dutch P-3 and surface warships sank three Indonesian torpedo boats), and ultimately attracted the attention of the Soviet Union, who supplied a Sverdlov-class cruiser to bolster Indonesian naval capabilities. (This was the Ordzhonikidze, which Lionel Crabbe had famously been killed while trying to secretly inspect in 1956.) Ultimately, the overstretched Dutch, who had won every battle, were persuaded to give the Indonesians everything they wanted in a 1962 peace conference. President Sukarno was confident this strategy would work again. As it happened, things didn't quite work out that way, and in a remarkable campaign, conducted largely on the cheap, the British, along with their SEATO allies from Australia and the Malaysian and Singaporean people, emerged triumphant. One of a handful of RAF squadrons to participate (and one of a very few to fire weapons in anger after WWII) was 20 Squadron, whose motto is, appropriately, "Facta non verba". During the Confrontation, they flew Hawker Hunters, a jet which, to be entirely honest with you, has never been my favourite for looks, but I still have at last count nine Revell 1/72 kits of it, so here we are. I'm using a RAFDecals aftermarket sheet, and Freightdog's corrected wheel set -- I can't see the difference, but I trust Colin on this one. God knows how long it will take to build.
- 761 replies
-
- 18
-

-
Hi all I usually, when time allows (which isn't very often due to having a young daughter) make 1/72 armour so this is my first aircraft in a very long time. When my grandfather passed away some years ago we found some of his old photos - this piqued my interest in modelling his actual aircraft not just a generic one. He was a flight engineer on Halifaxes with 58 Squadron (Coastal Command) and the aircraft in the photos is "N for Nuts!" (As he wrote on the back) These are the photos: So in preparation for this marathon task I started a bit of research: And so the shopping spree began: Thanks to 'Rossm' on here I also have the decal 'ingredients' to make the serial numbers and code letters up: I'm aware that the revell kit isn't the most accurate out there but it's a starting point - there are a few things that I have planned for this which mean getting hold of a few more things - at the moment I am hunting (unsuccessfully) for 4 bladed props as I understand the kit ones aren't good (if I can't find any I'll reshape these!) Anyway thanks for sticking with me, sure I will have lots of questions but at the moment and ideas/advice/help would be appreciated! Hoping to crack on this weekend, if the little one allows! Thanks Adam
- 49 replies
-
- 10
-

-
Evening, so here is my build of the isreali MBT Merkava Mk.III. The Merkava is the a series of israeli MBT developed since 1973. The first Model MK.I was introduced in the IDF 1978. The current version is the Mk.IV being intriduced in 2003. All variants have in common that the engine was moved to the front to add more protection againts RPGs inlike most other modern MBT where it's in the rear, and due to the space in the rear through the missing engine, was used to add an rear compartment so that the tank can transport infantry, ammunition, a stretcher ("tankbulance"), or goods like e.g. a watertank. Another difference to other MBT is thatit is also equipt with mortar in the turret. I build the 1/72 Revell kit of the Merkava MK.III. Ibuild about a month ago and the fit was pretty good; I build it OOB and painted it with Revell colors (matched by eye; I think the tone looks pretty good though it should be a little brighter ) I weathered it with pastel chalks grinded to a dust So here are the pics: IMG_2124 by nivelnnamkcurts, auf Flickr IMG_2125 by nivelnnamkcurts, auf Flickr IMG_2126 by nivelnnamkcurts, auf Flickr IMG_2127 by nivelnnamkcurts, auf Flickr IMG_2123 by nivelnnamkcurts, auf Flickr IMG_2128 by nivelnnamkcurts, auf Flickr close up of the chains on the rear turret, used as protection against RPGs IMG_2144 by nivelnnamkcurts, auf Flickr and the obligatory comparsion to a 1€ coin and an 1/72 esci figure (all pictures were taken with my phone as my camera has some focus problems , so they're all a bit grainy) so that was it, hope you like it comments an critics are welcome Regards Levin Edit: to sgt. Squarehead - I didn't found a way to "trim down" the shine on the bare metal surfaces, except repainting, what I haven't done yet
- 10 replies
-
- 16
-

-
Good day every one I though I would share my latest completion. This is the Revell Cargolux 747-8F. Very nice build totally out of the box. Fit was very good and the detail is (to my eye) excellent. I had issues trying to work out the correct colour, in the end I opted for Tamiya spray can which look ok but on reflection it is way, way too dark. On some photos it looks almost white, on others it is quite dark but no where near my selection. I didn't go for a respray because I used a poor primer (automotive) and was worrying about loosing the detail. The decals are very good but the tail one is very thick and just would not settle into the panel lines no matter how much micro-sol i used. The engines I think are very good and the engineering involved produces a very good looking attempt but some of the fan blades did suffer slightly from short shots or flash and they are difficult to clean up. Over all i am happy with the result, She is a big, good looking beast! I am still quite new to the civvy side of things but I do like working in this scale and looking forward to my next attempts. It does make a pleasant change. Any hoo here are the pics: And here she is joining the rest of my civvy fleet. The Concorde is on its last legs but I have another in the stash to take over Thanks for looking! Cheers now Bob
- 23 replies
-
- 17
-

-
I only met SOFIA a few days ago, while watching a TV documentary, and I immediately feel in love. Pretty girl, isn't she? More info here: https://www.sofia.usra.edu/ and here: https://en.wikipedia.org/wiki/Stratospheric_Observatory_for_Infrared_Astronomy I am closely following John Hagmann's build in the March 1994 issue of Fine Scale Modeler, using the Revell 747-100 kit (or better, the carrier from the 747/schuttle box) and I already cut the fuselage and made a plug to join the centre section to the tail one. However, I think that the fin's leading edge angle to the vertical is a little off in the kit. Can someone point me to a *good* side view of the 747sp? The several ones that I have are only approximate, and one even refers 45º which is clearly too much judging from photos. Or am I wrong? A few pics of the work already done, more to follow in a WIP thread: The two front parts are now yet glued, but they are joined with tabs. I will glue them only after re-profiling the wing fairing. Thanks in advance for any help. Comments about any potential problems welcome! Carlos
- 7 replies
-
- Boeing 747SP
- Revell
-
(and 1 more)
Tagged with:

