Search the Community
Showing results for tags 'revell'.
-
Decided it's time to clear out some of my old stash, instead of selling perhaps i should build thes as that was what i originally intended......I think? So here goes: BF-109 G6 will be the late variant. He-111 H6 will be KG26 1H+GP ? JU88 will be a C-2 perhaps 4D+FH ? My problem for the outset is going to be finding RLM paints. I have all the required Luftwaffe RLM colours: 65, 70, 71, 74, 75, 76, 81 and even 02 but these are all MM enamels. I really would like to use acrylic even if its lacquer based like tamiya and Mr Hobby Colour (gunze). But i am skeptical on using MIG or Mr Hobby Aqueous. although they do RLM colour ranges. Vallejo is a non starter as i think there colours for RLM especially the model Air range are not that accurate. also i want paint that is tough after 24hr of curing like Tamiya. Open to suggestions.... Is the Mr Hobby Colour the way to go as it's probably tough and durable like tamiya?
-
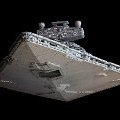
Hello BM's. Now for me, something completely different. My wonderful modelling supporting Wife bought me a Millennium Falcon in 1/241 scale for Christmas and I've had great fun completing this over the last few days. I'm normally a 1/72 WW2/Cold War aircraft modeller so some different techniques and approaches were used to create the effect I wanted: Tamiya Acrylics used, XF-20 and lots of XF:2 to get the colour Painted the different panels using the starter set acrylics that came with it I only used the kit decals on the gun turret view port For a quick, fun build, I can't recommend this enough. Enjoy!
- 7 replies
-
- 10
-

-
- Millennium Falcon
- Revell
-
(and 1 more)
Tagged with:
-
Help a novice on his return to the hobby im stuck, thanks!
degsye39 posted a topic in Modelling Tips
Evening all, first post so hello, hope you are all well. I seem to have a slight issue with my revell 1:72 me109 g-10, it does seem to be a bit of a duff kit with flash galore and a quite poorly fitting fuselage. I’ve only been back to the hobby around a month and this is my first foray into kit building since the 1990’s. The exhaust ports on my 109 are fine one side and badly formed the other I know on a g-10 me109 the manifold should have a shroud above on one side, mine had a small lump of plastic and a malformed hole which I attempted to sand and salvage somehow, quite badly it seems. I’d like to scratch build the exhaust shroud and reform the curved section where the manifold comes through, could any of you gents give me some insight into how I could achieve this? I was thinking along the lines of milliput or maybe trying to scratch build a small part using flat plastic (I do recall seeing such things but this would of been in d.hewins Grimsby around about 1997) Thank you and kind regards! what im after! the kit ps, if this is i the wrong place i apologise! -
Here's the Revell Jordan EJ10 in 1:24 scale by Revell that Jarno Trulli drove back n 2000. It's not the best model to put together. Some of the parts didn't fit and the plastic was really soft. The tyres are of poor quality too - the decals don't fit and i managed to snap out the middles of the wheels due to the plastic been so soft and the tight fitting onto the axels. I used Halford's Primer on this model for the Yellow bits and im not too happy with it. It's not got that smooth look which i got with the simoniz primer but the simoniz plastic printer does adhere to the plastic so when sticking masking tape on the model the primer just peels off. The Halfords primer gives a rough finish and it comes out the can far too quick. Ill be going back to Hycote i think as that was the best primer ive bought and used. Just need to think how to get that excellent flat shine on the model that others get. It's had about 3 coats of Klear (Pledge floor polish from Sainsburys) and 2 coats of white spirit and humbrol gloss (mixed) and brush painted on. The only bit that looks glossy is the black on the front and rear wings as this has Simoniz plastic primer and Hycote black gloss spray can applied to it.
-
Dear fellow Britmodellers. I am currently working on Revell's 1/72 B-17F kit, which contains markings for B-17F-10-BO, serial 42-29591, LL-Z, The Shamrock Special, 8th Air Force, 91st Bomb Group, 401st Bomb Squadron. Revell's instructions are a bit vague: - Revell's painting/marking section show "Shamrock Special" with a astrodome. (The astrodome is not mentioned in the build instructions though.) As "Shamrock" is an early production B-17F (F-10 block), should it have an astrodome - or the flat transparent panel? I have found two period photographs of "Shamrock", but can't tell for sure which part should be fitted. Information on this subject is welcome. Thanks!
-
Dear all, This year was particularly unproductive model-wise. I just managed to finish three models, two of which had been started in 2015. However, I started a few more, to add to my collection of unfinished models. Anyway, here are the three finished models, with links to the WIP and RFI threads. Thanks for looking and for your unfailing support during the builds. 1. Helmut Wick's Bf 109 E4, October 1940 (Battle of Britain) (Tamiya 1/72) This one was started in the Battle of Britain GB, in the Summer of 2015, but I only managed to finished it in the KUTA VIII GB, in January 2016. It's the first model I finished which used PE and the camouflage is stippled, with just a bit of mottling. More info can be found in the RFI and WIP. A few pictures: IMAG3231 IMAG3234 IMAG3250 IMAG2946 IMAG2944 2. Revell Fokker Dr.I triplane 1/72 (Red Baron) This one was also started in 2015, and was intended to be a quick build ( I know... I know...). I just managed to finish it in 2016, after several setbacks with the matte varnish and the CA glue for the really simple rigging. If you're interested to find out more, you can read the RFI and the WIP threads. It should be mentioned this was my first use of PE stretchers to add detail to the rigging. A few pictures: IMAG3511 IMAG3513 IMAG3522 IMAG3528 IMAG2986 3. Ju 88A-4, Sicily, June 1941 (Revell 1/72) This was my entry to the Ju 88 STGB in 2016, but I didn't manage to finish it in the time frame of the GB. It's my most complex and ambitious build to date, as it's a super-detailing project, using Eduard's BIG PE set and some scratch-building. It took me just under three months to finish. Details in the RFI and WIP threads. The main pictures: IMAG4282 IMAG4286 IMAG4292 IMAG4297 IMAG3971 IMAG3975 That's all. Thanks for looking Cheers Jaime
-
I’m currently on a bit of a small model kick and have just taken delivery of the Revell UH-60 A in 1:100. While looking for pictures on wiki I saw the IAF version and thought that looks quite snazzy and certainly less dull than NATO olive all over. So knowing next to nothing about military vehicles in general and absolutely nothing about IAF vehicles I turn to the collective here – can I build up the Revell version oob and just paint it up in the IAF livery or does the kit need work? It’s 1:100 so I don’t need to go to the detail required of a 1:35, but do I need to change load outs etc? Thanks in advance chaps MD
-
Hi there folks I'm back with another of my most recent builds - seem to have managed to get on with quite a few lately - must be the Christmas spirit I'm posting this one first but there will be more to follow very shortly. The kit in question is this one: Considering I'm such a fan of Luftwaffe aircraft, I've never built a 109 (I know - I can't believe it either!!!!) up until now and chose this kit as a test bed and a practice for more to follow, particularly the Airfix 1/48 109 I have in the stash. I built the kit pretty much OOB with just the addition of some tamiya tape belts and the odd scratch built item - nothing spectacular. I know this kit is not the best representation of a 109 but it's details weren't too bad and it went together pretty nicely. I do have aftermarket swastika decals but I completely forgot for some reason to add these to the tail - doh!! By the time I realised it wouldn't have worked to add them so they'll just have to stay omitted and be a learning curve for next time!! Anyway, without wasting anymore time talking, the pics are below - as always please let me know what you think - comments are always welcomed
- 23 replies
-
- 29
-

-
On July 9th, 1943 Allied transports took off from Tunisia with 144 assault gliders in tow in the opening move of Operation Husky, the invasion Sicily. The assault gliders, 136 Waco CG-4/Hadrians and 8 Horsas, were to deliver 2075 troops of the British 1st Airlanding Brigade in a daring night time assault to secure the Ponte Grande Bridge. The story of the assault can be seen here https://en.wikipedia.org/wiki/Operation_Ladbroke but the 1st Airlanding Brigade would run afoul of bad weather, friendly fire, poor nighttime navigation and a lack of communication between the gliders and their tugs. Released at the wrong point, 65 of the assault gliders failed to make landfall and ditched in the nighttime sea. The remaining gliders were scattered, and only a dozen gliders hit the landing zone. Of the remaining gliders only 59 more reached Sicily but some missed the LZ by as much as 25 miles. Regardless, the 1st Airlanding Brigade was able to take the bridge (with a force totaling only 87 men) and hold it until they ran out of ammunition. The Italian forces then retook the bridge but they where unable to demolish the bridge because the 1st Airlanding Brigade had removed the demolition charged the Italians had rigged on the bridge. In a small tribute to the brave men of the 1st Airlanding Brigade I will build the 1/72 Revell Waco CG-4/Hadrian in the markings of the craft used in Operation Ladbroke. (Which, oddly, are USAAF markings as the Waco gliders were "loaned" to the British for this operation) The kit it self is an older Revell offering (does anyone know the release date?), very basic interior but some nice "fabric" work covering the wings and fuselage. The first step is to glue in some flat stock along some of the edges of the fuselage halves to avoid the thin butt joints that the kit has. I hope that you will enjoy the build. Greg in OK
-

1:72 Eurofighter Typhoon- Operation Shader
cathasatail posted a topic in Work in Progress - Aircraft
Good evening all! Popped into the LMS today and picked up a new tool Revell Eurofighter Typhoon. The kit looks cracking- improved cockpit detail and much less flash than the older toolings (i've built one before and it is now hung up next to the Vulcan ): I've always modelled historical aircraft or display aircraft from previous years but I thought I would have a crack at an aircraft involved in live operations. Naturally, not many pictures exist of Typhoons involved in Operation Shader (RAF's action against IS) but those aircraft that are shown have the bare minimum of markings, are heavily weathered and have had any squadron emblems removed. While I do have an XtraDecals RAF/RN Update set with a few Typhoons included, they don't include the stencilling that you could otherwise use from a kit's decals. Bizzarely, the new-tooled Revel kit only comes with one decal option for a Luftwaffe aircraft- but having said this, the kit decals do include some of the basic dayglo green strips that are found just below the canopy and the no-step decals. No problems there then Now, armament. I do have a spare set of Storm Shadow missiles but I gather that these are rarely used, so 2 paveways will have to sufice for now. The commonly seen air-to-air missiles (fitted into the fuselage recesses) and the wing tanks should top it off nicely. Build pics!: (Out of focus- whoops!) Nice panel lines! Instrument panel coaming (although not shown here, the actual instrument panel is moulded as a clear part!) Very fine detail on the upper intake surface Right, that's it for now! With school having broken up for Christmas, I should have plenty of time to devote to this, thanks for having a look! Kind regards, Sam -
Hullo, I was thinking of doing a Polish Air Force F-16C Block 52, and I was wondering if all single-seat Revell kits had everything I'd need in the box (aside from CFTs and the bulged gear doors)?
- 30 replies
-
- F-16 Block 52
- Revell
-
(and 1 more)
Tagged with:
-
Another F1 car completed back in May but only just had chance to upload it. First time with microset and microsol on this model and since then, not looked back.
- 6 replies
-
- 5
-

-
- Revell
- Jordan 197
-
(and 1 more)
Tagged with:
-
I have been a regular flyer on easyJet’s Bristol/Edinburgh flights over the last 4 years. This build uses the excellent Two-Six decals to convert the basic Revell A319 kit into one of the aircraft used on that route, named after Sir George White, the founder of the British and Colonial Aircraft Company, otherwise known as Bristol. Revell’s kit is nicely moulded and fits together well. My one criticism would be the shape of the CFM56 engine pods, which lack the very distinctive flattened lower edge. Fitting the cockpit windows was also surprisingly difficult due to a lack of fixing surface and I ended up having to fill them with Tippex. Like most 1:144 airliner kits, in comparison to larger scales it is a relatively simple build with few parts and limited detail. It has been released many times, with excellent decals for a number of airlines. Mine was a British Airways release, but although the kit decals are of excellent quality, I replaced them with after market easyJet ones, including, as seems to be the fashion in this scale, replacement decals to cover the kit’s windows. FredT
- 15 replies
-
- 20
-

-
Here's the Toyota TF102 from the 2002 F1 season I cant remember what i did with this, i think i sprayed the base with humbrol white spray and then hand painted the bits of red that were needed before laying the red decals over the top. Was one of the easier builds but is a very rare model to find.
- 1 reply
-
- 4
-

-
- Revell
- Toyota TF102
-
(and 1 more)
Tagged with:
-
Tried to complete last years KUTA, but alas no. Will attempt to finish it for this years one.
- 9 replies
-
- 6
-

-
- Whirlybirds
- revell
-
(and 1 more)
Tagged with:
-
The last one I'll finish this year is another Sabre Dog. This one is a little different as it is a machine from the 3rd Air Wing of the JASDF,using a set of Flying Papa decals I found in a second hand F-86D I bought in the kit swap at Telford. Just a couple of photos a Photobucket is playing up as usual. Thanks for looking.
-
Finished this one a year or so ago but never got to post pics up. This is the Revell release with lots of scratch building and detailing using the following aftermarket; CMK Cockpit CMK Wheel Wells Aires Armament Set Kagero Decals Full fuselage/wing riveting, plumbing for main landing gear etc etc. Enjoy
- 19 replies
-
- 34
-

-
I`ve decided to have a short break from my usual WWI aviation subjects... It`s my second completed maritime subject. Some progress pics: A PS variation of the pics: The finished model:
-
Here's my finished MP4/12 of Mika Hakkinen's car from 1997. I struggled with the decal on the nose, it would not stick even with loads of Microsol pasted over it.
-
Nice easy kit this one, a good kit to get the mojo juices flowing again. Added some aftermarket decals to make the RAF version. Scale: 1/48Manufacturer: RevellPaint: GunzeExtras: Eduard RBF tagsDecals: Caracal
- 13 replies
-
- 23
-

-
Finished this a couple of days ago, something a little different for me, picked the kit up earlier this year in California for a tidy sum of $9.99, so I got two. Nicely made, couple of little bits inside to go with the police stickers - yes stickers not decals. Moulded in black which made the white paint a pain. The decals are from JBOT (who still seems to be off line), the light bar is from police car hobbies and a few stick on glittery things to simulate the LEDs that adorn most emergency vehicles these days. You may ask why Ontario Provincial Police out of Thunder Bay? Well, I could lie here but I saw a photo of an OPP cruiser and liked the look of it and these are what I had left from a project of a few years ago. Untitled by phil da greek, on Flickr Untitled by phil da greek, on Flickr Untitled by phil da greek, on Flickr Hope you like it, I enjoyed the simple build but as always there were some struggles along the way.
-
Airbus A320 Etihad 1:144 Revell The first of the successful narrow body range from Airbus, the A320 flew commercially for the first time in March 1998, having completed its maiden flight in February of the previous year. Designed to compete for a share of the short to medium range market which at the time, was dominated by Boeing and Douglas with their B737 and DC-9 respectively, a production run of fewer than 1000 aircraft was originally intended. However, the success of the design, and the introduction of the longer A321 and shorter A319 and A318 derivatives has seen the A320 family become the worlds fastest selling airliner. As of April 2016, Airbus has delivered nearly 7000 aircraft, with a further 974 firm orders making this the worlds best-selling, single-generation aircraft programme. The kit. The Revell kit has been around for a while now, and has been issued in many different airline liveries such as Lufthansa, Eidelweiss, Air Berlin, and Condor. This latest release offers the rather attractive Etihad livery that has been recently introduced. The box is in Revell's new 'black' style with a side view painting of an A320 climbing to altitude. The instructions have likewise been revised and are now in full colour on glossy paper. The plastic parts are the same as previously issued, and are now beginning to show traces of flash in some areas, but nothing too serious. The first of the two main sprues holds the fuselage halves and undercarriage components. The passenger cabin windows are moulded open, so you will need to decide whether to finish them with one of the liquid glazing products such as Micro Krystal Kleer, or fill them in and use decals. Glazing is provided for the cockpit windows, but without any framing on the decal sheet (apart from outlines for the two centre panes), or a 'solid' decal option. I always prefer to retain the clear option and mask it, so this is no problem. Others who like to use decals will need to take one from the spares box. The second sprue contains the flying surfaces and the CFM 56 engines, but the V2500 engine option on some previous releases have been deleted here. The trailing edge flaps on all the Revell A320's need a little modification to remove some of the smaller track fairings, and this is clearly pointed out in the instructions. Note also that the inboard flaps need the 'sub section' engraved oblong filling in. The little 'winglets' on the wingtips are somewhat undersized, but larger replacements are easily fabricated from plasticard if you desire. All my previous builds of this kit have them, and it only takes 15 minutes to make a pair. Decals. The decal sheet is probably why most modellers will want to obtain a copy of this kit. Designed by DACO it provides a wealth of stencil detail, wing walks, door outlines, engine and pylon details, as well as the Etihad livery. It is all beautifully printed in sharp register and with excellent colour matching. Being a DACO design they should fit perfectly as well, no small consideration when considering all the decals to go around the rear fuselage and tail. The fuselage colour is suggested as mix of Revell's own paint, 75% White 04, 20% Orange clear 730, and 5% Aluminium metallic 99. Several other Etihad airliners have been posted on this forum over the last few years, and other suggestions may be available with them if you search. (My own Boeing 777 was done with nail varnish applied by airbrush). Whichever method you use, it is probably wise to mix up a batch and keep it for re-coating and touch ups. Conclusion. It is nice to have this kit back in such an attractive livery. The new upgraded box and instructions are also very welcome, and much clearer to read than the old instructions. Many of us will have already built at least one of Revell's A319/320/321 kits, so know that it is a trouble free build. The real 'icing on the cake' here is the beautifully produced decal sheet, and should produce a stunning model. Recommended. [EDIT] Under construction now ! Build log here [/EDIT] Review sample courtesy of
-
Hello All, I'm throwing this one in as a quickie. There will be the most basic of enhancements 'cos I don't do OOB. It's the ancient Revell kit, one from my late Dad's stash of four or five plane kits, no doubt picked up from a bargain bin in a model railway shop. Mandatory box and sprue shot: I'm off to stick some bits together! Thanks for looking, Adrian
-
TAH-1F Cobra Flying Bulls Revell 1/48 build within and for the great, just finished Huey group build Bell Huey STGB Work in progress at Airpower16 - Hangar 7 Salzburg/ Austria Kit: Revell Monogram Aftermarket: none, inner pylons scratch Paint: Tamiya rattle can (black), Revell Enemels
- 12 replies
-
- 17
-

-
- cobra
- Flying Bulls
-
(and 1 more)
Tagged with:

