Search the Community
Showing results for tags 'revell'.
-
Bréguet 1150 Atlantic "Italian Eagle" 1/72 Revell (03845) The Atlantic was developed by Bréguet in response to a NATO specification to replace the Lockheed Neptune as a long range maritime patrol aircraft. The design was a conventional mid winged monoplane powered by 2 Rolls Royce Tyne Turboprop engines. As a designed for purpose aircraft a large ventral weapons bay was included as well as a retractable surface search radar, with a Magnetic anomaly detector in a tail boom. The primary weapon was air launched anti submarine torpedo's, although mines, depth charges and anti ship missiles could be carried. Its reported Italian Aircraft have flown with NATO provided nuclear weapons. Sonar buoy tubes are located behind the weapons bay. Originally the French ordered 40 and the Germans 20. Later the Italians ordered 18 and The Netherlands 8. The Kit Here Revell have re-boxed their kit from 2003, this is though only the second re-boxing of the kit. This kit come with special markings for an Italian example with a complete airframe motif of an Eagle on it. With 9 sprues of grey plastic and 2 clear ones you got a lot of plastic in the box, there is a full weapons bay, and torpedoes & other stores for it; and it looks like all the parts for different versions are on the sprues as well, most notably the rear fuselage with the sonar buoy dispensers. There is nice engraved detail throughout and the moulds have held up really well. Construction begins away from the cockpit in the centre of the aircraft with the weapons bay. Two sides, the roof of the bay and two end bulkheads make up this section. Into the are added the racks for the weapons. There are also quite a few stencil decals for the bay as well. Of course if you are going to close this up on the finished model you dont have to do this work, though it would be a shame to hide all the detail in here! Once the bay is complete it can be added into the main fuselage section and this can be closed up, not forgetting to add in four windows before you close it up. We can then move onto the cockpit (phew). Floor and side consoles are added to the main lower part and rudder pedals are fitted. Control yokes for both stations go in followed by the seats and the instrument panel (instruments are provided as decals). The lower front observation position is built up and attached to the underside of the cockpit. then the rear bulkhead goes on. The search radar is built up and added to the back of this bulkhead, it has an "in flight" position, and an "on ground" position depending on how you are building your model. The completed cockpit can then be put inside the two halves of the main fuselage. The two part cockpit canopy and the nose glazing can then go on, and the front fuselage can be joined to the centre part. Work now moves to the rear of the aircraft with the vertical tail and tail planes being assembled and added to the fuselage. The MAD boom is also assembled and added here along with the correct under fuselage insert. Next up its the wings. These are convectional left/right with uppers and lowers. The first thing to work on for each wing is the turbo prop engine. In the upper wing half the rear bulkhead for the engine are goes in and then a full length exhaust is built and attached to this, Next up in the lower wing the main wheel bays are built up if you are doing a wheels down version. The wing halves can then be joined and on each side of the nacelle the side parts are added. Under the nacelle the chin intake is added. The wings can then be attached to the fuselage. The propellers are made up and attached to the engine front, these are then in turn attached to the nacelles At the front the nose gear is built up and added along with the gear doors. The main wheel units the follow suit. If closing up the weapons bay then then the doors can be added, if opening them up then some surgery is needed before attaching the doors. Moving to the top of the aircraft the dorsal spine parts are added along with various antenna and aerials. Under the tail a whole host more aerial are fitted along with the rear entry stairs if the modellers wishes to open this. The last items to be added are the underwing spoilers and the wingtips. Decals There is only one option ton the sheet the rather impressive Italian Eagle from the Italian Air Force., 41 Stormo, 88 Gruppo form 2006. As good as the decal sheet is they cant do the whole aircraft in decal. Only certain parts are and the modeller has to paint the rest, though Revell have done what they did with the resent Cargolux 747 and provide masking templates to copy and use in the instruction booklet. Conclusion This will be an impressive kit once built up, my only small gripe is the Revell could have included markings for a standard line aircraft as an alternative to the special scheme. Currently, Revell are unable to ship to the UK from their online shop due to recent changes in import regulations. Revell model kits are available from all good toy and model retailers. For further information visit or
-
This was a kit that I searched for a long time. They are rare these days and often change hands at ridiculous prices. This one I got on a Swiss auction site for a reasonable price,not cheap though... It was the 1985 Revell issue. Its the same mouldings as the Otaki kit,just this time in the Airbus house color markings. The decals were yellowed,so I ordered a replacement set from BSmodelle. The cheatline on the new sheet seemed too wide,so I used the Revell ones instead and only used the numbers and the titles from the new sheet. The kit has only a few parts,not very detailed but it has nice recessed panel lines and the fit is mostly fine. I improved the engine outlets as the kit ones were plain and also wrong in design. Photos of the original showed the outlets are pretty roughly installed. This was created by using plastcard plates and tubes. After the assembly,the whole model was sprayed gloss black as a baae coat for the metallics. Here I used Testors aluminium and silver and Gunze duraluminium to give some nuances. I tried not to overdo it because the real thing has a quite smooth metal surface. Airbus used 4 Super Guppies for transporting all kinds of parts for the A300,A310 and probably also the A320. They served fom the mid 70s to the early 90s,when they got replaced with the bigger Airbus Beluga,which is a heavily modified A300-600. Super Guppy No.4 is still flying today,with NASA,while the others are preserved in Toulouse and Hamburg. One was lost in an accident. Alex
- 17 replies
-
- 54
-

-
Normally I am building models of aircraft, but I couldn't resist buying and building this kit for a change. My uncle owned a similar type of this typical tractor of the early 1960s, so it kind of reminded me a little bit of my younger days. The kit is constructed as an so called easy-click kit and theoretically you can put away the bottle of glue. Well, I recommend using some. Without painting, the model would definitely look like a toy. So I painted all parts, especially the rubber tyres and the chrome-plated parts forming the accessoryies of the engine cowling. I exclusively used Revell Aqua Colors, a mix of Smaragdgrün and Moosgrün with a little yellow for the body and Sand mixed with Alu for the above mentioned Gold-Chrome plated parts. For the other small parts different mixes of red, brown and other shades. This is not a tractor forgotten in the field and rusting and rotting away, but simply awell used one. The seat is already worn out and you can find a lot of traces from intensive use. Hope you like the short excursion to an agricultural subject. cheers, Norbert
-
Again something new from me. This time an Airbus A400M in 1/72 scale from Revell. I got the kit 2020 as a gift for my 50th birthday. This is the re-release from 2017. To enhance the somewhat simply presented model I got myself an engine from black dog and wheels from Armory. The model was painted with colors from MRP. The gray camouflage color is MRP105. The decals were a bit difficult at times. The details inside are a bit basic and some are missing on the outside as well. But I left it like that. I hope you still like the plane.
- 29 replies
-
- 70
-
-

-
 I was going to post this when I finished it last month, but I didn't want to clash with (or get unfavourably compared to !) HL-10's one. It's the ancient Revell 1/32 kit, (the original UK boxing) with its original price tag of 14s.9d! I bought it from eBay for a fair price from a poor chap whose eyesight is failing - he had already started the kit and was unable to continue. I hope I've done right by him Not many original parts left - replacements detailed as follows: Cobra Company: cockpit, 20mm cannon and turret (truly excellent pieces!) Fireball Modelworks: engine cowl and exhaust, rocket pods, decals (also very high quality) Werner's Wings: Extremely good vacform canopy, a must-have for this kit. CMK: crew figures Academy: Crew heads (from the 1/32 Hornet); turret miniguns (from 1/35 BlackHawk kit) Verlinden: helmets in the cockpit (from their detail set for the AH-64, wrong helmets for that kit, so very useful here!) Lots of aftermarket added on this! The excellent Cobra Company cockpit, which transforms the interior. The finished article in a simple diorama setting entitled, "Real Men Drink Kool-Aid"! (All pictures courtesy of IPMS Farnborough website, taken by Chris Bradley) The build was inspired by the book "Snake Pilot" by Randy Zahn, who flew 68-15068 "Cyndy Ann" as Aircraft Commander, callsign Cavalier 24. (The name was painted by crew chief Marshall "Bones" Maring, and was spelt differently from the real Cyndy, after whom the aircraft was named). This book is an absolute must-read if you like Vietnam-era aviation. Although a very simple diorama, Zahn mentions often that all they had to drink at the forward operating base at Phuoc Vinh was Kool-Aid, a fruit squash drink. I played on this for the diorama, and it meant I got to avoid the Vietnam diorama cliche of Coke cans! The XM-35 mod added a sawn-off 20mm Vulcan cannon to the underwing hardpoint on the left side. It was designed to enable stand-off engagements with the NVA .51 AA guns. The fitting of the cannon required extra wiring looms inside protective panels. The ammunition was carried in two sponsons on either side and fed through a crossfeed under the nose. All these additions are provided in the Cobra Company aftermarket set. Contrary to most online and book references (and even the decal instructions), 15068 had a left-mounted tail rotor. The diorama (if you could call it that) was a simple plywood base. It's based on a photo which shows C/1/9 Cav helicopters in the open on dirt parking without revetments. Suits the kind of simplicity I like! I added various vents, tail "stinger", and beacon mount/light from scratch, and extra details in the cockpit, rotors etc. I think for such an old kit, it's very well served with very high quality aftermarket items, and scrubs up nicely! I am happy to answer questions and offer any tips on the build process if anyone else is making one of these. All the best, Alan
- 46 replies
-
- 59
-
-
-
Hi all, This is my second attempt of building civilian aircraft and I am still learning many techniques. My first one was a same kit, but done in Lufthansa livery. Knowing these kits have a small number of parts, I thought it would be a quick build, but I was dead wrong. Never knew how complex it could be dealing w/ painting... And I found out people basically block out all of the windows and that is exactly what I have done here. The build is straight forward, but I found out that there are many after market decals, so I used Draw decals for Swiss logos and also used Pas decals for windows. I gave multiple coats of clear with Gunze Super Clear III. It gave some incredible shine in the beginning, but now after some weeks, it is starting to lose shine. The reason is pretty simple, the thinner getting evaporated, and the clear coat shrinking caused the shine to diminish a bit. I should know this, coming from building autos... Next time, I would like to try something different to prevent that. I used to build everything when I was young, but I have been strictly building autos for many years. Then the hobby got away from me for awhile and now I am picking things up again. As I tried to learn new things and re-learn the know-hows, I must admit that this is definitely a hobby that needs dedication and patience. Unfortunately, this is probably why this industry isn't picking up with young kids, I don't see how this hobby can compete against something such as playing video games. 😉 Having said that, my respect to you all, we are not easy and we know how to pursue what we like for a long time! Steve
- 12 replies
-
- 34
-
-
-
A few pics of my latest build, a Belgian Air Force Sea King Mk.48 based on the 1/72 Revell kit and using the excellent decal sheet from DACO Products. For me, the Belgian scheme is one of the most attractive Sea King schemes out there. I really like the combination of the bright orange with the sand and spinach camouflage. Matching the green was straightforward. I used MRP-376 which is their version of Olive Green BS220. Matching the sand was more of a challenge. Following some exchanges with @janneman36, @825 and @thorfinn, I finally went for Xtracolor X813. This is actually an armour colour that I used c.15 years ago when building a Gulf War Challenger (BS361 Light Stone). Despite its age, it sprayed very nicely. Finding a good match for the Dockerblaze orange was also challenging. After various trials with Humbrol and Tamiya, I opted for an automotive colour from Zero Paints in the end: ZP-1057 Jägermeister Orange. I had to scratchbuild the radar at the left of the cabin. It's not 100% accurate, more representational than anything but "good enough and done" is the right way forward. I cobbled it together from 2 balls of Milliput, a Little Cars lens and some plastic card. All in all, it was quite an involved build and I am pleased to have got this one over the finishing line. The Revell kit still holds its own despite being over 20 years old. I actually like the raised rivets and the subtle surface detailing. The kit goes together well and is sharply moulded. Cheers Richard C.
- 17 replies
-
- 52
-
-
-
Hello fellows, Let me show you my last project: the Volkswagen Kafer (Beetle) from early 50's, in 1/16 Scale, from Revell. This was a little special built, since this kit was already started (...I got it in Wallapop). This added some extra difficulties, as you can imagine. The chasis, engine and other main parts were done by the previous owner, (almost sure a begginer in modelling...), and most of them painted in glossy black. Othe parts, were missing or damaged, as I explain in WIP thread My idea was to depict this old Beetle, in light green - a very common color for this cars-, in some parts rusted and also weathered. let's go! And that's all gentlemen! I hope you like it Here, my thread in WIP, if you want to check it: C&C will be welcome! Cheers! Josep
- 14 replies
-
- 15
-
-
- VW Beetle
- 1/16 Scale
- (and 1 more)
-
Hello, Straying a bit outside my comfort zone here, with something that isn't mud green, mud yellow or grey. A couple of days back, I felt the need to build a kit that was a little different (for me), and wandered into an LMS, and took a look at what was on their shelves. The thing that caught my eye was this: A Revell boxing of an ICM Model T Roadster essentially a two seat Ford Model T. Sprue shots: The main sprues Think the sprue on the right is unique to this kit, the other two look fairly standard. Again, standard sprues. Separate wheels (presumably in case somebody wants to offer wire wheels?), white vinyl tyres, and a sprue that could have been brass plated, but, fortunately, isn't. And a clear plastic sprue Construction has started, with some key assemblies These need filling and checking but are, otherwise, ready for painting. Revell suggest that the engine should be aluminium, but modern photos of similar, preserved, machines have black engines, with post WWI versions having dark green engines. Dry fitted Afterthought This may not be quite so far from my usual builds as I thought: I have built a Model T chassis before, but then it was a 1/48 scale Soviet AA truck- basically a green camouflaged, 1940s era, licence built, 4x2 Ford Model T lorry.
- 11 replies
-
- 11
-
-
Hello fellows, Let me show my current WIP. The VW Kafer, 1/16 from Revell, that I started in december 2021: This is a little odd project...: I got this model from Wallapop, because it was already started. It was a 20 euros bargain! As you can see here, the whole model was painted in gloss black (from spray): The former owner didn't do a great work. The seats were poorly painted also... (surely with a brush): Some of the mounted parts, were also partly painted, as the steering wheel... My idea, was to transform this VW Beetle in and abandoned and rusted car, painted in light green. First of all, I airbrushed the whole model with Vallejo Nato Brown 71.249, in order to represent the rusted car's parts. I also used Vallejo 71.042 (Dark Brown), and 71.129 (Light Rust), in order to create more colour variety: Following step: I tried to fix the engine. It was already mounted, but painted in a very simple way. After some carefully re-painted work, It looked like this: The seats were also re-painted, in a cream colour. And weathered with a wash, to achieve a semi-gloss and worn effect. After this, I mounted and painted the doors: The following step, -previous to paint in light green the model-, was to apply Vallejo liquid mask in those spots whre I wanted the chipping effect. And this are the three colours I used for the light green. In fact, the mix was random... Here in the above pic, you can see clearly the spots on the roof, where the liquid Mask has been applied: Starting the chipping proces... The clear parts depicting the windscreen and the rear windows, were missing. So I did them from scratch, cutting a fruit box...the result is quite well 😉 I had to dismantle all the wheels, in order to paint it and weathered. Fortunately, it was easy. Once the wheels were ready, I put together the body and the chasis. This required some extra glue and time: And thst it is all for the moment. This car is almost ready, and I think en few days will be completed. I'll appreciate your comments. And thanks for watching!!
- 10 replies
-
- 7
-
-
- VW Beetle
- 1/16 Scale
- (and 1 more)
-
Hi everyone, it's Hornet Groupbuild time! I'm a big fan of the F-18 in its various guises, but an STGB calls for something special, right? This is a great scheme for the Super Bug, all the more for being really clean https://www.seaforces.org/usnair/VFA/VFA-154_DAT/VFA-154-Black-Knights-086.jpg (link to seaforces.org) The hi-viz, multi-coloured markings, glossy black spine and red cheatlines are really cool. Even better, this is the box art and main decal scheme in the Revell Super Bug kit. The 1/32 version is big, brash and a lot of hard work to be honest Lots in the very big box - the beautiful decal sheet which would set you back a good £15-20 if it was aftermarket. If it's anything like the previous issue, these decals will be superb. Very thick, well-produced A4 instruction booklet running to over 20 pages. The new Revell instruction style is a gigantic improvement over their previous efforts. The only aftermarket I'm using is the MasterCasters SJU-17 seats. Even these might be a bit of overkill as I plan to have pilots in the seats with the aircraft posed in flight. There's a nice selection of ordnance, which looks accurate and pretty well detailed. I might mix up the underwing load a bit with maybe goofy tanks and JSOWs, but who knows at this stage? Thanks to a spoilt canopy in the original kit issue, I ended up with three, courtesy of the retailer (Jumblies Models) and Revell's efficient spare parts dept. I'll be using the spoilt copy as a mask for painting. The original Revell 1/32 Superbug (F/A-18E) has a dire reputation which appears to be driven by an unfavourable early build review on Big'n'Tall Airplanes. In my opinion the reviewer gave up far too easily and seems to have expected Tamiya-like fit for a Revell price. I built the last one in two weeks during the 2020 lockdown and although it certainly had its challenges, most of it fit well, especially the one-piece top section, which is a huge piece of plastic. As you can see from the paint pot, this is a BIG kit when finished! This time around will definitely take a lot longer to build due to my crazy work schedule this winter (we have five possible daily shifts now operating 24H 0600-0600!) All the best with your builds folks! Alan
-
 Having retooled their mid 1990s tooled '32 Ford roadster for the the short lived TV show tie-in Rat Roaster version about ten years ago, Revell's '32 roadster has finally reappeared again, this time without the much criticised Rat Roaster specific parts, and now with a Duvall windscreen. https://www.scalemates.com/kits/revell-85-4524-32-ford-rat-roaster--1410987 BTW, Scalemates has the history wrong according to info on one of the US model car forums - whilst the parts are fully compatible with Revell's other '32 Ford hot rods, the Rat Roaster was entirely new tooling and this release is the first modification from that. More info on the Rat Roaster, on which this is based: http://www.modelcarsmag.com/forums/topic/49169-stacey-davids-rat-roaster-by-revell/ More info here on the new release, including test shot pic: http://www.modelcarsmag.com/forums/topic/170411-revell-32-ford-roadster-revised-former-rat-roaster-tool/ Finally a '32 Ford hot rod that I'd want to build straight from the box!
 -
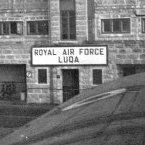
Another kit that has sat, waiting for attention, for more than 20 years. Back in 1999 I was, as they say, between jobs, so I bought the then relatively new Revell kit. I've always had a fondness for the Hunter, since 111 Squadron performing as the Black Arrows at Farnborough Air Show. I got the main structure of the kit finished and bought a sheet of Xtradecal transfers, XD05-32. The new job started with house move and the kit, well it went into the same place as the others. I finished the Tomcat...so time to start. up the Hunter. This is where I am with the kit... There is quite a bit of surface work needed, the next stage is to prime and see how much more work is needed. I will finish her as XE552, with 54 Squadron at West Raynham in the early 1960s. Why? Because I want to model an aircraft with an aluminium underside!! The airframe had quite a long life of 25 years, first flying on 10 January 1956 and sadly ending with a write off on 23 February 1981 when with 2 TWU she dived, inexplicably, into the north sea 20 miles offshore from RAF Lossiemouth. The pilot was never found. More as it happens... sooner than later, I hope.
-
First released from Matchbox in 1990 with American Airlines and Iberia decals,this one is a Revell re release from 1998,this time with a very nice and,for its scale,detailed decal sheet,I guess it was done by Liveries Unlimited. I had this kit on my wishlist for a long time but the Matchbox boxing,if found on certain auction sites,is offered only for ridiculous prices . I found the Revell version for a bargain and started the build soon after reception. Given its tiny scale,the shape is pretty good and it even has fine recessed panel lines. Some details are missing,like the small fences on the wing leading edges and the fairings on the engine reversers. I scratchbuilt them with Evergreen plastic. The engine in/ and outlets were redone also with evergreen plastic to have even and round openings and no visible seam. This was a bit tedious to achieve but it improves the look. Unfortunately the windscreen was missing,so I had to use some plastic sprues to fill the hole,the putty and sanding the cockpit back to shape. The recessed cabin windows were filled as well. Painted with Gunze white surface primer 1000,gloss coated with Gunze premium clear. Metallics are Gunze super metallics chrome silver,aluminium and steel the greys are Gunze grey 315 for the wings and tailplanes and Gunze grey primer for the corogards. The decals were still good to use,only the cabin window decals tended to break apart and had to be realligned carefully. It was a bit more work than expected but its a fine model nonetheless given its tiny scale. Matchbox had also the DC-10,Boeing 747 and the 737 in their range but all in different scales. Nice little kits but the original boxings are now way overpriced. I would love to build more of those but the lack of decals on the aftermarket makes it more or less impossible. Cheers Alex
- 13 replies
-
- 26
-
-
- Boeing 727
- Revell
- (and 1 more)
-
Dropped the whole model building hobby for five weeks, being seriously addicted to following heroic but sad news from 🇺🇦. Slava Ukraini! Had time to re-think my approach to building them American bombers too. Something bugs me in having to somehow hack and slash everyone of my builds, even though the oob kits would be good enough. Hey, first de-staggering an Airfix kit and then staggering a Revell kit waist made our son ask me what's the point? Indeed. So I took a break from them. I did some shopping, though, and used the gift card got from dear Mrs.V-P to a hobby shop to buy two more ICM 🇺🇦 Dorniers and something from 🇵🇱... yes 🇵🇱 I took them all home from the PO today, had a look at them, and then decided to go quickly back to my workbench with the big Heinkel! I'm now on page 2 of the actual assembly instructions, having cemented 20 little cockpit parts together. I will not take or show pics of them, though, before I brush mouse gray paint all over it. I think I'm back, my friends, this will be a nice three week push before the Dorniers GB begins! V-P
-
 Finally I have mostly cleared my bench of part started kits and renovation works that had got piled up over the last year and years.So today there will be quite an amount of airliners showing up on BM...So here is No.1... Last year I was lucky to find another Revell Convair 990 kit on a Swiss auction platform. Together with that kit,the seller also sent me a completed model,which was in a very sorry state. It must have been some decades old already and it was mostly unpainted,just the top was hand painted white.The rest was unpainted palstic with the Swissair decals applied. It sat on my desk for quite a while,until I had my plans ready for a complete redo,repair and repaint work on this classic Revell kit. The first task was to get rid of the old paint,Revells Paint remover worked perfectly for this. Then the unpainted landing gear had to go and all the seams hat to be puttied and sanded smooth as well as some repair work that had to be done. The landing gear was replaced with an unused set that I had left over from my first Revell CV-990 which I built in-flight. After all clean-up and repairwork was completed,it was time for the new paint and livery. I chose the prototype scheme which I think is very elegant. The superb decal set comes from Vintage Flyers and is really nice to work with. For the white I used Testors Classic White,the natural metal parts are painted with Revell metallics and finished with a light coat of Future to give it a nice and shiny appearance. I hope you like it
 -
Here are the photos of old Revell model of Boeing 727-100. I engraved the model. I installed a transparent part of the cockpit from the Daco model of B-737 to improve the shape of the nose
- 5 replies
-
- 22
-
-
- Boeing 727
- Revell
- (and 1 more)
-
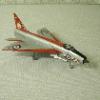
Me.262A-1a & P-51B Combat Set (03711) 1:72 Revell Believe it or not (most of you will), the technologically advanced Messerschmitt Me.262 and the P-51 Mustang did actually square off against each other in the skies over Germany. Not many P-51Bs would have still been in service, but even though there was a huge difference in top speed, the doughty Mustang shot down a number of these shark-like fighters, especially at the weaker points of their flight envelope during take-off and landing, where the low spool-up of the jet engines made them an easier target. This kit from Revell is in their Combat Set range, and puts together these old foes in the one box, both of them being a product of the late 90s. The 262 came out in 1997, while the Mustang was released a year later, although having been moulded in silver styrene this time around, it looks older on initial inspection. Let’s handle them separate in case there’s a (dog) fight. Me.262A-1a The shark-like profile of the Messerschmitt Me.262 Schwalbe and its almost matchless abilities at the time have given it a high profile despite its lack of practical effect on the outcome of WWII. If Der Fuhrer had been a little less prone to meddling however, the effect of its presence may have been felt more by the bomber streams than it was – thankfully! That's if they could have solved the metallurgy of the engines to obtain sufficient time before they burned themselves to destruction – 100 hours for most engines if the aircraft it hung off lasted that long. That's a lot of ifs, but if we concentrate on the actual performance of it, it's still an impressive aircraft that was superior to the British Meteor in most respects, using axial flow jet engines and swept outer wing panels together with a slippery aerodynamic shape. It first flew with a prop in the nose and dummy engines, dragging its tail along the ground until airborne, but this was changed once the engines were live, as the heat and thrust from both engines would have played havoc with their landing strips. The delays were caused partly by Hitler's insistence that the airframe should be able to carry bombs, which it eventually could under its nose, but as usual their efforts were spread too thin by trying to make the Schwalbe a jack of all trades, all of which took valuable engineers and strategic materials away from the fighters that were desperately needed in the Defence of the Reich. The huge speed differential between the Schwalbe and its bomber stream targets meant that zoom attacks were necessary, giving precious little time for the pilot to take aim due to the high rate of closure and subsequent overshoot. The aircraft were also vulnerable during take-off and landing due to the slow spooling-up of early jet engines, which the Allies took full advantage of to reduce the fleet further, with intensive maintenance whittling away at the available airframes even further. It was a case of too little too late in terms of numbers, and even with their speed advantage a few were shot down in flight by piston-engined Allied aircraft due in part to the extensive experience that the Allied crews had gained during the invasion and the comparative lack of experienced German pilots by that stage of the war. As the Allies rolled through Germany, they captured airbases and research establishments with many variants that didn't see combat found and hoovered up by US Operation Paperclip and similar operations by the other Allied governments. The kit is on four sprues of pale greenish grey styrene, with a clear sprue in a separate bag, and shared instructions and decals. Construction of the 262 begins with the two fuselage halves, which should have a few holes drilled out and another on the spine that straddles both parts. The cockpit tub is next, and this one really is a tub. The front bulkhead is partly moulded-in but has another laminated to it, while the aft one is glued in place along with seat, instrument panel and control column. The detail is pretty good for the scale, and there is also some wheel bay detail on the opposite face to the tub, as well as the inside of the fuselage halves. The tub also has a couple of ejector pin marks that will need filling if you are cutting out the bays (see later) and think the centreline bay divider won’t hide them. The fuselage can then be closed up with some nose-weight added because this is a potential tail-sitter thanks to the nose wheel. The nose has a big empty slot underneath, which is filled by an insert with the nose-gear bay slotted inside, which has some internal ribbing within. The rear of the cockpit cut-out is covered with a ‘hump’, which makes it ready for its wings. The lower wing is a full-width, and inexplicably has a pair of main gear bay roof panels moulded-in, despite it already having the correct hollow bay details already there. If it makes your mind boggle as much as mine, just cut out the inner section and make good. Sounds easy if you say it fast, doesn’t it? The lower is glued to the fuselage and joined by the two upper wing panels, then the two engines and their nacelles are made up from two side cowlings, nose cone, and rear bullet that is attached to the inside on the two horizontal stator vanes, but take care to ensure the bullet is in the centre of the exhaust before you leave the glue to dry. When you’ve dealt with the seams they should insert neatly into the underside of the wing, filling out the notches in the leading-edge with their fairings. The elevators slot into the tail in the usual tab & slot manner, then it’s on to the landing gear. You can quickly pose the gear retracted by fitting the single nose gear bay door and the two main bay doors after removing the pegs for the landed option. The bay doors are all separated for the gear-down option, then the nose wheel with separate tyre goes into the bay with the two door parts, while each main wheel strut has a separate retraction jack, two captive bay doors and separate wheel, which is rather well appointed with detail. The trapezoid inner doors are both positioned on the centreline between the bays, and if you’ve cut that bit off to see the correctly shaped interior, you need to get the styrene rod and glue out! A pitot probe is fitted to the port wingtip, with two antennae under the wing and fuselage, then a finely-moulded D/F loop behind the cockpit, and a single part canopy part is glued over the aperture, although you’re going to have to work to find some of the canopy framing lines. Again, it’s not the kit’s finest part, and it’s somewhat of a let-down compared to the rest of the kit. The aftermarket seems bereft of replacements, although I’ve been wrong before. To use those bomb-mounts that slowed the 262’s gestation too much, a pair of two-part auxiliary fuel tanks are provided that sit on short pylons under the nose. Silly Adolf. North American P-51B Mustang Originally developed to fulfil a British requirement for a new fighter aircraft, the unmistakeable North American P-51 Mustang famously went from drawing board to first flight in just 178 days. It went on to become one of the most famous and successful aircraft of the Second World War. The original Allinson engine was hopeless above 12,000ft, and was transformed by being replaced by Rolls Royce’s legendary Merlin engine. With its Achilles heel sent packing, the Mustang went from strength to strength and was eventually developed into several successively better variants. The P-51D introduced a number of improvements in response to combat experience, including a cut-down rear fuselage and bubble canopy, plus an increase in the number of 0.5 inch machine guns from four to six. Over 8,000 P-51Ds were produced, more than any other Mustang variant. As already mentioned, this is a re-release of one of Revell’s earlier kits from the late 90s. there are three sprues of silver-coloured plastic, a one-piece canopy on its own sprue (wrapped separately for protection), with the instruction and decal sheet shared between the kits. As may be expected of an older kit, the quality of mouldings is not quite up there with Revell’s latest releases. There is an amount of flash present and some fairly prominent ejector-pin marks on the upper wing and some more inside, so some cleaning up will be required, which is best done before commencing the build. Surface detail is comprised of fine engraved lines and rivets plus some raised details where appropriate, so care will have to be taken when sanding seams to avoid destroying this detail. The cockpit is made up on a floor panel, with heavy moulded-in wood effect, the rear radio gear on a pedestal and a front bulkhead, which is improved with the addition of an instrument panel with moulded-in rudder pedals, control column and seat with moulded-in belts. The sidewalls of the fuselage also have some basic internal detail moulded in, and after painting the fuselage can be closed up and left to cure, followed by some seam filling. The lower wing has a couple of holes reamed out for the drop-tanks, then it is attached to the underside of the fuselage and joined by the upper wings, with the two elevators slotted into the tail, at right-angles to the tail fin. The exhaust stacks slot into the sides of the nose, then with the airframe flipped on its back, the chin scoop lip, belly intake lip, and two cooling flaps at the rear are installed, capable of being posed open or closed if you wish. You have the option to model this Mustang with wheels up or down. With wheels up, there are just three parts and you’re done. For the wheels down option, there’s a single tail-wheel part and you chop the tail bay door piece in half then pose them splayed open. The main bay doors are cut into two sections, with the tapered part attached to the main strut along with the wheel, and the rest of the door attached to the centre divider between the bay halves under the fuselage. The prop has four separate blades on a rear boss, which are then hidden away after adding a retaining ring by the spinner cap. A clear leading-edge landing light is fitted into the cut-out in the port wing, then the other clear part, the one-piece canopy is glued into the cockpit. This part is not the best, and is a funny shape (IMHO) as well as being far from clear. It’s a shame, really as beneath the old-skool silver moulding, it’s not a bad kit, so I’d be looking for a replacement part for the Malcolm hood, and a quick search on Hannants shows one for another brand, but whether it’ll fit, I don’t know. The last parts are the two optional compressed paper fuel tanks that each mount on a short pylon with anti-sway braces on each side, fore and aft. Markings Each kit has just the one decal option as per the boxtop, and those are on the same sheet, although you’ll need some Swastikas for the tail of the 262 if you’re going to depict them. From the box you can build one of each of the following: Messerschmitt 262A-1a W.Nr. 110836* P-51B Mustang Captain Willard Millikan, 336th Fighter Squ., 4th Fighter Group, May 1945 * A misprint has slipped past the proof-reader on the instructions, with the heading over the 262 reading “Messerschmitt Bf.109G-10, Normandie, D-Day”. Even with my limited knowledge of aviation, I can tell you that’s a mistake. There’s no prop, for a start. We all make mistakes though, so let’s not go on about it. To err is human… If you don’t make mistakes, you’re either lying to yourself and everyone else, or a deity. Anyway, moving on, decals are by Cartograf, which is a guarantee of good registration, sharpness and colour density, with a thin matt carrier film cut close to the printed areas. Conclusion This is a re-release of two nice little kits that have disappointing canopies. The Mustang has the most work to prep the parts, and the 262 has that weird and extraneous main gear bay. They’re by no means perfect kits, but as they say forewarned is forearmed. Recommended, just read the whole review. Revell model kits are available from all good toy and model retailers. For further information visit or
-
As my user name suggests, I have more than a keen interest in all things aircraft and in particularly anything from the stables of Germany in the First and Second World Wars as well as the Inter war years. I have a particular soft spot for anything Junkers. The corrugated skins of a number of their craft, whilst often looking old fashioned, rugged and utilitarian, also exude a certain appeal and charm I've just recently added the 1/48 Revell Junkers Ju52/3mg4e to my stash - probably one of my all time favourite aircraft - and whilst keen to get it started at some point in the future, I find myself daunted by the task also as I'd like to do the build justice. So to whet my appetite and get a feel for the much bigger 'Tante Ju' - a quick raid of my stash offered up the little 1/72 Revell Junkers F.13. I haven't had the kit in the stash for too long and bought it not only due to it being a Junkers aircraft but also due to the attractive box art showing the F.13 in a very smart black, silver and red livery. So over the past few weeks I've been working on the kit as an OOB build and have finally got her finished. It's an excellent little kit - not perfect - but the general fit and details of the kit for it's size are really good (IMHO) I've also used Revell Aqua acrylics for the paint job which I actually really like and they are great for both brush painting as well as spraying. So without boring you all any further with my waffle - here's a selection of pics to show you what I've produced (apologies it's a bit photo heavy, I get carried away and then never know which pics to choose) Thanks for looking in and as always your comments, feedback and questions are always very welcome 👍 Kris
- 30 replies
-
- 41
-
-
So far so good! Fits together well, but its full of gaps and will need a lot of filler! PMask masking set was bought from EBAY 2011 Tooling Interiors sprayed Gunship Grey, dry drushed with light grey, washed with water colours. Decal panel Wood effect was hand painted 🥰
-
So, I have the very promising looking Vampire Mk. 3 from Revell (rebox of the Special Hobby kit) that I want to build as a Rhodesian plane with the Bush War camo pattern. My questions; - Do I need to convert some areas to get the correct type? I know very little of the external differences between Vampires.. - What are the best colour matches? I myself mostly use Vallejo or Revell paints. I don't know if standard Dark Earth/Dark Green are the correct colours. In some pictures the DE seems yellowish, in others it seems more reddish. Thanks in advance, Luka
-
Hello everybody This will be a build of a Revell issue of Matchbox's DH Venom kit - there are two of these kits in the GB, @bigbadbadge is also building one (link). Hopefully, this one will be an Australian example ... The box has seen better days: The plastic looks sound The instructions and decals have gone AWOL ... Fortunately, Scalemates have a scan of the instructions, so taking a look at those shouldn't be too hard. The decals ... just before New Year, I ordered some decals. They are shipping from Aus, but I hope they'll be here by the end of the month 🤞
-
Another month passes, and another model goes from bench to shelf. This one being the Revell 1:72 Shackleton AEW2 of 8 squadron Lossiemouth 1981. A few issue with this kit which is a shame considering the nice surface detail. 1 being mentioned in another thread on here being the MR3 layout fuselage with extra windows etc not present on the AEW2 or missing vents. 2- had a lot of manufacturing issues with this kit with the moulding just not complete or not fully formed eg landing gear missing one side of the fork, detail missing from bay antenna, hole in fuselage half and delaminated clear windows. Fortunately Revell parts uk sorted me out some replacement frames so big thank you to Revell. Now the pics. And with my Revell MR3 (1996 vintage)made about 20-25 years ago (glad my skills have progressed since then!)
-
Completing the quartet of 'box scale' Matchbox airliners, this is the Revell boxing of the 1/320 DC-10, which has decals for a KLM example. DSCF3129 by timothy jones, on Flickr DSCF3130 by timothy jones, on Flickr DSCF3131 by timothy jones, on Flickr DSCF3132 by timothy jones, on Flickr In case there was any doubt about the kit's provenance. 🙂 DSCF3133 by timothy jones, on Flickr
-
 Hi Everybody! Another Century icon from the bench: the F-100D "Hun". To pay tribute to the Super Sabre, I built two of them, an ESCI and the Revell (ignoring tha their are the same!), being really disappointed by the Trumpeter kit. So, first the Revell: As said, the Revell kit is a re-boxing of the old Esci/Italeri kit but, at least, it seems more accurate than the Trumpeter. Dimensions and proportions are overall OK, depending on the drawing you select: For Details & Scale, the fuselage is too long by 3mm and the vertical fin too high by 2mm but if you do the same comparison on the Burindo or Warpaint no4 , this mistake disappears! So, being lazy and not fond of a heavy surgery, I went on the easy way - ignoring D&S! However, far for being easy to build due to its age, a lot work awaited me, from front to end: - As usual, riveting, good news the engraved panels are OK; - Cockpit replaced by the AIRES one, needing a lot of adjustments to be fitted correctly inside the fuselage. The front shroud is scratch built. - Front wheel well, re-done with wiring and tubing; - Inner air intake "tunnel" made from scratch. Not easy because it has a shape of a crushed pipe. On the upper intake lip, a small bump is added for the prehistoric "radar"; - Airbrake well, some tubing is needed here even if you don't see that much when the airbrake itself is fitted; - The wings: Here, big problem: Revell gives a wing with the leading edge slats retracted, which is not the case when the aircraft is parked and not powered. So, I decided to buy the Obscureco resin wing (very expensive with the shipping😫) offering this option. What a waste of money! these wings are too short, badly moulded with a too thick trailing edge and a lot of bubbles, and finally completely twisted 🤬🤬😤. Frustrated, I decided to cut the inner part of the leading edge slats from Obscureco, and graft to the Revell wing. The slats were glued later...This done, the AIRES resin main wheel well was put in place. Long, not easy but the result is OK. This photo shows the final result with the Obscureco pieces put to the Revell wing and the AIRES WW. - I did a lot of work also on the landing gears, wheels and doors which are too simplistic and wrong. (Too long to explain) - Horizontal stabilizers: a thin evergreen plate needs to be added top/below their root. - Exhaust: From AIRES, simply... - Canopy: Vacform, all details inside reproduced (thanks to a picture of a real canopy found by a US aviation "archeologist" in the Nevada desert searching for a Super Sabre crash). -External tanks: I tweaked the long banana-shape to make a 275Gal tank, not given as an option in the box. Painting was made with a lot of Alclad II shade of NMF. Exceptionally, I chose the marking given by Revell, very attractive to me. It seems that the blue of the fin marking is not dark enough it appears to me after the model was finished. (may be one day I will have the guts to change it). The USAF and "US AIR FORCE" letters should be dark blue rather than black. I did a little bit of weathering as the only photo I found of the bird shows a "old warrior" at the end of its operational time. Definitively not an easy build, but despite its age, this kit deserves the work and time spent on it to have a reasonable version of the Hun. The photos: The real Hun: My Hun: Next to come is the ESCI and a F-100F... Hope you have enjoyed reading this post!
- 14 replies
-
- 36
-

a.thumb.jpg.58d92d116b0315dc55d352fd191d65e4.jpg)


_opt.thumb.jpg.be9c1e22e34c329b51268dfacc8614e0.jpg)