Search the Community
Showing results for tags 'revell'.
-
 I know,some of you may think "how on earth can he churn out so many models in one week ?" As my stash has grown bigger and bigger,I decided to increase my production rate and work on several airliners at once. It's also more interesting to work on different projects on and off as only on one,at least for me...I have usually 3-4 kits on my bench on which I am working on and off so from time to time 2 airliners roll off production line almost simultaneously. So,here we are,the last of the bunch is also probably the most special one. The Air France Concorde in the striking Pepsi livery. Pepsi struck a deal with Air France in 1996 to brand one of their Concordes in this special livery. Altough the Jet could not fly more than Mach 1.7 due to the color,it flew 16 flights to 10 cities from Europe to the Middle East. After that,the Concorde was repainted back in the usual all white Air France livery and entered regular service again. The whole story can be found here... http://jalopnik.com/remember-when-a-concorde-wore-this-ridiculous-pepsi-liv-1709488664 I saw pic of this Concorde back then and always though it looked cool. So I was more than happy when I found the rather rare decal set for this particular aircraft.Having the decal set,I needed to get me another Revell Concorde as the other one in my stash will receive the Singapore / British Airways livery. I am not sure but I think the decal set was made by Gio Decals.The set was already a bit aged but it was still usable,although with much care. The tail logo was the most tricky part,esp. as they didn't really wanted to lay around the edges.I had to use a lot of decal softener and carefully repaint cracks that were unavoidable. Its not as perfect as I wanted it but I can live with it and from a normal distance its not really noticeable. All additional markings come from the original Revell decal set as it has lots of detail to enhance the overall look. The build was straight forward with only minor filling and sanding areas,esp. around the wing halves. I also shortened the front gear but it still sits a tad too low on the back. I airbrushed the whole kit by using Revell enamels. Revell Blue 54 with some drops white 04 to get as close to the Pepsi blue as possible.The instructions from the decal set are no help in that matter. Revell Gloss White 04 for all white parts and Aluminium for the landing gear. The engine hot sections were painted with a mixture of satin black and iron. The fuselage and wings were also clear coated after all decals had been aplied.The Pepsi decals didn't really wanted to stick,probably due to their age ?,so the clear coating did the trick. To tone down the too shiny surface a light mist of Testors Metallic Sealer was sprayed on the whole model. Enough writing on with the pics....after this one the next batch of airliners awaits its turn on my bench...
- 23 replies
-
- 35
-

-
Don't know if there are any other Halo fans out there but these kits look awesome! http://www.hobbytalk.com/bbs1/99-science-fiction-modeling/551817-revell-halo-kits.htm
-
 Hi Guys, This isn't completely done yet, but i've been itching to share it. A320 Easyjet 250th Airbus livery, made from the 1/144 Revell kit. Proved a little less cooperative than the 3 x A319's i've built, but generally not bad! Decals from Draw decal, can't remember for the life of me the site I ordered the winglets from. Chris
- 16 replies
-
- 16
-
-
This is one of the most difficult to find Revell airliners and prices for this kit are usually astronomic. I had the luck to achieve this one on Ebay for a surprisingly cheap price. The box and all parts were in pristine condition,only the decals showed their age a bit. The kit itself is very nicely molded and has engraved panel lines. Fit is quite ok,the most difficult parts were the wing to fuselage fit which was very poor and required some serious correction work to get the wings in the right angle atached. I decided to build this one as a desktop model.The landing gear is very basic and I didn't like the look of it. As the kit included the classic Revell display stand which allows the model to be displayed in different "flight modes" I decided to omit the landing gear. The Convair 990 looks also very elegant in flight. I decided to paint the whole Swissair livery by airbrush and only use decals for the logos,and other details. Paints are Revell and Testors enamels. For the decals I used a mixture of kits decals (the "Coronado" in the tail,and the "A" from the wing-registration and the registration in the red cheatline) , Swissair titles,logos and the white cross as well as the registration on the wings come from the Glencoe/Frog Convair 880,cabin windows and doors are from a Vintage Flyers decals set. As I tried to build this kit mainly straight from the box I kept the "open cockpit windows" and just filled them with Krystal Klear" The engines show the Coronado before the enhancements she received on behalf of Swissair. Research showed although that the first examples Swissair received came in this configuration and were modified later on so I had not to make alterations on the kits engines. After years of searching for this kit,I can finally add this classic airliner to my collection and it will get a special spot in my vitrine. Cheers
- 33 replies
-
- 32
-
-
- Revell
- Convair 990
- (and 1 more)
-
So in between the group builds I'm busy with - in particular the F-16 build - I had started making the Revell 1/72 Buccaneer - box art below: Now to say this was a difficult kit that fought me at just about every turn would be an understatement but I enjoyed it all the same. The model is very basic with very little cockpit or fuselage detail and would benefit from the inclusion of some ordnance but once complete I think is a pretty good rendering of a bucc. This particular model is of an Operation Granby bucc and again I think this scheme helps to show off the lines of the aircraft in a pleasing light. The model is built completely out of box with no scratch building as I just wanted to keep this one very simple. At this point in time I have given the aircraft next to no weathering and was debating whether or not to go any further. A quick round up of your thoughts on this would be appreciated. So here she is - by no means a show standard piece - and as always your comments are most welcome:
- 18 replies
-
- 22
-
-
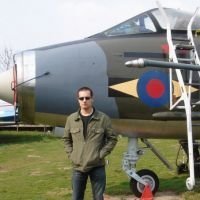
(Note - I've probably put this is the wrong section, it should have been in Ready for Inspection, but I'm not sure if I can move it easily....) Welcome to one of my now infrequent postings, as the title suggests, here's a Revell 1/48 Lunar Module I did earlier, about 39 years earlier in fact... this is my oldest surviving model of any kind. For some reason it's just always been there! First, a little history... Yup, that's me - No-more Shelf-space Junior, from Scale Models August 1978. (thanks to Jinxman for the pdf copy!) Note the financial confidence, quite unfounded as I was on a student grant at that time, if anyone remembers those. (I am no longer at that address). From that ad I got an Aurora Land of the Giants Spindrift (orange and bright green plastic, uuh), a Lindbergh wheel type space station, and a nice Revell 1/48 Apollo stack in all its totally inaccurate glory. The CSM and other parts did not survive the decades, and the other two got sold on. And I never got the Saturn and Vostok... Anyway here's the Lunar Module; I detailed it up from photos of the mockup then in the Science Museum. The landing legs were mostly rebuilt from EMA/Plastruct tubing, plume deflectors were toothpaste tube and straightened paperclip wire (stuck with Evo-Stik when it was actually glue), and foil - rather faded now - off a Cadbury's Caramac, another one of those things that isn't quite the same nowadays. Here's a photo round the back, where they kept the bins. Most of the details were rebuilt with plastic rod, and by some miracle nothing has ever got broken off! I had no airbrush then apart from one of those horrible Humbrol squirt-brushes so it was all hand painted in silver 11 and matt black. The windows were acetate, and now very yellowed, although you can't see this against the black interior. When I examined the interior with a torch I could see some attempt to stick something inside, although what I was intending to do I don't remember. Reference at that time was very hard to come by unless you were a smart alec and wrote to NASA. The base I made quite recently - it's the base you have seen in my aircraft photos, cut into a circle shape with "moon" built up with lumpy Tetrion and painted with tube acrylic. The placard is mounting board with lettering via a technical lettering stencil and rOtring pen - sort of in keeping with the era I made it in - I could have done something on the PC but, nah. Keep it 1978!
-
 Afternoon, I've finally given into temptation and made a start on this one. I have some big(ish) ideas to go with this kit - we'll see how many of them come to fruition. Things I definitely want to do are: - Drop the flaps - Separate all the flight control surfaces, - Add external (and possibly internal) lighting - Motorise the props My inclination is to keep all the doors closed up - out of the box the cargo hold is fairly plain, and I think it would take a lot of work to get it in to a state that I would be happy with. Also, I'm inclined to do it 'in-flight', so whilst the ramp could be down, it's more likely to be up. I'm still undecided on whether to have the wheels up or down - the kit wheels are rather strange slab-sided affairs, and I'm not aware of any AM replacements. I have the PE set and paint mask, but don't think I'll be bothering with the SAC landing gear - I'm a bit sceptical about the utility of these in most cases. I think this aircraft is quite well suited to dropping the flaps - it has a very simple high-lift system: no leading edge devices and dropped-hinge flaps with a fixed vane on the trailing edge. This should make getting the geometry correct that bit easier. So far, I've mostly been cutting things up, starting with one of the flaps and flap-hinge fairings: I've also cut out the ailerons, elevators and rudder, so I'll need to get the Evergreen strip out are start building up the missing parts. I might cut out the spoilers too, possibly only on one side, as these are also used for roll control and I want to try and capture a 'dynamic' snapshot as it were. If anyone has any advice on lighting, I'm all ears! http://www.britmodeller.com/forums/index.php?/topic/234957864-adding-led-lights-to-models-any-good-how-to-guides/ Thanks for looking! Andrew
 -
 Hello, here's my recently finished 1/72 Revell Handley Page Halifax B.III. I built straight from the box except the main wheels which seem to be undersized. They were replaced by resin items from Kora. As with most new Revell kits, this is a smooth & easy build. I encountered some fit issues with the engine cowlings, but this was probably my own making, as I had painted all parts before assembly. The tolerances here are so low that even the thin layer of paint was too much. Decals come from the box, representing a machine of (Canadian) 424. Squadronm Skipton-On-Swale, December 1944. Painted with acrylics from Gunze/Mr.Hobby. # The position lights come as clear parts; I drilled a small hole and added a dot of red and green paint with a sharpened toothpick. To represent the 'wear & tear' of the propeller blades, I used a soft pencil to pronounce the edges. The detail of the flame-daming exhausts is simply marvellous. Even though the undersides are Black, I tried to apply some 'pre-shading'. Here, it is faintly visible. Thanks for your interest! All photographs; Wolfgang Rabel, IGM Cars & Bikes, Vienna Have a great christmas time.... cheers! Roman
- 43 replies
-
- 63
-
-
I've just completed my 1:72 Heinkel He 111 from Revell, a second part for the diorama (the first part was this Stuka). It was very nice build without the major problems. In fact the set is so good that there were no problems at all. You can see the progress here Here are some pictures of the finished model. More when the diorama is finished.
- 16 replies
-
- 33
-
-
Rogue One AT-ACT Walker (06754) 1:100 Revell Make & Play Rogue One is the latest film from the Star Wars universe, and sets the scene for Star Wars – A New Hope, which I'm hoping hasn't spoiled the plot for you. It introduces a raft of new types to the Rebel and Imperial forces, some of which are totally new, others are variations on an existing theme. One such is the new (old?) All-Terrain Armoured Cargo Transport AT-ACTs that the Rebels encounter on the Imperial outpost when they're trying to half-inch something special. I won't spoil it too much if you've not seen the film, but the Walkers' appearance on the screen is like seeing an old friend, even if that old friend is going to be shooting at you any minute now. These variants carry cargo in what appear to be modular containers that fit into their body, probably sliding in and out as needed. Their armament is limited to two cheek-mounted cannon that can still pack a sizeable punch, and they are still clearly related to the mighty AT-AT. The Kit Make & Play is a really cool range of easy-kits that require no glue, have few parts, and are fitted with light & sound modules, which makes them great fun for kids of all ages to play with. Inside the box are 45 parts in tough ABS plastic, some held fast in vacform plastic packing, other in heat sealed plastic bags. Like the other kit reviewed today, the numbers engraved on the insides of some of the parts are at variance with the first page of the instructions, so take care when putting together these parts. Construction begins with the large slab-sided hull parts, into which the orange-coloured cargo panels are clipped, after which the lower hull and the leg axles and bulkheads are attached together, the right hull half clipped into place, and the roof part slotted in before closing up the hull with the left side. The head is next, with its cheek guns clipping in place so that they can be posed, and the lower part of the head contains the light & sound module, which is shipped with the batteries isolated by a slip of clear sheet. Remove this, and pressing the button the top of the head will make the cockpit aperture glow red, and make one of two sound effects from the film. The legs are all built the same way, so a little production line will speed the process up. The foot can slide within the lower leg, which is in turn able to pivot around the knee by inserting a snap-in axle, the same process being used again at the hip joint. These snap-in parts required a fair amount of force on my sample, so it might be necessary for adult fingers to help out here to avoid frustration. On the upside, they should consequently be difficult to remove. Conclusion The kit captures the look of the on-screen walkers well, and apart from the cannons, should stand up to play very well. The sounds are fun, and the evil glow from the cockpit is surprisingly effective when viewed from the front. Kids will love them, and I'm sure some adults will too. It is also nice to see that the scale chosen for this kit is the same as the U-Wing that has been released at the same time. It isn't stated on the box, but they are both shown as 1:100 scale on Revell's website. Perhaps previous criticism of the eclectic scales of the earlier kits have been listened to? Very highly recommended. Revell model kits are available from all good toy and model retailers. For further information visit or
-
Rogue One Rebel U-Wing Fighter (06755) 1:100 Revell Make & Play Star Wars. You're reading this, so you've probably been a fan most of your adult life, whether it's only a minor obsession, or you live your life by the Jedi code. I know a few grown men (one in particular) who dress as Stormtroopers at the weekend, and since Disney took over the franchise from a rather dormant Lucasfilm a couple of years back, we've been treated to two new films. One following on from the original storyline, and now Rogue One, which is set in the Star Wars universe, and (look away if you've genuinely got no clue of the story) sets the scene for the conflict of Star Wars – A New Hope. I took my 6 year old son to see it soon after it came out, and there are some great new designs fighting alongside the more well-known ones, many of which will no doubt become icons alongside their older siblings (I know, sacrelige!). The U-Wing is a Multi-Role combat ship of the Rebel forces, and is seen many times during the film, transporting the main protagonists to and from many a "fun" encounter with the Imperials. It is swing-wing, and can carry a number of troops in its belly, whilst exhibiting a number of familial traits in common with the X-Wings of legend, which also make more than a brief appearance in the film. The Kit Make & Play are a superb line of easy-build kits that are great for both little ones to be introduced to the joys of model making, and for the older modeller that quite fancies one of these soon-to-be-iconic designs for their shelves. Not to play with at all. Oh no! They can also be used as a basis for a detailing project if you so wish, which I once did with the old Sith Infiltrator. These ones come with nifty sound and light modules built into them, which is always a bonus. The box contains 35 parts, some of which are contained by vacformed clear packaging, others within a pair of heat-sealed plastic bags. The instruction booklet is simple, and begins with a visual list of parts, which also gives them numbers, which is at variance with the numbers and letters etched inside some of the parts, so pay attention to which parts go where. There are two clear canopies, a pair of pilots and their seats, and a very simply hull construction that shouldn't take long to complete. In the rear of the hull sits the light & sound module, with a slip of clear plastic breaking the contact between the batteries to ensure that they reach you in good working condition. Pull this clear part out, and pressing the button will then activate a green light in the cockpit, and one of two sound effects culled from the film. Before the hull is closed, the wings are fixed to posts in the lower hull, and once closed up, the wings pivot around the posts, clicking into position around the octagonal shape of the posts. The four engines are made up in pairs and fit onto their own posts on the rear of the fuselage. They will only fit the correct way, with one from each pair installing on the top, the other on the bottom on the opposite side. Add four landing gear legs, and that's it. Go and play! Speaking of play, the parts are all made from ABS plastic, which is substantially stronger than the styrene that most "serious" models are made of, so the structure should be quite resilient to heavy handling, although the gear legs look like they may collapse in a heavy landing, and the flexibility of the wings could be severely tested in the wrong hands. Conclusion I've said it before, and I'll say it again. These kits are excellent introductions to modelling, and great toys for kids, but they are not super-detailed hyper-realistic replicas of the "real" thing. I know my Boy will love this one in particular, and their ready-painted nature means that there's no waiting around. I added a few dabs of glue inside some of the more structural friction-fit towers to keep the engines on the model during the inevitable rough play. Very highly recommended. Revell model kits are available from all good toy and model retailers. For further information visit or
-
 Hi Guys, Newbie here! Finished Build, brush painted, superscale decs, burner cans stolen from an academy kit. Hope it's OK Best Regards Ben
- 15 replies
-
- 19
-
-
I've had a soft spot for the P-40 since I was a kid. I blame the Airfix Kittyhawk kit. It was a must-have when I started getting interesting in building modes in the second half of the 1960s: the exotic colours; the shark mouth; the box art flying over a burning Axis convoy on a desert road - what wasn't to like? https://www.scalemates.com/products/img/8/4/8/148848-11669-pristine.jpg I clearly remember having one in its bare silver grey plastic with the markings stuck on, and another later example finished from my dad's stock of gloss Humbrol enamels that he kept in the house. No matt paints, only gloss, so the chances are the colours were something like 9 Tan and 10 Service Brown over 47 Sea Blue, or perhaps some of the now discontinued but equally inaccurate shades in the grey check-pattern tins. The smell of vintage gloss Humbrol enamel still takes me back to that newspaper covered kitchen table... I also had a 1/72 Revell P-40E, in US Army markings: http://www.boxartden.com/gallery/var/resizes/Boxart-Collection/REVELL/MILITARY AIRCRAFT/PROPELLER/Revell P-40E Curtiss Warhawk 1-72 '60's.jpg?m=1362192280 It had a sliding canopy - that was cool. Curiously, I didn't know Revell GB had released this kit in RAF markings until I saw one a couple of years ago. I have no recollection of this at all, because I certainly would have invested my pocket money in one if I'd come across it: https://s1.scalemates.com/products/img/2/4/9/406249-15398-47-pristine.jpg Then - wonder of wonders - I was given the Aleutian Tiger boxing of the 1/32 Revell kit as a present. It had an engine, sliding canopy, retractable undercarriage and that amazing tiger on the nose. Wonderful: http://www.oldmodelkits.com/jpegs/r/Revell H271 P-40Alut.JPG Over the years I've dipped in and out of the P-40 kit market, building a couple of the Otaki/Arii/Airfix 1/48th kits and the Hasegawa 1/72. My interest was restarted by the new Airfix P-40B/C kits, and in a fit of nostalgia I dragged my ProModeler kit from deep storage: There's no box shot because it's a long time since it had one but it looked like this: https://guideimg.alibaba.com/images/shop/2015/12/15/49/revell-p-40e-warhawk-1-48-scale-military-model-kit_12903449.jpeg I also have this decal sheet bought in contemplation of finishing an Otaki/Airfix kit with it, but that never happened: I might be able to do an homage to my long gone Aleutian Tiger. Anyway, I thought it might be interesting to put this together along with the Airfix P-40Bs I'm working on. John
-
I fancied a quick and easy project and seeing Spitfires overhead daily during the summer months (I'm under the approach to Biggin Hill) I didn't need much inspiration to dig this one out of the attic This model simply fell together and was an absolute joy - construction of the main airframe only took a few evenings and I only used a smidgen of filler at the wing to fuselage join. Decals were from EagleCal and I also added the MDC corrected spinner and oil cooler,to more accurately replicate a MkIIa. The model depicts P8088 of 118Sqn during April 1941. All paints were Xtracolour enamels, with Humbrol Matt varnish. I'm really looking forward to the MkIX that Revell are about to release to go with this one. All the best, Tom
- 16 replies
-
- 35
-
-
 Hello Chaps, Since completing my Monogram Pro-Modeler 1/48 scale Heinkel He 111H-22 and enjoying every minute of the build, along with the end result, I wanted to do another German Bomber, either the Ju 88 or the Do17. Very kindly, one of my YouTube viewers sent me this kit- the Revell Pro-Modeler 1/32 Junkers Ju 88A-1 Bomber, for which I was extremely grateful! So, without further ado, let's get onto the introduction: The kit comes in a sturdy two piece lid and base box with a 24 page black and white instruction booklet, a decal sheet that offers two sets of markings- one for Geschwaderstab KG 30 and one for a "Battle of Britain" version Kampfgeschwader 54, six bags of sprues; five bags containing a total of 13 grey sprues and one bag containing a single clear sprue making a total of 281 parts. This kit was originally released as a new tooling in 2008, then again in 2011 with a new box art and last released in 2013 with new box art and some new parts. This kit is the second release of 2011. The Box Art: Specification table on the side of the lid: With the lid removed one can see the contents are contained in a nice sturdy base with overlapping sides: The 24 page black and white instruction booklet: The Decal Sheet: The 13 grey sprues: The one clear sprue: So, that's the kit, let the build begin!....I have actually begun the build, I started on Monday, but I'm just getting around to posting and starting this build thread. "Build Update #1 coming very soon! In the meantime, if you'd like to see my YouTube "Build Introduction" video, then here is the link to that: https://youtu.be/jXrdga-zYG8 Thanks in advance for reading this thread, leaving any comments and for watching my video, should you decide to do so! Happy modeling and have fun! Cheers Martin
 -
 Finally my dad has some free space in his "factory" to start his next project for our homeland collection. This time going big and doing a Ju52 with the great ProModeler kit. I guess most of you didn´t know that, besides Austria´s civil airline, also our airforce used Tante Ju´s. They bought 3 aircraft in 1937, one was used as a staff aircraft and trainer for instrument/night flying, the other two were used as nightbombers. In 1938 they went back into German inventory.. stay tuned
 -
I'm starting a new build, 1/32 Revell EC135 Flying Bulls, it's seems this kit is a little weak, lots of flashing, ejection in marks, but with some work and mods it might become neat. Enjoy, hope you like it. Scratch instruments panel Base plate with some minor modifications, grids on the exhaust panels
-
Hi, this is my 1/72 Bradley that I've build 12 years ago. I added a TOW missile and smoke was done with painted cotton wool, road signs are actual road signs from Iraq and reduced to scale, I also added stretched sprue rolls to look like barbwire. Many thanks for looking.
-
Hi all! Following a house move, this was the first kit i got around to building. Bit annoyed at the camera angle in the video as i was working in confined space and couldn't quite set it up right. What do you guys think of the build and finish? i didnt paint it as it was already in base colour, but feel it could have made a thicker wash.... thanks
-
Hi guys!! I´m still uploading pics of some old builds, this one was build 3 years ago... it´s the revell kit with some scratch parts like the machine gun, lights fenders, a new mantlet was done with milliput and other bits ... Hope you like it: Cheers!!
-
Hello, It's been only 8 days since I finished the 2 A-7's, and here's already a new finished build. Something quite different from the Corsairs, the 1/72 Revell Fw-200 C-8 Condor. This one is almost completely OOB, except for the swastikas, and it was a joy to build. Nicely detailed interior, good fit, decals were decent. I used Xtracolor, Humbrol and Modelmaster on this one. The plane I picked was found intact at Braunschweig at the end of the war. I guess its crew decided it was better to sit out the war there. Thanks for looking, I hope you like it. Pete
- 15 replies
-
- 38
-
-
My first post in this section I have started to make Revell's 1/24 scale mini cooper 998. I am sharing just 3 pics but i will upload more as i progress. I am still in progress. Tonight, i will complete whole engine, axle,exhausting system and other small details... the seats are(currently) white but i will paint them beige color..
-
Star Wars Imperial Star Destroyer - Rogue One 1:4000 Revell Star Wars is a little-known cult series of films about two 'droids called R2-D2 and C-3PO, that some of you may have seen. In line with the latest film of the franchise, which goes by the name Rogue One, Revell have released a number of new Star Wars kits with newly Rogue One themed boxart. The Star Destroyer has gone through a number of variants/versions for the various films, and quite frankly I get a bit lost as they're all huge and cheese-wedge shaped, so I hope the purists will forgive me. If you've not seen Rogue One, you should perhaps check it out, as if enough people watch it, they might make another one. The Kit Right from the start I feel the need to state that this is a Level 1 Make & Play "kit", and not the newly minted (and huge) Zvezda kit that is soon to be reboxed under the Revell brand. The kit is snap-together, using pillars and tubes that friction-fit together, locking the parts in place to all but the most determined fingers. It measures 400mm long, and comes in 46 parts, some of which are quite small, and could get lost if you (or a child) open them a bit too enthusiastically. The parts are all pre-cut from the moulding sprues, so there's less to throw away, and they are held loosely in place within the box by clear vacformed mouldings, which do go in the bin. It has light and sound, which is always a fun aspect of these kits for the kids, and my 6 year-old was cock-a-hoop when I demonstrated it to him, scurrying off to show mummy in a very excited manner. Everything clips together easily, with only the small clear blue liners to the engines a little tricksy in places, and the purists will have literal kittens when they see the three "landing gear" panels that hinge down from the lower hull to allow it to be stood square on the shelf when not in use. Small fingers find those a bit fiddly, but after a few operations, they slacken up a bit, and familiarity helps too. In step 4 and 5 the instructions show the rear detail area being constructed from two main parts that encompass and trap the exhaust bells in place behind the heavy light & sound module. The lower section is fitted to the lower hull, the exhausts mounted, and then the upper section is placed on the lower part, after which the upper hull is added. This turns out to be a bit fiddly, so install the upper rear part in the upper hull to make your life easier. The rest of the kit builds up very quickly, and if you're familiar with construction kits, you could have it ready for action in 10 minutes or less if you're that excited. The other moving parts are the small gun emplacements on the flanks of the superstructure, which clip in place and rotate quite freely once inserted. They have been moulded in a slightly darker grey styrene to help them stand out, as have the golf-ball shield generators and the lattice structure between them. On completion of the build, pulling out the little plastic tab on the underside allows the three 1.5v LR44 batteries to make contact with the circuit, and pressing the small square button on the underside will then play one of two sound clips from one of the movies (It sounds like A New Hope to me), which you will be able to hear if you play the video clip that I've embedded from Revell. The rear exhausts also emit a baleful blue light, but it doesn't extend to the smaller pairs of exhausts, even though they have clear blue inserts of their own. It's a minor omission, but it makes you wonder why they bothered with the inserts. Nevermind. Also on the underside is a small compartment for the batteries that you access with a small Phillips screwdriver, and if you can't be bothered Googling the alternative codes for the LR44, they are AG13, AG14, LR1154, AG76 and many others. It's about time battery manufacturers did something about that! Finally, there is a small grille near the button that allows the sound from the speaker to escape from the hull. Whoever put the kit together in the video needs more finger strength. My example had none of those massive gaps between the parts once the parts had been properly squeezed together. Conclusion Little Johnny or Jemima will love this, although the detail compromises that have been made to facilitate play will have the perfectionists rocking back and forth in a corner, but they should rest easy, as they're not the intended market. As I have said in the past, this series of kits is aimed squarely at kids, who don't care that Star Destroyers don't have landing gear, and that the panel lines are over-scale, and they certainly can't wait for the kit to be painted before they start whizzing it round the living room. My son still regularly plays with the other kits from this series, and this one has become a firm favourite with him too in the short time he's had playing with it. If they were to do a Make & Play Kylo Ren's or Krennic's shuttle, he'd be one happy boy, but if they did a new shuttle Tyderium with light & sound, he'd go ballistic, as he's inherited his love for that design from his old man. One of the many reasons I remain a proud dad. Very highly recommended. Revell model kits are available from all good toy and model retailers. For further information visit or
-
 Star Wars - The Force Awakens Millennium Falcon 1:72 Revell Easy Kit She may not look like much, but she's got it where it counts. If you have not heard of the Millennium Falcon by now, then where have you been since 1977! Central to the plot in the Earlier films it would seem the Millennium Falcon has been brought back for the latest film with the rather tantalising glimpse in the trailer of Han and Chewie returning "home". The Kit Here Revell have re-boxed their earlier kit with a new sprue for the updated parts, and some rather fake looking effects pre-painted on the hull. The kit arrives with the main hull on two large sprues, three other sprues (including the new one) and two clear sprues. The clear sprue for the rear exhaust area has been sprayed blue on one side, some of the overspray from the process has covered the front side and could do with being cleaned off. Construction begins with the cockpit pod. Here the sides have been coloured straight matt black, unlike the earlier release which had the seats a different colour. The cockpit and rear bulkhead are fitted into the lower pod half. Next up construction moves to the landing gear. If the gear is going to be up then these don't need to be built (though the instructions only tell you this later!) Next to be built up is the is part of the internal ramp and the new radar scanner for the top. Moving to the underside of the craft the ramp is mounted as are the lower guns. The landing gear, or the covers if building gear up can then be added. The Internal ramp parts are then added along with the lower turret glazing. Next all the side components are added into the lower hull. Most of these just slot into place, though the instructions have you taping some of them in place to hold them in which seems a bit Heath Robinson (Rube Goldberg for our US readers!). The last part to be added is the lower cockpit pod. With the lower hull parts sorted it is time to move to the top hull. The top turret guns and glazing are added along with the top of the cockpit pod. The radar unit can be added now as well. Finally the two halves of the hull can be joined to complete the model. Conclusion Sadly Revell have rather ruined the look of the kit with their colouring of the parts, this could be fixed by painting it. Recommended only if you understand what you're getting in the box. Revell model kits are available from all good toy and model retailers. For further information visit
 -
Hello, Finally I had some time to finish anything. This time I was working on a car. Quite a nice kit to build, straight forward with good fit. But as usual I had some problems on the way. Starting with lack of instructions on how to paint the interior, aluminium roof was a bit of a pain, I couldn't achieve smooth surface, tried Mr. color metal paints, AK true Metal wax, finally used old good Alclad2. I thought, that will be my try with high gloss Halfords laquers, Audi real colour. But then, I looked in the instructions, and bang - this car has a satin finish.. I used it anyway and to be honest it looks way better satin than gloss. Some parts were meant to be gloss, like chassis. I guess that's because they used the same chassis for different variants on the track. Decals were a dream to work with, no big issues with the kit. Pictures: Now back to tanksThanks,Bart